Content
This page allows you to make general settings for all mailings.
To go to the form, you need to select the Mailing section of the main menu and then the subsection Settings.
The settings form consists of 6 tabs:
- Sender contact information
- Main parameters
- Email templates
- Email server
- Messengers integration
- Language
Sender contact information
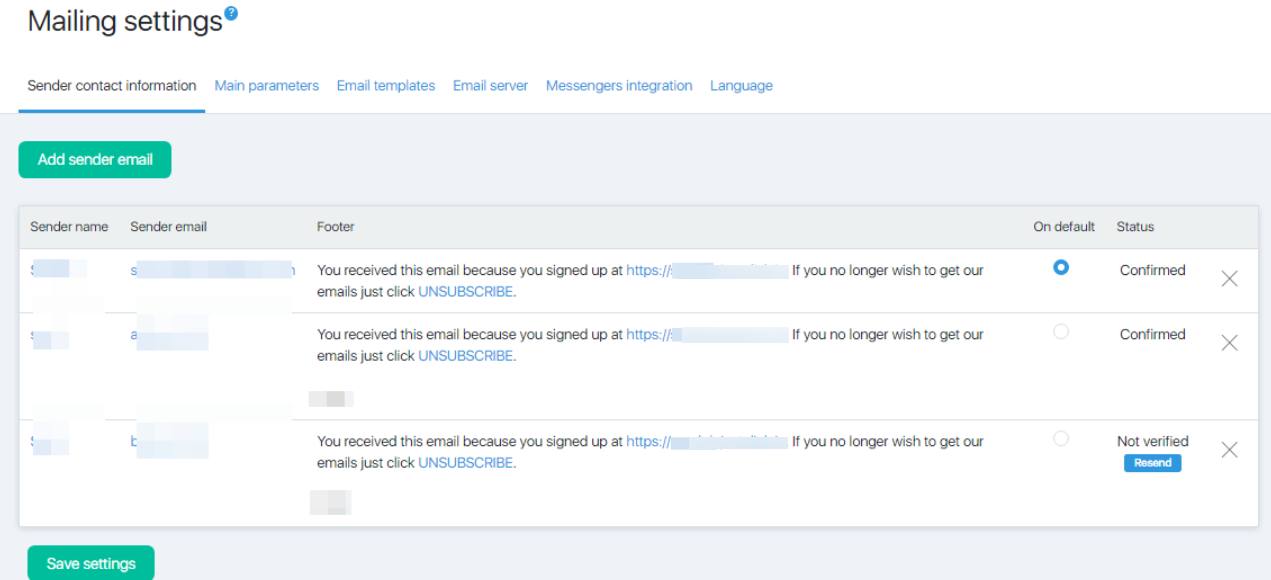
On the Sender’s Contacts tab, you must add and confirm at least one email l address that will be used as the sender’s address in the messages.
Adding a sender
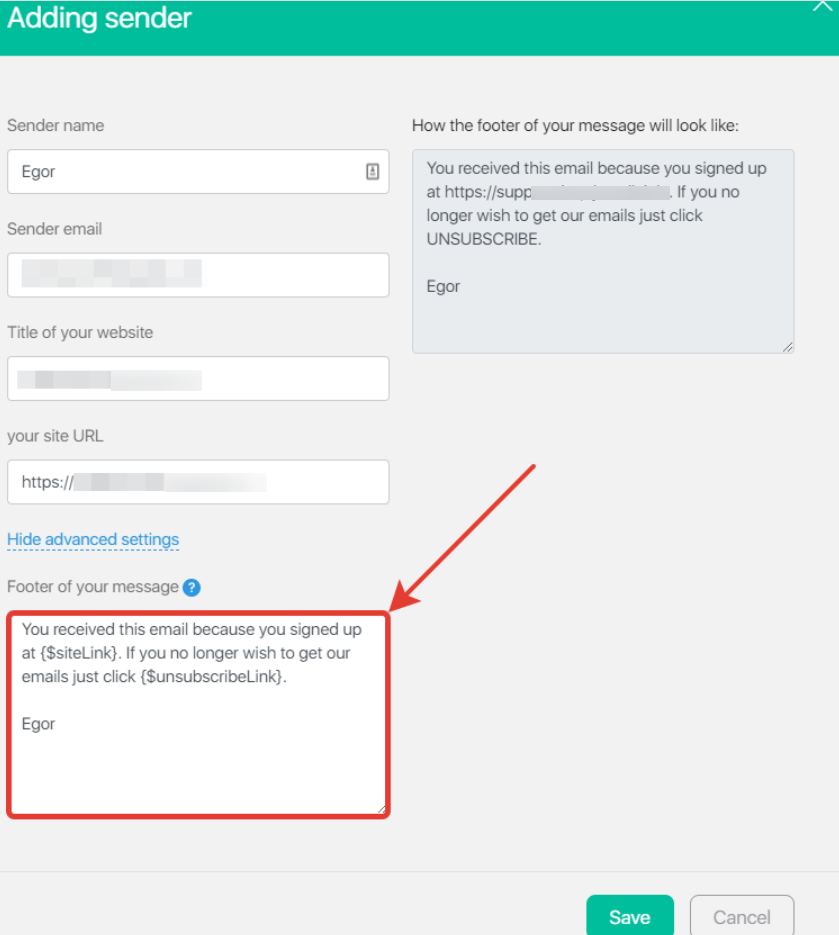
To add a new sender address, click the Add button. A pop-up window appears with the settings. The first four fields of the form are required:
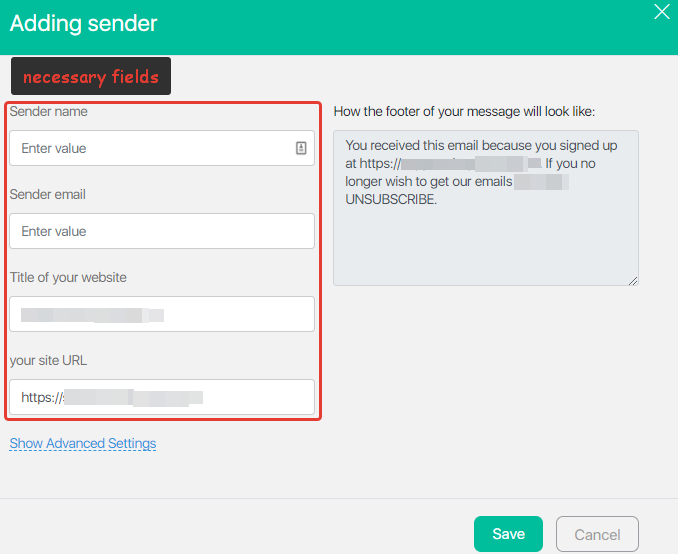
The sender’s email is checked for compliance with the DMARC policy. This means that as an e-mail sender, you can use only e-mails created on your domain (corporate e-mails). The use of mail on free mail services as an e-mail sender is prohibited, since this can lead to the rejection of your mailings.
We described how to create email on the domain in this article.
When you fill a particular field in the window How footer of your letter will look like, the content of your message will be updated. So, you will be able to assess the need to add certain data.
After filling in the form fields, you need to Save the entered data. If the required fields are filled and the email meets DMARC requirements, then a message will be sent to the email address to confirm their email adress:
While the email will not be confirmed by the transition through the link from the message, it cannot be specified as the sender in the settings of the messages. The confirmation email can be sent again by pressing the corresponding button:

Editing a sender contact
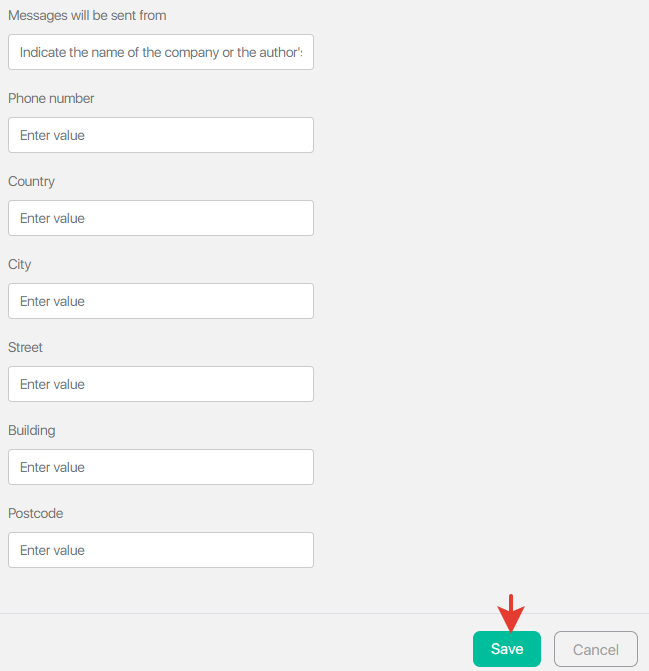
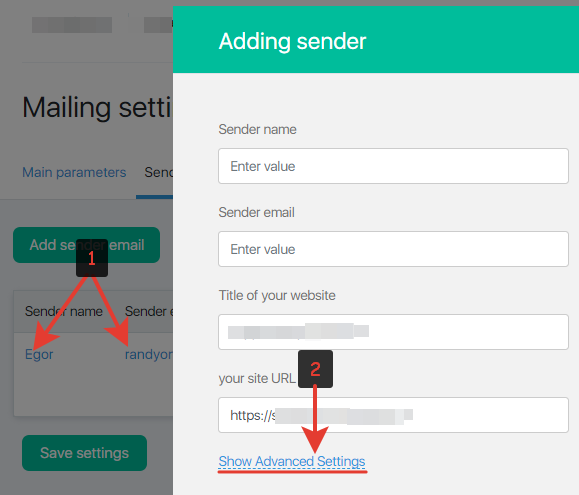
To edit the information about the sender’s contact, click on “Sender name” or on “Sender email” (number 1 in the screenshot). After clicking, a window will open in which you can edit the contact information of the sender. Initially, only 4 fields will be displayed in the window, but if you click on the “Show advanced settings” button (number 2 in the screenshot), all the sender’s contact settings will be displayed.
You can edit the entire footer of the letter by simply entering text in the input field.
Default Sender
If several emails of senders are added to the account, one of them will be selected as the primary one. The primary sender will be used by default when creating new categories, contact groups, emails and payment reminders.
To change the main sender, you need to put a marker (point) in front of the email in the Default column.
Main parameters
The {…} button has appeared on the editor panel, which allows you to add information from additional contact fields to letters. More details can be found here.
This tab allows you to configure:
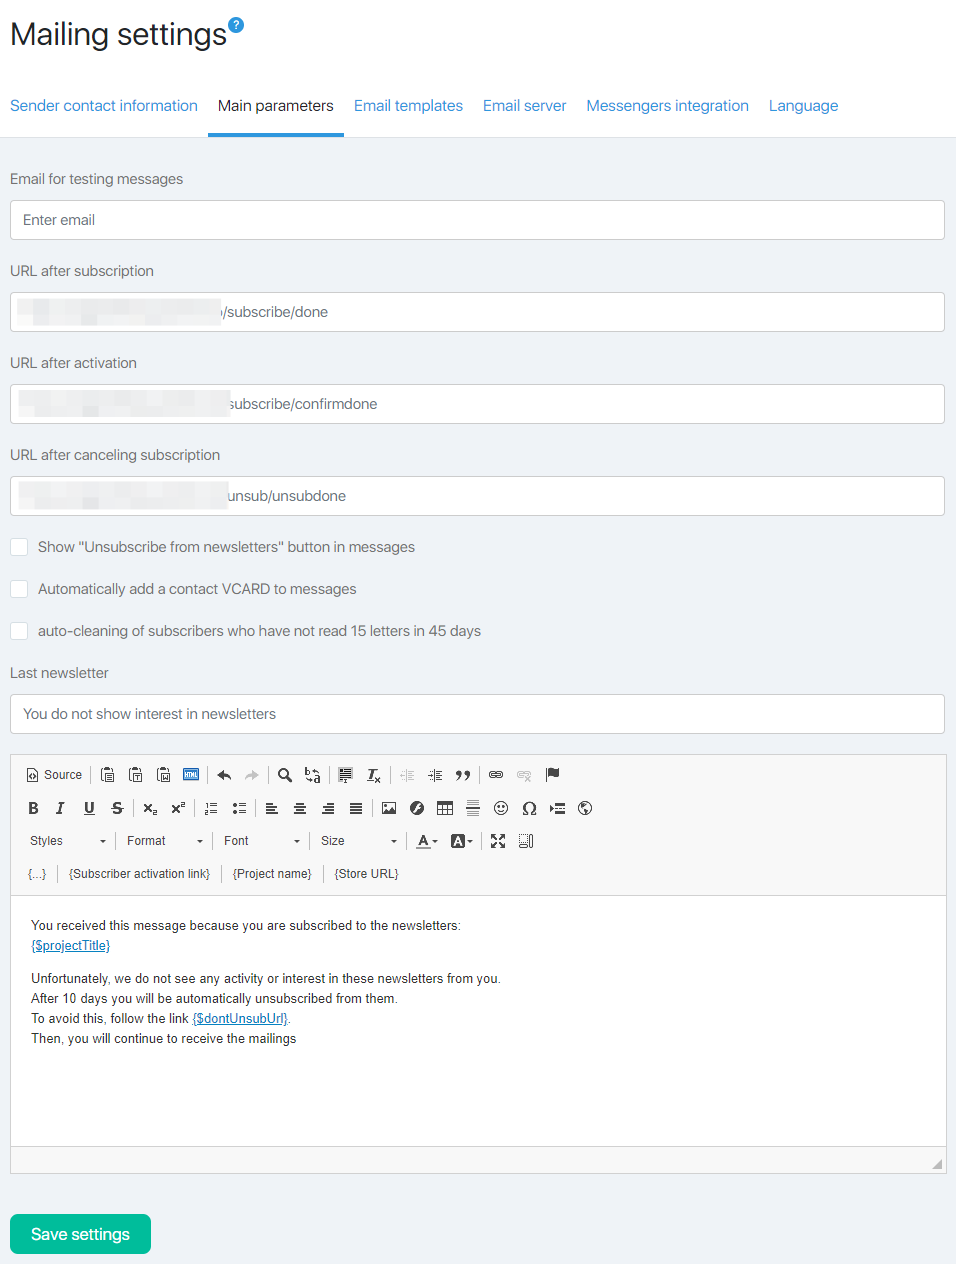
- Address for testing messages – this address will receive test messages, allowing you to evaluate how the message from subscribers will be displayed. Only one email can be specified for test emails. This email will also receive test emails from employee accounts. So that employees can test emails, you can set up forwarding to employee email or set up a special mailbox for the entire team.
- URL after subscription/activation/unsubscription – if you leave these fields blank, default JustClick pages will be used. However, you can customize your pages (for example, add a welcome video with gratitude for the subscription, instructions for activating the subscription, etc.)
- Show the “Report Spam” and “Unsubscribe from the mailing” buttons in the letters. In this case, the name speaks for itself. Adds 2 useful buttons to your mailing list.
- Automatically add a VCARD contact to the letters. Data format VCARD – electronic business card will be added to all emails. A vCard record can contain a name, address, phone numbers, URL and etc.
- Checkbox auto-cleaning subscribers who have not read 15 emails in 45 days allows you to enable automatic deletion of inactive subscribers. When activated, an account of unopened emails will be automatically maintained for each subscriber. If sending emails is rare (for example, once a week or less), the subscriber will be considered inactive after not opening 15 emails in a row. The period of 45 days in such a case will not be taken into account. If a mailing occurs frequently (for example, daily), then the subscriber will be considered inactive after 45 days. The restriction of 15 emails in this case does not work, i.e. both conditions must be fulfilled
- Such a subscriber will be sent one last mailing list, which can be edited on this page using the default JustClick editor. If he follows the link in the email, the activity counter will reset to zero and the countdown will begin again. If he ignores the message, it will be automatically deleted from the database
Email templates
This tab allows you to configure your own template for automatic and instant messages. Here you can add links to your site and groups in social networks, the project logo or the author’s photo. All these elements will be automatically added to each email sent, which will shorten the time for editing it.

The template is modified using the default JustClick editor.
Note! A template for instant and automatic distribution is separately set up, as well as for the html and text versions of the message.
After executing all the settings, you must click the Save button to apply them.
Email server
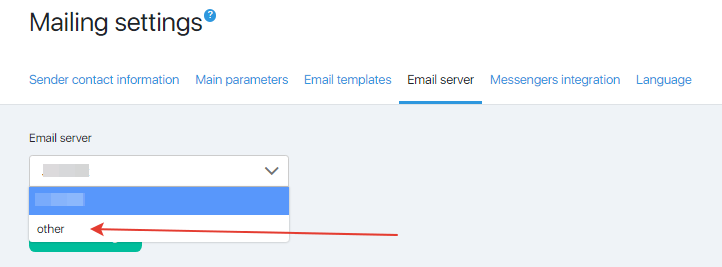
By default, all emails you send to subscribers are sent from JustClick servers. You can choose your server for sending emails – then emails that you configure in auto-chains, funnels, etc., will be sent from your server.
To do this, select the “other” option in the server settings:
Fill in all the settings fields of your server for sending emails and click on the button “Send test message …”:
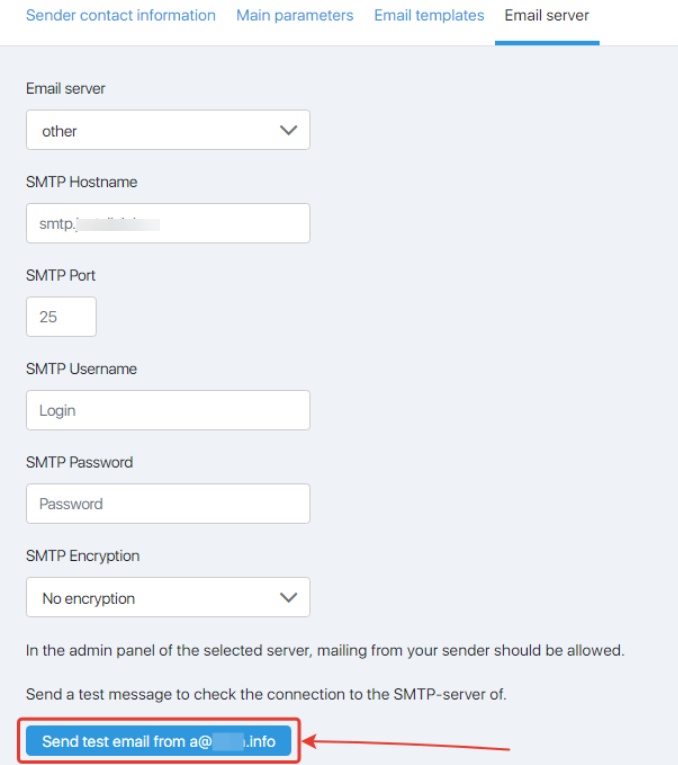
You can get all the necessary data in the control panel of the service, from the server of which it is planned to send letters. Find the data in the control panel will help the knowledge base or support service of this service.
In the event of an error in sending a test letter, you should first check with the support service with which you are setting up integration, whether mailing from the selected sender is allowed. You should also clarify whether the correct port is selected (for example, for smtp.gmail.com, when using SSL, you need to select port 465, and when using TLS, select port 587).
Messengers integration

Facebook here
Instagram here
Telegram here
Language
In this section, you can configure the translation of the user’s subscription management page, which opens to him when he clicks the “unsubscribe” button in your emails. You can translate or edit the texts on this page by editing these fields:

After changing the field values, save the changes by clicking the “Save settings” button.

 (10 votes, avr.: 4.30 / 5)