Content
What if I’m not a programmer?
Now you do not need to write code (or look for someone who will do it) – everything is configured in your personal account and differs from the mailing list or page creation settings only in details.
In this article we will look at two examples: how to transfer data to JustClick and how to transfer data from JustClick.
- more features than in API 1.0 (for example, it supports working with additional contact fields, can transfer social media profiles);
- setting has become simpler and more convenient (the participation of a programmer is not required or is minimal);
- our support team will be happy to help you.
How to read articles about API 2.0?
The address
At the beginning of the articles there is this (or similar) phrase: “The request is sent by the POST method in the URLencode format to the address: https://username.justclick.io/api/createorder.” From the link we need:
- link (in bold);
- method – in the example above it is “POST” (sometimes “GET”).
Parameter names and meanings
There are only two terms: the parameter name and its value. For example, it is written: “customer_email – email of the contact to which to issue an invoice.” This means that the customer’s mail should only be called customer_email – this is the name of the parameter. But the parameter value is a regular email address (for each customer it will have its own).
From another service – to JustClick (example)
What will we do first of all?
We determine what we want to transfer to JustClick. Do we need to create an order, a contact or something else? We make sure that both services (JustClick and the other) can do this. To do this, go to the Knowledge Base of both services. For JustClick, this is the current section – API 2.0.
Then we search simply by the title of the article. For example, we want the order to be created in one system and paid through JustClick. This means we need an article on creating an order. It is called “Order creation […]”.
Where will we transfer the data?
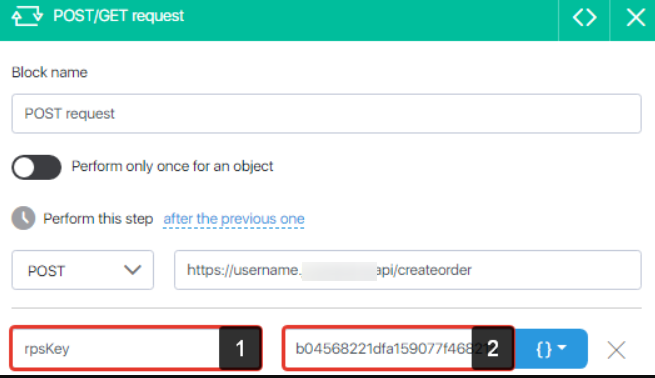
Open the article and look for the phrase “The request is sent by the POST method in the URLencode format to the address: https://username.justclick.io/api/createorder, where username is the user’s login in the system and his third-level domain in the JustClick service. ” This link is where and how to send the request. If we did it in JustClick (and you need to do it in a third-party service), then it would look like this: [1] – indicated the type of request, [2] – indicated the address, indicating the login of your account.

What data should I transfer?
The articles have the heading “Parameters passed in the request”. The required and optional parameters will be indicated. Mandatory are those without which JustClick will not accept the request (or rather, reject it).
The value of the parameter is already your key – that very long combination of letters and numbers that you can copy by clicking on the words “Integrations and API” in the footer of your personal account.

This is how we would configure it in JustClick. In another service, it may look different, but the essence is exactly the same: [1] – parameter name as in the screenshot below, [2] – your key (each account has its own).
Now we add other parameters you need (the order is not important), from those described in the article. For our example, at least the following will be appropriate:
- mail of the contact for whom you need to issue an invoice;
- his name;
- telephone, possibly;
- product (s) to be in the order;
- order status (because you can create a new order awaiting payment and a paid invoice too).
We are looking for the name of these parameters and that is exactly what we indicate.
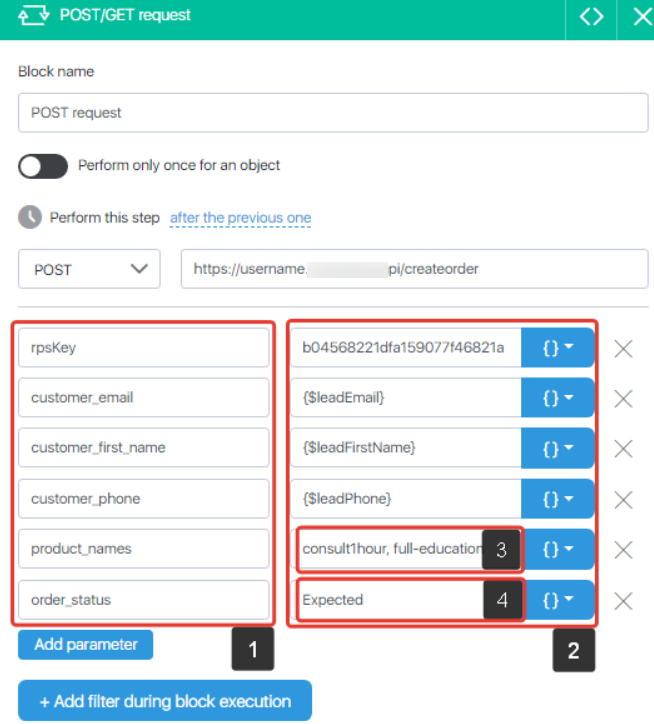
Parameter names are marked with [1], they should be like in the example.
Parameter values in block [2] can be different. In the screenshot above, “variables” are indicated for the contact’s email, name and phone number.
Instead of variables, the system will substitute the desired value. The variables in the example are variables in JustClick. In other services, the variables may differ (if you write the same, it will not work).
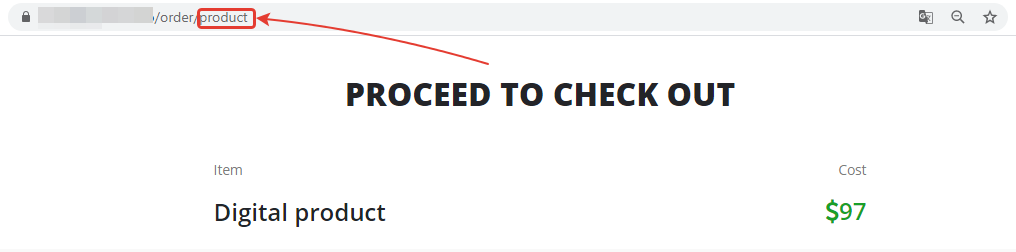
[3] is the id of the products to be included in the invoice. The IDs are listed in the link on the JustClick invoice page. We clarify such points in each article so that it is convenient for you to work.
[4] is the account status. What it should be is also indicated in the corresponding article (Expected, Paid, Cancel or MoneyBack).
Everything is ready!)
From JustClick to another service
You can write classic code in your PhpStorm, but this article is for “non-programmers”. 😉
The principle of transfer to other systems is exactly the same as we described above, with the only difference that you will need to find out the address and parameter names from the documentation of another service.
In other words:
- You will find out what another service can receive.
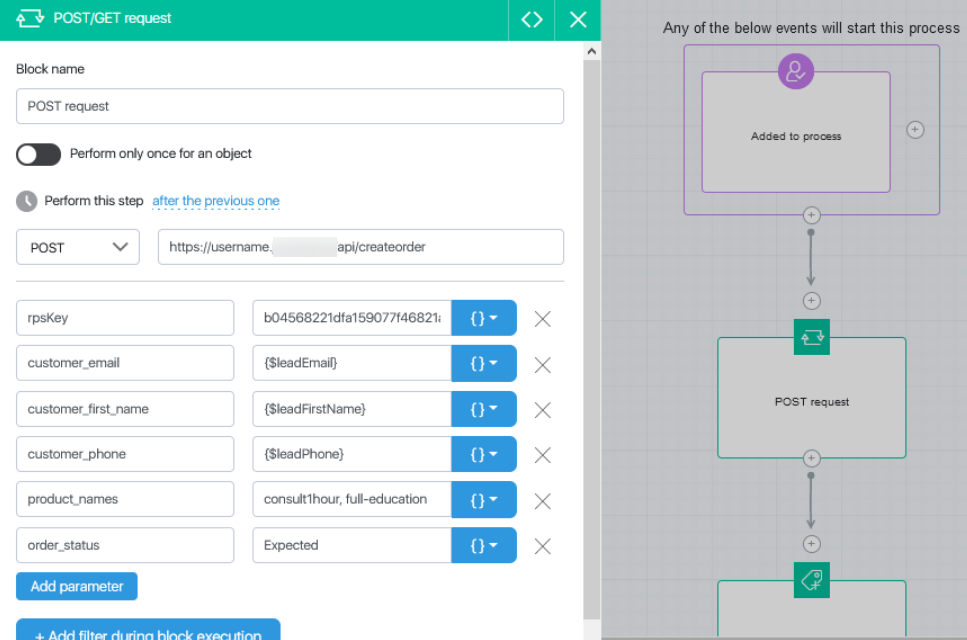
- Create a process in JustClick (more convenient through Funnels), add the “POST / GET request” block to the process and then make all the settings in it.
- Choose the POST / GET format (as indicated in the documentation of the third-party service).
- Specify the address where the request to send (the same ordinary Internet link).
- Add the necessary parameter names (see again in the documentation of the third-party service).
- Add the required values for these parameters. If we are talking about mail, phone, and similar values individual for each lead, then select the corresponding variable (instead of it JustClick will substitute data). If we are talking about any static data (like an API key, but this time a key from a third-party system), then register it manually.
Is it difficult anyway?
Then take a look at the Zapier service, the integration with which is also described in our Knowledge Base.
With love❤,
Your JustClick!
