Content
Why do I need to bind an additional domain?
When registering with JustClick, you will receive a domain named “yourlogin.justclick.io” for all pages of the store and mini-site. However, there are often situations where it is required to:
- Observe the “corporate spirit” and make sure that the pages of the store are in the address space of your existing external site
- Hide the login that appears in the default domain from JustClick
- Bind the domain to the store in order to make it easier to approve in some payment system
- Bind a personal domain in order to undergo moderation on advertising platforms
- Add a separate domain for the alternative store
In all the listed situations, the additional domain to your JustClick account is a solution. And then visitors will see a nice address like shop.yoursite.com or mydomain.com.
Domain registrars like GoDaddy.com and Register.com let you choose a domain name and register it for a fee (usually ranging from $3 to $70 depending on how desirable they think that domain is).
Pay attention: if you already have a site that is located at mydomain.com, it cannot be bound – otherwise the existing site will be lost! Therefore, you need to choose either a free domain of the 2nd level mydomain2.com, or a new unused subdomain (domain of the third level), of the form: shop.mydomain.com.
Delegating (setting) a domain
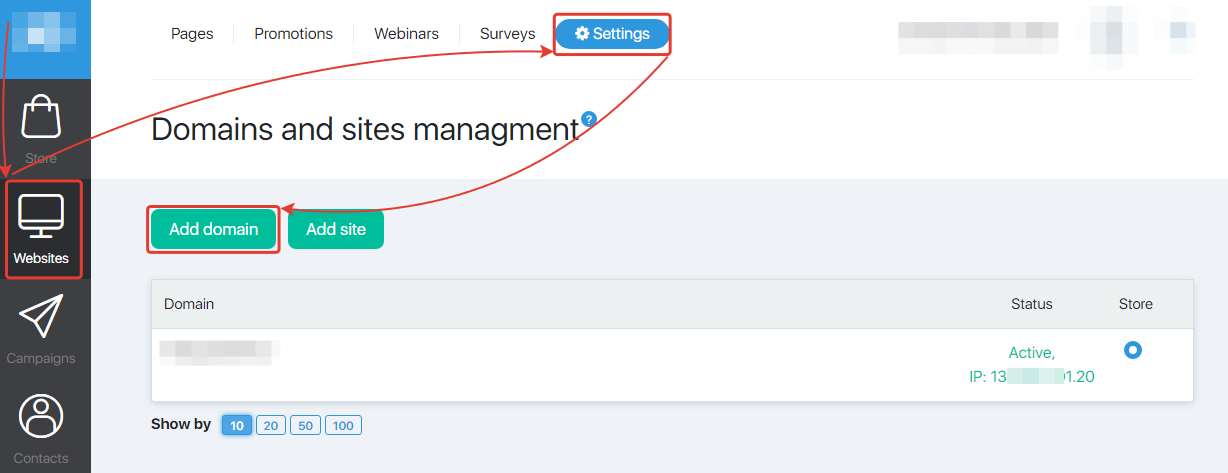
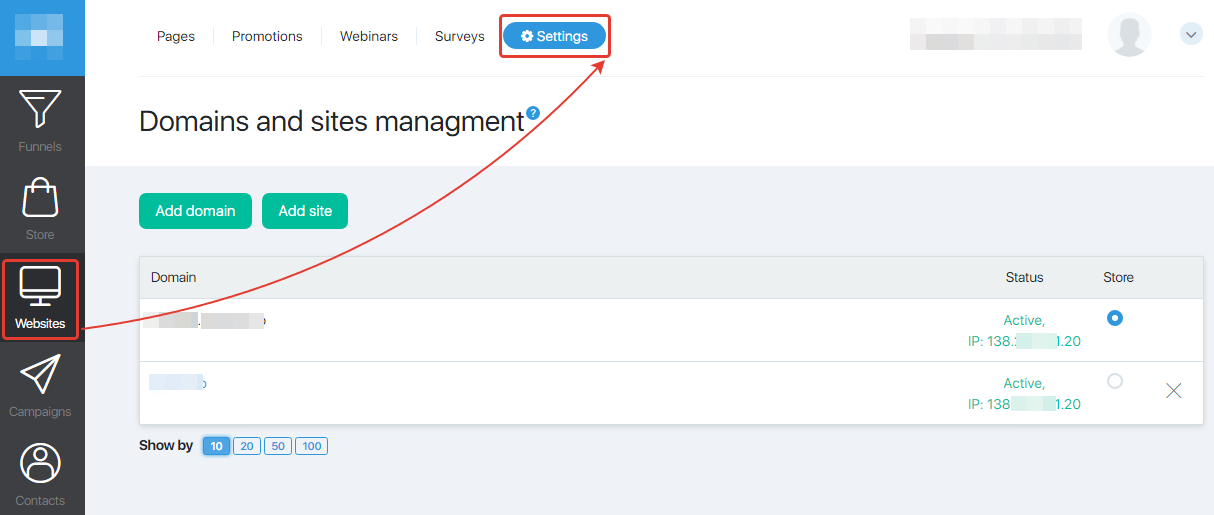
You can add a new domain to your domain list at any time. To do this, go to the Website – Settings and click on the “Add domain” button:
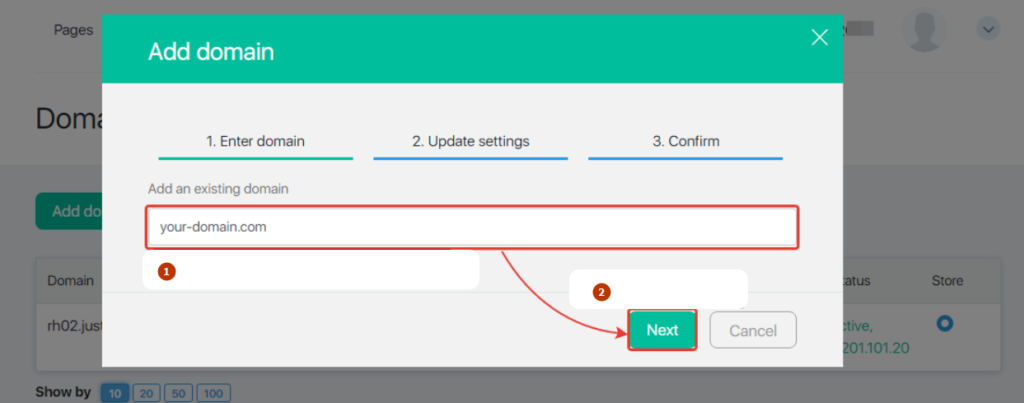
Enter the domain name and click “Next”. For example, if you chose shop.moyblog.com, then this is exactly what you need to enter in the verification field. If you chose your-domain.com, then enter this particular entry.
- enter the domain name in this field
- click the button
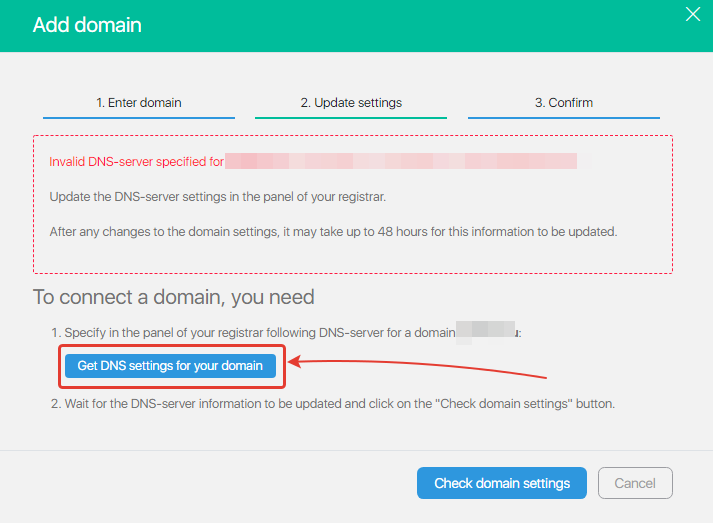
Next, in the window that opens, the service will show you a message with instructions on what to do to connect the domain. Click on the “Get DNS settings for your domain” button:
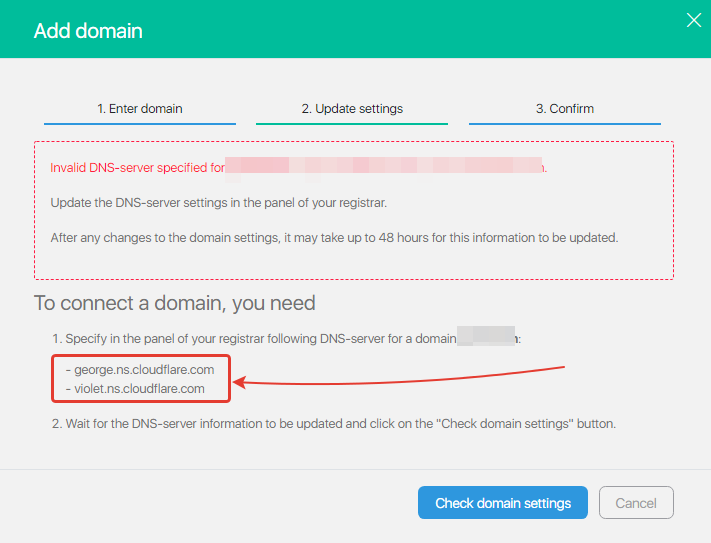
After that, the service will show you a message with instructions on what records you need to make to your domain settings:
If your domain does NOT have a site (a free second-level domain like mydomain.com), then to edit the domain settings, go to the DNS control panel at your domain registrar (domain registrar is the service in which you purchased the domain itself).
To enter the DNS control panel, instructions on the websites of the registrars themselves will help. If you can not do it yourself – contact the registrar support for help.
If there is a site on your domain (and you want to bind a subdomain of the form shop.moidomen.com), then to edit the domain settings, go to the DNS control panel on your hosting (hosting is the service where the site is located on the main domain).
Depending on the hosting, this section may have different names: “DNS Management”, “DNS Editor”, “DNS Master”, “DNS Server” or “DNS Zones”.
Pay attention: if you have several sites and several domains hosted on that hosting, select the domain that you want to edit.
If you cannot find the necessary section or you are afraid of something to be damaged, be sure to consult your hoster’s support by copying the message text with the settings that the service offered you.
Some hosters prohibit the creation of subdomains by the user. To create a subdomain in this case, also contact the hoster support to create a domain according to this instruction on their part.
After completing the domain setup at the registrar (hoster), after a while it will be possible to activate the domain:
You can check in 2-4 hours after changing the settings for the domain and then at the same interval. The maximum waiting time is 48 hours. This process is not up to us.
After the records are updated on all network devices and the domain is successfully activated, you will see its active status in your account:
Working with a delegated (configured) domain in JustClick
How to make the store pages open on their own domain?
To change the primary domain for the store, you must:
- Go to the “Site -> Settings” section and click on the “Domains” button
- Scroll down the page and find the table with domains
- Set a marker in front of the desired domain in the “Store” column
How do I place pages on an alternate domain?
After the new domain has been attached to the personal cabinet, the question “how to attach it to the pages of the mini-site” arises.
To do this, go to the “Site – Pages” section. Here, by default, when creating an account, “Main Site” is added, the pages of which open on a standard domain of the form yourlogin.justclick.io.
Two possible options are as follows:
Option 1.
If the “Main Site” has already created pages that now need to be configured on a new attached domain, then you need to edit it, that is you need to click on the “Set Up” button opposite the name “Main site”.
Click to bind a domain to an exiting site:
Option 2.
If the pages already created have to remain on the previous domains and on the new domain you need to create other pages – you need to create a new site by clicking on the “Create” button.
Click to create a new site and bind a domain to it:
Further actions are identical for both options:
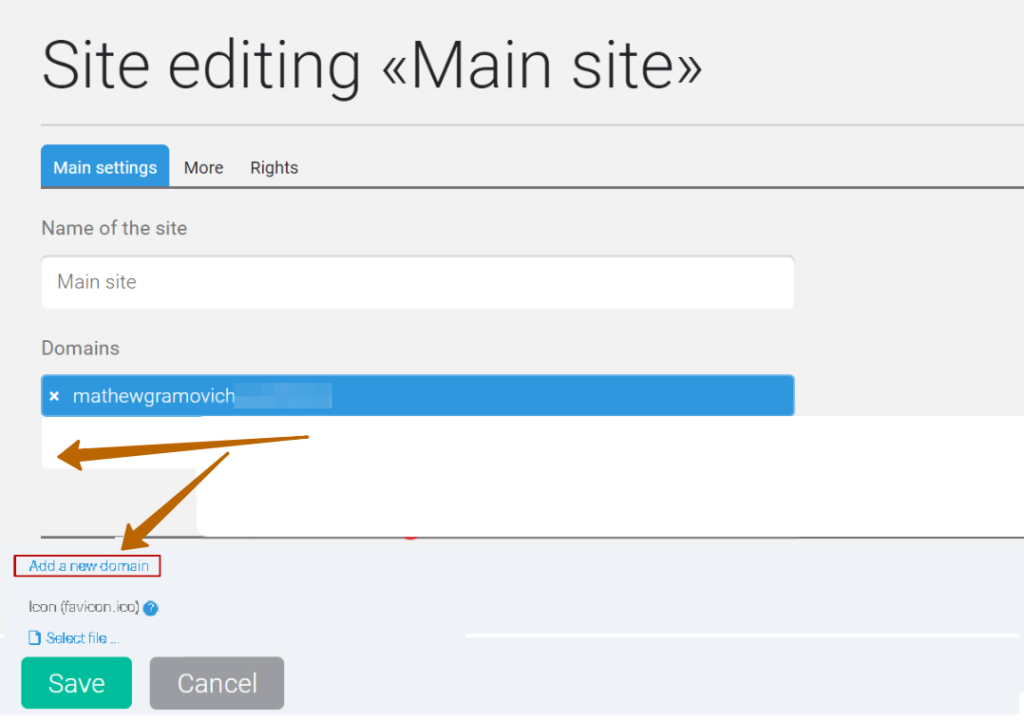
- On the “main parameters” tab in the “Domains” field, click on the empty space and select the required domain from the drop-down list
- Save changes
When you click the “Add a new domain” link, the section for adding a domain will open.
DNS Editor for Second-level Linked Domains
Go to the Website – Settings:
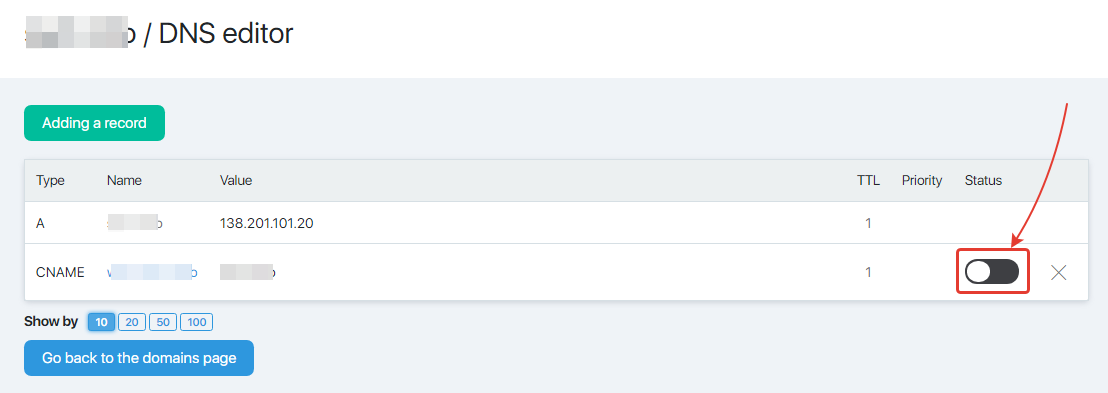
By clicking on the name of a second-level domain in the Active status, the DNS Editor page is opened. You can add / change domain records in the Editor. Most often this is necessary if you need to configure domain mail on a connected domain using services such as G Suite.
The first time you open the DNS Editor for a domain, you will see a data loading window. You need to wait until the data is updated (up to 2 minutes). Then you can already start adding the records you need.
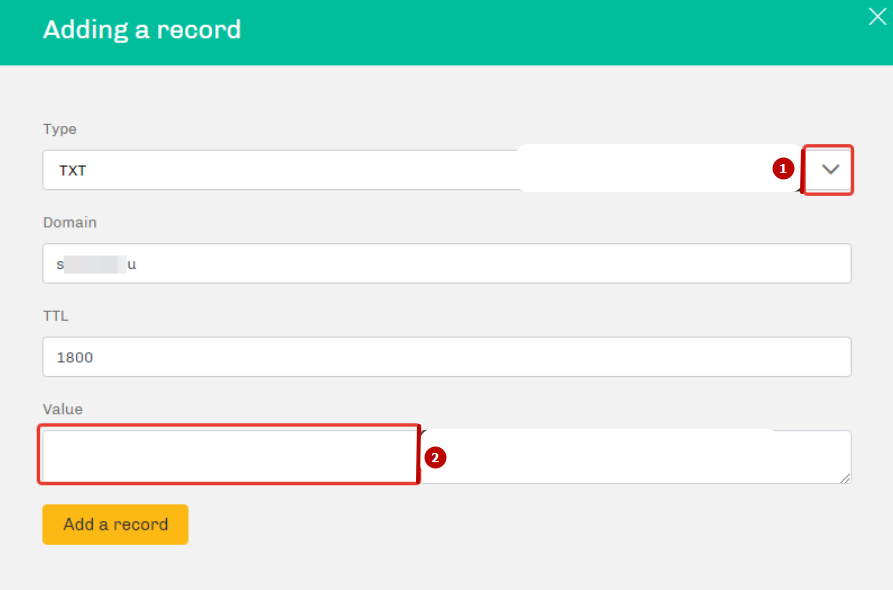
Click on “Adding a record” to add a new record.
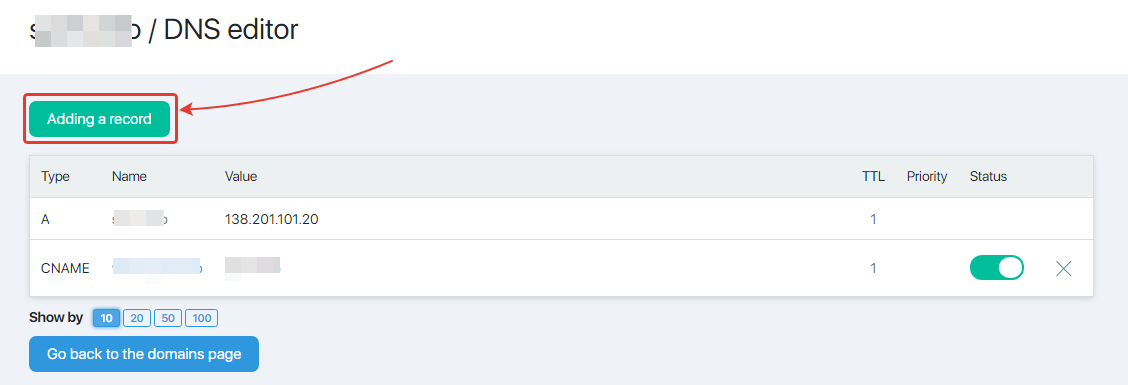
Select the type of record you need, specify its value and click on “Adding a record”.
Available record types:
- A
- AAAA
- MX
- TXT
- CNAME
- select the type of record
- specify the required record value
By default, the record is added as Enabled.
If you need to temporarily disable record, click on the switch button in the “Status” column to turn it gray. Pressing the button activates the record.
Why doesn’t the subscription/order form work when recaptcha is enabled?
If the subscription/order form is inserted on an external domain page and at the same time author’s recaptcha is enabled in the CRM settings, then it is necessary to add the domain of the page where the form is added to the recaptcha settings, otherwise the form will not work.




 (15 votes, avr.: 4.07 / 5)