Content
Zapier service options
Zapier — it is a platform for transferring data between web-applications using software that supports more than 1000 applications. Zapier can be used to combine different cloud services and automation of a processes.
Zapier saves time and money. You will be able to concentrate on business. Here are two typical problems that you will come across in online business:
- search for a programmer, setting a task, monitoring the implementation (and if a freelancer…);
- re-search the programmer for support and improvement.
You can set up a free profile in Zapier (will be available within 14 days after registration) and easily deal with setting up connections between applications.
This service helps to automate daily tasks and combine two or more applications.
The main Zapier features:
- synchronization with more than 1000 services (Google, Slack, Evernote, etc.);
- setting triggers and actions;
- automatic operation;
- maintenance of all API;
- synchronization between applications;
- actions management;
- action templates;
- automation of repetitive tasks;
- no need for programming knowledge.
Currently, the basic integration with Zapier is implemented in JustClick.
How does it work?
During integration set up Justclick will notify Zapier when there is a subscription to the list or when there is a sale of the product. And then you will have a huge space for choice and action, and where (in what service) to transfer this data.
In fact, it turns out that Zapier acts as a link for the integration of JustClick with other services. You do not need knowledge of the API and there is no cost for programmers.
How to login/register in Zapier service


If you go to the page using the usual “direct” link, you will find JustClick in the general list of applications.
If you don’t have a profile yet, so :
- Go to Zapier website using this link, fill in the form and click on “Sign Up”.
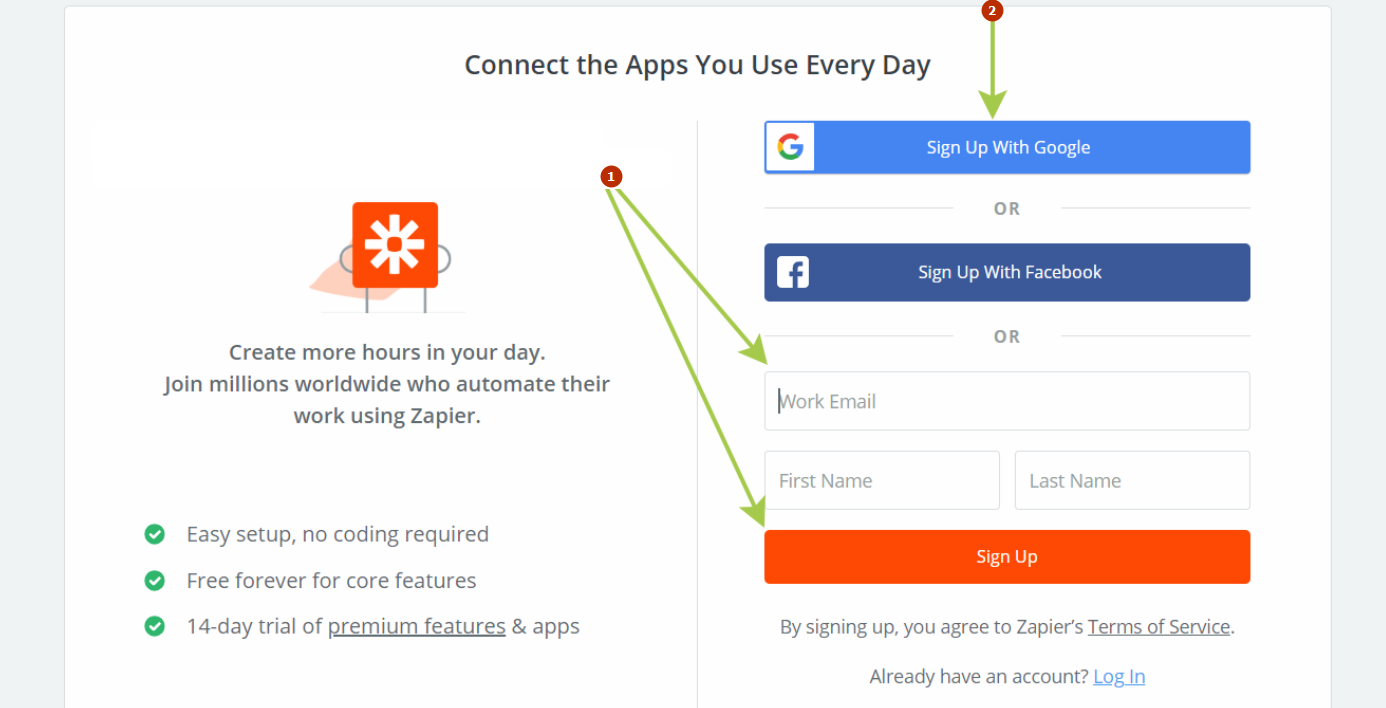
1. fill in the form and press the button
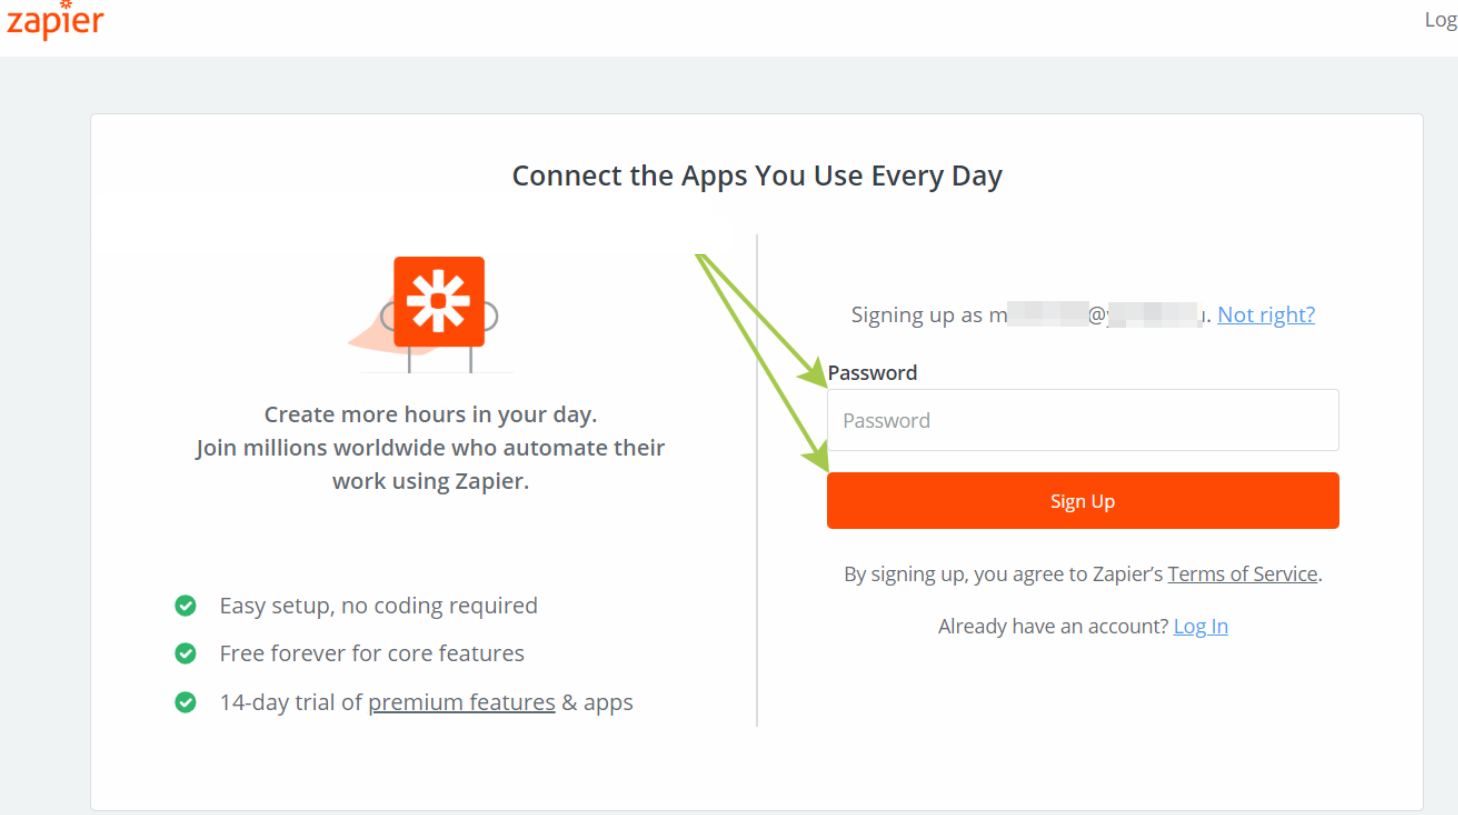
2. instead of filling out the registration form, you can sign in with your Google account - Enter your password on the next page and click “Sign Up”.
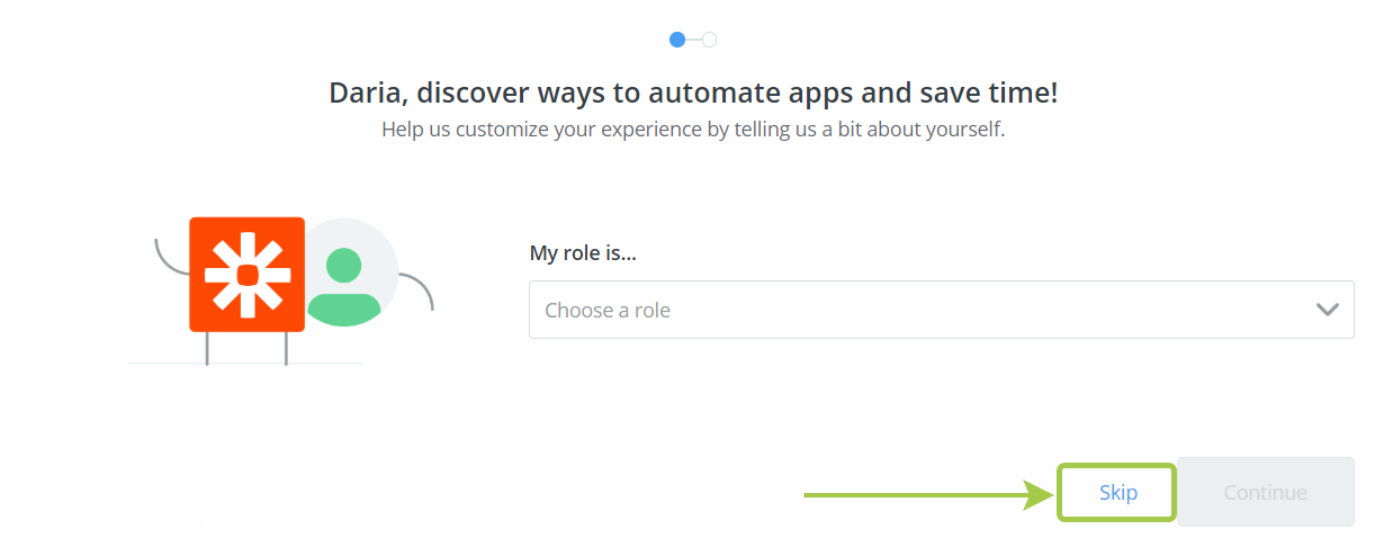
- After that, a page will open, where you need to tell a little about yourself. You can either fill in the fields or skip this step. To skip the step, click the “Skip” button.
- A page will open with a message that the JustClick team invites you to check the integration with Zapier. Accept this invitation by clicking on the “Accept Invite & Build a Zap” button.

- Than you will be able to enter your personal account and make integration settings. On this page you can connect JustClick, for example, to Google, MailChimp, Trello, WP, Evernote, AmoCRM. More than 1000 options.
How to set up integration
- On the opened page of the personal account (link) click the button “Make a New Zap”.

- Next you should select on this page the application “JustClick”. Start typing “just” in the search bar and you will see it in the search results. Select the application “JustClick”.
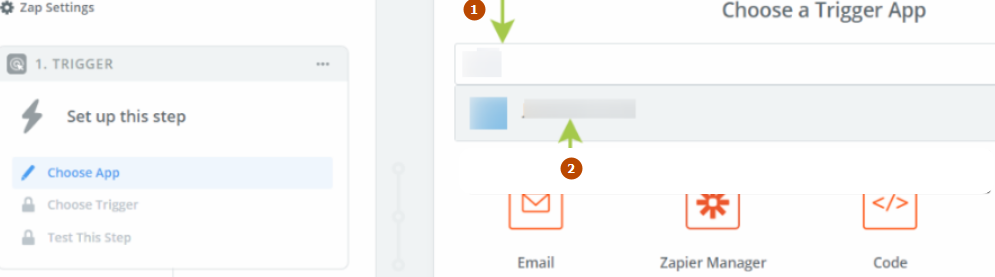 1. start typing the first letters of the name
2. click the name to add the app to the trigger - After adding the application, you will see a page with the ability to select triggers. Select one of the triggers:
— “Added to List” (subscribe to list, adding the contact)
— “New Purchase” (new purchase, paid product)
— “New Order” (new order, created, but not paid) After selecting the trigger, click “Save + Continue”.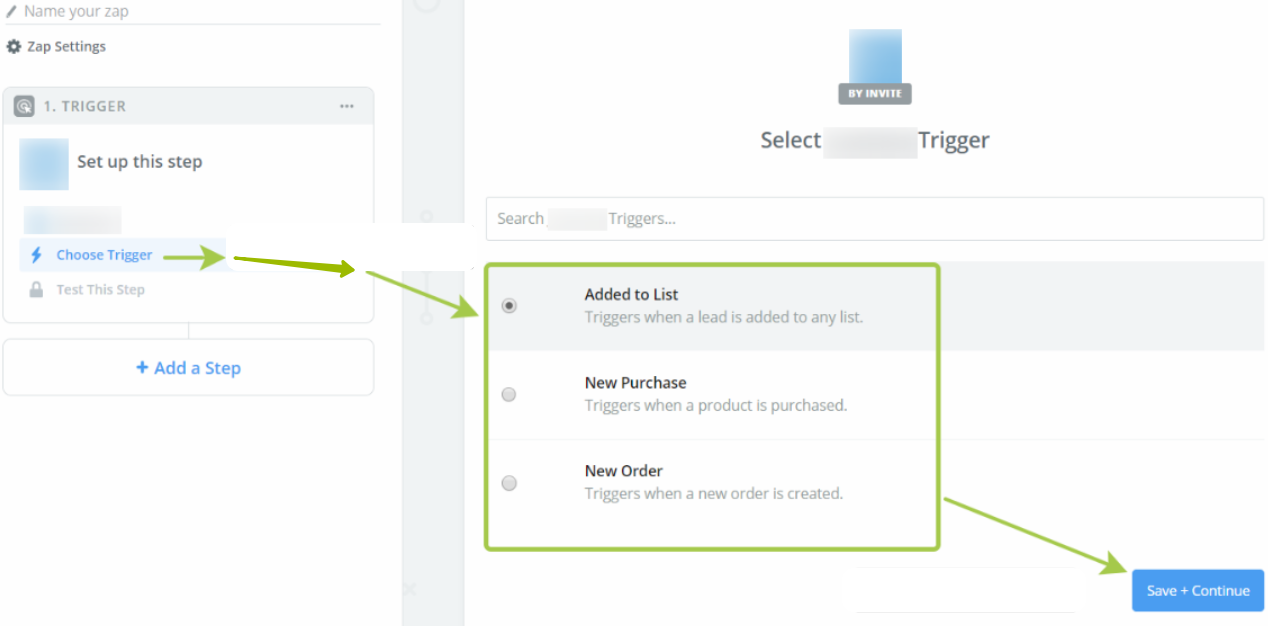
- Specify the following information on the opened page:
1. Login
In this field, enter your username in the system JustClick.
2. API key
Enter the API key in this field. The key itself you can copy on the page:
https://YourLogin.justclick.io/shops/setts/apisettings/
You can also go to this page from any section of your personal account by clicking the link “Integration and API” in the footer of any page:
3. Domain
Select domain in this field: Justclick.io
After filling in all the fields, click “Continue”. - Click “Continue” again on the opened page. After that, our trigger is set up!

- It remains to add an action for the configured trigger.
To add an action, click on the link “Your Zap currently lacks Action step. Add one now!”.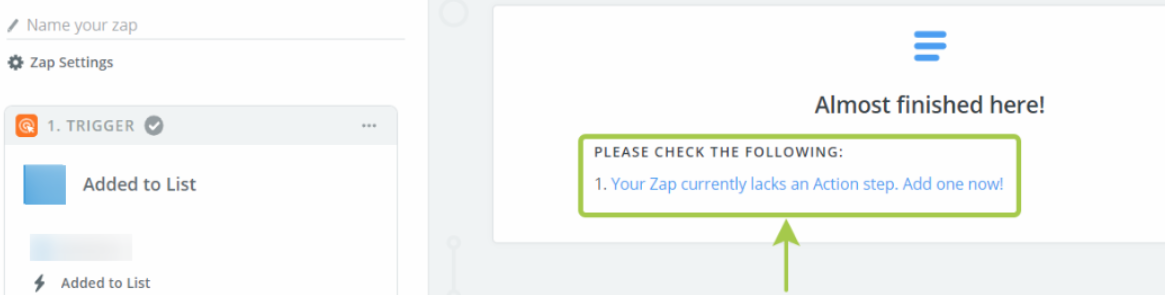
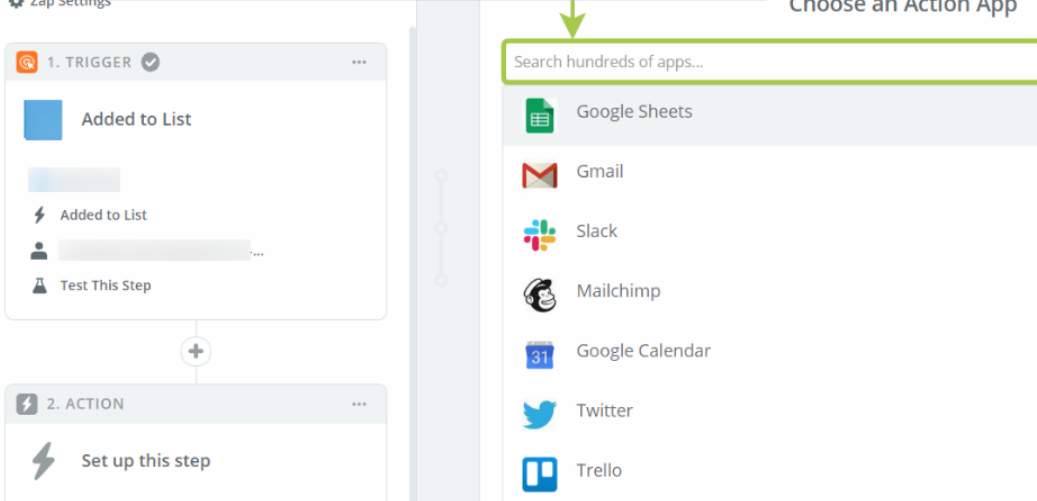
- Than will open a page where you can select the application for the action. That is, the application to which the data will be transmitted from JustClick. You will only have to select the required application and configure it to complete the integration.
- After configuring the action throws on the page where you need to enter the name of the created Zap, and be sure to include it.
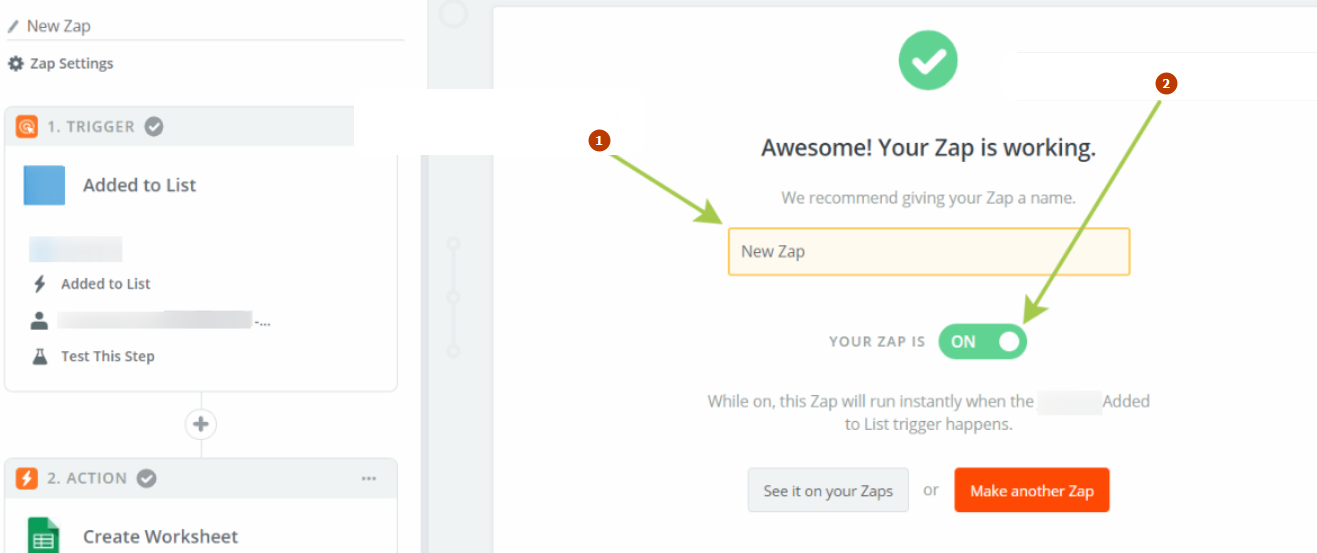 1. enter the name
2. be sure to turn on Zap
Integrations templates
What parameters can be transferred from JustClick to Zapier
With the integration configured, JustClick notifies Zapier, and transfers the following data:
- first name (if not specified, nothing is transmitted)
- middle name (if not specified, then nothing is transmitted)
- last name (if not specified, then nothing is transmitted)
- email address
- phone
- city (if not specified, nothing is transmitted)
- group name
- group id (data from group settings, “API” tab, “Group ID” field)
- group category (if not specified, nothing is transmitted)
- tags (one or more)
- customer information (data from the field of the same name in the contact card)
- contact ip
- contact time zone (UTC+03)
- contact id
- contact creation date
- global status of the contact
- lead personal manager (last name, first name, login)
- Order id
- Order amount
- Tax sum
- Order currency
- Order created at
- Order paid at
- Order status
- Payment method
- Order IP
- Product id
- Product type
- Product order page
- Product Name
- Product price
- Product Tax amount
- Product Expenses (product costs at the time of order creation)
- Coupon
- Customer VAT ID
- Reverse charge on EU VAT
- Product thank you page for your purchase url
- Billing address
- Billing country
- Billing city
- Billing state
- Billing zip
- Shipping address
- Shipping country
- Shipping city
- Shipping state
- Shipping zip
- Lead id
- Lead email
- Lead first name
- Lead last name
- Lead middle name
- Lead phone
- Lead city
- Lead tags
- Lead description
- Lead ip
- Lead created at
- Order sales manager (only if the “New Purchase Trigger” trigger has been selected) – the following are transferred: last name, first name, login
- Lead personal manager (last name, first name, login)
- Shipping/Name – the name of the consignee in the delivery address
- Shipping/Phone – phone number of the consignee in the shipping address
- Lead id
- Lead email
- Lead first name
- Lead last name
- Lead middle name
- Lead phone
- Lead city
- Lead description
- Lead ip
- Lead created at
Therefore, if the subscription or sale of the product, JustClick will transmit data to Zapier. Moreover, from Zapier you can already set up data transfer anywhere.
What parameters can be transferred from Zapier to JustClick
With the integration configured, Zapier transfers the following data to your JustClick account:
- Add to List – Select the list to add a lead.
- Remove from list – Select the list to remove a lead.
- Add tag – The tags will be added to the lead. Ex. “tag1, tag2, tag3”.
- Remove tag –The tags will be removed from the lead. Ex: tag1, tag2, tag3.
- Lead email – Email address of the lead you want to add or update.
- Lead first name – Name
- Lead last name – Surname
- Lead middle name – Middle name
- Lead phone – Phone number
- Lead billing address 1 – Payer Address 1
- Lead billing address 2 – Payer address 2
- Lead billing city – Contact city (payer, card holder)
- Lead billing state – Region (region) of the contact (payer, card holder)
- Lead billing zip – Contact index (payer, card holder)
- Lead billing country code – ISO country code. More details
- Lead shipping address 1 – Shipping Address 1
- Lead shipping address 2 – Shipping Address 2
- Lead shipping city – Delivery City
- Lead shipping state – Delivery State (Region)
- Lead shipping zip – Shipping Address Index
- Lead shipping country code – ISO country code. More details
- Lead utc – Timezone
- Lead description – Customer information
- Lead personal manager – Personal manager. Surname First name (login). All employees with the rights of a call center and additional admin are displayed. You can choose one.
- Lead Facebook – Facebook profile link
- Lead Instagram – Instagram profile link. Example https://www.instagram.com/jkennedy. If you transfer in @jkennedy format, then conversion to a link will occur
- Lead WhatsApp – WhatsApp Profile (Number)
- Lead Telegram – Link to Telegram account. Example https://t.me/jkennedy. If you transfer data in @jkennedy format, it will be converted to a link
- Lead Viber – Profile (number) Viber
- Lead Vkontakte – Vkontakte profile
- Lead points – Points of lead
- UTM
- Additional contact fields (more details)
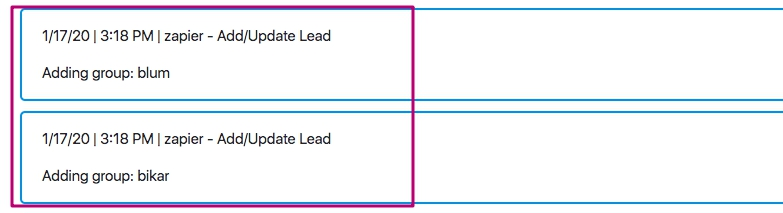
The changes that Zapier makes through the “Add/Update Lead” action will be recorded in the contact history. A contact history note (next to the date and time) will indicate “zapier – Add / Update Lead”.
- Lead tag – Add a tag for the contact (you can specify multiple tags separated by commas)
- Lead email – Email address for which you want to add the tag (s)
- Lead tag – The tag which will be removed from the lead.E xample: tag1, tag2, tag3.
- Lead email – Email address of the lead you want to remove a tag.
- List – Select a group to add a contact (sorting in alphabetical order)
- Lead email – Email address to add to the group
- List – Select the list to remove a lead.
- Lead email – Email address of the lead you want to remove from this list.
- Lead email – Email address to unsubscribe from all groups and set the global status of “Unsubscribed”.
