Content
Funnels allow you to move a contact (lead, subscriber, customer, buyer) through connections (arrows) between blocks. As well as customize each block to the task. Yes, the blocks are interactive! The idea of visual funnels is that you do almost all the settings in one place and you don’t need to switch between different sections of your account!
And you also don’t need to prescribe links to the next page every time in the form settings, buttons, hyperlinks. All you have to do is specify the “next page” or (#nextpage) parameter.
It’s convenient! You simply connect the blocks with arrows (links) and the lead moves through them. If you decide to change the customer path, just change the links between the blocks. You don’t have to edit each block by changing the link in the form settings, buttons, hyperlinks. And it will also save you from private typing errors, after which the links don’t work.
Previously, there were fewer possibilities 🙁
Sometimes more block exits were needed.
For example, you need to implement 2 subscription options on the subscription page – to email and Telegram.
Or add 3 buttons on the page with the rates and direct the potential customer to the desired checkout page or by a unique path.
Now it is convenient! 🙂
We have implemented a setting that allows you to increase the number of exits from the block of pages, emails chatbot in Telegram. Here is how it is actually implemented:
Example for “Double opt in” block
This is what a subscription page for a contact looks like.
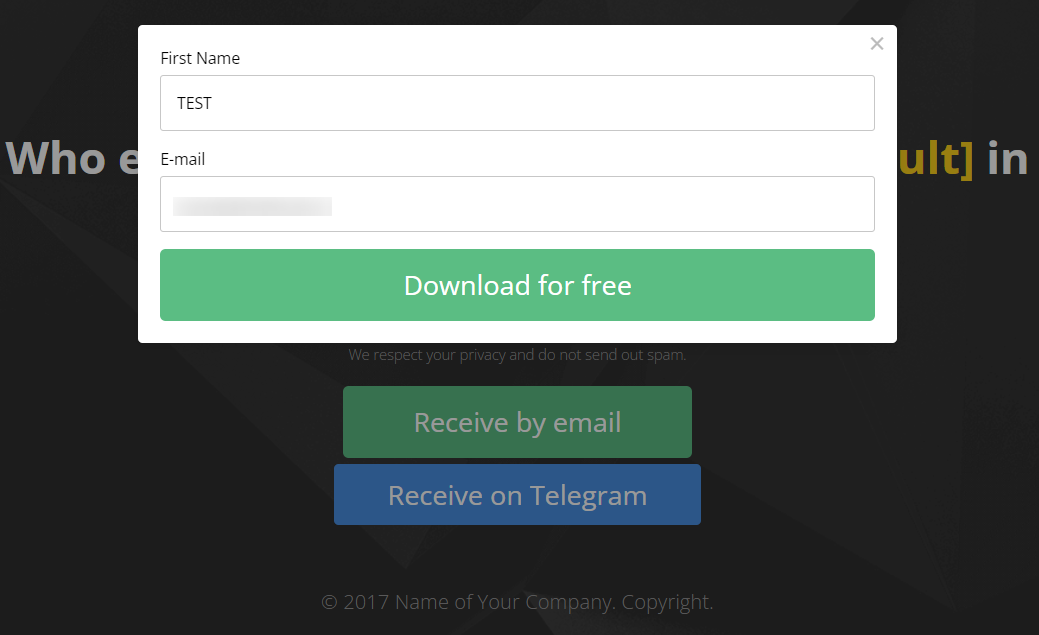
The contact can sign up by email and via Telegram.
By the way, we have added 50 new templates to the page builder, so you can choose the right landing page structure and colors and not waste time on the layout. Just change the text and add your images.
And here’s how it’s implemented through visual sales funnels.
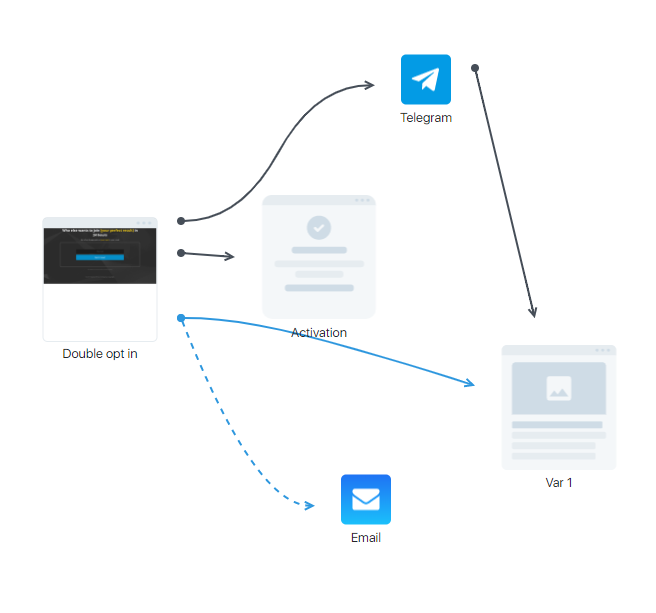
In addition to the standard subscription and activation output, the “Double opt in” block has added another output, which is configured for the transition button and subscription to the chatbot in Telegram.
You don’t need to provide a link to the chatbot page, and you track the conversions. You will then be able to suggest the lead to re-subscribe from Telegram to email. You warm up through messenger, and sell and provide access to the lessons already to the email address.
An example for a “Telegram” block.
Similarly, you can make several outputs in the Telegram chat-bot, assigning a separate output to each button. This is how it is implemented in the funnel:
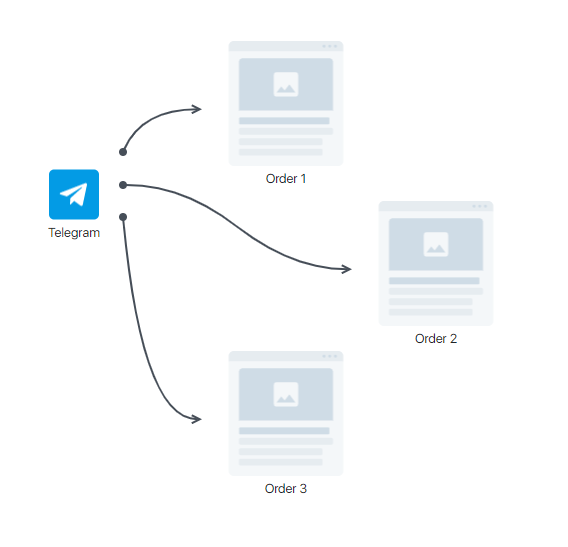
Transitions from each exit are recorded on the block exit and on the arrows themselves. The number of views of the final page is also counted (the number under the block (visited)).
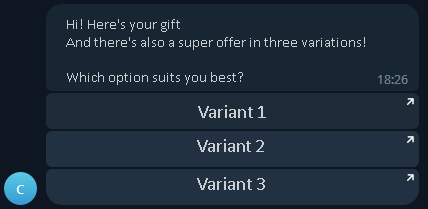
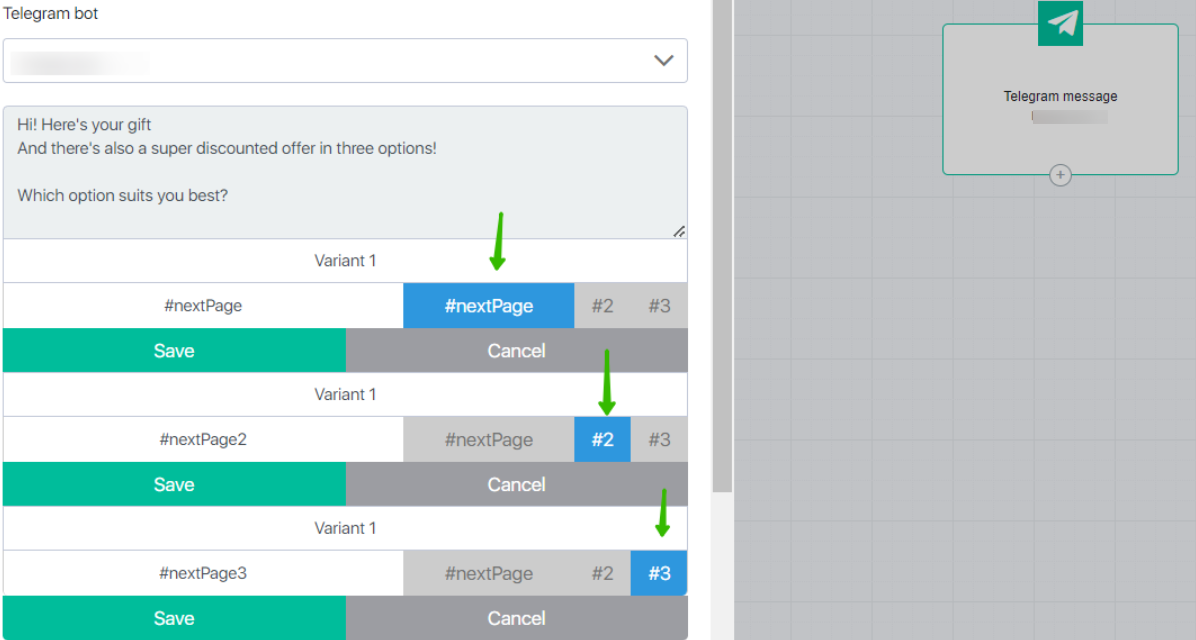
And this is what the message in Telegram looks like on the lead side:
How to set it up?
If you can increase the number of outputs for a unit, this setting will appear in the unit settings:
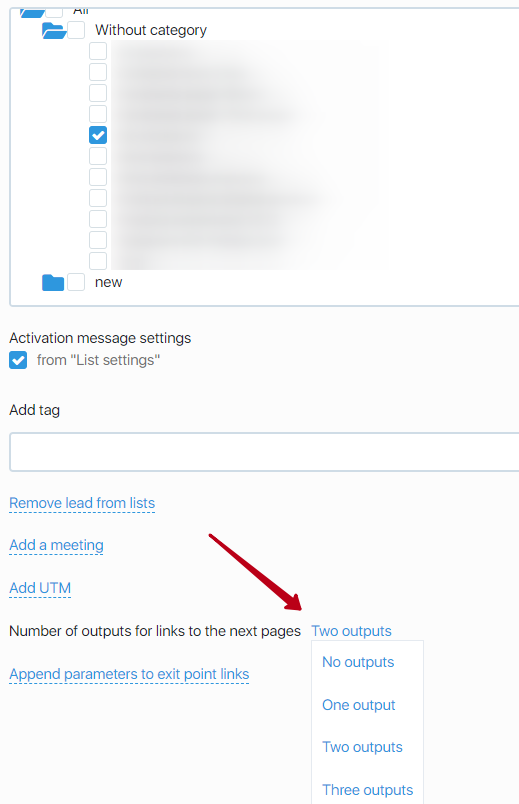
You can leave the default output or add additional outputs (up to 3). In one funnel the same units can have different number of outputs depending on your task.
Double opt-in block.
If you want to implement email and Telegram subscriptions, then leave 1 additional output at the subscription page. In the page editor for the button, specify the settings:

The email subscription will happen via the default outputs, and the contact button will take you to the next page, via the link arrow to the “Telegram” block. The Telegram subscription page will open and the messenger will offer to launch a bot, after which the script that you specified in the process by editing the “Telegram” block will be triggered.
Telegram block
If you need to implement several exits from the Telegram chatbot message, specify the variables #nextPage, #nextPage2, #nextPage3 in the buttons by clicking the necessary hashtag option. Save the settings.
Then connect the blocks to each other by pulling the arrow from the right exit to the right block.
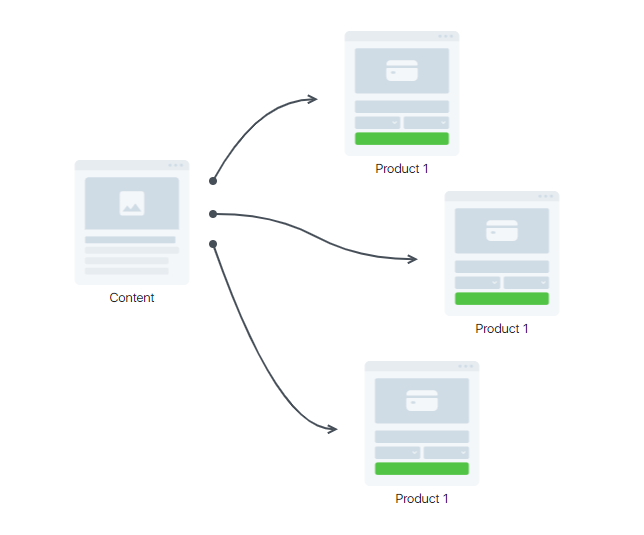
Block “Content”
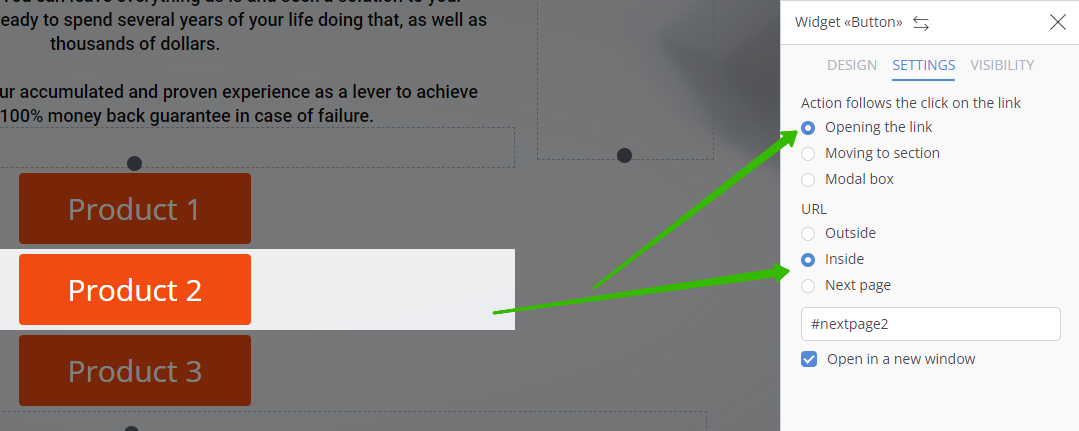
Suitable if you have a sales page with several buttons for different rates, or a content page from which you want to direct the contact to different blocks, giving the choice to the contact. At the same time you will be able to track statistics (exit from the block, on the arrows, visited the block (the number under it).
Open the block settings and activate the three exits to the next page in the settings. Then go to the page editor.
For the first button, leave the “Next Page” output, but you can specify #nextPage (the logic is the same).
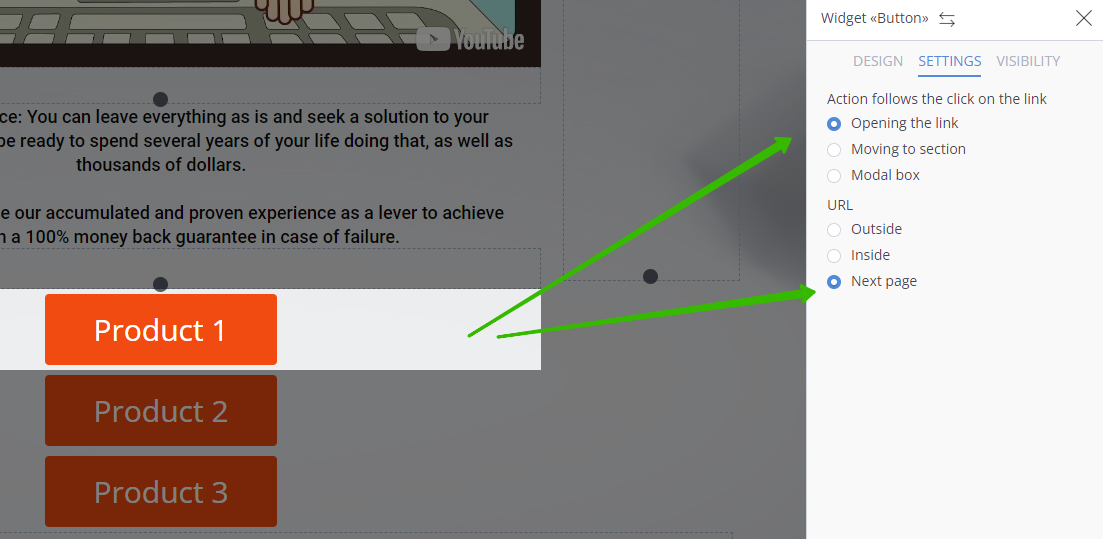
For the Product 2 button, use the hashtag #nextPage2. For the Product 3 button, specify the hashtag #nextPage3.
The “E-mail” block
A letter can be created through the visual editor or the message constructor.
At the moment, multiple outputs are implemented for visual editor letters.
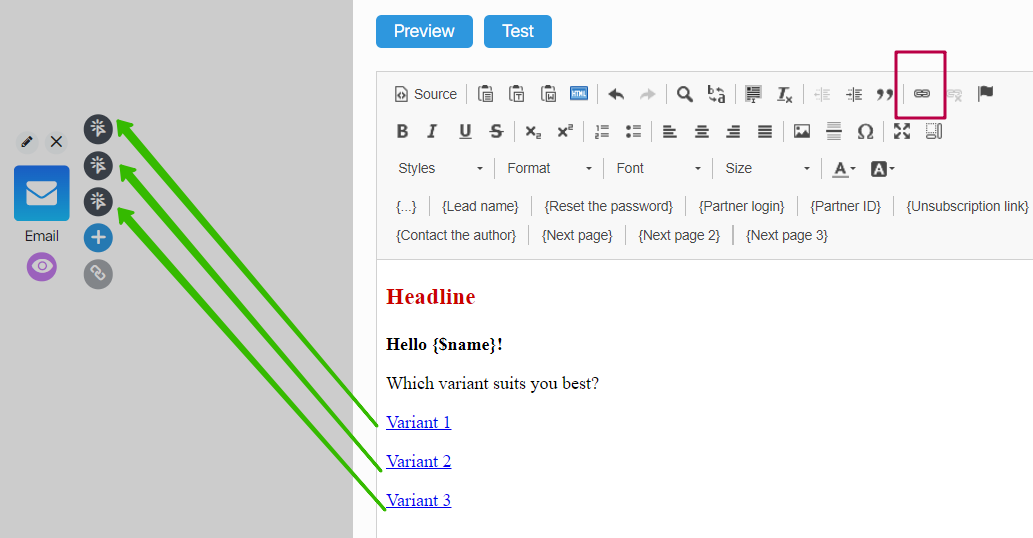
Hashtags: #nextPage, #nextPage2 and #nextPage3 can be added as hyperlinks in the text.
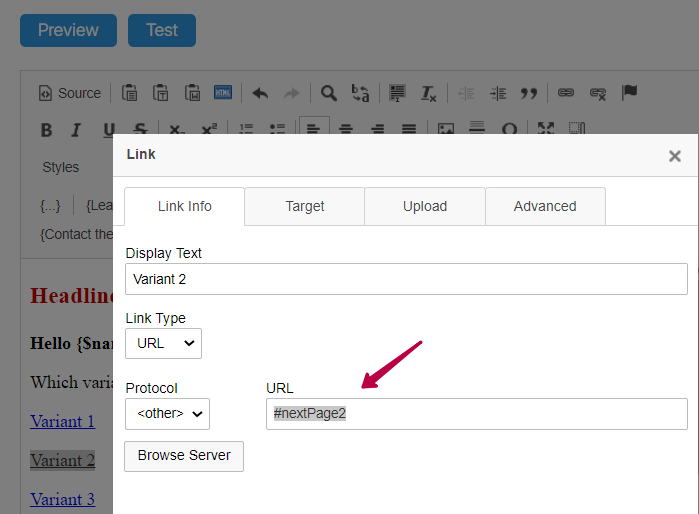
If an email is created through the email builder, only 1 exit “Next Page” is available at this time:

For the other buttons, you must select the “Outside” option and specify the full working link where the contact should go.
But in the statistics of outputs will take into account only the transition from the first exit “Next page”, because it is this output for the transition from block to block through the link.
But there’s a loophole, write the hashtags through a hyperlink in the text:
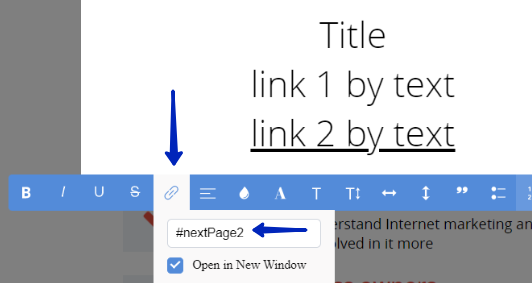
Then the contact will be routed from the right output to the right unit. This option will segment the base by offering the subscriber different options to choose from, and then directing them to a unique customer path based on their choices.
Conclusion
In the rest of the blocks the settings are similar:
- Either the “Next Page” switch is available
- or a field where you can specify hashtags: #nextPage, #nextPage2 and #nextPage3
After making the settings, we recommend that you first check the settings yourself and go through the client path, make sure that the contact will be directed to the right exit in the actual block.
The main idea of this update is to get rid of the routine of writing static links in every block, form, button, link. If you have to change the client’s path, it will take a lot of time to edit and the chance of error increases.
Using the “Next Page” setting and hashtags, you get rid of the routine and quickly change the customer path through arrows between blocks, as well as tracking statistics.
The capabilities of visual sales funnels are increasing all the time. If you haven’t implemented them in your project yet, it’s time to start!
If you have any questions, write to the support team, we’ll give you tips and help with settings!
