Pages for adding and editing surveys are identical, they differ only by name (Create/Edit Survey).
The page consists of 4 tabs:
- Main parameters
- Pages
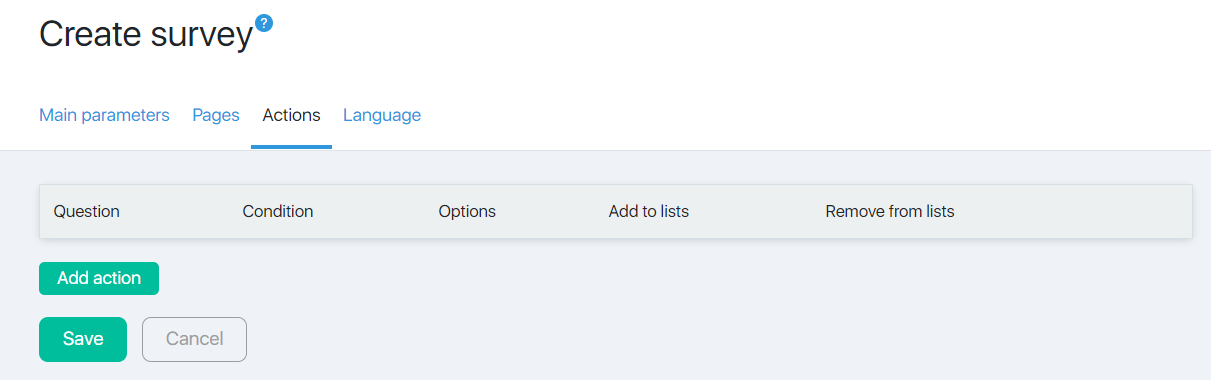
- Actions
- Language

Main parameters
On this tab, you must specify the name of the survey and its description.
The survey name is displayed only in your account, subscribers will not see it.
In the Description field, for example, you can add a short explanatory instruction for the interviewers.
If you want to reach out to subscribers as much as possible with the survey and send a letter to the database several times with a proposal to fill out a survey, the Add to list field will avoid duplicating letters to those who have already answered questions. Create a separate group, for example, “Polled” and specify it in this field. And then, when sending a repeated letter, specify in the settings to exclude those who are in this group.
Also on this page, using the radio button, you can specify whether the survey will be unlimited, or it is valid until a certain date.
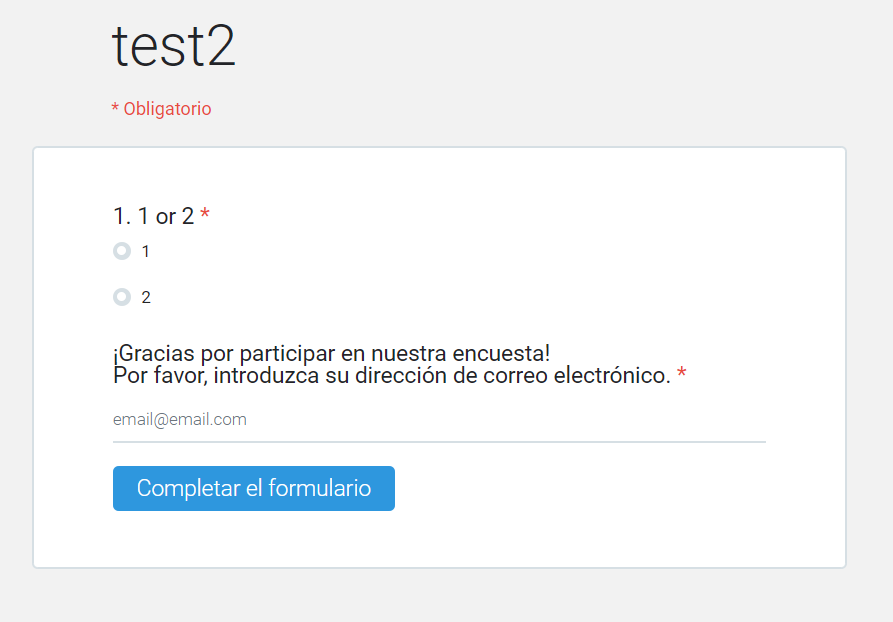
In the “URL after completing the survey:” field, you can specify the page that the participant will go to after completing the survey.
The default page looks like this:
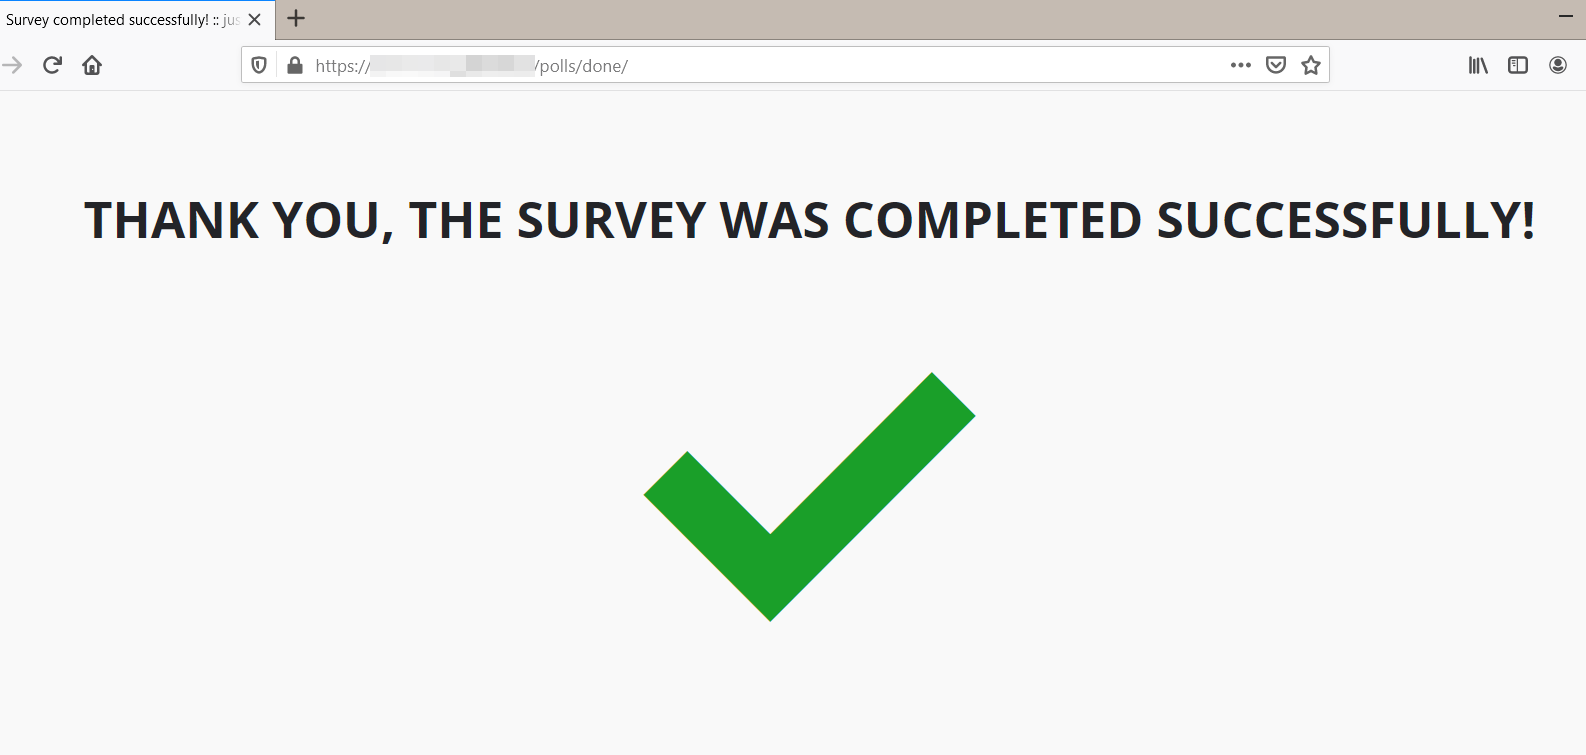
However, you can, for example, offer some kind of gift or bonus to everyone who takes part in the survey. Then you can make your own page on which to place it. And here, set the address of this page.
The Save button saves the survey and adds it to the Surveys page.
Pages
On this tab, the questions themselves are configured directly.

You can add all the questions to one page or distribute them on several pages for convenience of perception.
Adding a page
To add new pages to the survey, use the Add page button. Below the first page there will be a similar block page 2. If necessary, you can add 3rd, 4th pages, etc.
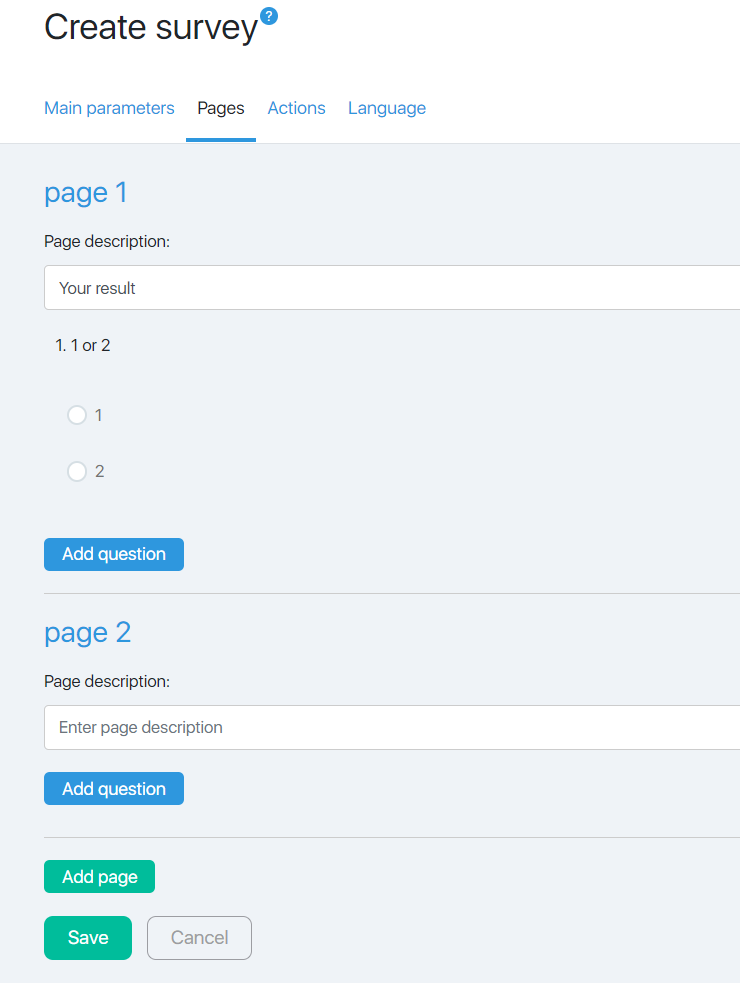
On each page, you need to specify a description.
Then you can start adding questions.
Adding questions
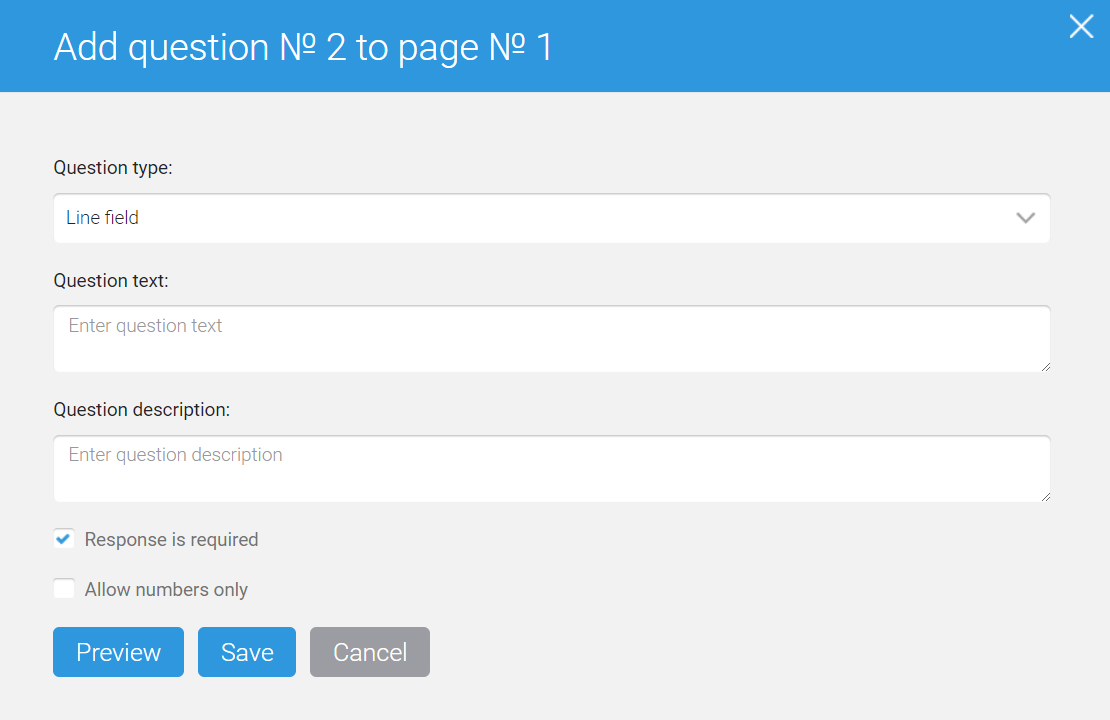
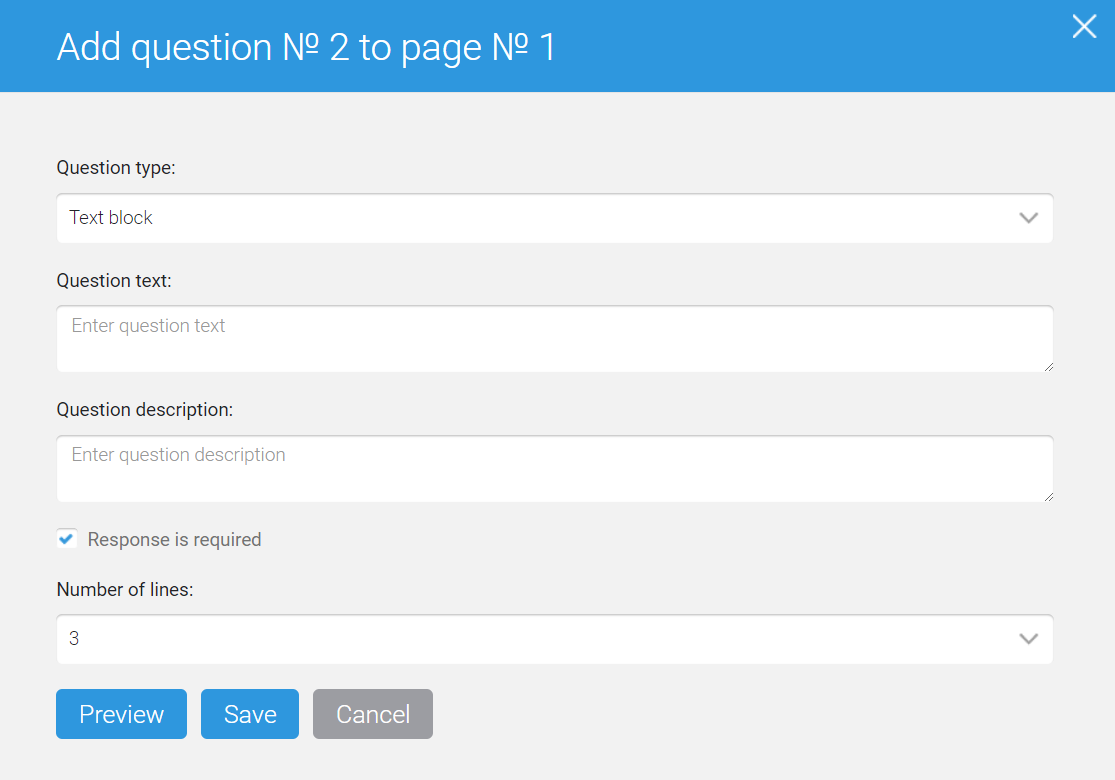
Clicking the Add Question button opens a pop-up window.

You must select the type of question. Depending on the option selected, additional fields will appear that need to be filled.
For any type you need to ask the question itself, if necessary, specify a description. Use the checkbox to indicate whether the answer to this question is mandatory.
Only one answer version. The answer is selected using the radio button. You must specify the answer options.
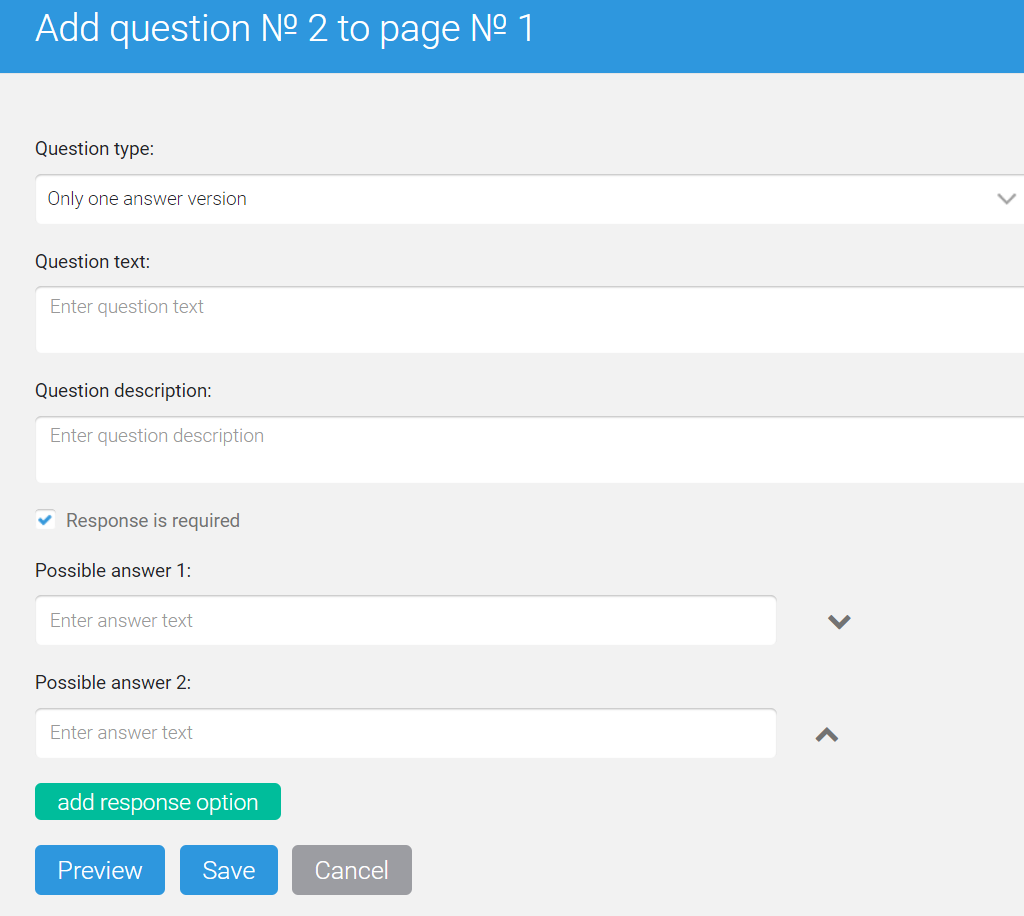
By default, 2 options are added, if you need more, use the button to add response option.
The arrows to the right of the answer options allow you to change their places.
Multiple response options. The answers are selected using the checkboxes. You must specify the answer options.

By default, 2 options are added, if you need more, use the button add response option.
The arrows to the right of the answer options allow you to change their places.
Button Add option “Other” allows you to add a text field to the answer options, where you can enter any text, if none of the proposed options are suitable.
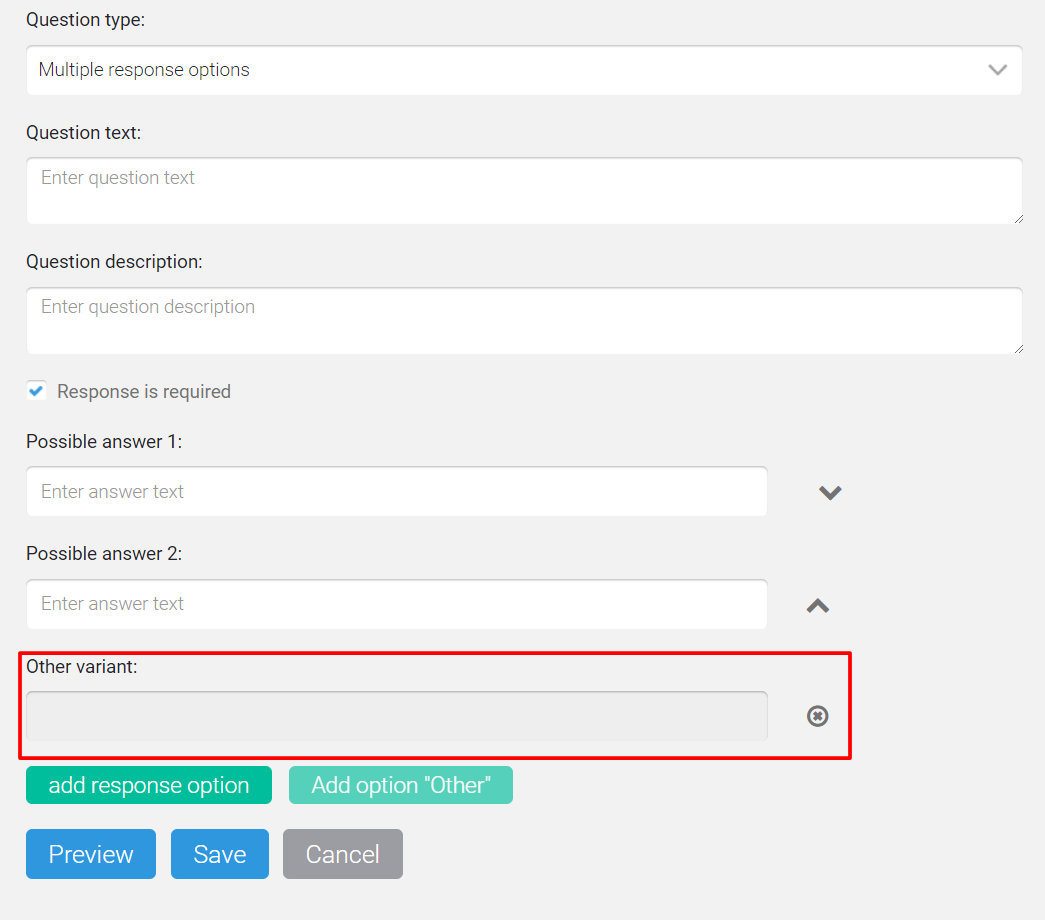
This field will always be the lowest, the cross to the right of it allows you to remove this option.
Line field. Reply with custom text up to 255 character. If you select the Allow to enter only check box, you cannot enter anything except digits in the field.
The text block allows you to enter text of of custom length. It is necessary to set the block size in lines (if the size of the response in the visible part of the block exceeds the scroll bar).
Action
For questions with fixed answers (one answer or multiple answers), you can specify adding/deleting to/from groups when selecting one or another answer option.
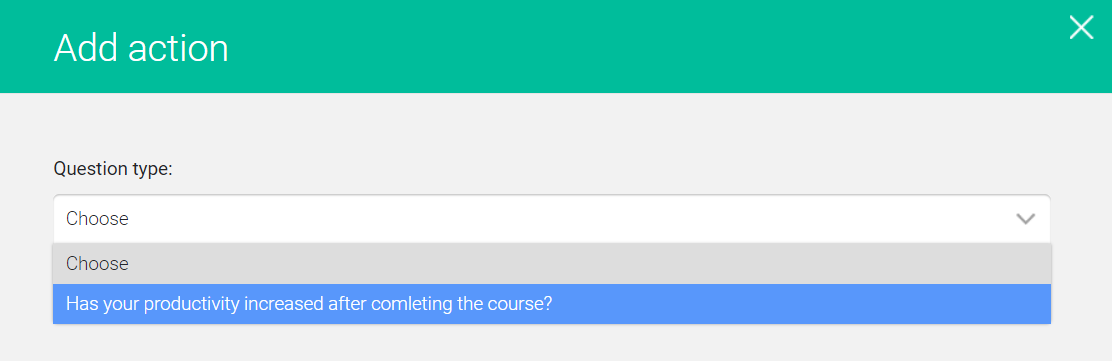
Clicking the Add action button opens a pop-up window.
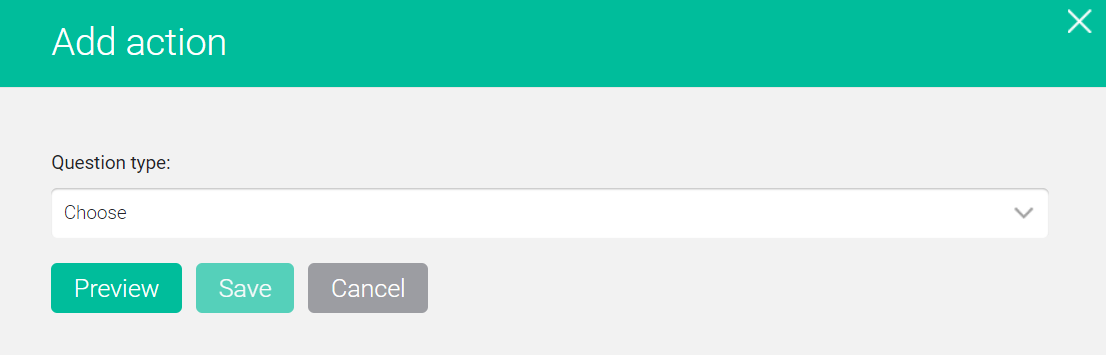
It is necessary to choose a question, the answer to which entails an action.
After selecting a question, additional form fields appear.
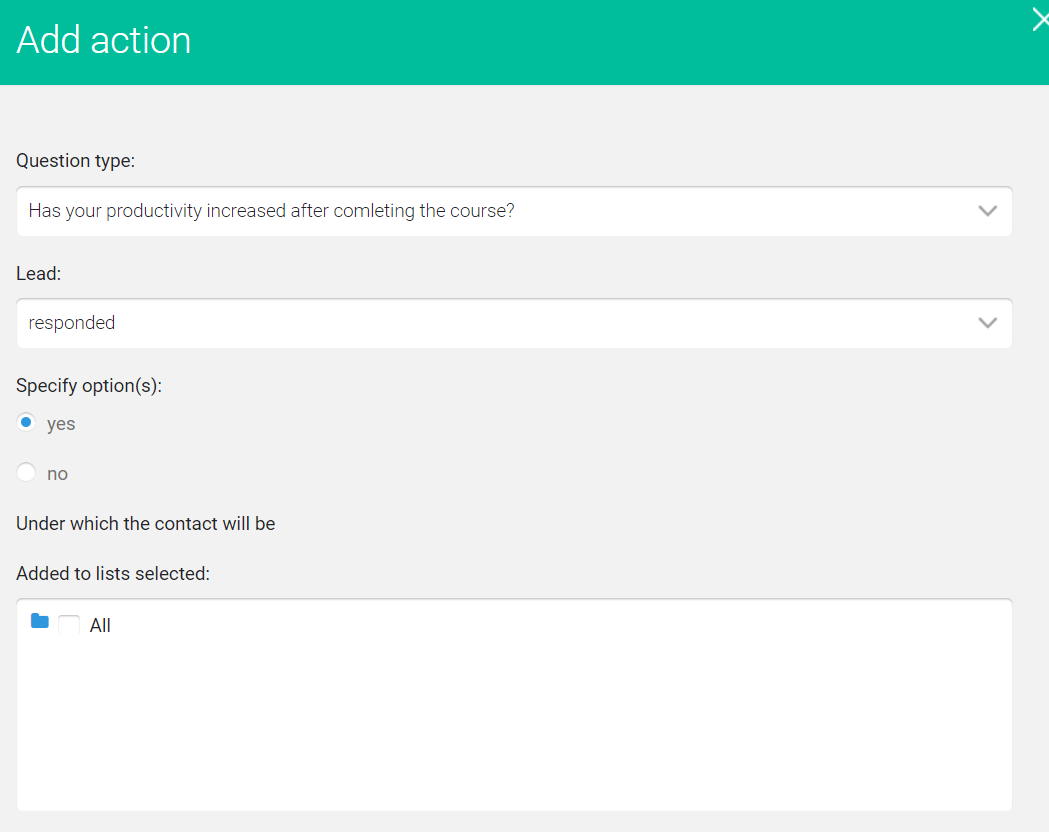
If we want to add (or delete) only those participants who answered the question in a certain way, then in the Lead field we choose answered. If we want to add (or delete) all the participants, except those that the question in a certain way, then in the Lead field we choose didn’t responded.
Next, use the radio button to select the answer.
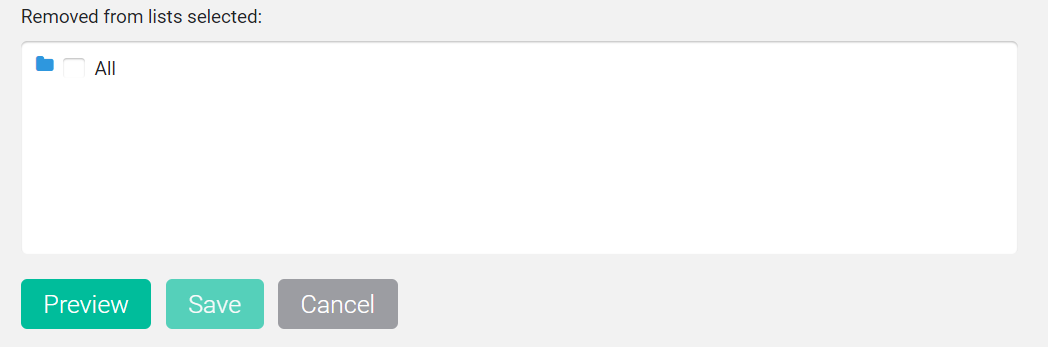
After that, specify the group(s) to which the respondents and/or groups will be added, or from which they will be deleted. Moving by category is done by clicking on the blue folder. Selecting a group by clicking on the checkbox (empty square) – it should have a blue tick. The choice of all groups in the category can be done by clicking on the checkbox category.
Then click the Save button.

The added action can be deleted by clicking on the button with a cross in the last column.
Language
The settings on this tab allow you to change or translate the main text of the survey pages if you would like to invite a user to take a survey in a different language. Change the data in the survey fields:

Then, on the survey page, all texts in English will be translated into another language:

 (1 votes, avr.: 4.00 / 5)