Content
- 1 How to setup?
- 2 Setting up a webinar room
- 2.1 [1] Menu Control in the Webinar Mixer
- 2.2 [2] Webinar room settings switch
- 2.3 [3] Webinar title
- 2.4 [4] Date and time of the webinar
- 2.5 [5] Choosing a video source for a webinar
- 2.6 [6] Choosing a webinar script
- 2.7 [8] Timer
- 2.8 [9] Banner
- 2.9 [10] Turning menu items on and off in the webinar room
- 2.10 [11] Exit Webinar Mixer and Connection Status
- 2.11 [12] Configuring the display of the list of webinar participants
- 2.12 [13] Blocking messages from a specific participant
- 2.13 [14] Configuring the webinar chat
- 2.14 [15] Field for sending comments
- 2.15 [16] End webinar
- 3 Delayed start of Video and Banner blocks
- 4 Create a webinar in sales funnels
- 5 FAQ (answers to frequently asked questions)
JustClick now has a tool with which you can conduct a live online webinar, and then convert the broadcast into an auto-webinar and use it in your sales funnels. To start the broadcast, you need a Youtube account.
How to setup?
The functionality of webinars is located in the Site – Webinars section.
Let’s consider the settings of this page in more detail.
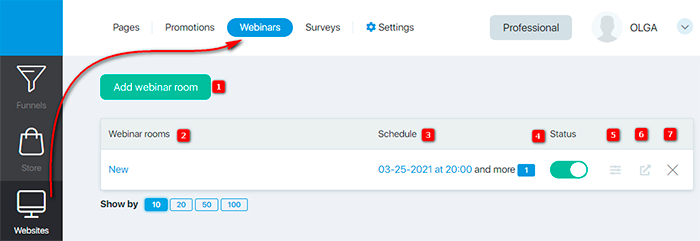
- Button for adding a new webinar room;
- List of created webinars. Clicking on the name of the webinar room opens its settings;
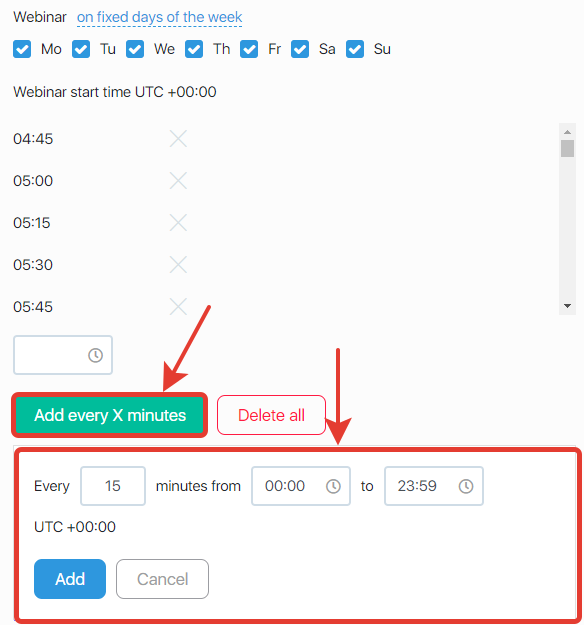
- Schedule webinars;
- Webinar room status (green position – the room is on, gray – off);
- Go to the Webinar room settings mixer;The mixer is a webinar control panel.
- Link to the webinar room. On click, a banner is displayed and the link is copied to the clipboard;

- Removing a webinar room.
Creation of a webinar room
To create a webinar, you need to go to the address “Site” – “Webinars” and click on the “Add a webinar room” button.
Enter the name of the automated webinar, click the “Create webinar” button and make the basic settings of the webinar:
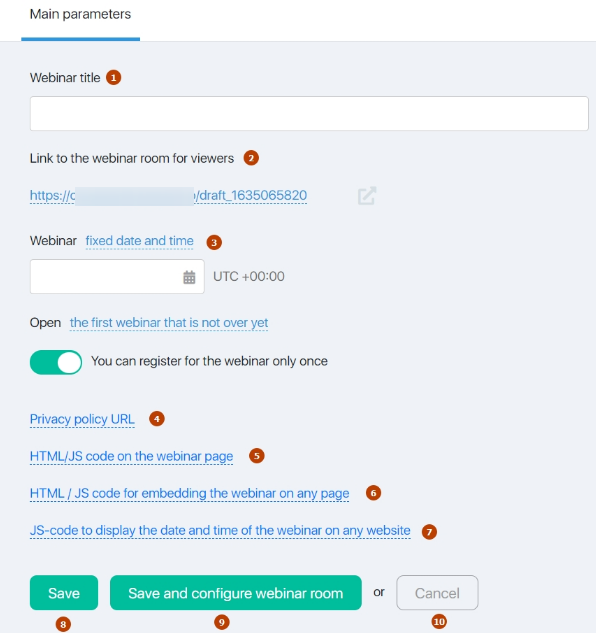
- Webinar title;
- Link to the webinar room.
You can change the link if necessary. To do this, you need to click on the link, select a domain and enter the webinar room ID: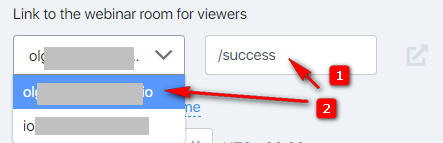
where:
1) enter the webinar ID
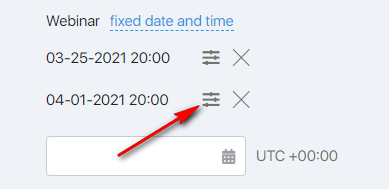
2) choose a domain - Webinar times for this webinar room:
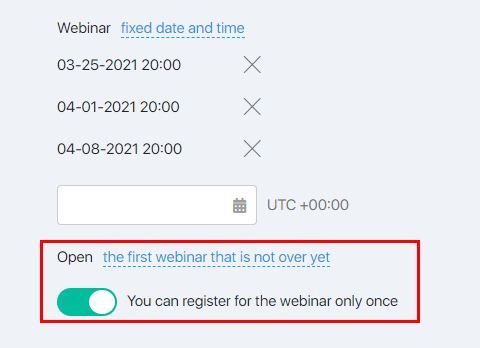
If the webinar is not a one-off (you have chosen different dates and times for the webinar), then additional settings are available:
– Which webinar to open for a webinar participant; there are 3 options to choose which webinar to open:
The first webinar that hasn’t started yet – contacts fall into the nearest future webinar. If such webinars do not exist in the future for the contact in the plans, then the one that started later than everyone else and is still running is shown.
The first webinar that is not over yet – contacts fall into a webinar that has previously begun and has not yet ended. If such webinars do not exist, the contact will be shown the closest webinar in time.
The last webinar, which comes less X minutes and has not yet ended – contacts get into the webinar, which later began and goes less than X minutes. If there is no such thing, then next.
– How many times can you sign up for a webinar (once or repeatedly).
4. Consent to the processing of personal data.
Clicking to open a field for entering a link to the Privacy Policy:

If there is a link in this field, agreement with the Privacy Policy is added to the registration form.
5. HTML/JS code for placing on the webinar page.
Code can be placed:
– on the login page, where the registration form,
– in the webinar room (the code will be on the page all the time),
– in the webinar room (the code will be added after the start of the webinar and will disappear after the end).
6. HTML/JS code for embedding a webinar on any page.
You can copy the webinar code and paste it into any site.
7. JS code for displaying the date and time of the webinar on any site.
You can copy the webinar start date and time code and paste it into any site. The nearest webinar start date and time will be displayed.
8. Saving settings (by clicking on this button the settings will be saved and you will return to the page with the list of webinars).
9. Save settings and go to the Webinar Room Mixer.
10. Cancel creation of a webinar room (by clicking on this button, the settings will not be saved, and you will return to the webinar room).
Conditions for creating a webinar in a webinar room
- at the time of recording a contact for a webinar;
- when you click on the mixer at a specific date, if there is no such webinar yet. This will open the mixer for this webinar.
Therefore, if you do not see the webinar you have created in the Mixer in the “Webinar Room Settings Switch” item, you should check if one of these conditions is met.
Conditions for deleting a webinar in a webinar room
- There are no participants registered for the webinar;
- The webinar has not started yet.
Therefore, if the webinar is not deleted, you need to check: there are no registered participants for this webinar and whether the webinar has not started yet.
Setting up a webinar room
After the initial settings of the webinar room have been made, by clicking the “Save and configure webinar room” button for a new webinar room or “Configure a webinar room” for an existing webinar room, you go to the page where webinars are configured and managed in real time. (Webinar mixer).
Let’s take a look at each Mixer function in order.
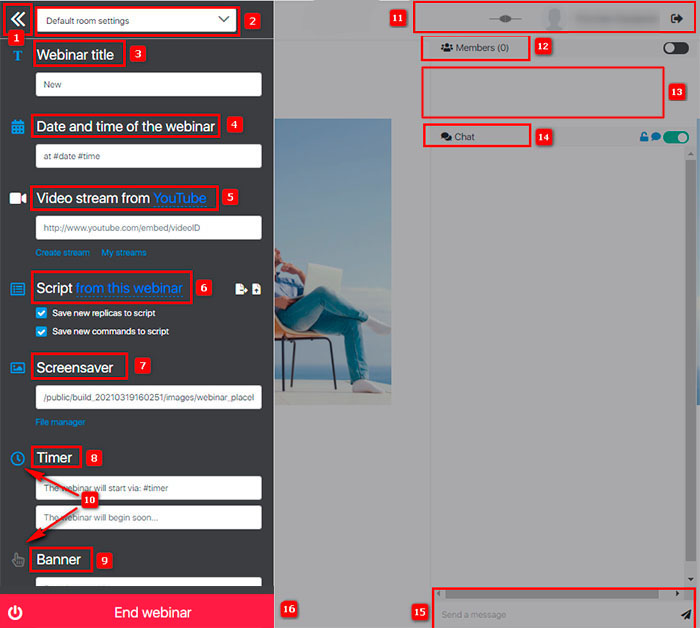
[1] Menu Control in the Webinar Mixer
This setting allows you to open and close the webinar settings. You can also close the menu by clicking anywhere on the screen outside the menu.
[2] Webinar room settings switch
- In this switch, created unfinished webinars are selected.
- If Default Room Settings is set, the webinar room status is displayed as the default.
If we see a different name in the switch, the webinar room is displayed, which has been created and has not finished yet.


The choice of a webinar in this switch determines which webinar in this webinar room you will configure in the Webinar Mixer.
By clicking on the arrow to the right of the selected room setting, the link to the webinar will be copied. When you click on this link, a registration form for the webinar will open:
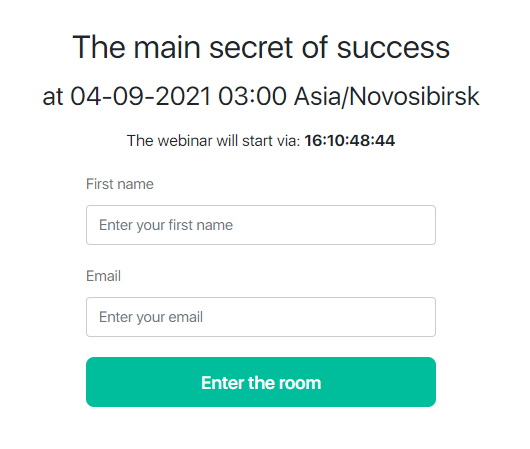
Let’s consider the options in the “Settings Switch” of the webinar mixer.
1. A webinar has been selected that has NOT STARTED yet.
1.1 The author has NOT EDITED the webinar settings in the Mixer.
When you change the settings in “Default Room Settings”, the settings in the menu and webinar room display will CHANGE.
Until the webinar STARTED and edited, it inherits the settings from the “Default Room Settings”.
1.2 The author EDITS the settings in the Webinar Mixer.
If you change the settings in “Default Room Settings”, the settings in the menu and webinar room display will NOT be changed.
The webinar has its own independent settings.
2. Selected webinar, which has already STARTED.
From the moment the webinar starts, its settings are independent of the “Default Room Settings”.
The webinar has its own independent settings.
But it is worth considering that the webinar settings depend on the scenario, which is configured in step 6.
(the script is common for all webinars in the webinar room).
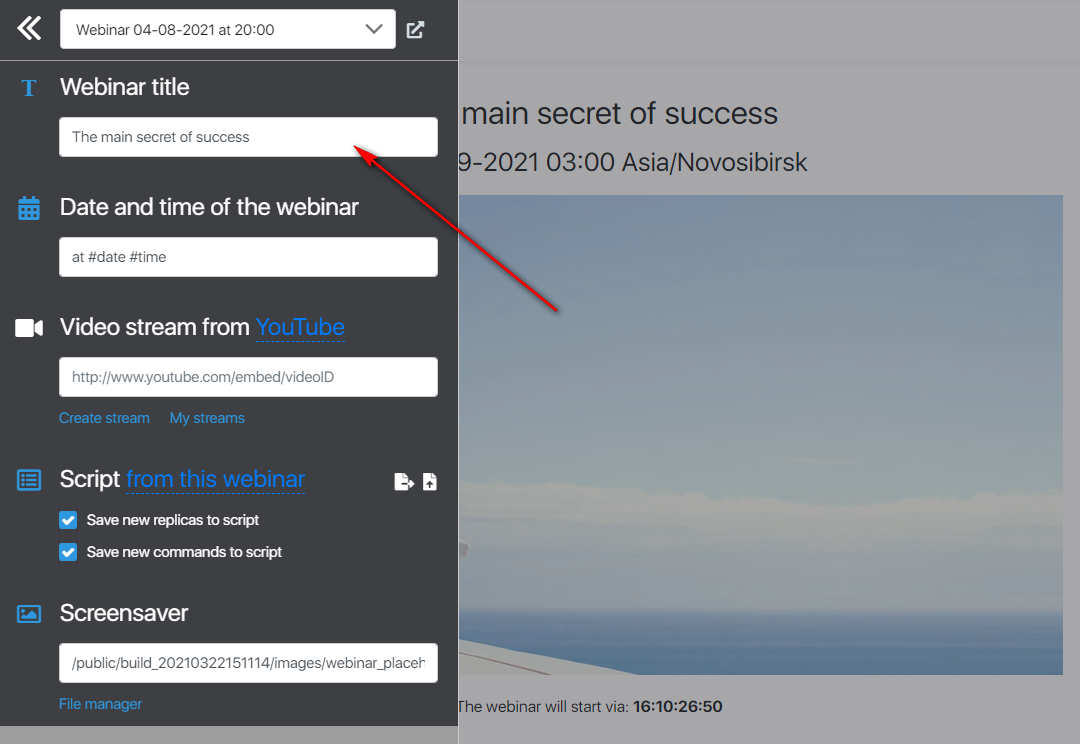
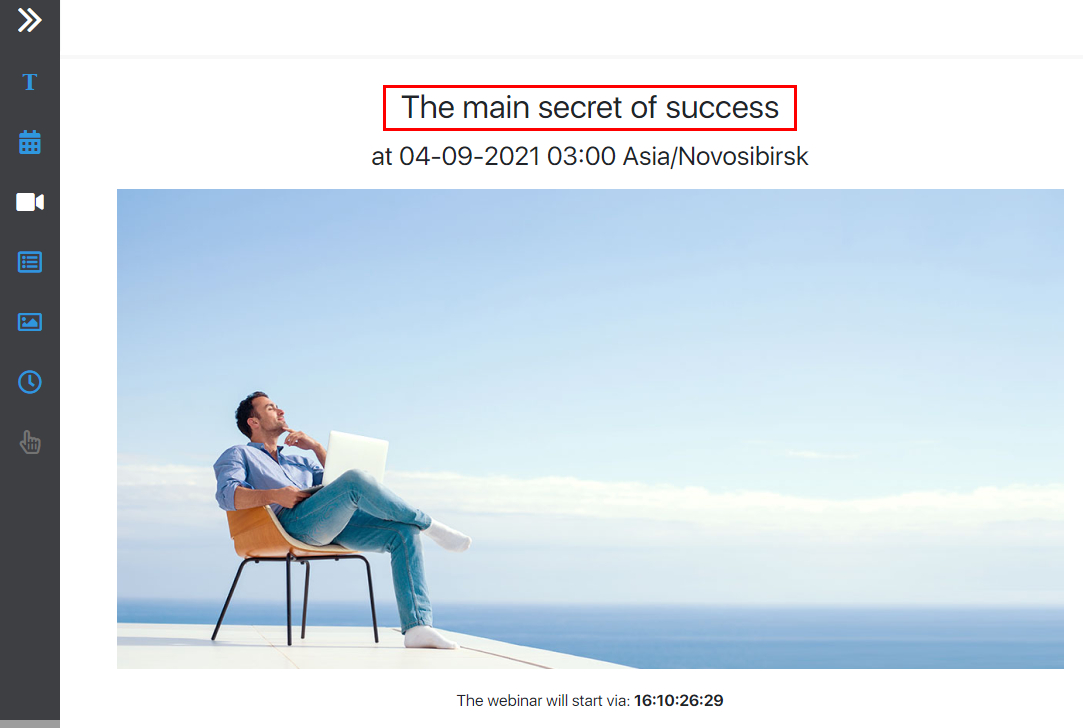
[3] Webinar title
The webinar name can be changed directly in the Webinar Mixer, and it will immediately change in the webinar room.
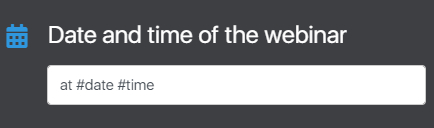
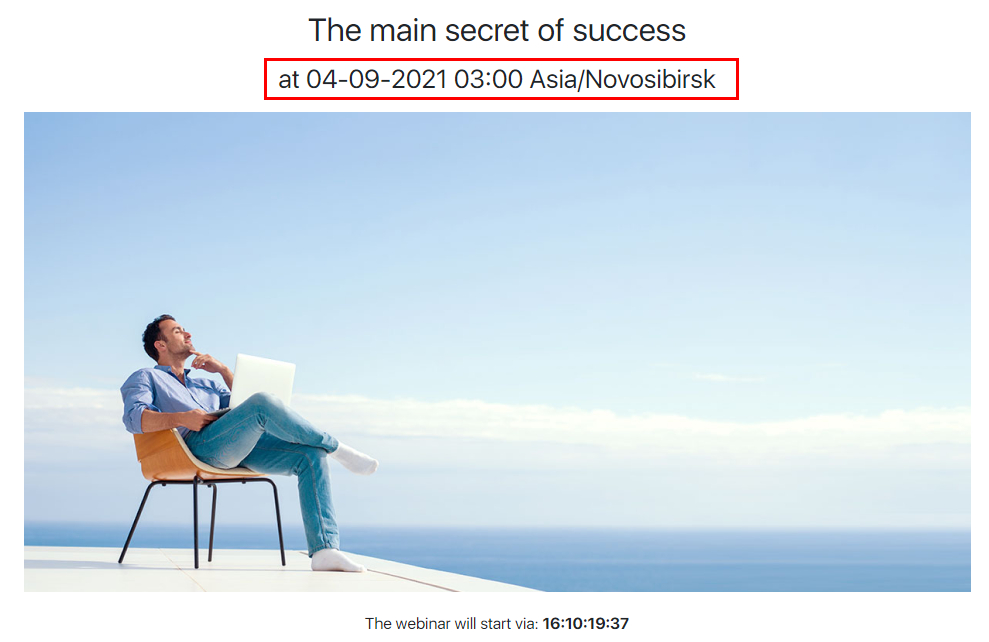
[4] Date and time of the webinar
In the Webinar Mixer, in the setting of the “Date and time of the webinar” block, you can specify the variables #date and #time – this is the date and time of the start of the webinar, the values are substituted from the webinar settings.
In the webinar room, the webinar participant will see the start date and time according to his local time (which will be read from his device and for which the time from the webinar settings will be adapted).
Consider the options for setting the webinar time depending on the settings
- If “Default Room Settings” is selected in the Webinar Room Settings Switch, the time variables are changed to
#date = –. – .—-
#time -: – - If a specific webinar is selected in the Webinar Room Settings Switch, the time variables are changed to the beginning of the broadcast according to the local time.
Webinar 15.04.2020 15:00 UTC +03: 00
For a participant from Vladivostok (Moscow time +07: 00), the variables change as follows:
#date = 04/15/2020
#time = 10:00 PM Asia / Vladivostok - In the webinar room
If a participant from Vladivostok (Moscow time +07: 00) is registered for the webinar on April 15, 2020 15:00 UTC +03: 00, then the variables change as follows:
#date = 04/15/2020
#time = 10:00 PM Asia / Vladivostok.
[5] Choosing a video source for a webinar
In this block, the webinar broadcast is configured. To change the video source for the broadcast, you need to click on the current video source and select a new one from the drop-down list.
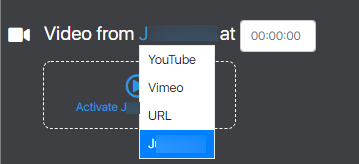
Available video sources:
- YouTube;
- Vimeo;
- URL – here you can specify an arbitrary link to a video file in mp4 format, an example of a link: https://example.com/video.mp4;
- JustClick Player – here you can upload video directly via your JustClick account.
Additional settings for YouTube videos
You can link to an already created broadcast or create a new one.
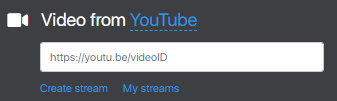
By clicking on the link “Create broadcast” you will be transferred to your Yotube channel in the section for creating broadcasts:
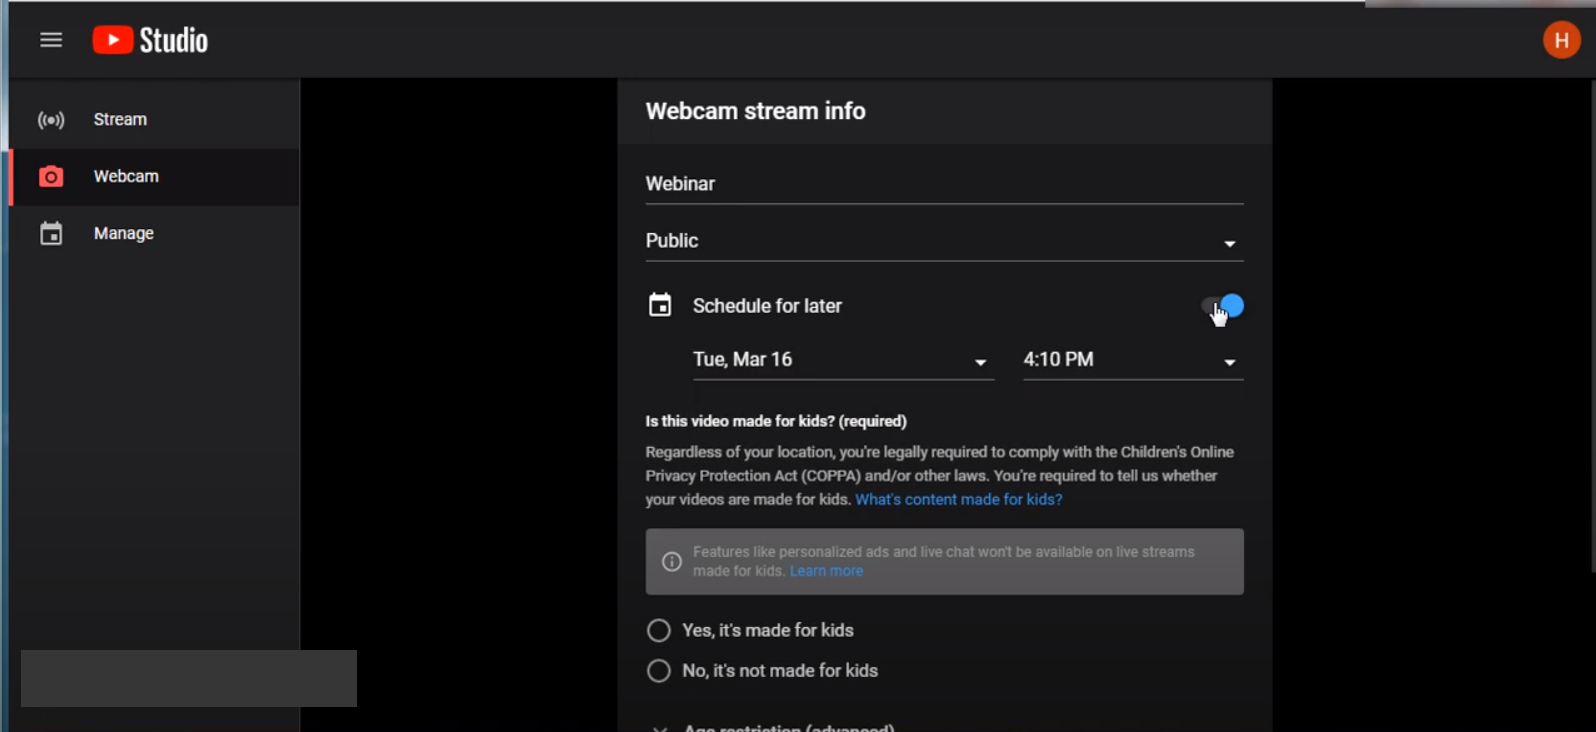
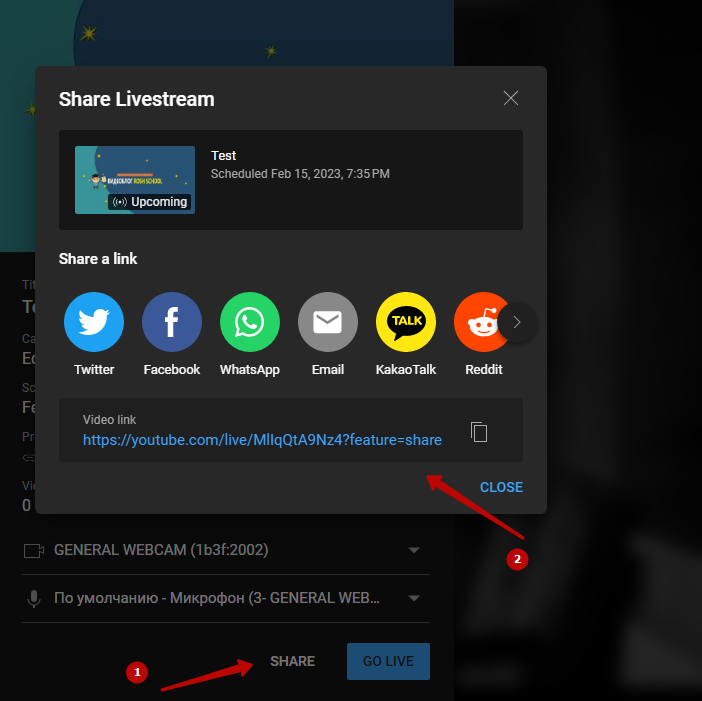
To embed the broadcast, click “Share” and copy the link.
Warning! The direct link may not work for embedding. To display the broadcast, click the link or open the copied link in your browser, and then copy the embed link in your browser.
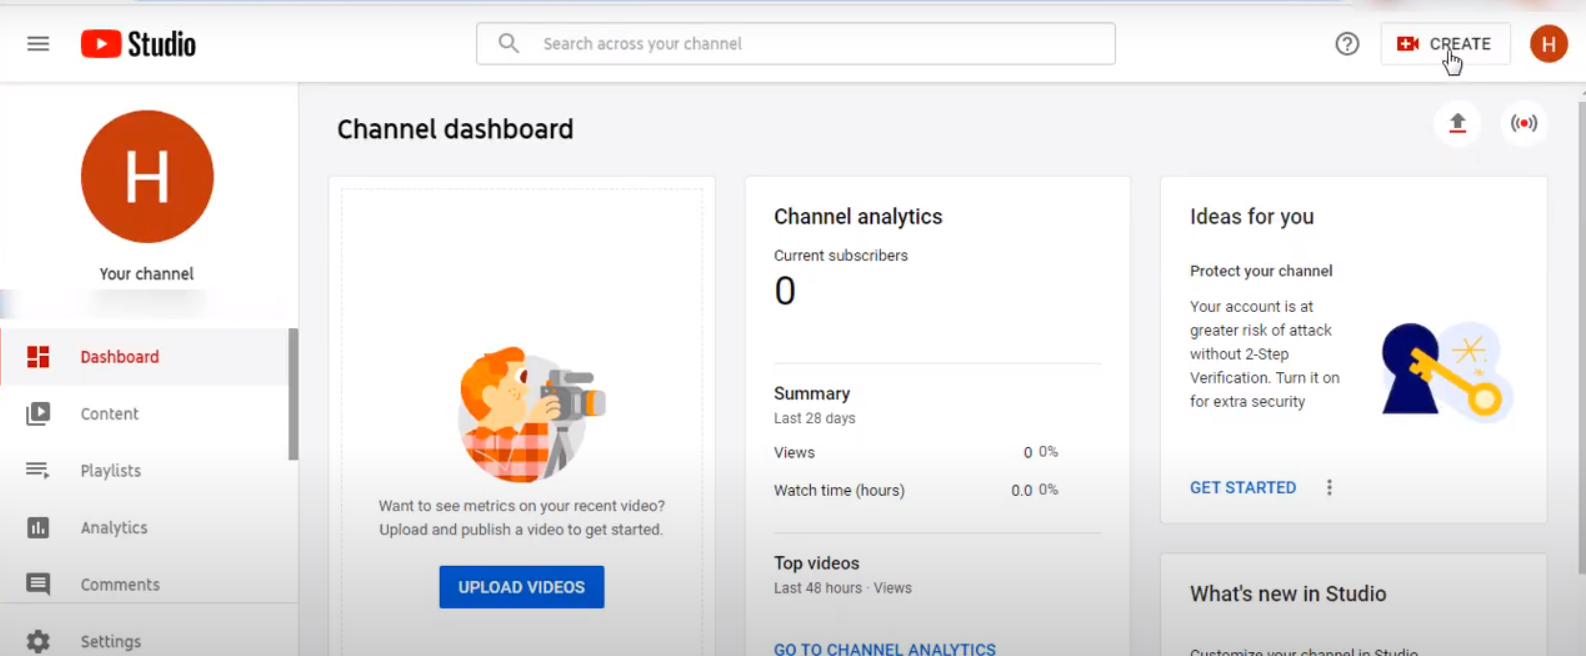
Clicking on the My Streams link will open the Channel Dashboard section of your YouTube channel.
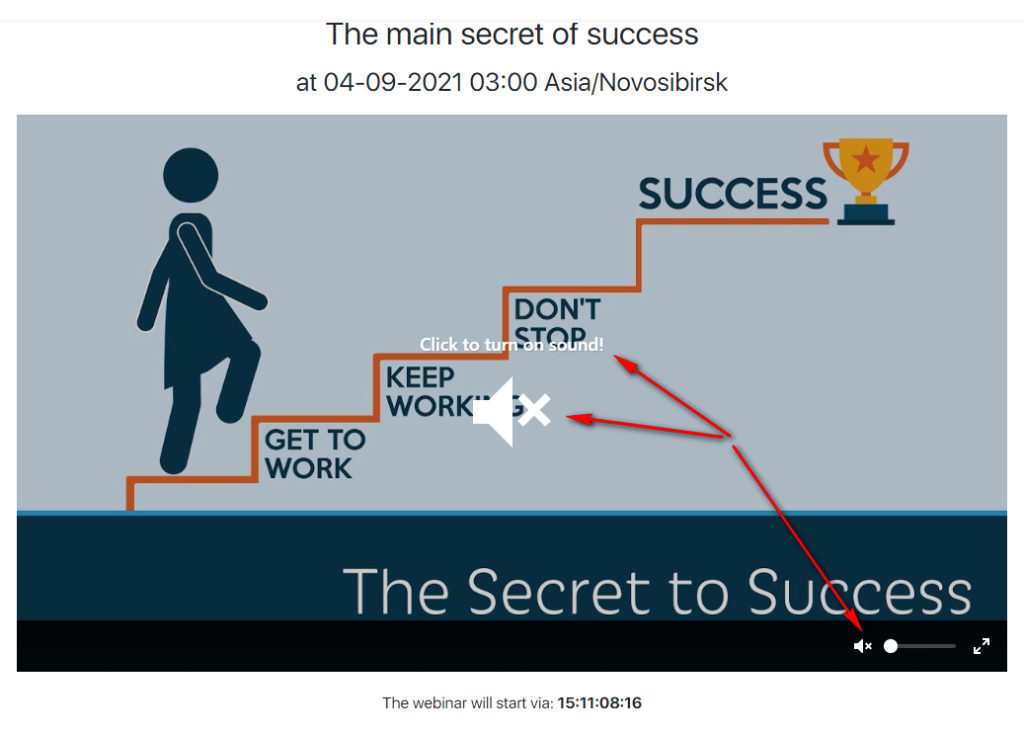
The inclusion of sound in a video is made by clicking on the corresponding icon in the center of the video or at the bottom right. You can also adjust the sound volume there.
Useful memo! The webinar host conducts a presentation from his computer, switching presentation slides. Youtube broadcasts the screen of the host of the webinar, and the video with the presentation is displayed on our service in the webinar room.
You can set up a delayed start of the video in the webinar.
[6] Choosing a webinar script
A webinar script is how the webinar goes from start to finish.
One webinar room contains many webinars according to the schedule, displayed at one address (Url).
All webinars in the webinar room follow the same scenario. Changing the settings in the “Default Room Settings” in the mixer does not change the settings, provided that the webinar script has not been changed.
If the script has been corrected, it will change for all webinars in the webinar room.
Each webinar script includes:
- on / off of each unit
- block / unblock chat
- chat messages
- completion of the webinar
The starting point in the script is the start date and time according to the webinar schedule.
The webinar mixer has initial settings for the webinar room + settings from the script are added.
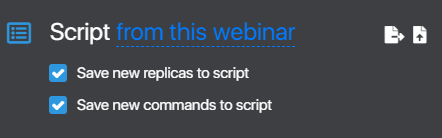
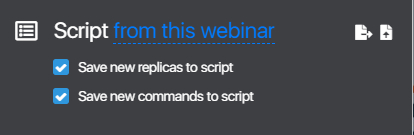
Using the corresponding checkboxes, you can choose to save new information to the current script:
- Save new lines to script (chat)
- Save new commands to script
Example:
There are 2 webinars in the webinar room schedule. The webinars start at 14-00 and 14-30.
In the webinar at 14-00 (we select it in the select in the Mixer), a banner is added and turned on for display in the webinar room. The banner activation time is 14-50.
If the “Save new commands to script” checkbox is enabled in the mixer, at this moment the following command is written to the script: + 50 min. Show banner ….
Accordingly, this command will be executed in the webinar starting at 14-30 at 15-20.
The webinar script can be transferred from the Bizon 365 service if you have ready-made webinar scripts. To transfer the script, click this button.
The webinar script can be transferred from another service or from another webinar room if you have ready-made webinar scripts. To transfer the script, click this button.
The webinar script can be transferred from another service or from another webinar room of our service, if you have ready-made webinar scripts.
To transfer the script, press these buttons.
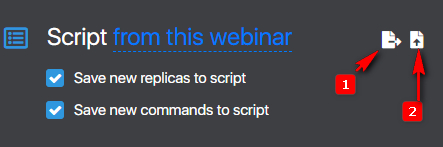
Where:
1 – export script
2 – script import.
Clicking on (2) will open the script import page:

Where:
- Selecting a file to import.
- Timing in the webinar script for adding commands.
- Selection of commands for import.
- Choosing to clean up the script before importing.
- Import button.
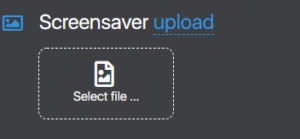
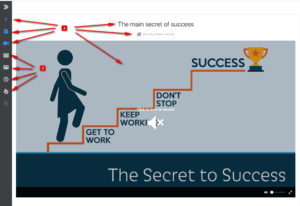
[7] Screensaver
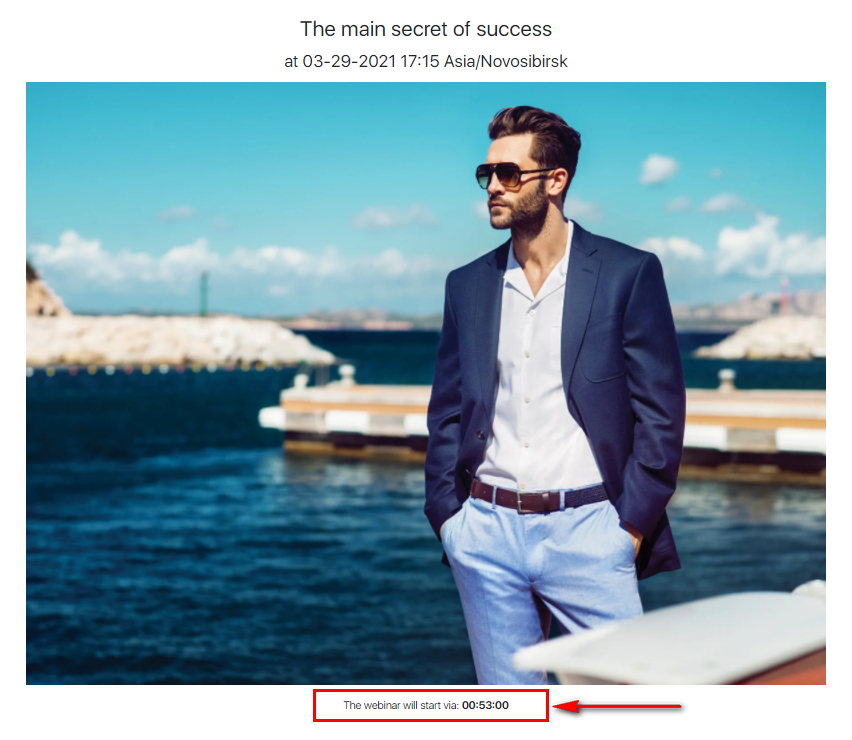
Before the start of the webinar, the webinar visitor will see a splash screen. By default, a standard image is displayed.
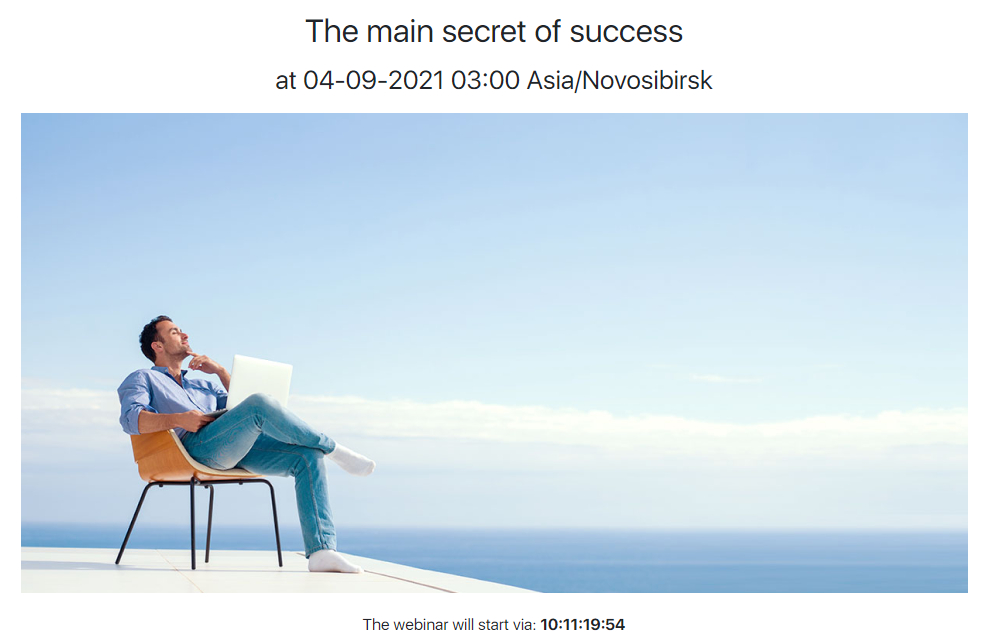
You can upload your image from your computer.
[8] Timer
The timer is displayed below the picture or video in the broadcast room.
There are two columns in the timer settings:
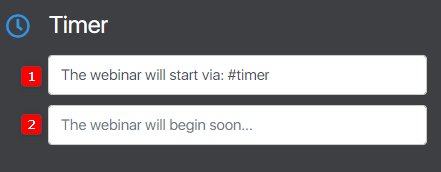
Where:
1 – Text that will be displayed in the timer before the start of the webinar.
2 – Text that will be displayed in the timer during the webinar.
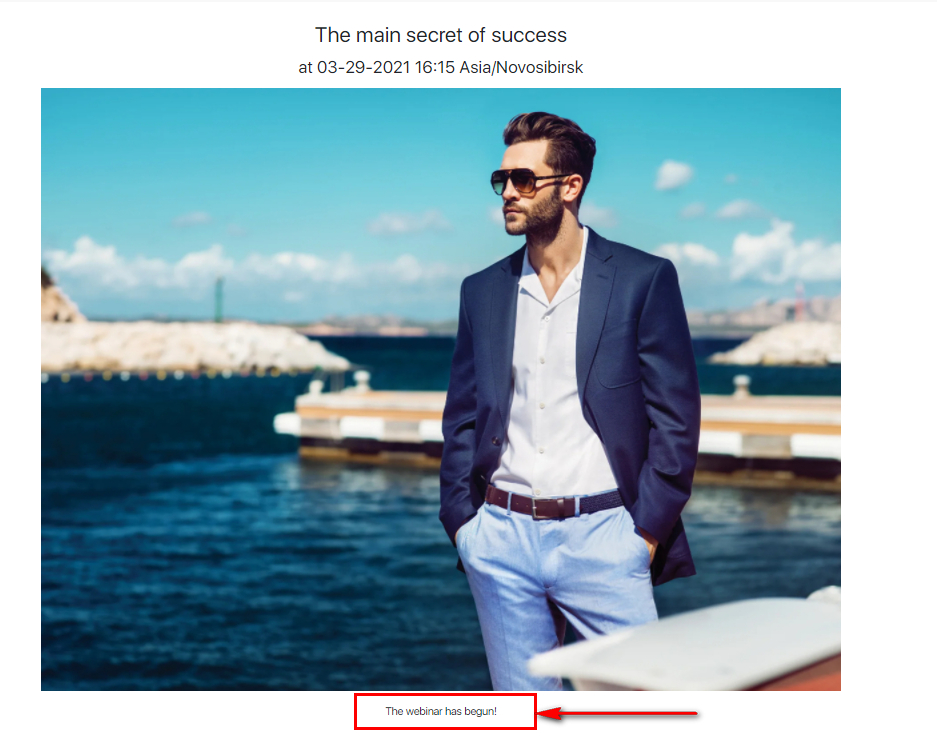
When the webinar has started, the “End Webinar” button appears in the mixer.
It should be clicked after the end of the webinar. After that, a message will be displayed stating that the webinar has ended.

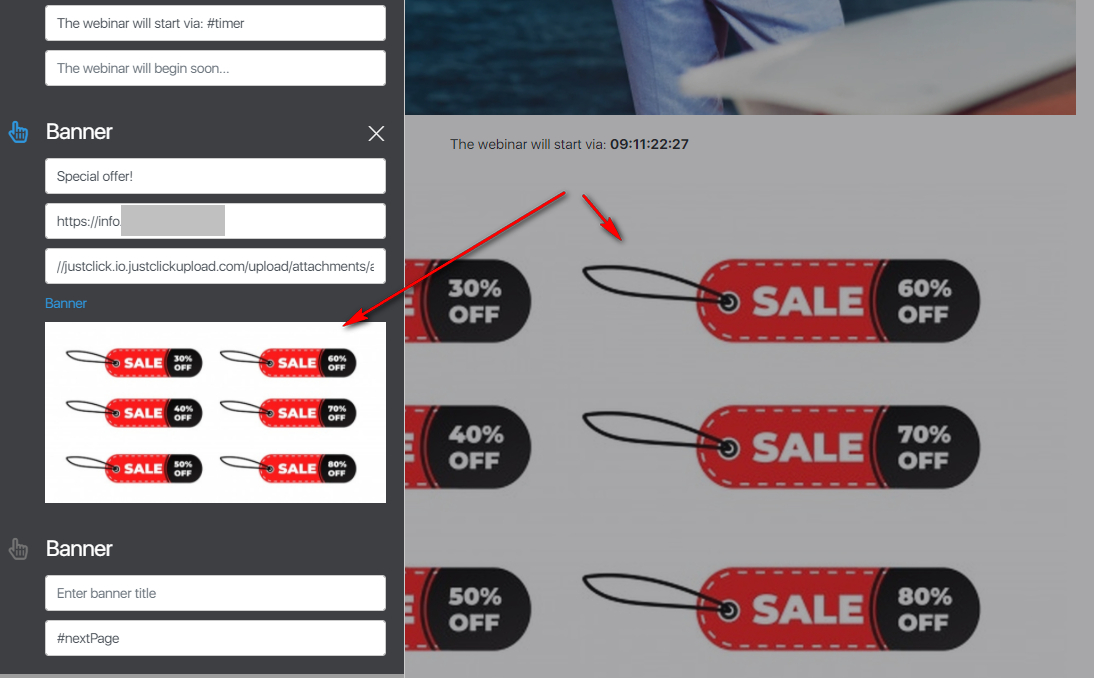
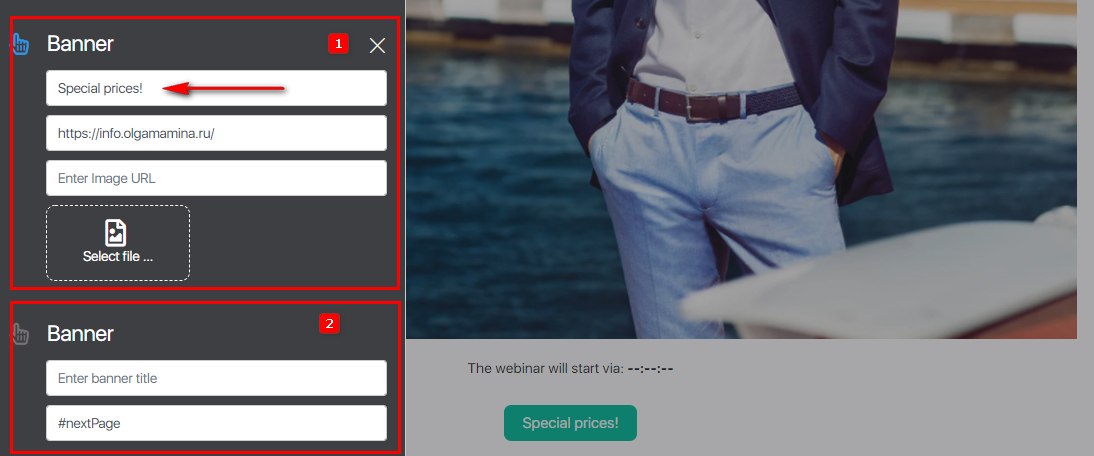
[9] Banner
The banner is displayed under the video or photo broadcast and a timer.
In the banner settings, there are 3 fields and a file selection:
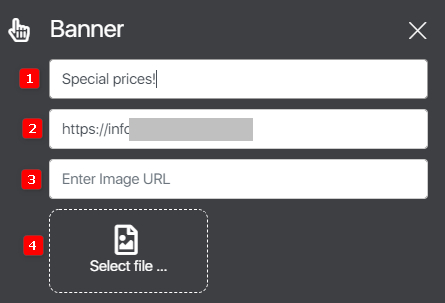
- Sentence text.
- A link leading to a page with a special offer.
- Field for entering the URL of the banner image.
- Selecting a banner file from your computer.
If the fields (1) and (2) are filled in and the field is empty (3) and the file is not selected (4), the text from the field (1) will be displayed on the button containing the link to the page with the description of the offer (2). And when the field (3) is filled in or the file (4) is selected, a banner is displayed, by clicking on which a page with a description of the special offer opens (2).
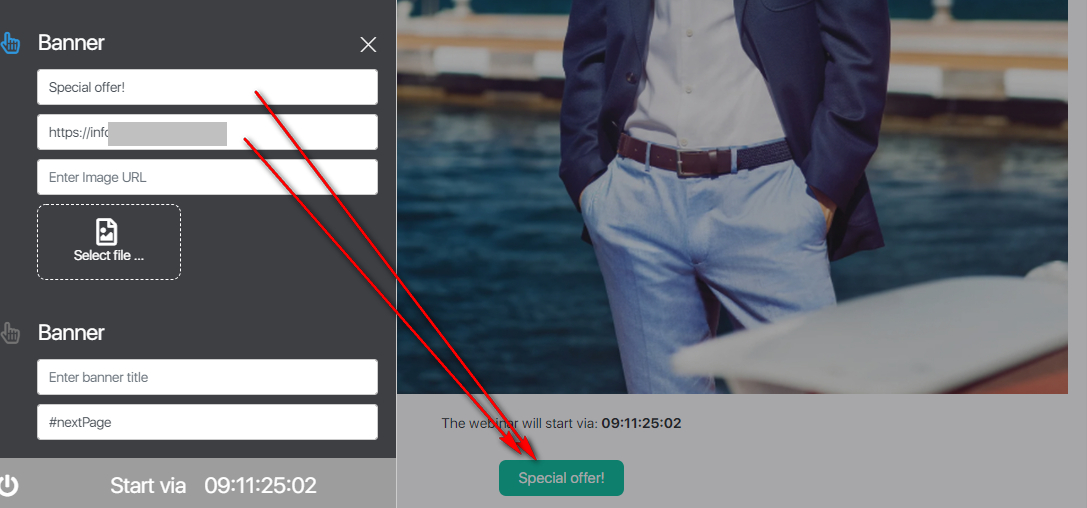
If at least one field in the Banner item is filled in, a form for adding another banner appears.
You can set the delayed display of the banner.
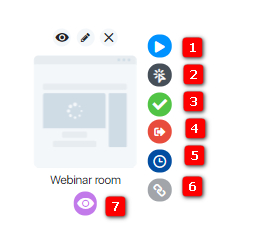
Turning on and off items to be displayed in the webinar room is done by clicking on the menu item icon.
Blue – on.
White – off.
Where:
1. Enabled for display.
2. Off for display
[11] Exit Webinar Mixer and Connection Status
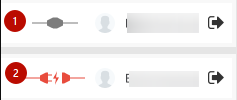
1. There is a connection to the server
2. There is no connection to the server. At the same time, it is shown with a message about how many seconds the automatic reconnection attempt will be made, and the ‘Connect now’ button for manual connection.
By clicking on the “Exit” button, you will be taken to the page from which you previously went to the Webinar Mixer.
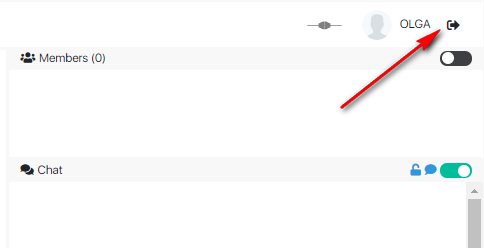
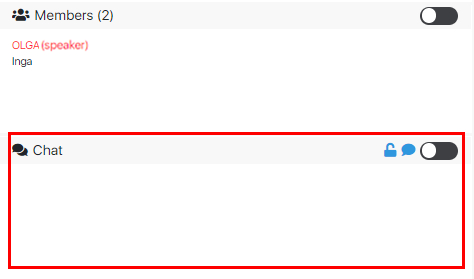
[12] Configuring the display of the list of webinar participants
There are only two provisions in configuring the display of the list of webinar participants:
- Green – display is on.
- Gray – display off.
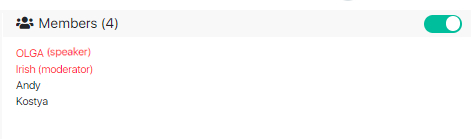
The host and moderators of the webinar are marked in red, the rest of the participants are marked in black.
Host is the main account administrator, which is located in the Webinar Mixer.
A moderator is an employee who is in the Webinar Mixer.
Webinar participants – contacts who registered and followed the link to the webinar room. If the contact does not have a name, then ‘GuestXXX’ will be displayed instead, where XXX is just some unique number.
The host and moderator have the same rights to manage the webinar.
[13] Blocking messages from a specific participant
Opposite each webinar participant, except for the presenters and moderators, there is an On / Off icon “Blocking messages”. By default, blocking is disabled for all participants and the icon opposite their name is blue. Clicking on it turns on the lock and changes the color of the icon to gray. Pressing again disables the lock.
A blocked participant can write to the chat and see his messages. But other webinar participants will not see his messages. However, such messages are visible in the mixer.
When a participant is blocked, all their messages are marked as blocked and will not be added to the script.
[14] Configuring the webinar chat
Let’s take a look at the chat settings.
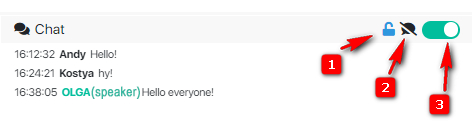
1 – chat blocking (lock)
Blue icon – chat is unlocked (comment field (14) is active, participants can write messages).
Black icon – chat is blocked (comment field (14) is not active, participants cannot write messages).
If the chat is blocked in the Webinar Mixer, you can write a message to the chat.
Thus, the presenter and moderators have the opportunity to send messages to the chat, but the participants of the webinar cannot.
2 – “All in ignore” function
The essence of this function is to prevent participants from seeing each other’s messages.
When All Ignore is enabled, participants only see
- your messages
- posts by moderators and author
- script messages
At the same time, all messages of the presenter, moderators and participants of the webinar are visible in the Mixer.
When you turn off the “All Ignore” function, all messages are displayed for all participants in the webinar.
3 – enable and disable chat in the webinar room (the setting is displayed only in the Webinar Settings Mixer).
Green position – chat in the webinar room is displayed.
Gray position – chat in the webinar room is not available.
Name color in chat messages:
- Red – messages from the presenter and moderators;
- Green – participant’s own messages;
- Gray – messages from other participants.
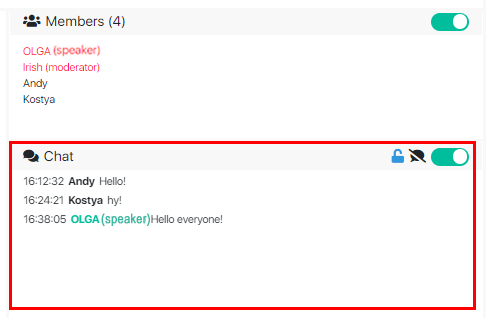
[15] Field for sending comments
The field for submitting comments looks like this.

The field is always active for the presenter and moderators and is active for participants in the case when the chat blocking setting is disabled in the Mixer (chat is not blocked).
You can send a message by clicking on the arrow on the right or by pressing the Enter button.
[16] End webinar
By default, each webinar ends automatically 24 hours after the start of the webinar. This time can be reduced by setting up the ‘Default room settings’:
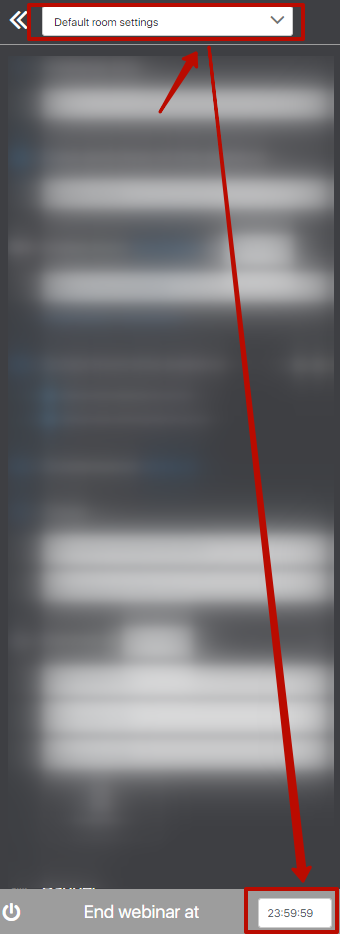
Completed webinars are not listed in the webinar mixer.
The end of the webinar is not recorded in the webinar script (since the end is taken from the webinar settings, and not from the script) and the finish event is not added to the webinar script when importing the script with such a command.
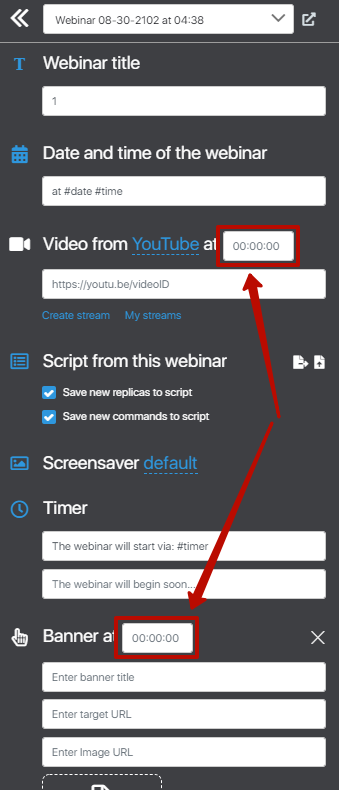
Delayed start of Video and Banner blocks
If the “Video” and “Banner” blocks are disabled in the webinar, then a field for entering the time appears next to them. This field is the delayed start timer.
For example, if you specify 00:30:00 in this field in the ‘Video’ block, the video will start exactly 30 minutes after the start of the webinar. It works the same with banners.
Create a webinar in sales funnels
A webinar can be created directly from the sales funnel, which expands the capabilities of this tool for effective use in your business.
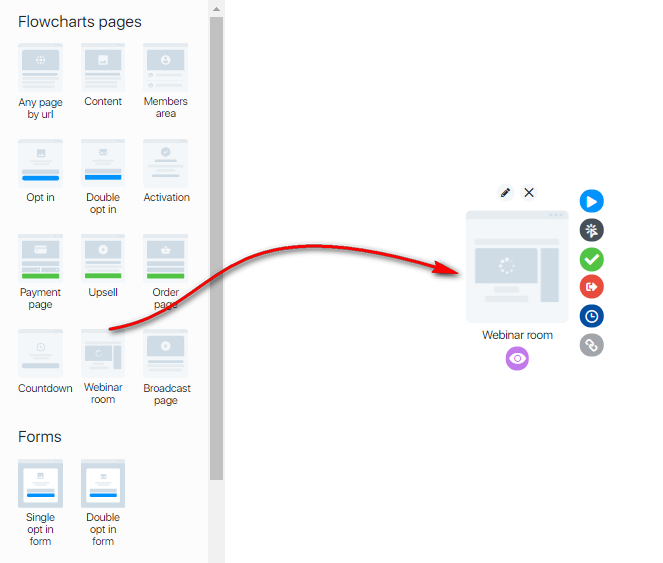
How to create a webinar in a sales funnel
To add a webinar to the funnel, drag the “Webinar Room” block from the “Pages” section.
Settings of the “Webinar room” block
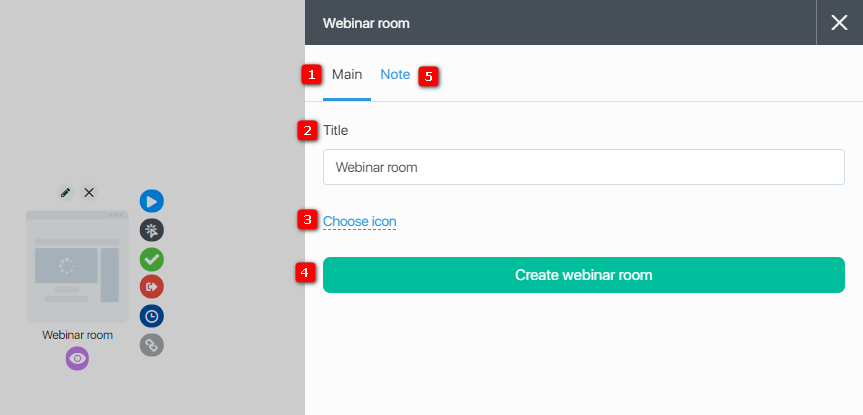
- Basic – a section with basic settings for the webinar room;
- Field for entering the name of the webinar room;
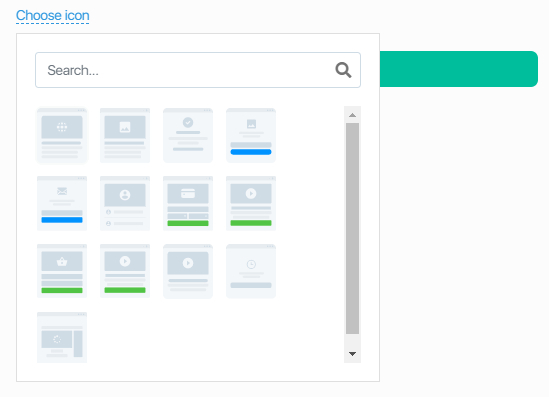
- Choosing a webinar icon. Clicking to open a list of icons for selection:
 4. Selection from previously created webinars.

- Basic – a section with basic settings for the webinar room;
- Field for entering the name of the webinar room;
- Choosing a webinar icon. Clicking to open a list of icons for selection:

- Creation of a new webinar room – Creation of a new webinar room. By clicking on the button, you go to the Webinar Mixer. After setting up the webinar and exiting the Mixer, additional elements appear in the settings. We have described them in detail here.
- Note – in the field you can leave explanations for this “Webinar room” block.
Outputs of the “Webinar room” block
Let’s consider the outputs of the “Webinar room” block and to which elements they can lead:
- Started watching the webinar – Was in the room at the start of the webinar or entered the room when the webinar is online (in progress)!
– Links can have 1 solid arrow and several dashed ones.
– Actions are performed: +1 to analytics. - Next Page (#nextPage link) – – Runs actions from exit.
– Links can have 1 solid arrow.
– When going +1 to analytics. - Watched to the end – Was in the room when the webinar ended. Clicked [End webinar] – a redirect to the page from this exit goes and the actions are performed.
– Links can have 1 solid arrow and several dashed ones.
– When you go +1 to analytics, if the page is not specified, we stay on the current one and see the inscription ‘The webinar is over.’ - Left the webinar – Page by button exit + actions. Or the action was at the webinar and was not at the time of the end of the webinar.
– Links can have 1 solid arrow and several dashed ones.
– When going +1 to analytics.
– If the arrow does not lead from this exit to the page, then upon exiting the contact will be redirected to the registration page for the webinar. - I was late for the webinar.
– Links can have 1 solid arrow and several dashed ones. - Linking elements is like everywhere else.
– Links can have 1 solid arrow and several dashed ones. - Visited page – Everyone who opened the webinar page before the end of the webinar (before the webinar + during the webinar).
– Links can have multiple dashed arrows.
– When going +1 to analytics.
Example of a funnel with a webinar room:
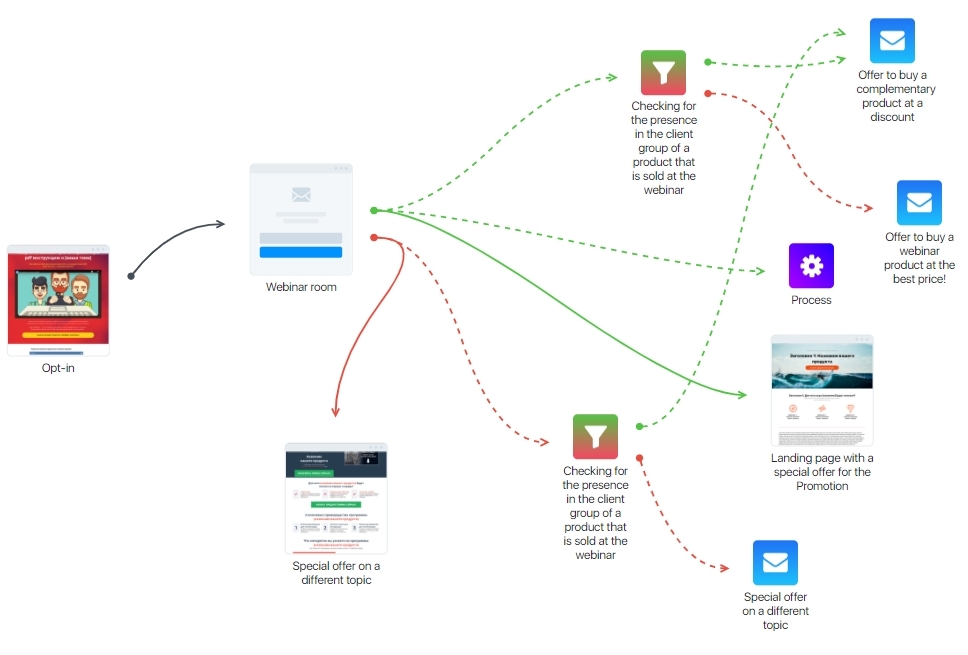
A webinar subscription page has been created in the funnel, linked to the “Webinar Room” block.
In the “Webinar room” block, the outputs “Watched to the end” and “Left the webinar” are used.
Each of these exits leads to a special offer page (solid arrow) and action blocks (links to dashed lines).
We hope that the new webinar functionality will make your work in the service even more efficient and help increase the profit from the sale of your products.
FAQ (answers to frequently asked questions)
Several webinars can be broadcasted simultaneously in one webinar room, even if they overlap on schedule.
Example:
There are several webinars in the schedule of the webinar room:
12:00 – 13:00
12:15 – 13:15
12:30 – 13:30
12:45 – 13:45
In this case, 4 webinars will be broadcasted simultaneously in the room at 12:50. Moreover, if there is a check mark in the Scenarios Webinar Mixer “Save new replicas in the script”, then messages from the chat of the first webinar at the right time will appear in the rest, even if the current webinar has not ended yet.
Those. if a webinar participant, which is broadcast in the period 12:00 – 13:00, writes a message at 12:05 (5 minutes after the start of the webinar), then in the webinar chat with the broadcast time 12:15 – 13:15 – this message will be displayed at 12 : 20 (5 minutes after the start of this webinar).
Thus, with this setting in the Script, each webinar will replenish the chat of subsequent webinars with replicas.
Algorithm:
1. A webinar is created with a schedule taking into account that the first webinar will be held in real time, and the subsequent ones will be broadcast in recording.
2. In the script of the webinar, checkboxes are placed to save replicas and commands so that the automated webinars contain all the new data.
3. The first “live” is held.
4. And then, according to the schedule, the recording of this webinar is broadcast already in the automatic webinar mode.
Example:
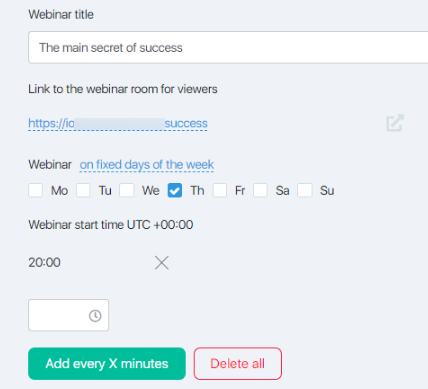
With such a schedule, next Thursday at 20.00 it is necessary to hold a “live webinar”, and in the future every Thursday the recording of this webinar will be broadcast in the automatic webinar mode.
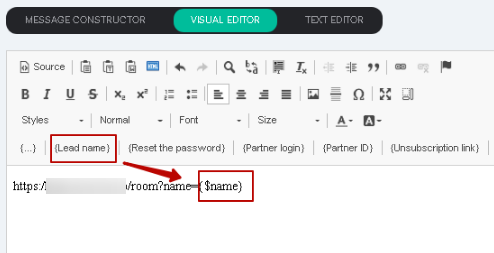
You can add parameters name (Contact name), email (Email of contact) and phone (Contact phone) into the webinar link so that the visitor data is filled in automatically.
You can add them to the link like this:
https: /login.justclick.io/room?name=Name&phone=
+37529700000&[email protected]
where https: /login.justclick.io/room is a link to the webinar room, and name=Name&phone=+37529700000&[email protected] are user parameters.
This tool will help you fill in contact details if the contact of the selected customer does not have a phone number or name. Moreover, you can use variables as parameters in emails or other functionality where a link with a parameter is added – thus getting a universal link.
For example, if you add a link to a webinar room in an email, you can use the name variable as a parameter: