Content
In the Website – Settings section, you can select the site and page you want to edit. To edit page settings, click on its name:
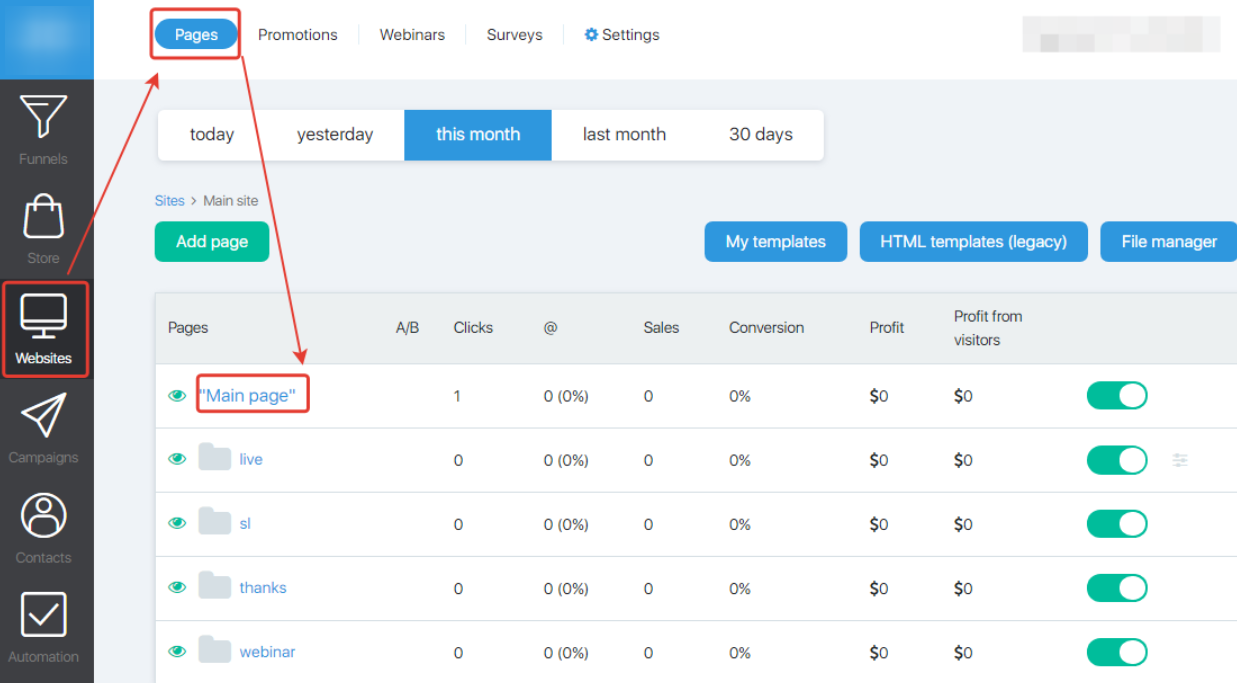
This page allows you to create and edit pages on the JustClick website:

The editor page consists of 3 tabs:
- Basic parameters;
- Additional;
- Rights.
When a new page is created, it is named draft_xxxxxxxxxx. The page identifier is part of its address, so it is advisable to change it to a more meaningful version.
Note! You can use latin letters (A-Z, a-z), numbers (0-9), underscore (_) and hyphen (-) to specify the identifier.
Basic parameters
HTML editor
The main parameters tab is used to configure the page layout. To work with the page, use the JustClick template designer or html editor where you can add complete page code:

In order for you to be able to use the HTML editor in the page settings, you must select it at the stage of creating a page, when choosing a site template:

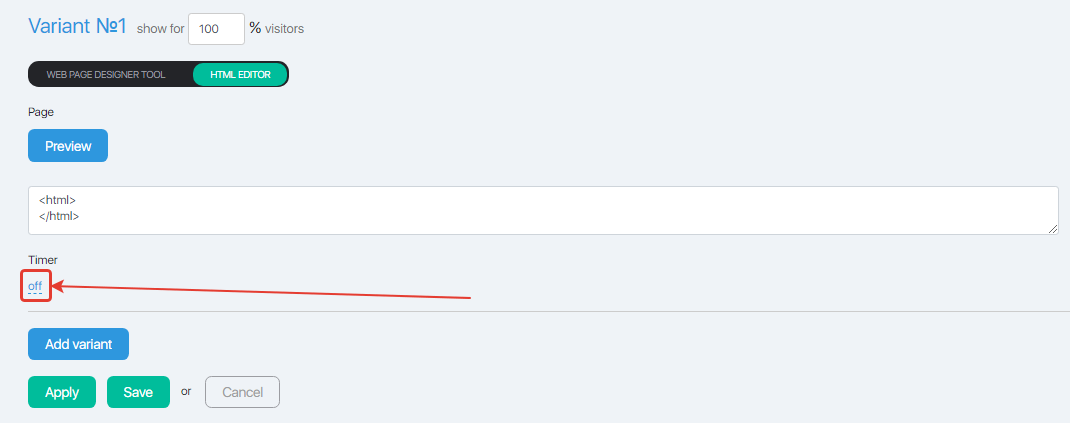
Timer setting
Clicking on the “Off” button opens options for setting the timer:
You can choose the type of timer:
-
- with an absolute end time (for example, in the case of a sale that ends at 00:00 on a given day);
- with a repetition of the countdown every X minutes;
- with a relative end time, 2 options are possible here:
-
-
- the countdown starts from the moment you enter the page;
- the countdown starts from the moment the letter was sent (this option is used in an automatic series of letters, for example, when we offer to buy something with a discount to new subscribers).
-
Below is the page setup window “after timer expires”.
If the html editor was used, then a field for entering the html page code will be shown:

If the Template Editor was used then the “Choose a template” and “+Copy” buttons will be shown:
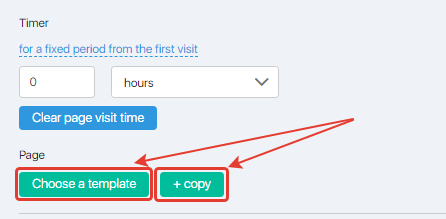
“Choose a template” allows you to create a page after the timer expires from scratch.
“+ Copy” allows you to copy an already prepared page and make changes to it.
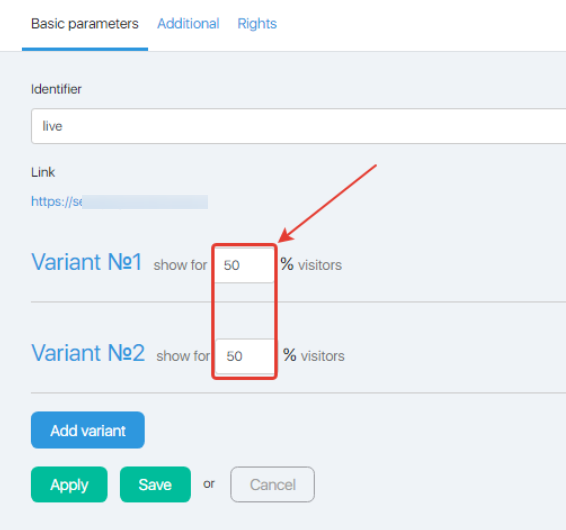
Split testing
Split testing (A/B testing) allows you to choose the option with the best conversion by analyzing the audience’s response to changes in any element of the page.
Note! It is not recommended to change more than 1 page element at a time, because it will not be clear which element change affected the conversion.
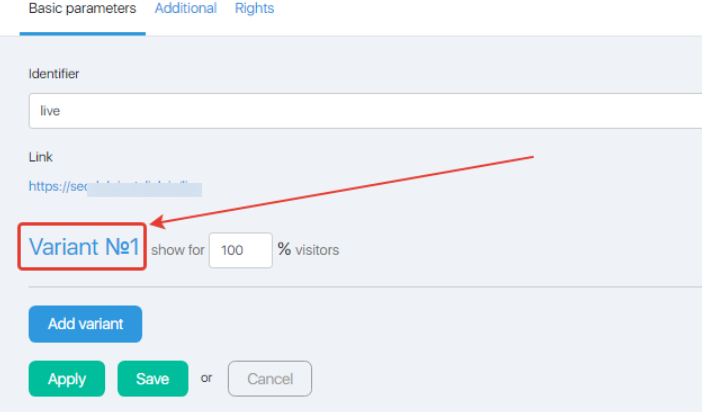
Clicking on the title Variant №… allows you to collapse / expand the current version of the page. This is useful for switching between page variations:
To conduct A/B testing, click on the “Add variant” button. A similar editor window will be added under the first variant, allowing you to enter the second variant of the page. Similarly, you can add 3rd, 4th, etc. variants.
It is recommended to copy the page from one window to the second and make changes to one element.
Note. The total value in the window should be 100% likely to be shown. Those if we test 2 variants, we set 50%, if 3 – 33%, 33% and 34%, and so on:
Additional
The tab additionally allows you to set the code in the <head> section of the page. For example, this is where the retargeting code is placed.
Also on this tab you can enable ““. If the checkbox is active, the video will not have the YouTube logo and the player’s appearance will be modified.
And if you check “Hide title of the video”, the player will also hide the title of your video.

Rights
This tab allows you to configure access to the additional administrators page:
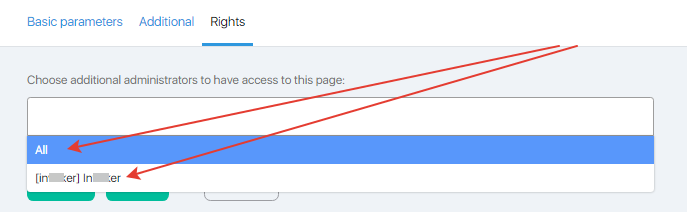
It is necessary to click on the box Select additional administrators who have access to this page, and select the required ones from the drop-down list.
After completing all the settings, click the Save button.
FAQ (answers to frequently asked questions)
To solve the problem:
- Go to the settings of the page that is not displayed. To do this, go to the Websites – Pages section – click on the name of the desired site – in the list of pages that opens, click on the name of the required page.
- In the page settings, disable the timer by clicking in the page settings, in the drop-down list, on “Disabled” (the timer is located under the editor window). Then save the page settings.
