Content
- 1 Where are the pages in my account?
- 2 Template Selection
- 3 Device editor
- 4 Collection of ready-made sections
- 5 Section customization
- 6 Adding New Widgets
- 7 Moving items
- 8 Changing design elements
- 9 Delay before showing (widget or entire section)
- 10 Site settings
- 11 Creating a page through an HTML editor
- 12 Working in the mobile version of the page builder
- 13 FAQ (frequently asked questions)
Where are the pages in my account?
All operations with pages are made in the section “Websites -> Pages”.

For each site, the default Home page is:
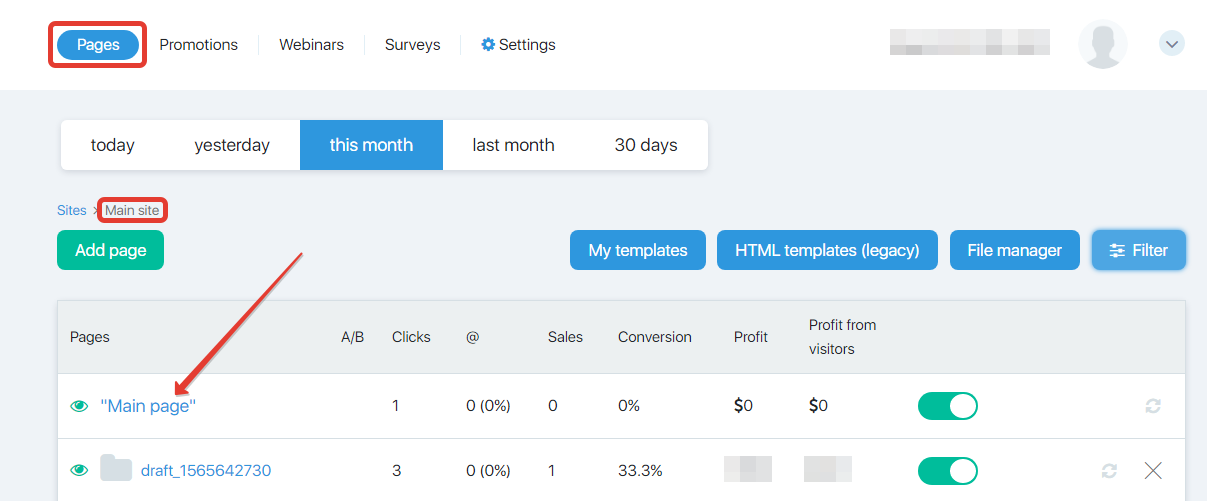
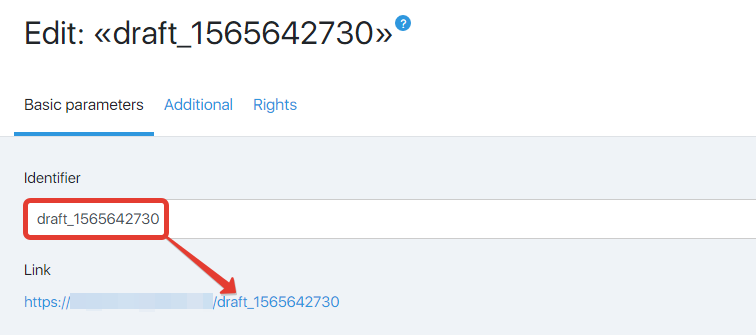
You can edit it or create a new page using the “Add page” button, the address of which will be compiled from the main domain and page ID:
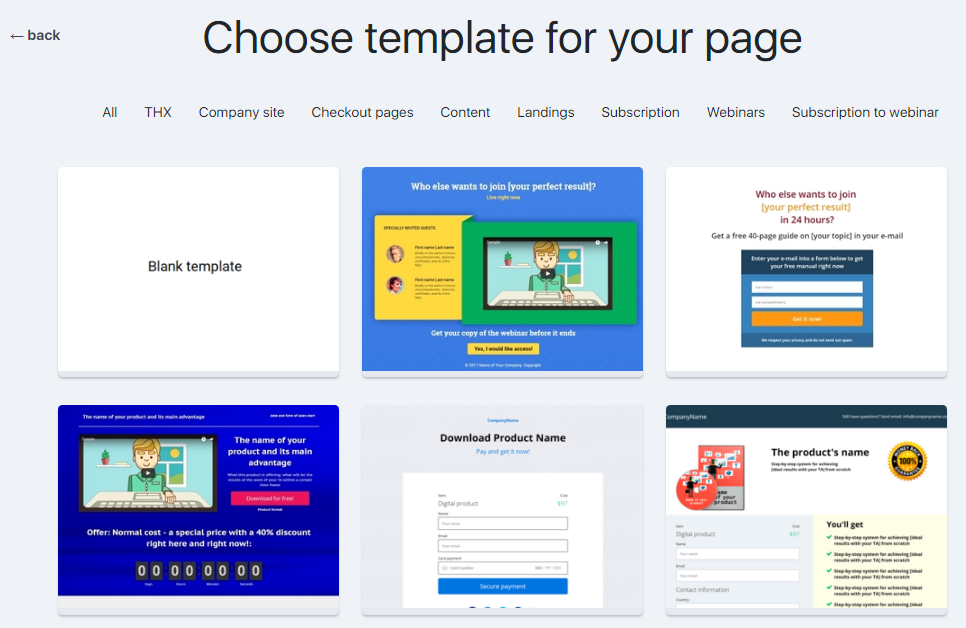
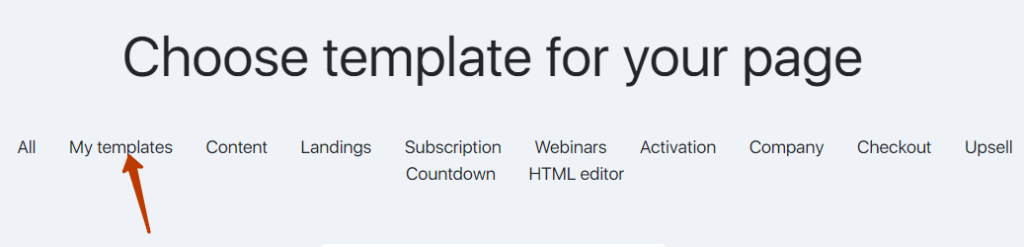
Template Selection
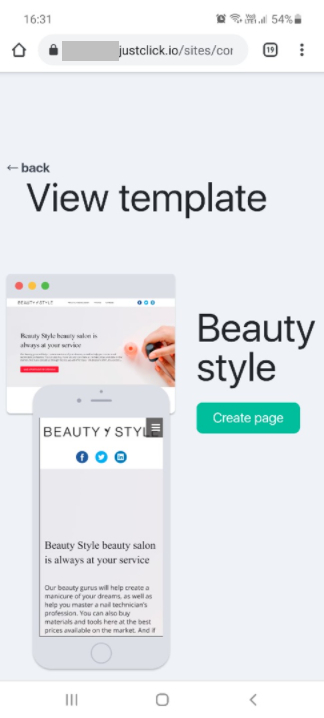
The next step is to select one of the predefined templates or create your own from scratch. Each of the templates can be previewed and decided whether it fits for your page or not. To do this, hover over any of the images and click the “View” button:
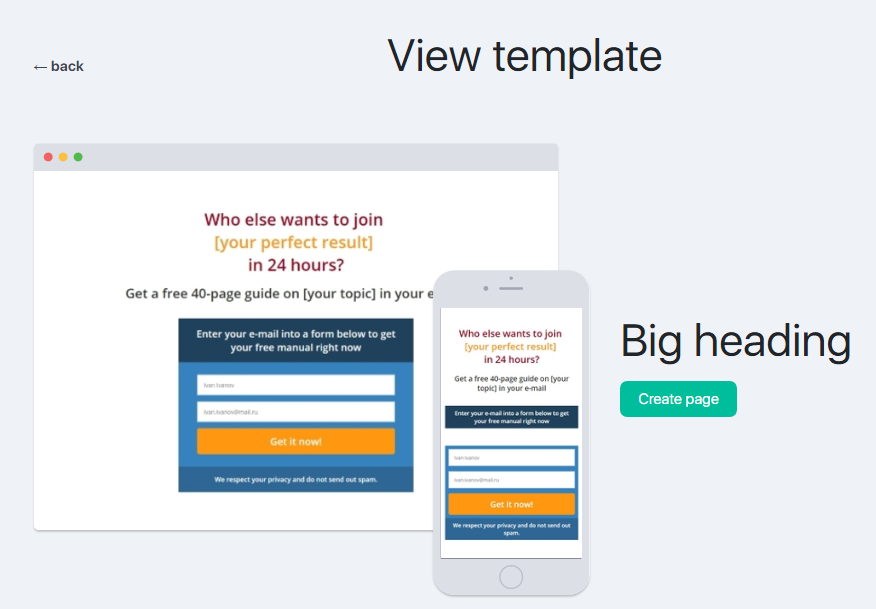
On the opened page, you can open a preview of the template and see how it will look on the computer or on mobile devices. Also, you can move on to creating a page on the selected template if you already understood that the template suits you:
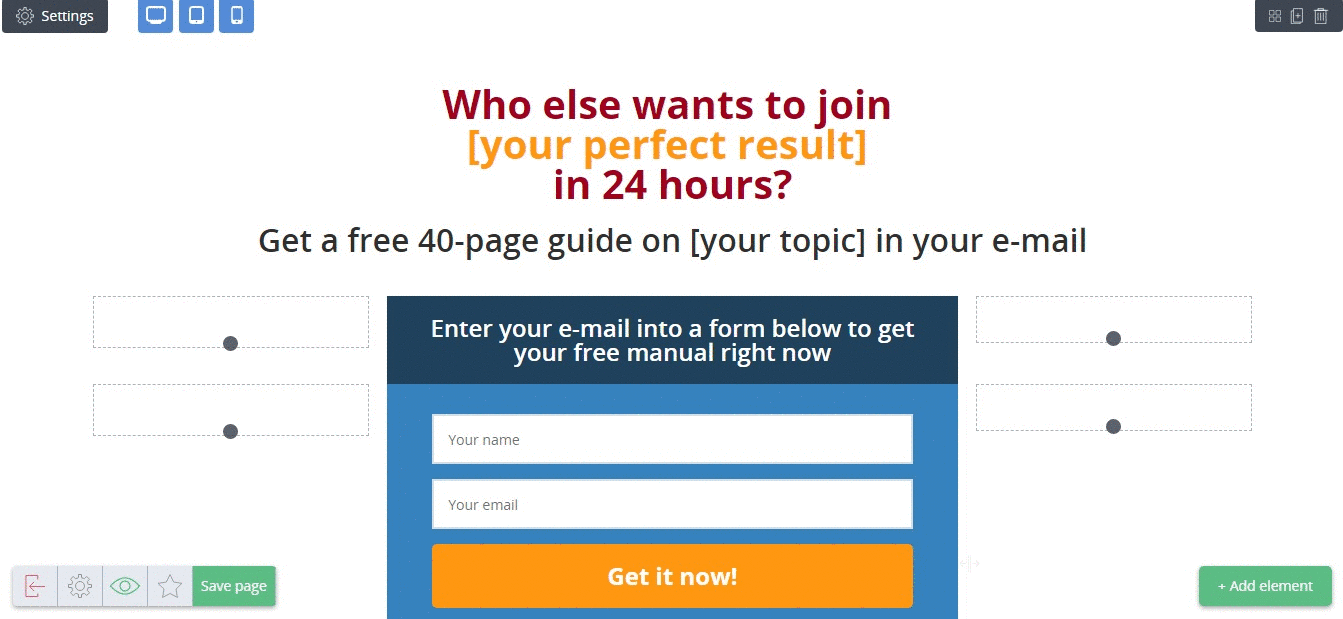
Device editor
The editor of the template designer takes up the entire width of the screen. The controls are at the bottom:
- On the left – page settings
- On the right – adding new items

- page settings
- add widgets and sections
Left panel buttons:

- exit the editor
- page settings (fonts, SEO, html-code, mobile version)
- page preview
- save a page as a template
- undo changes
- redo changes
- save chfnges to the current page
The page is divided into three logical parts: the header, the main content and the basement.
In each of the parts, you can add the appropriate sections.
Inside the section there are widgets.
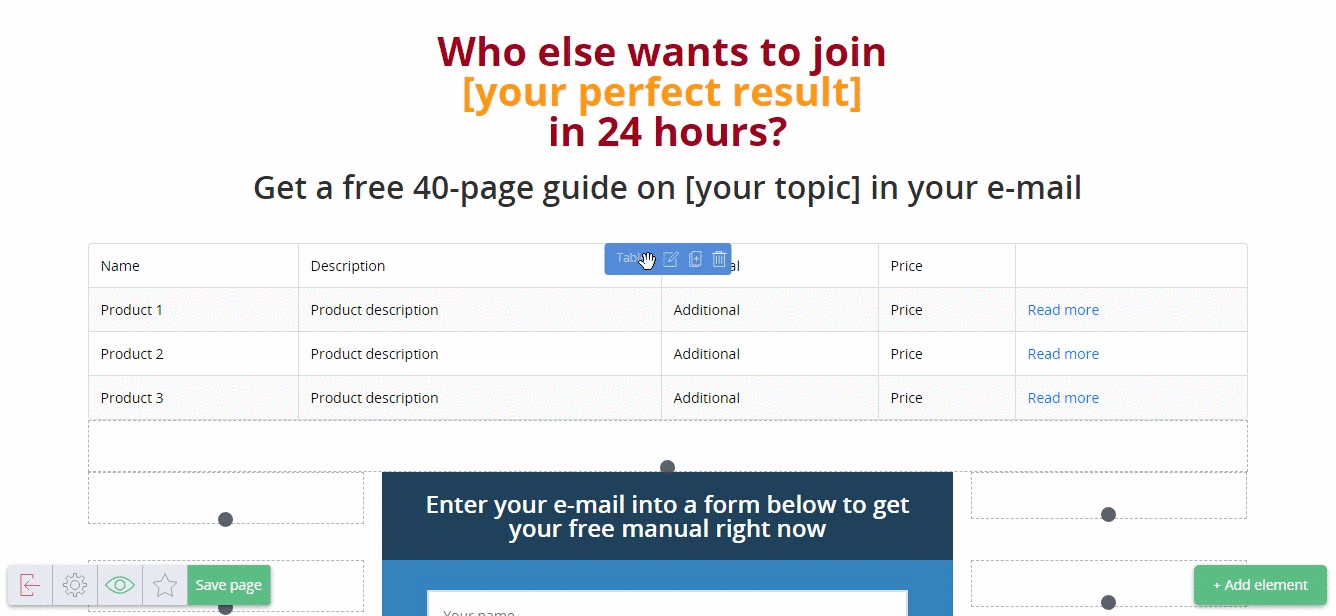
Collection of ready-made sections
Large blocks of pages – sections – are divided into categories by content type: promo, content, cap, footer, goods, etc. Finished sections will speed up the development of the site.
To select them and add them to the page, click on the “Add item” button at the bottom right:
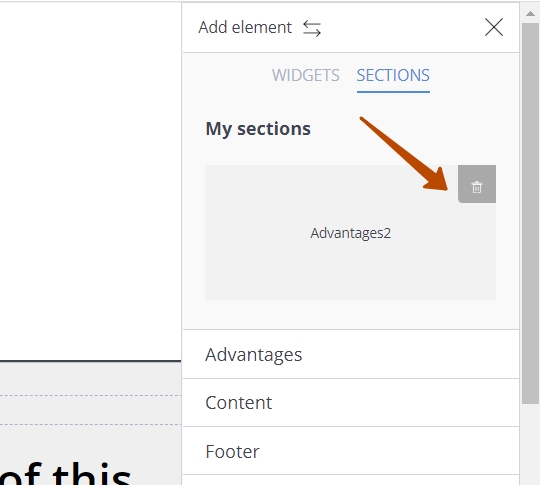
You can also add your own partition templates to a collection of finished partitions.
To save the section as a template, move the mouse over the upper-right corner of the section and click the star icon.

To delete a partition template, go to the My Partitions category in collection and click the recycle bin icon on the partition template you want to delete.
Section customization
After adding a section, you can customize some settings for the section itself and the content displayed in it.
To go to the settings, click the gear icon at the top left.
This will open a panel with settings.
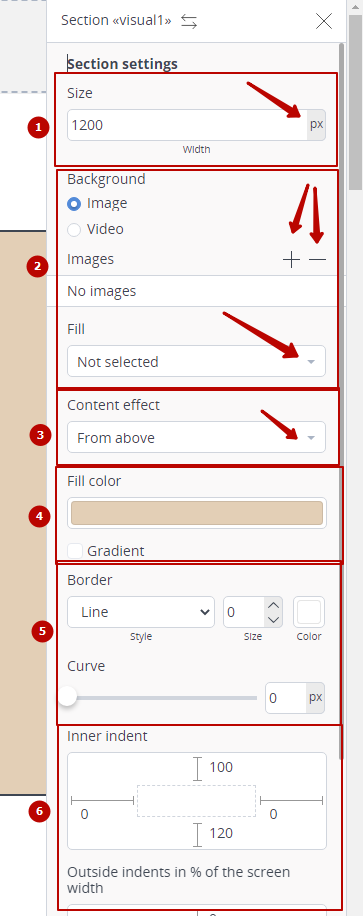
The settings include the following parameters:
1. Section size – Here you adjust the size of the section in pixels or percentages.
2. Section background – The settings allow you to add a background image or video by toggling the radio buttons. The + – icons are used to add and remove images. The “Fill” section allows you to choose how the background image will be displayed inside the section.
3. Content effect – Here you can set the effect of content appearing inside the section when the page scrolls.
4. Fill Color – Here you can set the single-color or gradient background color of the section fill.
5. Stroke – Allows you to set and customize the stroke for the section.
6. Indentation – Sets the internal and external indentation.
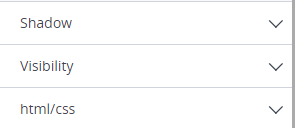
Additionally you can customize the shadow, visibility, and add html/css
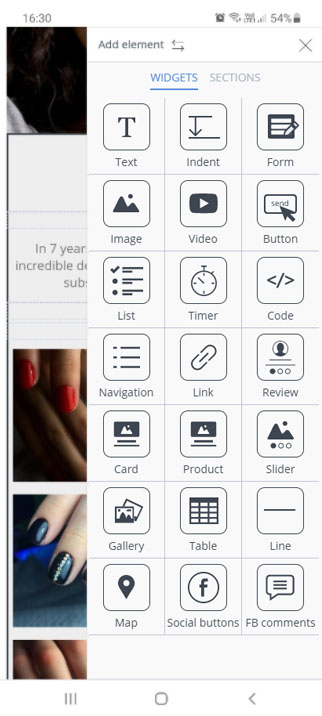
Adding New Widgets
To add a widget to the page, a section should be placed and selected (by clicking the left mouse button). Adding new widgets occurs by clicking on the button “Add item”. On the panel that appears on the right, you must select the “WIDGETS” tab, hold down the desired widget and drag it to the desired location in the section.
The insertion point is marked with a blue line.
Moving items
To move a section or widget, click on the block header. While holding the element with the left mouse button, move it to the desired location:
Changing design elements
Click on the desired item – the settings for this item will appear in the right panel. There are ready-made styles that help save time on design development for each element. In the html/css tab, you can add CSS classes to the block.

Delay before showing (widget or entire section)
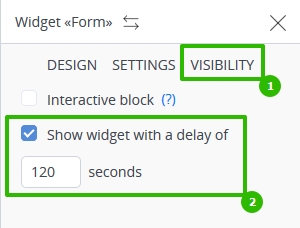
For sections and widgets, the “Visibility” setting and the “Show widget with a delay off” option to it are provided. It is convenient and can have a positive effect on conversion, for example, in such a case:
- You create a page with a video in which you offer your service / product.
The video is just over 2 minutes long, at the end you offer an order at a discounted price. - At the moment of the offer, a form of payment appears (configured to appear with a delay just using this setting).
- Additionally, a Timer is installed on the page, which, after a specified time, hides the current page and shows another – with the offer of the same product at the regular price.
That is, the setting is appropriate to use for auto sales. For live events there is an “Interactive” setting.
Site settings
This menu is called by clicking on the gear in the lower left corner and allows you to perform some advanced actions. For example, connect other fonts to the page (from the list of proposed ones), select a background for the site, enable / disable image compression (more on this below). You can also insert additional code in the head (it can be your personal styles or, for example, JavaScript), conduct basic seo optimization (specify title, description), upload an image for social networks.
Images
Setting the checkbox “compress images when loading” will allow compressing any image to compress it as much as possible without loss of quality. This will help the page load faster.
By default, image compression is enabled for all pages, but you can turn it off by clicking on the “gear” when editing a page. Then, on the “images” tab, you need to uncheck the “compress images when loading” checkbox.
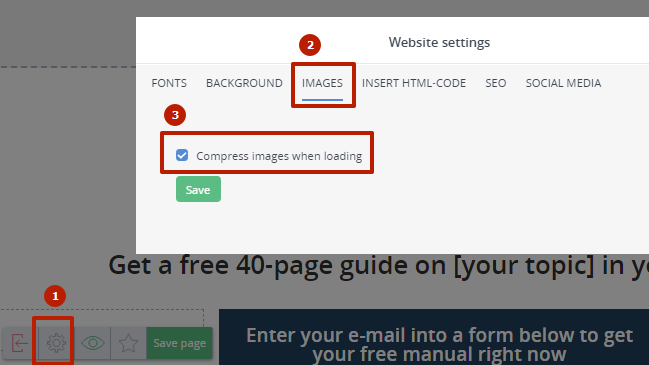
When loading an image into the constructor, it is immediately saved on our servers in several resolutions. Visitors to your pages see the option that is most suitable for their device.
If the “compress images when loading” checkbox is unchecked, then users of desktop devices (computers, laptops and netbooks) will be shown the original image size and quality, and mobile device users will still see a more suitable option for their phone or tablet model, but without compression.
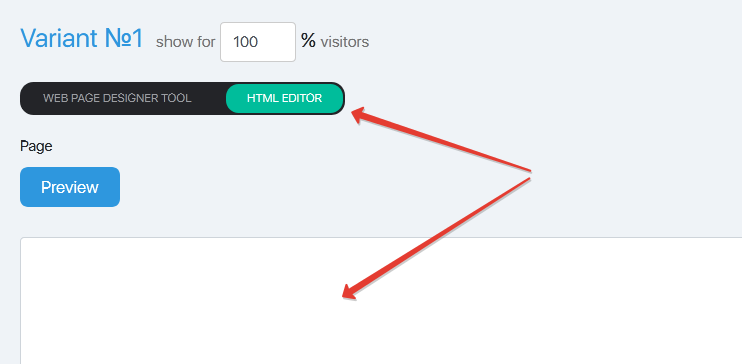
Creating a page through an HTML editor
Sometimes you need to order a landing page from a third-party specialist (layout designer), then to use these pages in our service. For this, it is possible to add a landing page by inserting code received from a specialist through the Html editor.
The html editor is in the same place as the rest of the templates.
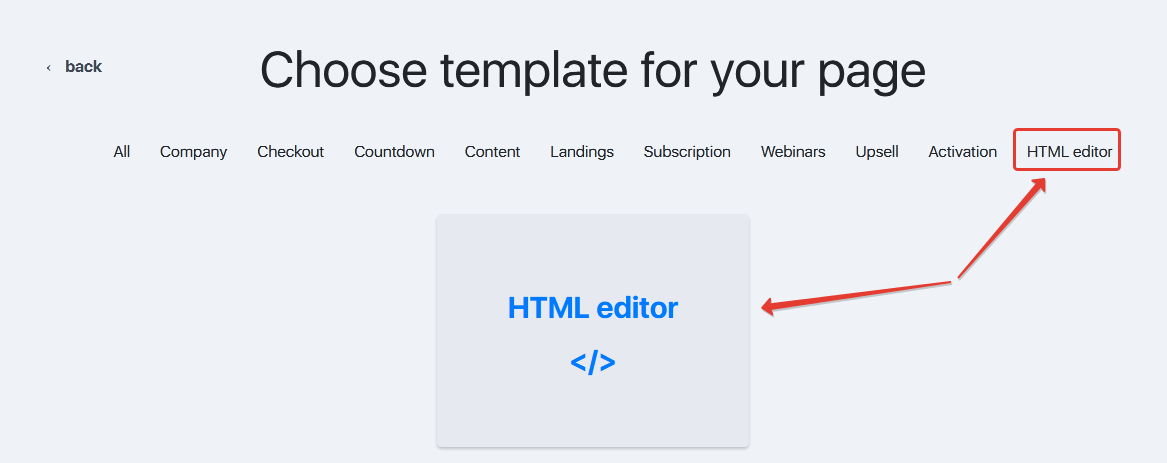
When you select the Html editor, a page opens with a field into which you need to insert the page code received from a specialist and save the changes.
This means that if for the whole site (in the settings) you have, for example, a Google Analytics counter, then on this page it will need to be placed separately (the one who created the page can do this at your request).
Working in the mobile version of the page builder
Sometimes you need to edit a page with only a mobile device at hand.
In the constructor, you can add, delete sections and widgets, make changes to the settings of widgets from mobile devices.
FAQ (frequently asked questions)
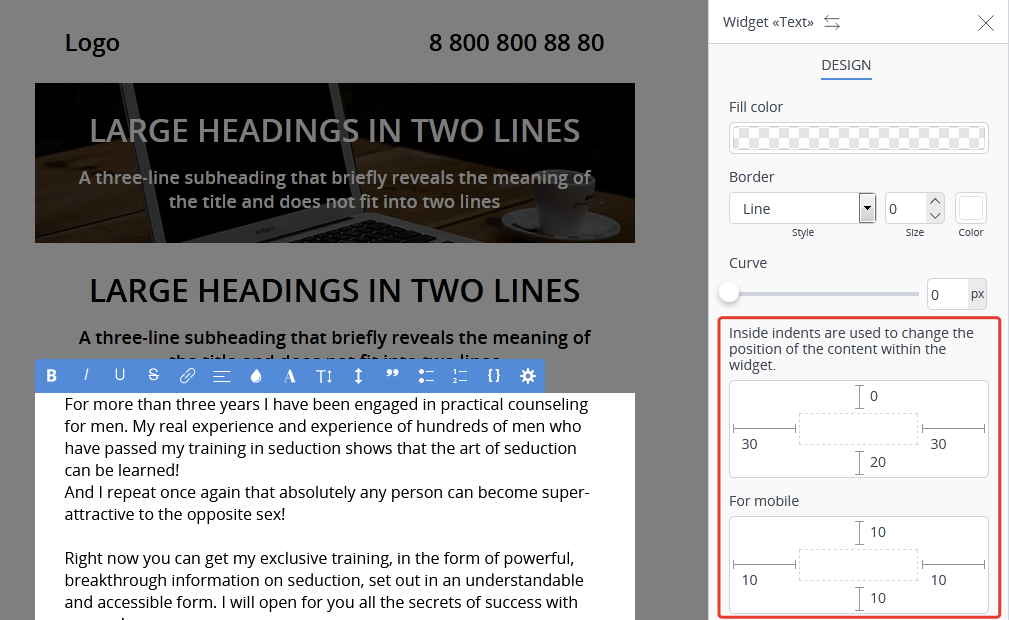
In the settings of the text widget, it is possible to set different indents for the desktop and mobile versions separately.
Open the widget “text” settings and set the necessary indent values.
There are three options for adding a favicon to pages in Justclick:
Option 1
Upload the file favicon.ico directly to the main folder under WebSites==>Pages==>File Manager.
In this case the icon will be applied to all pages of all sites created in your InstantClick account.
If you already have an image, but it has a different extension, then use any image converter.
The recommended size of icon – no more than 32x32px.
Option 2
Load an icon (favicon.ico) in the settings of the desired site, under Websites==>Settings==>Site name==>Advanced tab.
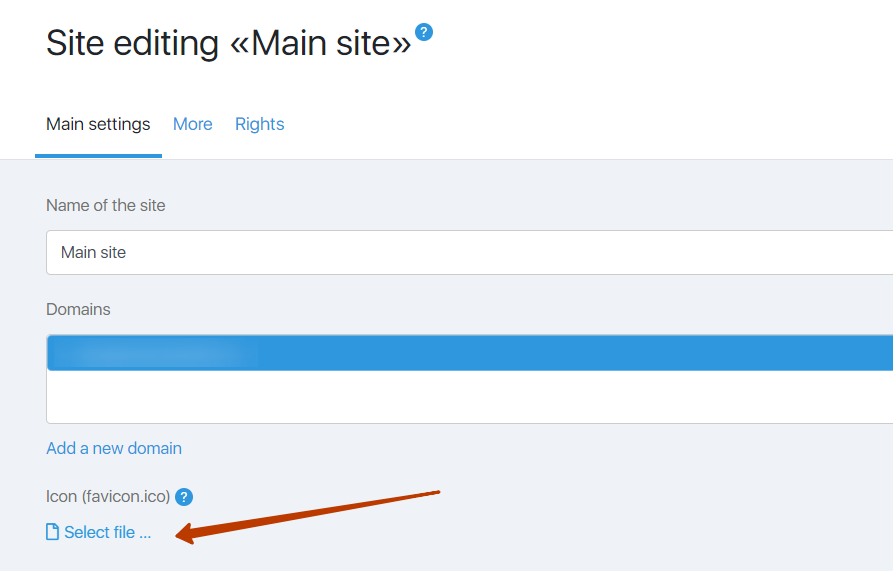
In this case, the icon will be displayed on all pages of the selected site.
Option 3
Add the html code in the page-specific settings on the Advanced tab:
<link rel=”shortcut icon” href=”FULL-TO-FILE-favicon.ico” type=”image/x-icon”>
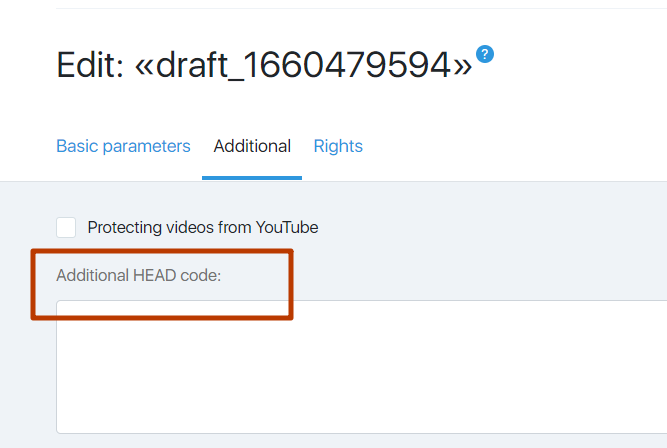
In this case, the icon will be displayed only on this page, and for each page of the site to do this setting separately.
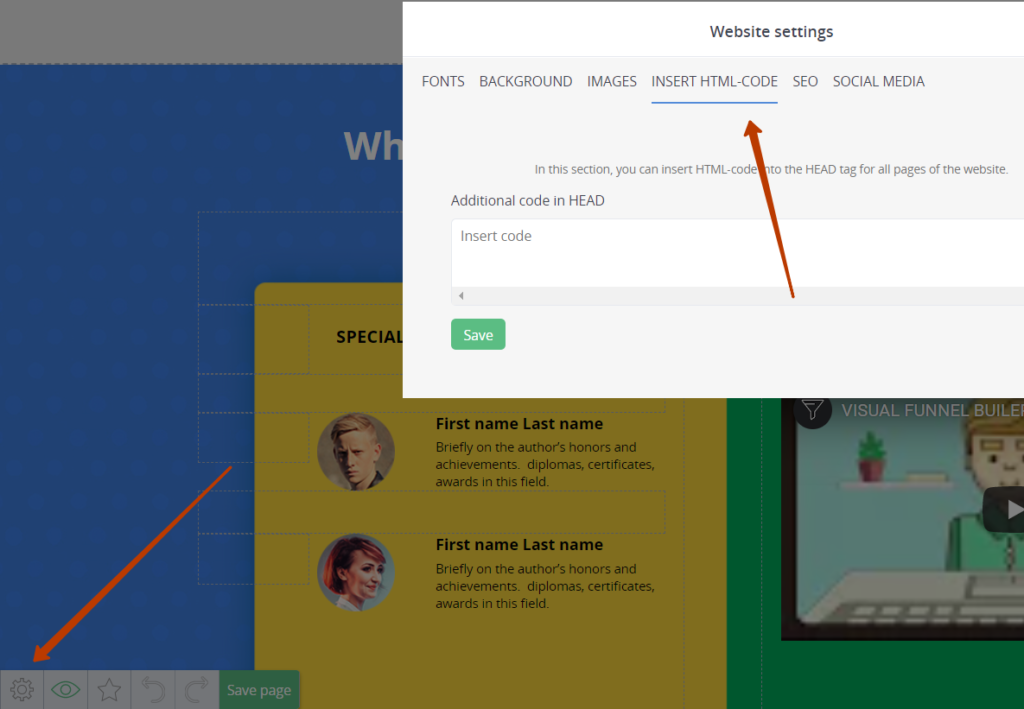
Open the page builder “Settings” and add the code to the “HTML CODE INSERT” section
To copy a page, click on the “star” in the lower left corner.
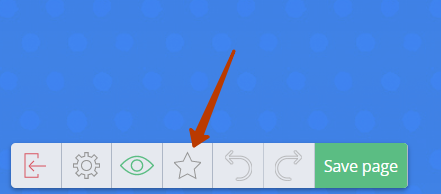
In the form that opens, check “your template,” enter the name and click “Save.
When you create a new page, the saved template will be available for selection.
Be sure to check the widget settings (subscription forms, navigation, etc.) on the new page.
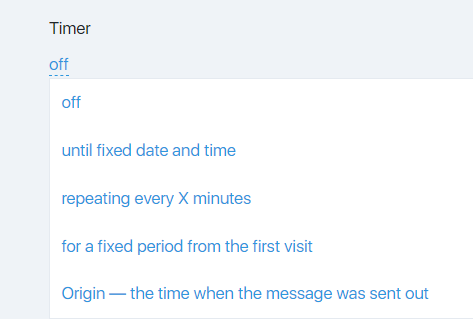
To configure the start and end of the timer:
Exit the Builder and in the main page settings window next to the Timer title, click on the text Off and select the desired option from the drop-down list.
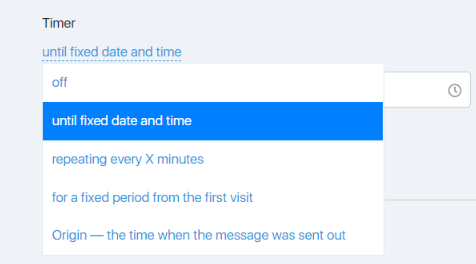
In the timer settings that appear, select the timer settings (in this example, the date and time of the timer expiration).
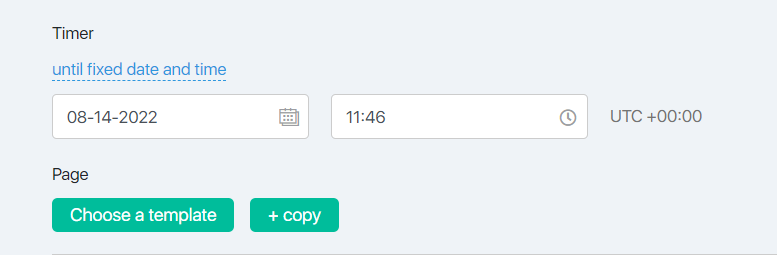
Create a page that will be shown to subscribers after the timer expires. To do this, use the Visual Editor under the timer settings.
Edit the created page as it should look after the timer expires (for example, remove the order buttons or the discount form and add a message that “Sorry, the promotion time has expired…”).
After that, save the changes you’ve made.
If after creating a page you follow a link to that page and it does not appear (opens a blank white page), this, in most cases, indicates that a timer is enabled in the settings of that page, which has expired.
To solve the problem:
Go to the settings of the page that is not displaying. To do this, go to Websites – Pages – click on the name of the desired site – in the list of pages that opens, click on the name of the desired page.
In the page settings, disable the timer by clicking in the page settings, in the drop-down list, on “Off” (the timer is below the editor window). After that, save the page settings.
You can change the size of an image in the “Picture” widget using the indentation widget.
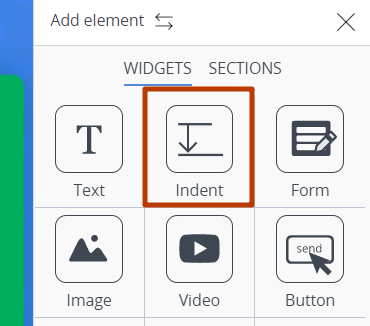
To do this, drag the Indent widget to one side and the other side of the item whose size you want to change. Then, by pulling the edge of the widget, adjust the position and size of the element on the page.
All elements of the designer can be moved and resized by adding left/right/bottom/top Indent widget.
The timer feature is so that you can set a timer period for the selected page in the settings. When the timer expires, the page will be hidden and you will see either a blank page or the page you selected after the timer expires.
About how to set up such a page, see the answer to the question “How to set up a page that will open after the timer expires”.
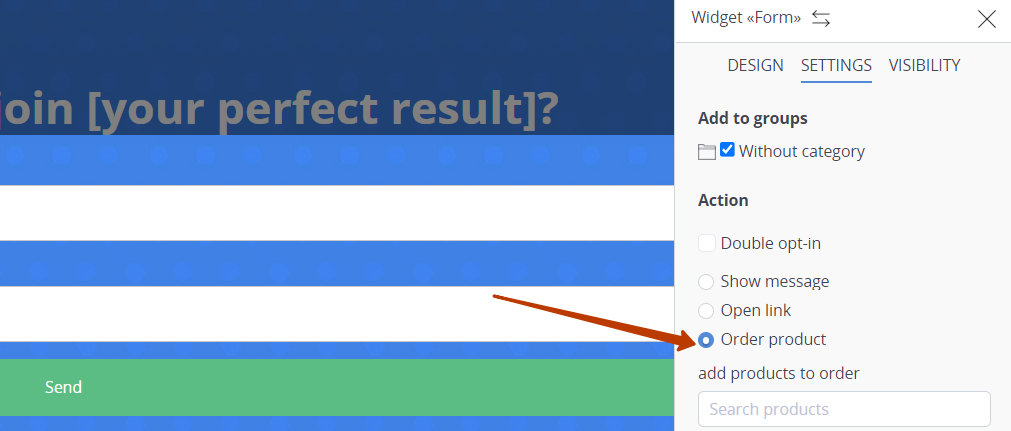
To do this:
Drag and drop the Form widget onto the page.
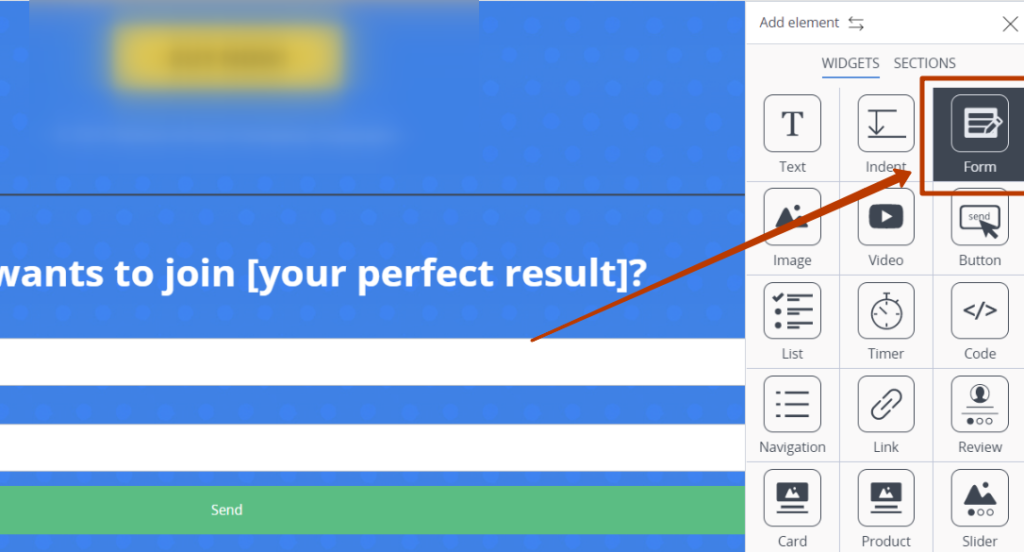
After that, open the form editor, select the Settings tab = > select Product Ordering = > and under “Add Products to Order” select which product(s) this order form will be for.
After that you can customize the display of the order form as you like on the “Design” tab in the “Design settings” section. You can also design the form by clicking on the Form Builder”, adding necessary or removing unnecessary fields.
- The timer settings are made in the main settings of the page.
- To make the timer appear on the page, you need to drag the “Timer” widget to the right place in the page designer. How to add a widget to the page, described here.
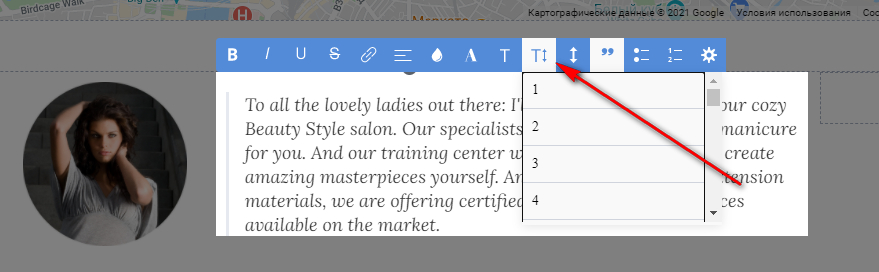
In the settings of the “text” widget it is possible to set a different font size.
Open the settings for the “text” widget and set the required values for the selected font.
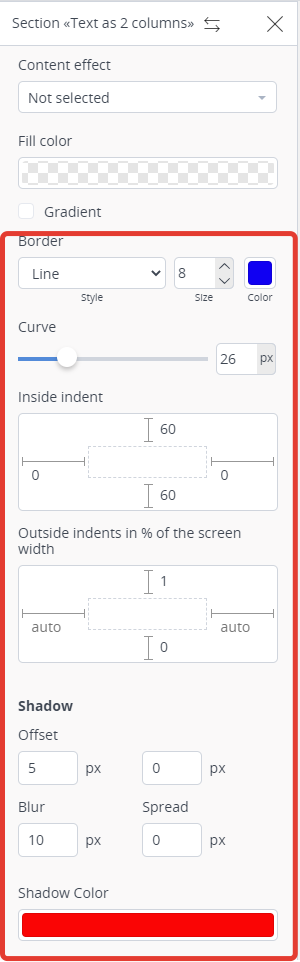
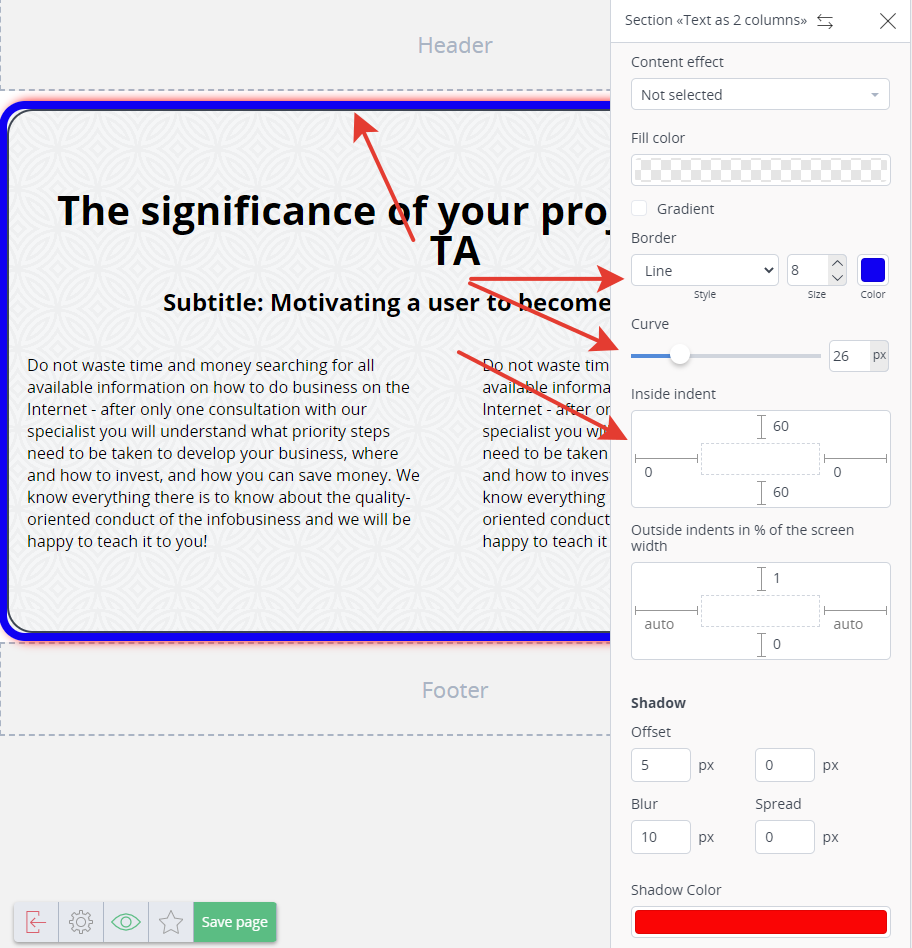
In the section settings it is possible to set different styles for the section outline (frame).
You can choose different types of Section Stroke, line thickness, line color, internal and external margins from the content, the presence of a shadow, its color and width.
Open the Section Settings and set the desired Section Stroke values.
Now in the page designer it is possible to create an anchor link (to move to page section, without going to another page) only in widgets “Navigation” and “Button”. But there is a simple enough solution to add anchor link to text. To implement this feature, follow the steps below:
- Add the Button widget in the page editor by dragging the widget to any location on the page.
- In the widget settings select “Action follows the click on the link” = > “Moving to section”, and in the list of section select the desired section, which will be moved to after clicking the button.

- Save the page settings by clicking the “Save” button in the lower left corner of the screen.
- After that, go to the page itself. You can go by clicking on the link in the main settings of the page or, in the section “Site – Pages” (in the list of pages of the selected site), click on the icon with a green eye, next to the name of the desired page.
- On the page that opens, right-click on the button you created earlier and select “Copy link address” from the drop-down list.
- Then go back to editing the page and add a link to the desired text. You can do this through the editor panel of the Text widget. To do this, select the text, click on the insert link icon (on the editor panel) and paste the copied link into the field.
Please note that you should paste the link in the field with the Ctrl+V key combination.

- After that, you can delete the previously created button (Button widget) in the page editor.
- Save the page settings by clicking the “Save” button in the lower left corner of the screen.
In the settings of the widget “Form” in the item “Design settings” there is an opportunity to enter additional text that will be placed below the title block on the button, with the ability to set the font height. The top line text is edited directly on the button.

A similar function is available in the Button widget.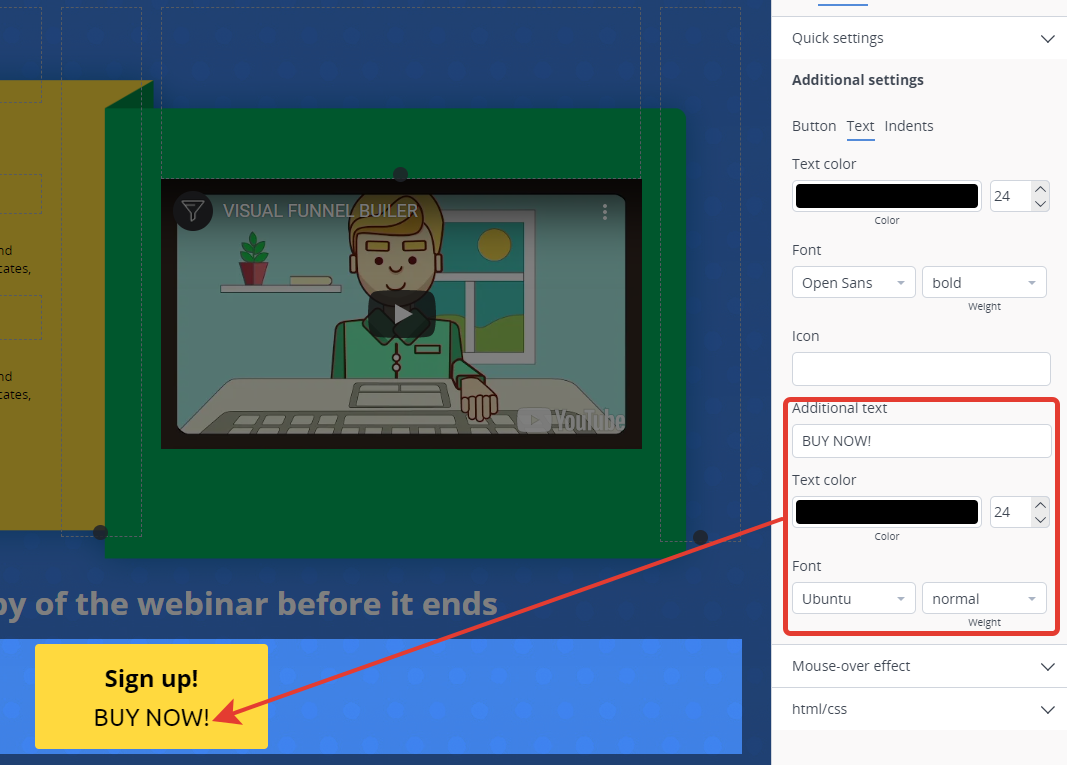
To edit a form in a modal window, you first need to switch the form position to the normal, vertical location by selecting the “Vertical” option in the form setup.
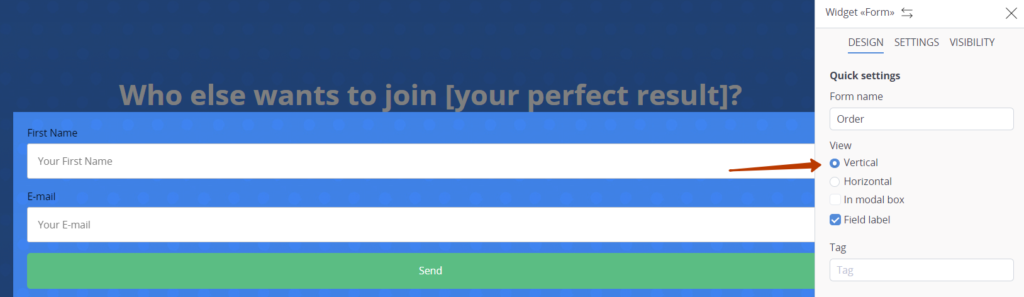
Then make the necessary settings for the form, if necessary, edit the name of the button by placing the cursor in the text of the button.

Then switch the form to the “in modal window” position.
Done! The subscription form in the modal window is edited, you can continue working with the page.
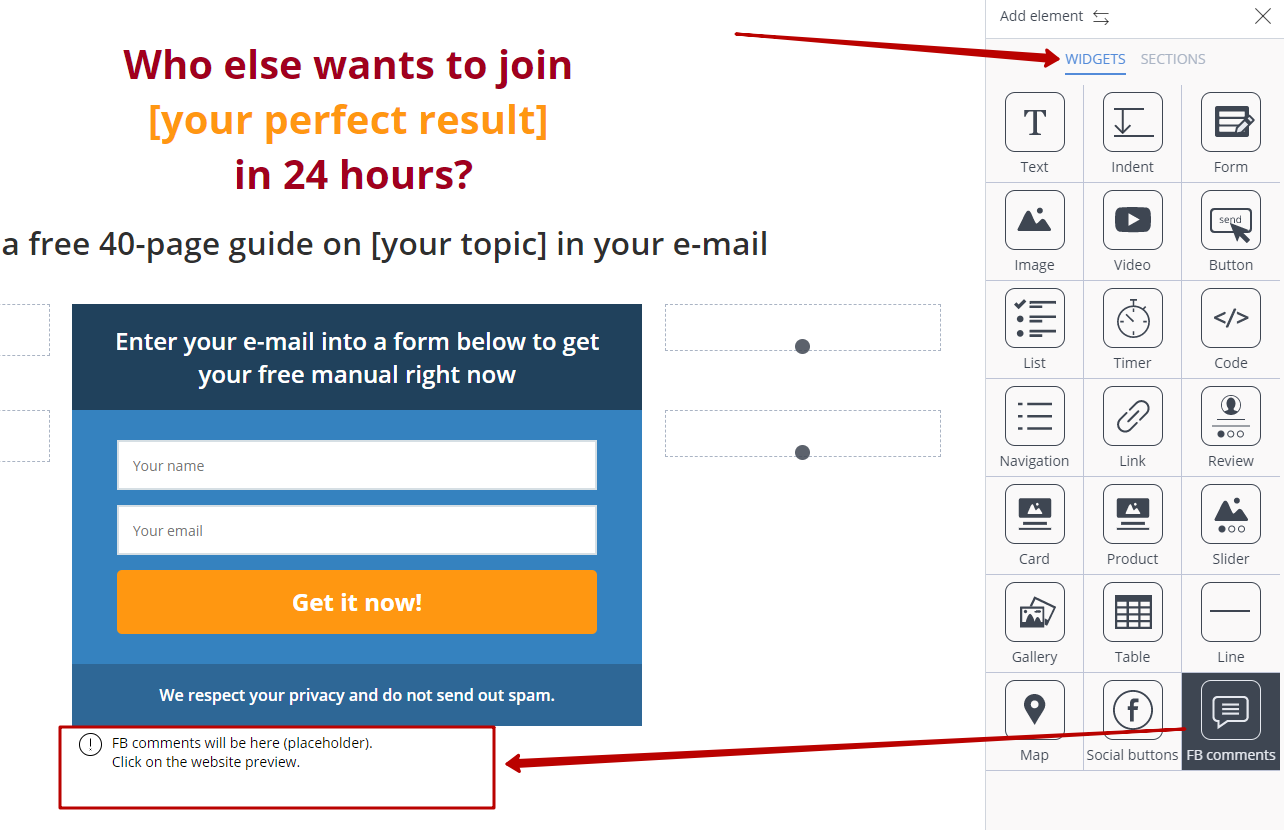
In the page editor, select the block in which you want to place comments and drag the widget there with the mouse.
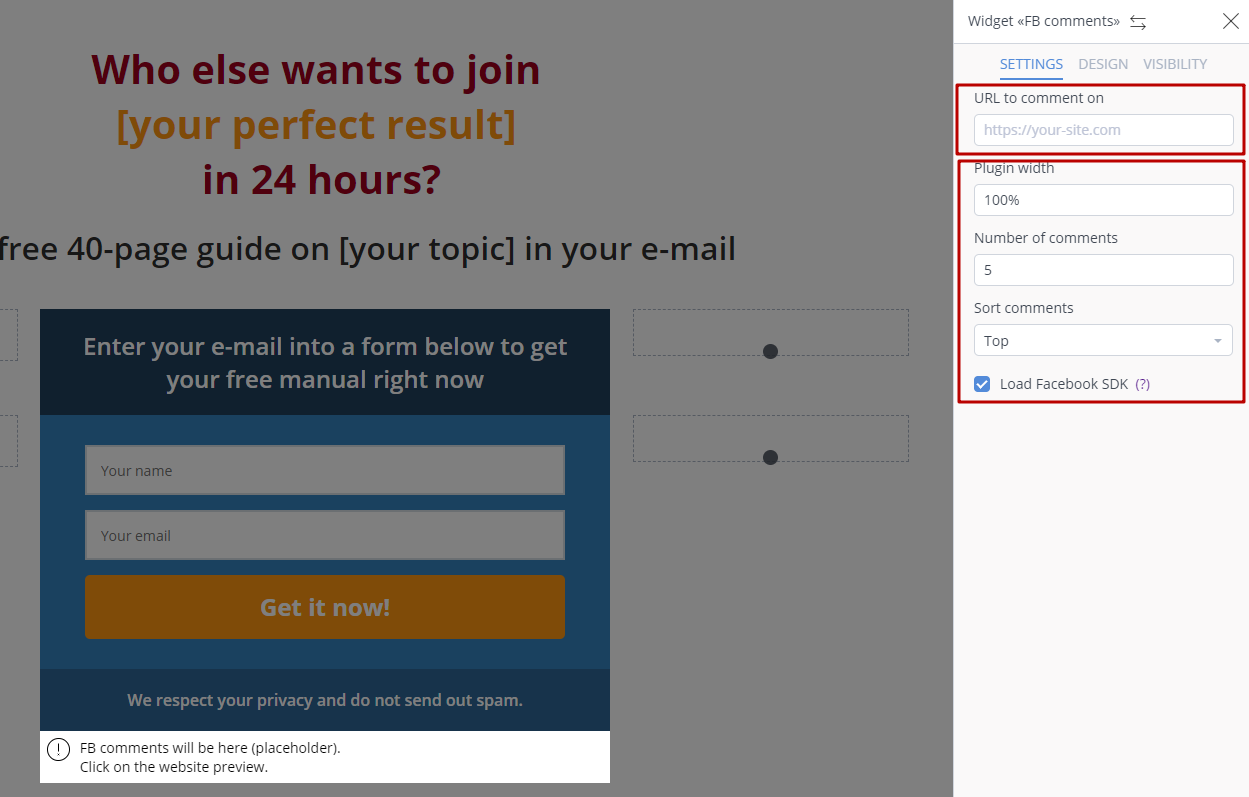
Go to the widget editor by clicking the pencil icon or opening the editor with a mouse click. In the “URL to comment on” box, paste the link to your Facebook page. The fields below are set to default settings, if you need other settings, just edit the fields by specifying your parameters.
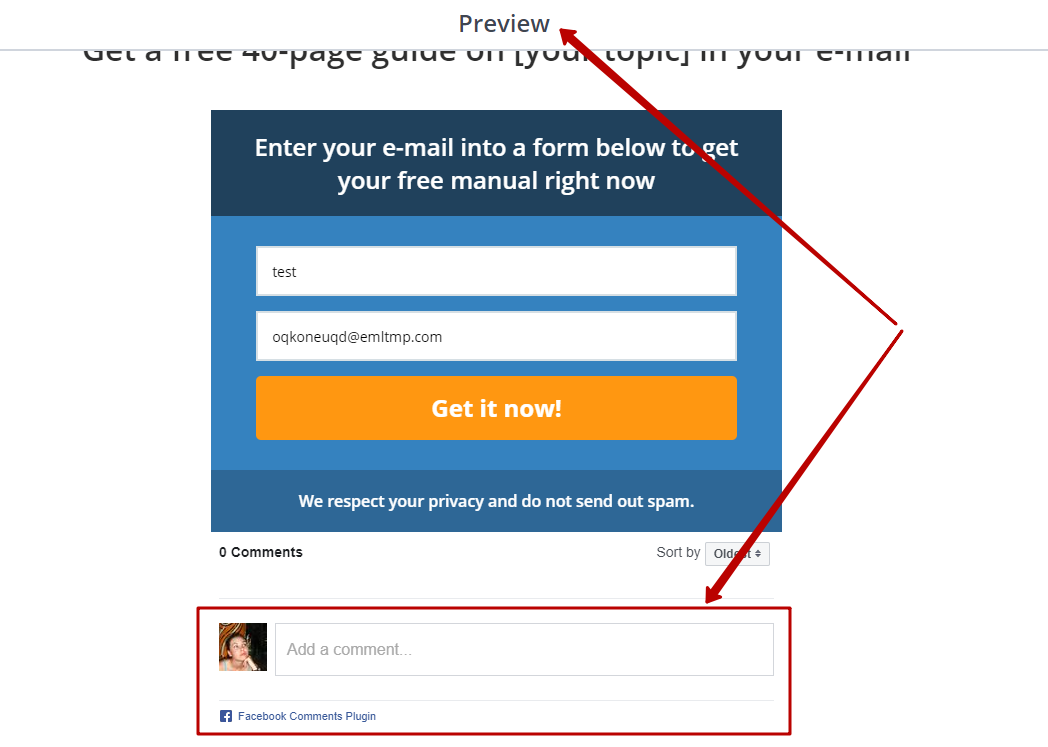
Click the page preview to see how the comments will be displayed.
To copy the link to the page for embedding in the widget, go to your FB account and open the page, and copy the link in the address bar.
The service “remembers” unsaved versions together with the browser and offers to save them. This can be both useful (for example, when you forgot to save the changes you made) and the other way around. So if you see a saving suggestion, I recommend that you look at the date when this message says that you should save the version you have made, which can usually tell you whether you should save it or not.
Also for insurance you can save important pages as templates, with this button
in this case, if something happens to the page itself, it can be restored from the template.
We prepared a separate article on this topic.
If the subscription/order form is inserted on an external domain page and at the same time author’s recaptcha is enabled in the CRM settings, then it is necessary to add the domain of the page where the form is added to the recaptcha settings, otherwise the form will not work.


