Content
If during a telephone call the customer expressed interest in buying a product, you can create an order using this form and send it to the customer’s email.
The Form set up an order consists of 3 tabs.
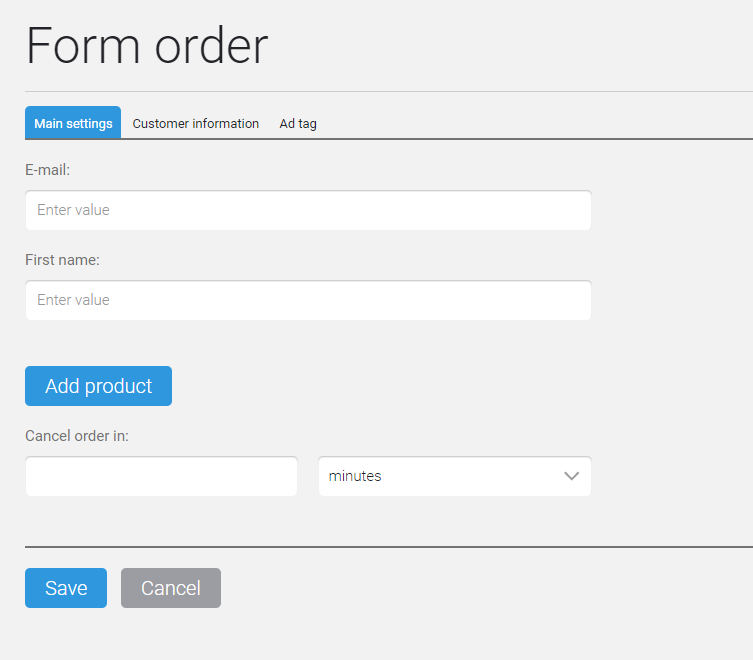
Main settings
On the Basic Settings tab, you must specify the client’s email, name, select the desired product and set the order cancellation parameters.
If the order formation is initiated from the Successful conversation form, the E-mail and Name fields will already be filled out.
Clicking the Add product button opens a window with a list of products.
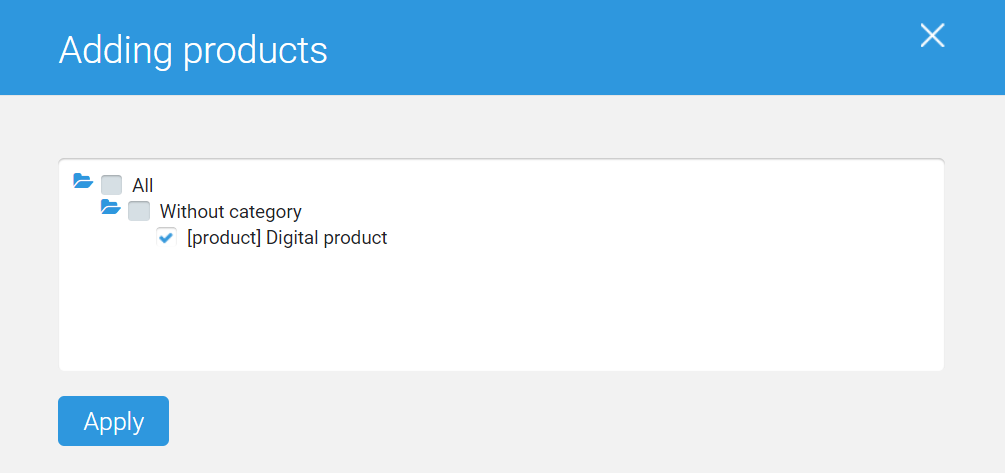
You must select the product(s) to which the order is generated and click the Accept button.
Customer Information
The Customer Information tab allows you to enter the necessary data into the database.
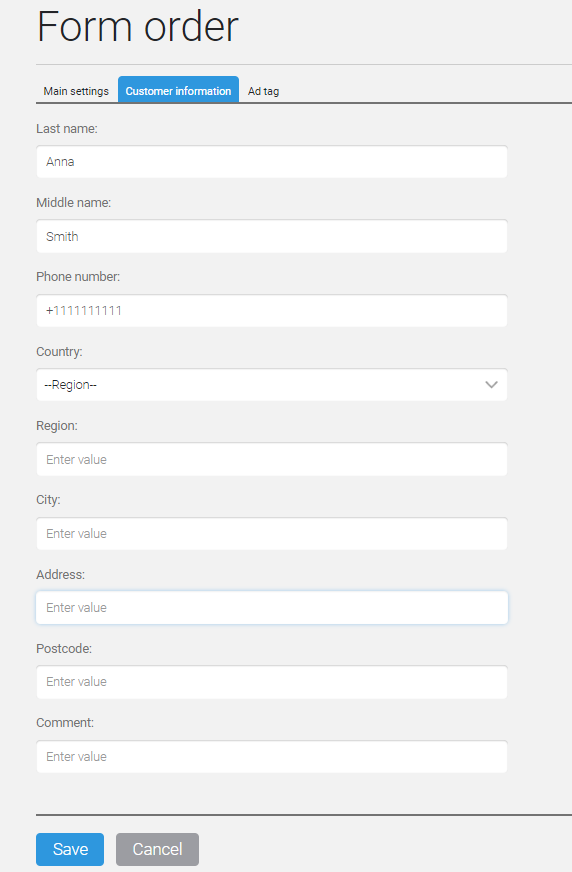
In addition to the phone, you can specify the client’s mail address in this tab, which is actual when delivering physical goods.
If an invoice is issued for the purchase of a digital product, then the country and city are automatically determined by the IP address.
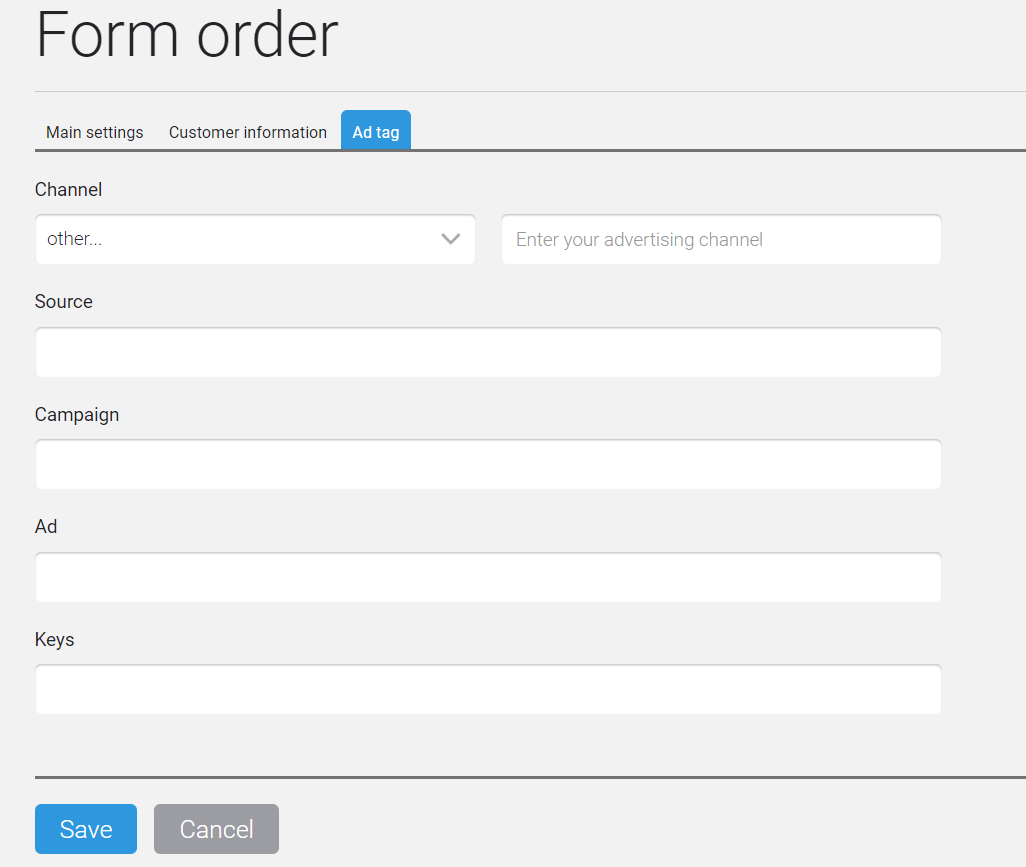
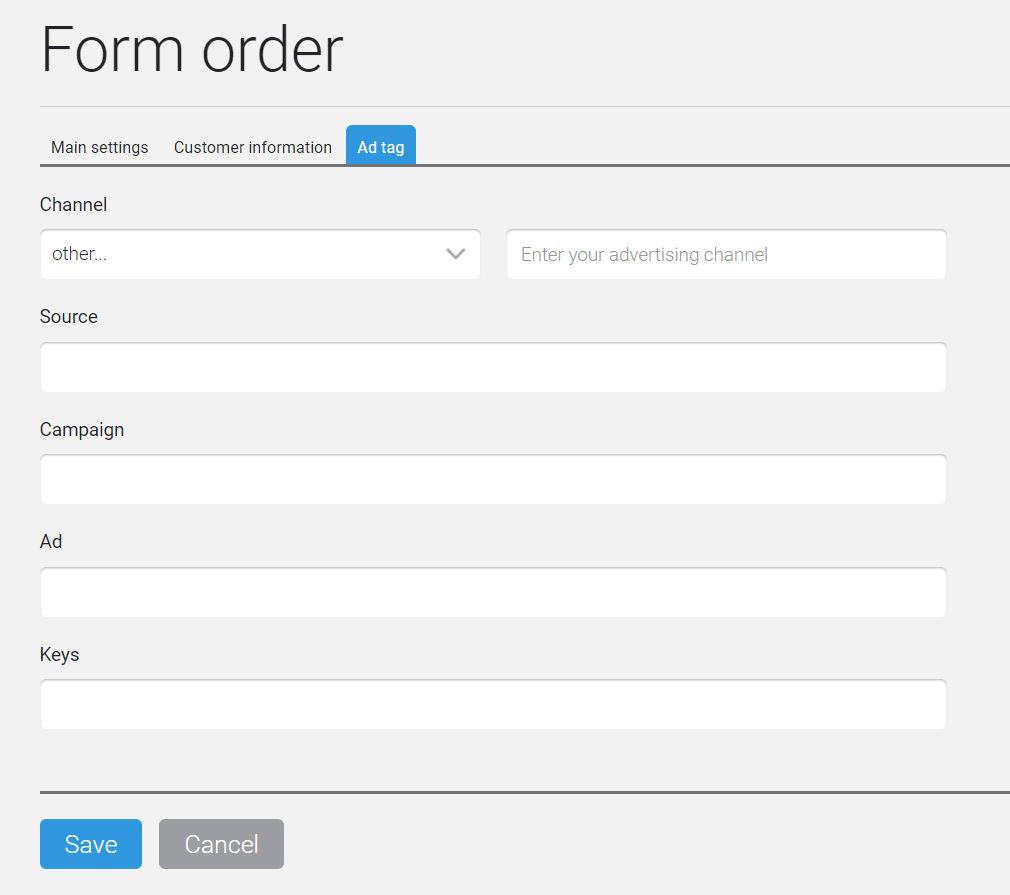
Advertising label
Here you can specify the labels that will be assigned to the order.
Setting up orders for an employee order
Creating orders from employees’ orders can be configured in such a way that a label with the manager’s login will be automatically added to the order.
This setting is adjusted in the section Store => Settings => General settings by checkbox. New orders created by managers are marked with a separate advertising channel and source:
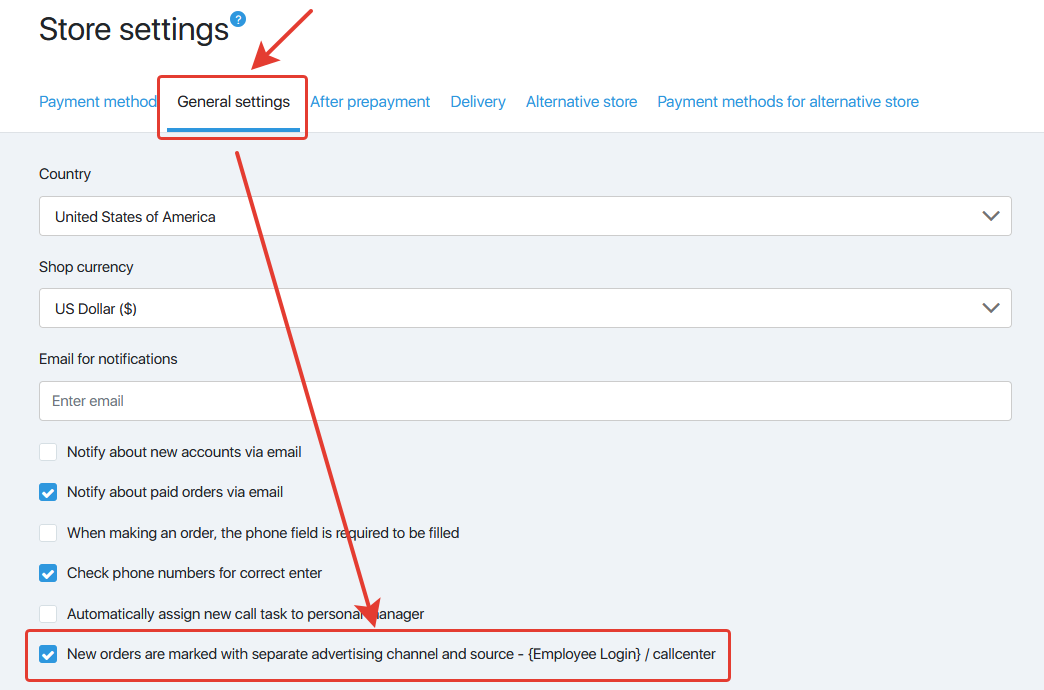
If you set a check mark, then when creating a new order by the manager, it will not be possible to set the Channel and Source, the default channel will be set as call-center, and the manager’s login will be pulled into the source:
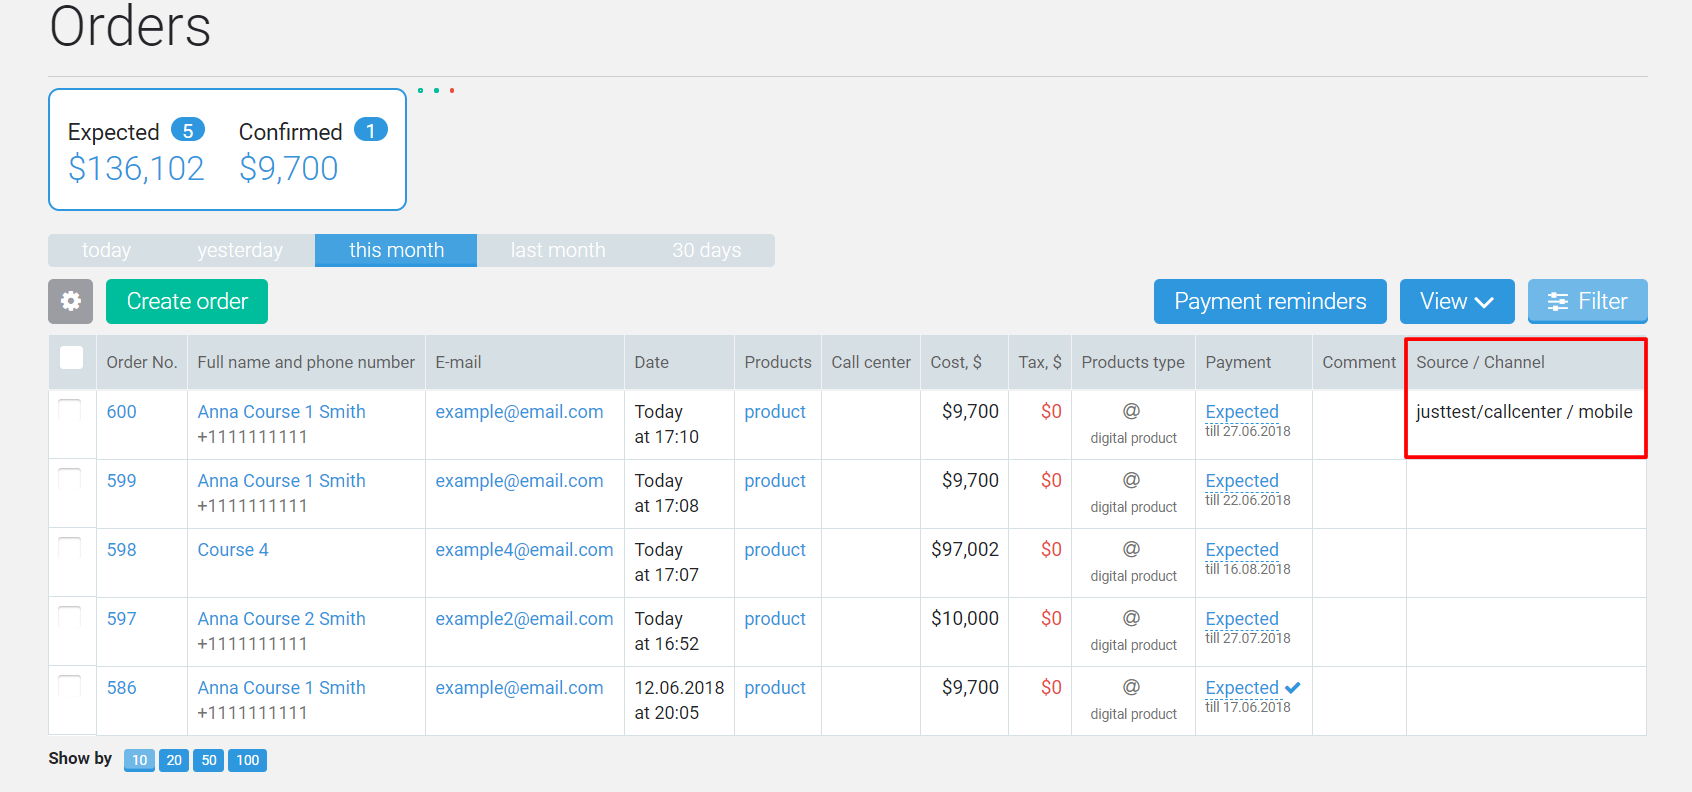
As a result, the order will be marked as follows:
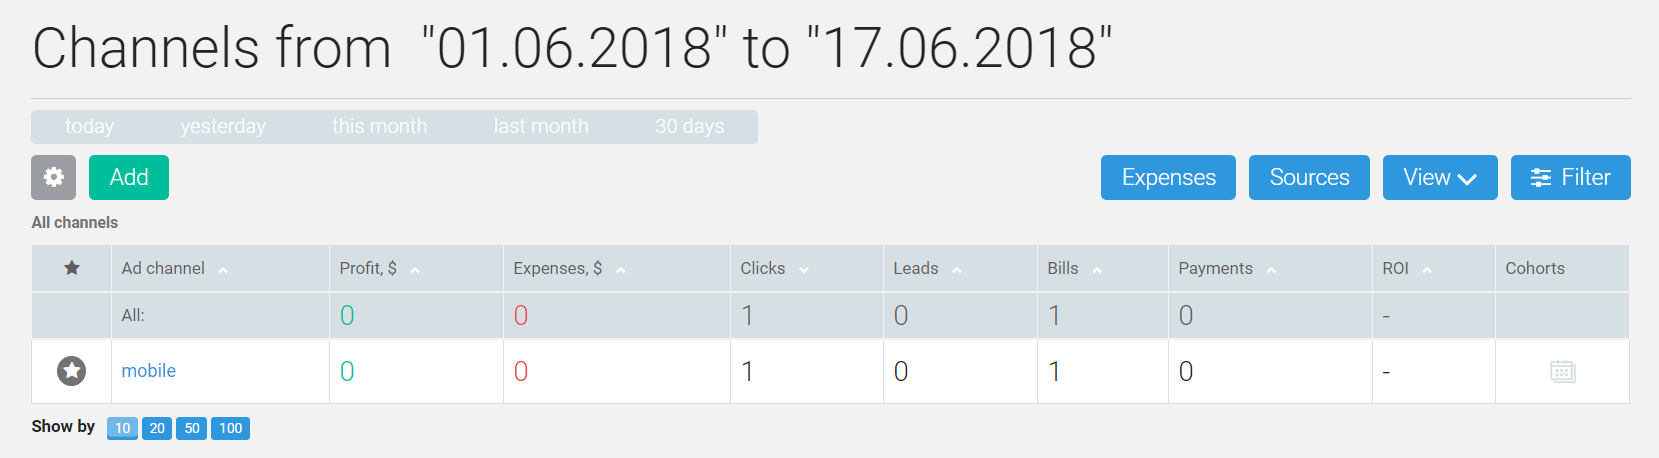
And in the Advertisement reports =>Channels section you can see the statistics for the specified label:
After all necessary fields are filled, you need to click the Save button to generate the order and send the invoice to the client.
FAQ (answers to frequently asked questions)
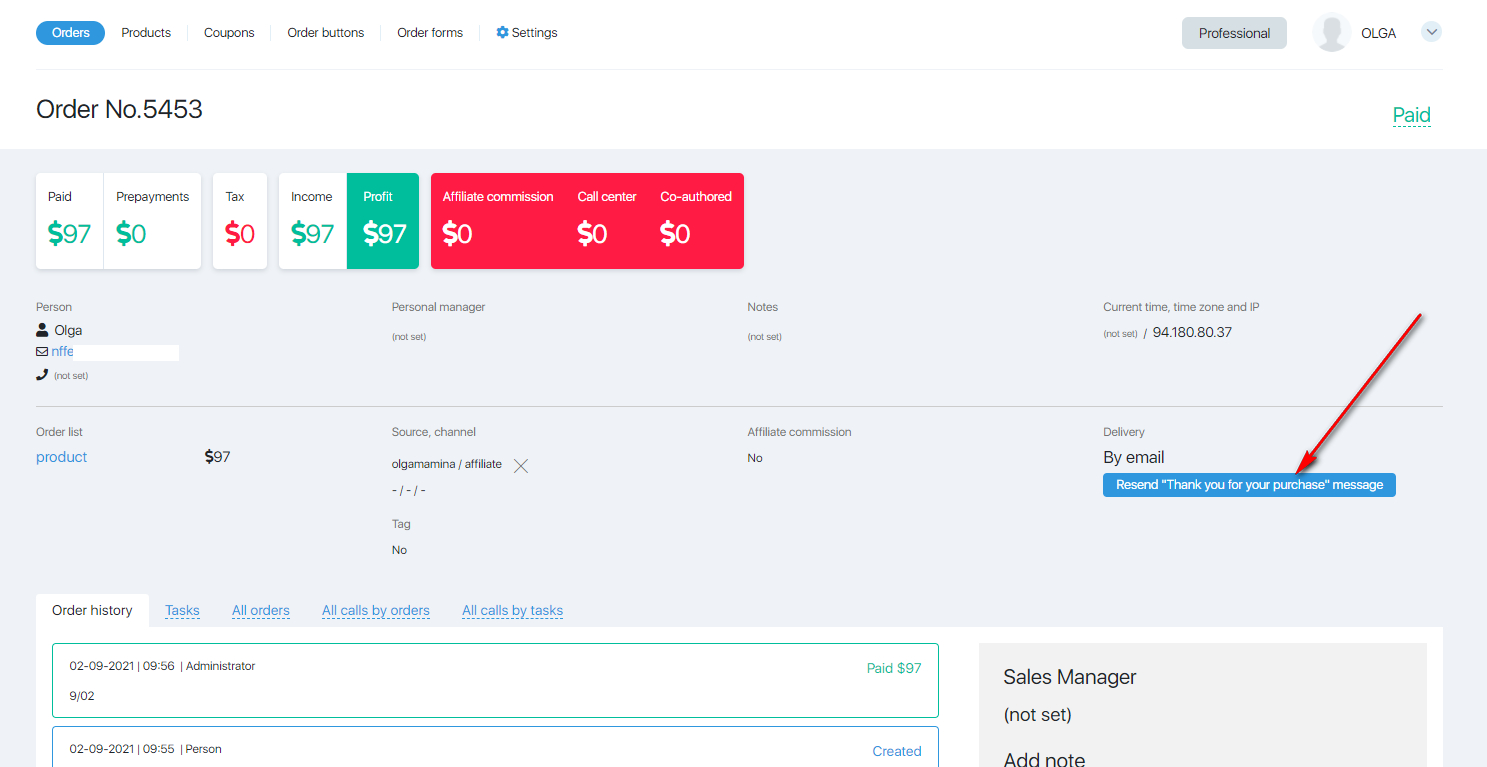
If your client has not received paid materials that should come automatically after payment, you can manually resend them. For this:
- Click on the required account number in the Shop – Accounts section.
- In the opened account card, click on the button “Resend the letter” Thank you for your purchase “.
To disable auto payments for a specific client, in the Store – Orders section, enter the View button, enable the display of the status of auto payments,

and after the column with the auto payments switch appears, find the customer account and disable auto write-off for this account. To do this, slide the switch to the gray, inactive position.

Please note that both the main account administrator and an additional administrator with the appropriate rights can disable auto payments.
