Content
Overview
To find this menu, go to Store — Orders and click the order number.

A page Order No… displays a detailed info about an order and helps perform the required transactions: to pay manually, to refund, to pay in advance, etc., as well as to monitor the results of the calls to the clients.
Please see the screenshot with the explanatory notes and short descriptions of the page’s features below.
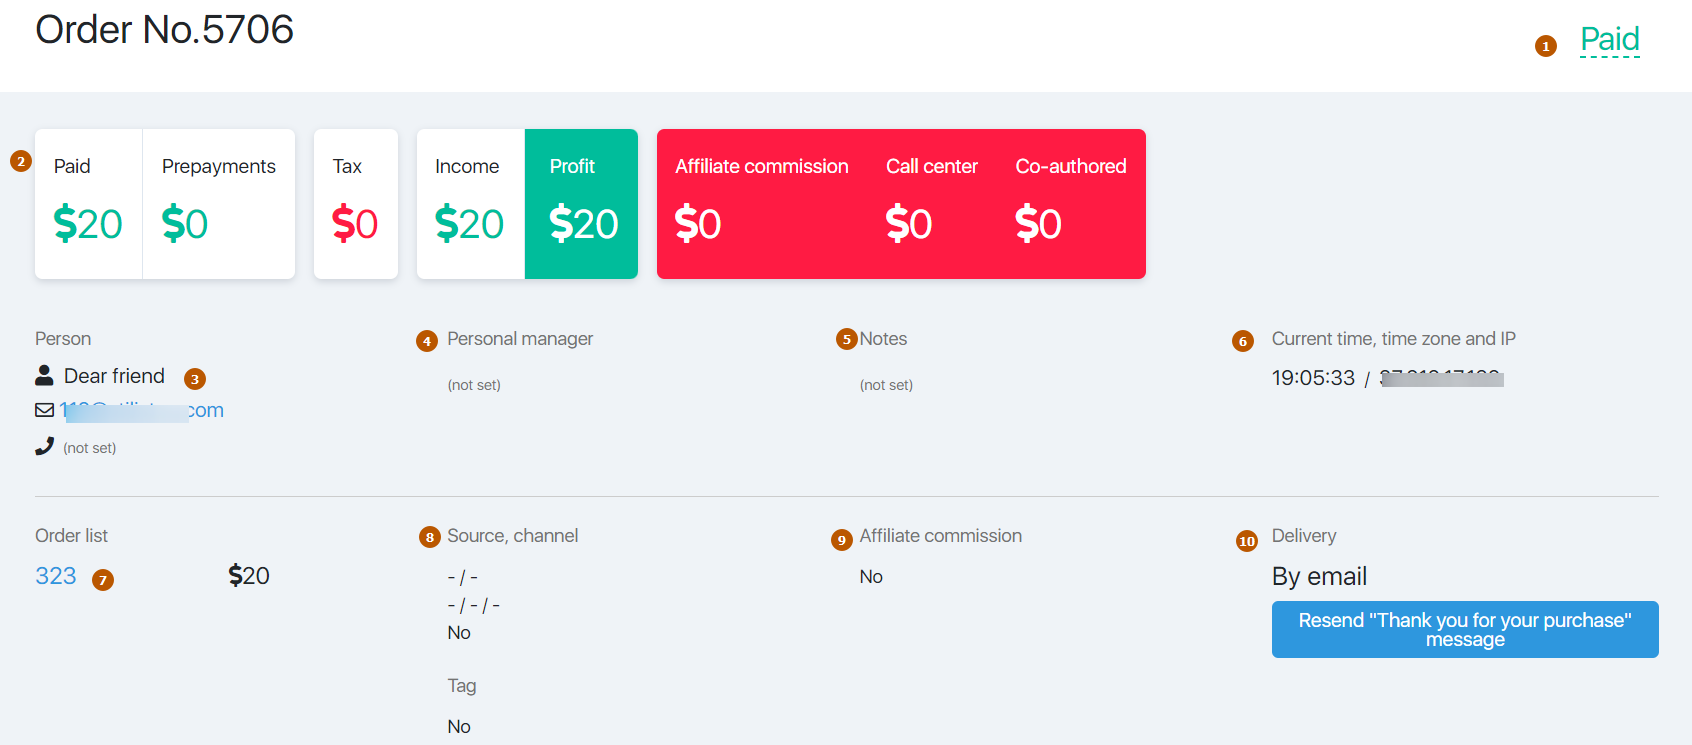
- order status
- statistics refers to this order
- name and the email of a client
- manager
- notes about a client
- information about client’s time zone and IP-adress
- odered product’s name and price
- source, channel where a client comes from
- referral source
- delivery adress
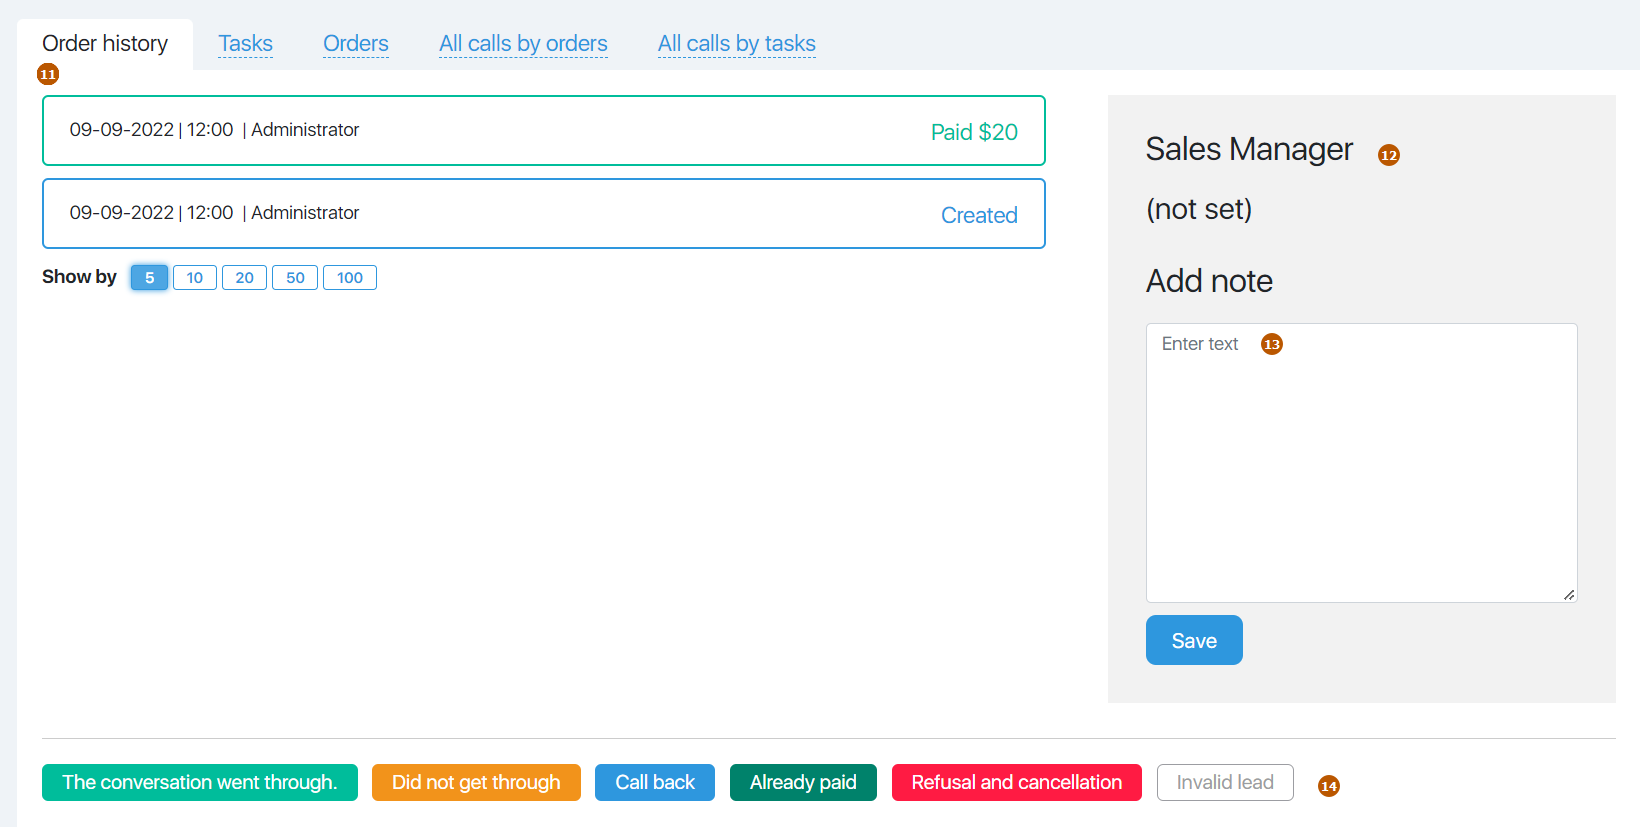
- section contains the order history
- person in charge of the order
- order’s notes
- buttons to monitor the results of the call to a client
Let us look closer at the page’s features.
Order heading
An order heading contains its number, status and date of automatic order cancellation.

Order status is clickable. An order can be cancelled, a new order can be generated for the same client, an order can be confirmed, refunded, deleted, or an advance payment can be made (provided a product has these settings).
This transaction can be performed from the main menu Store — Orders.


Date of automatically cancel an order is also clickable. The date can also be changed, or date limit can be disabled.
Key order information

Here we see a table with the information about the order amount, the sum of advance payments (prepayments), if any, incomes and expenses. These refer to a particular order.
Client’s names, his/her postal address, personal manager’s name (or “not assigned”) are displayed as well. Country and city are determined automatically by IP address.
You can add notes about a client. They will be seen in all orders. Notes can be deleted by clicking a recycle bin in the bottom corner of the notes.
You can also see the current time of a client and IP-address of the order.
Detailed information about an order

The left part of this section displays the ordered products. You can have one or several products in one order, for example, if you use cross-selling. You can also see the analytics (source, channel). It can be deleted, if necessary. You can also see the information about a affiliate commission, order’s tag.
Delivery section usually displays “by email” for the e-products. If an order is paid now, then you can send a letter about payment again:

Order history and extra information about client’s orders
The next visual section contains the order history, as well as the information about other orders paid by a client and made calls concerning these orders and call tasks.
This section has 5 tabs with the extra information.
- “Order history” tab
This tab displays the order history.
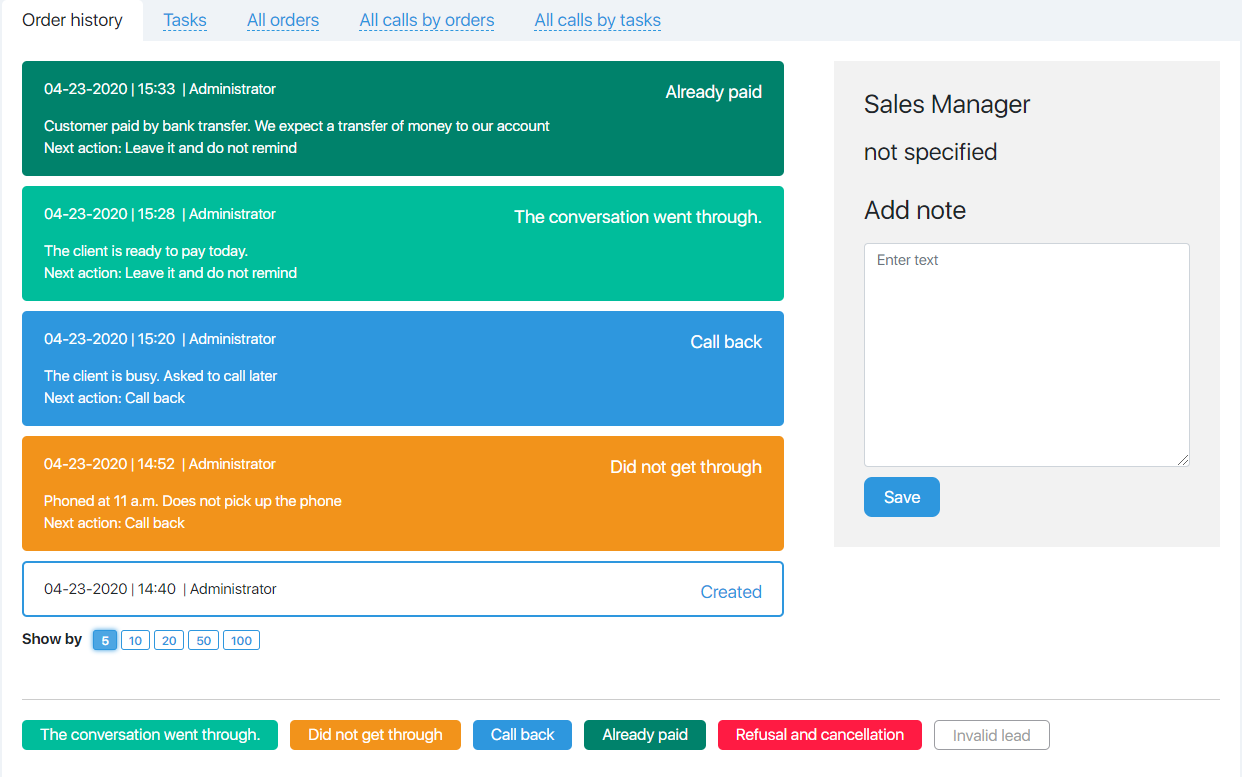
Here you will see both the results of the calls concerning the order and other actions: changes in order status (for example, from Expected to Paid), order notes (a module to add an order is on the screenshot to the right), as well as a manager’s name in charge of the order (upper right corner of this visual section). You can also see the buttons to add a call status and instruction for order calls.
The buttons used by a Call-center manager (sometimes by an administrator) to monitor the results of the calls will be looked at below.
You can define the instruction for order calls in Contacts/Settings (see the details here). - “Tasks” tab
This tab displays all the tasks for this order and here you can add a new one. (see the details abot tasks here). - “All orders” tab
This tab displays all orders processed by a particular client (this information is also given in a lead card in All orders tab). - “All calls by orders” tab
This tab displays all calls connected with the orders (this information is also displayed in a lead card in “Calls made to confirm orders” tab). - “All calls by tasks” tab
This tab displays all calls connected with the tasks (this information is also given in a lead card in “Tasks” tab).
Please read more about the task calls here.
Let us look closer at each button which are used by a Call-center manager (and sometimes by an administrator) to monitor the results of the calls.
Calls statuses
The conversation went through
If the customer was able to be reached and they confirmed their desire to pay, you must click the The conversation went through button and fill in the data in the opened window.
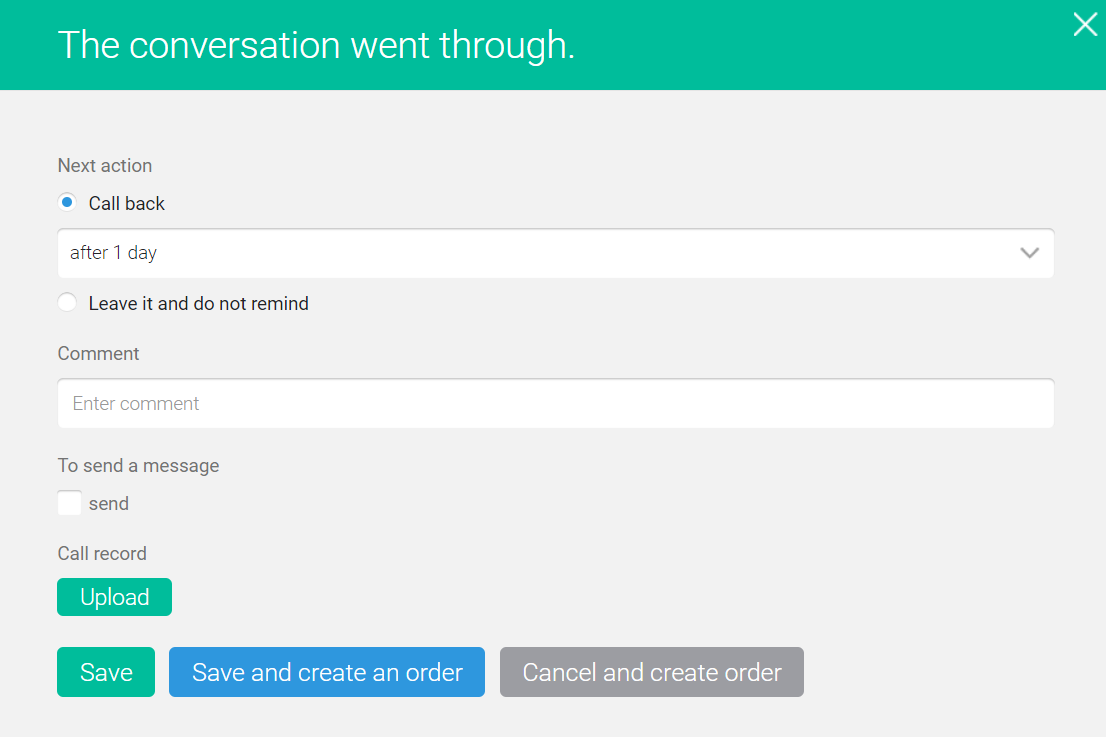
You must fill in the form fields, then click the Save button:
Using the radio button, you can choose to call back to the client, or not. In case you need to call them back, from the dropdown list you can select the time you would like to call, after which the next call will be made.
The Comment field allows you to enter custom text information about this order and the conversation.
Checkbox Send a message allows you to send a letter to the client by email.
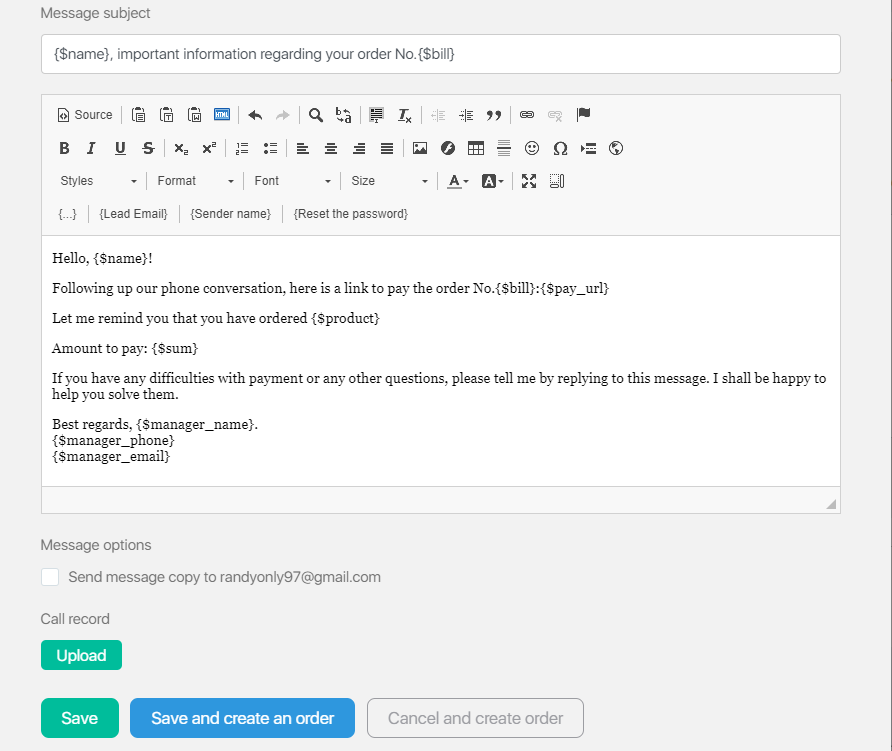
The editor now has a {…} button for using variables. More details can be found here.
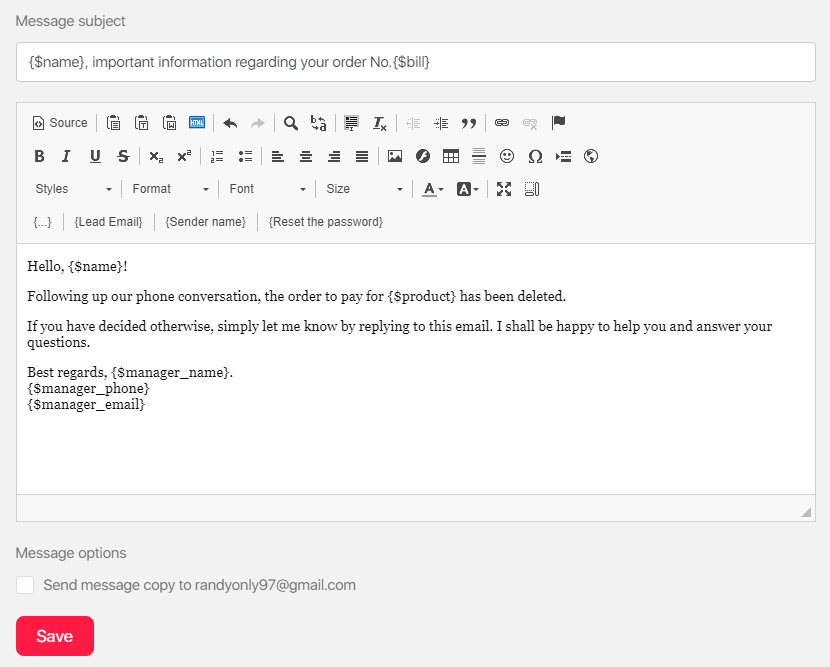
By default, the form contains a sample letter to the client, which can be edited. In addition to the default buttons of the text editor, variable substitution buttons have been added, which allow you to create a single letter template for all clients. In the example in the figure, the Client Name button inserts a variable {$ name} into the text, which will be replaced with the name of the particular client taken from the database while sending the letter.
Checkbox Send message copy to … allows you to send a copy of the letter to the manager’s mail.
During the conversation, there are situations when the client agrees to purchase the upsells or change the order (for example, to buy a more expensive training package).
In this case, directly from this form, you can draw up a new order. The Save and Create button adds a new order to the client without deleting the old one. The Cancel and Create button deletes the old order and creates a new one.
The Upload button allows you to attach a conversation record file to the client.
Did not get through
If the customer was not able to be reached, the button “Did not get through” opens a window that allows you to mark such a call.
An order or a lead (in case the same button is used in call tasks) will pop up in 1 hour. If a repeat call brings the same result, the order or the lead will pop up in 24 hours.
Example: today is the first time when an operator calls a client. At 10:05 a.m. the operator clicks “Did not get through”. This order will pop up today at 11:05 a.m. for a recall.
Let us assume that the second call is at 11:45 a.m., and a client can’t be reached again. Next time this order will be displayed tomorrow at 11:45 a.m. for a recall. And then every 24 hours from the actual call (from the moment when this will be entered in the card).
Let us return to the form which appears upon clicking this status.
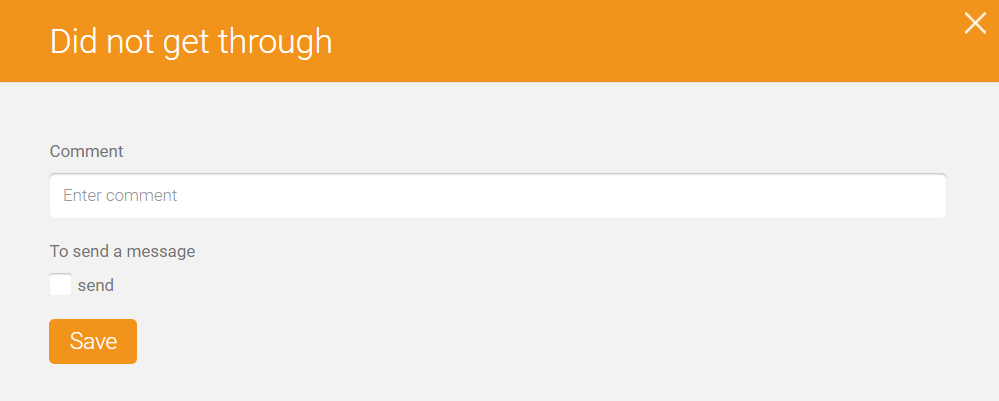
The Comment field allows you to enter custom text information about this order and the conversation.
Checkbox Send a message allows you to send a letter to the client by email.
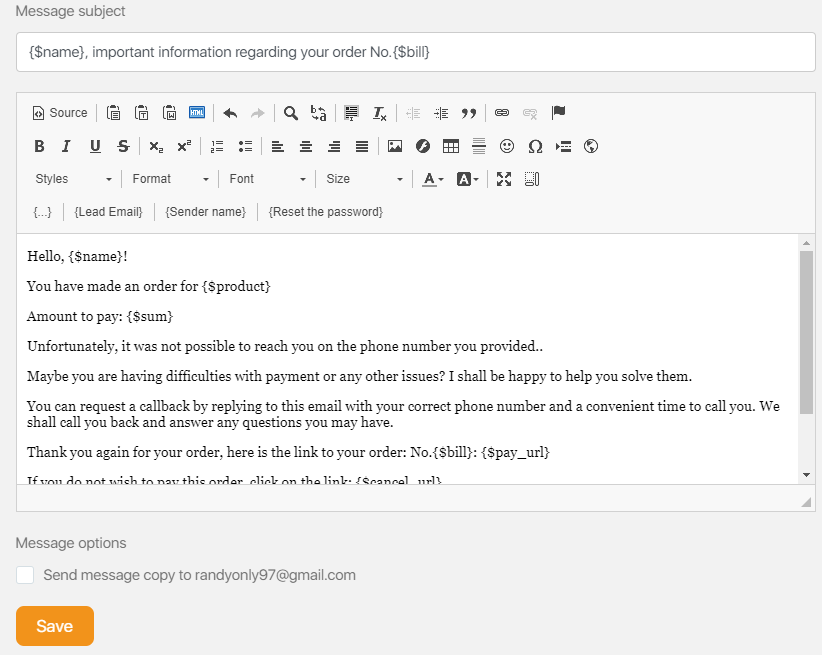
The default form contains a sample letter to the client, which can be edited. In addition to the default buttons of the text editor, variable substitution buttons have been added, which allow you to create a single letter template for all clients. In the example in the figure, the Client Name button inserts a variable {$ name} into the text, which will be replaced with the name of the particular client taken from the database while sending the letter.
Checkbox send message copy to… allows you to send a copy of the letter to the manager’s mail.
Call back
If you managed to get through to the customer, but he asked to transfer the conversation to another time, then the Call Back button opens a window in which you can specify the convenient time for the call.
You must fill in the form fields, then click the Save button.
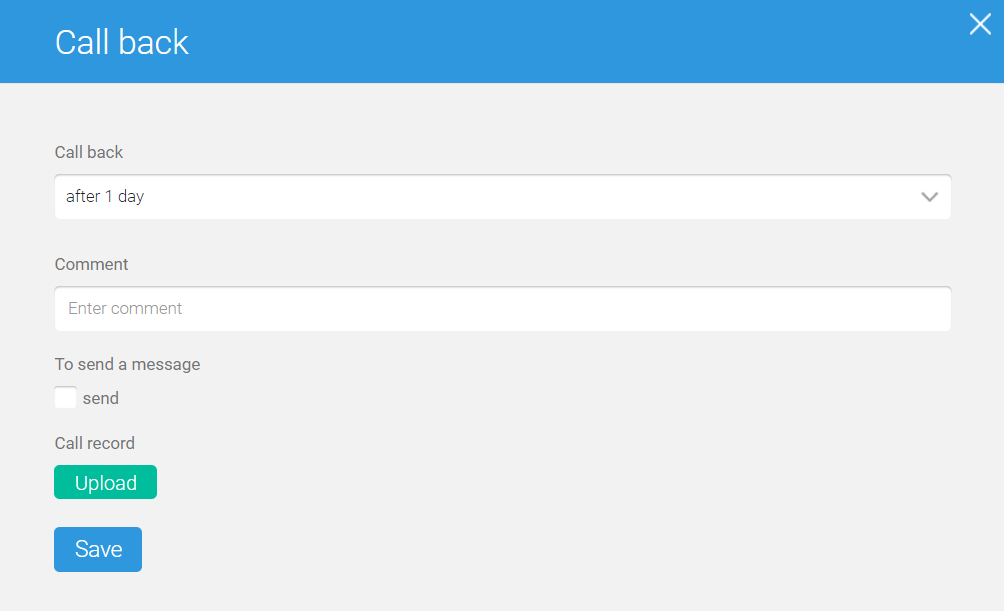
In the Call Back field from the dropdown list, select the time at which h the follow-up call will be made.
The Comment field allows you to enter custom text information about this order and the conversation.
Checkbox Send a message allows you to send a letter to the client by email.
By default, the form contains a sample letter to the client, which can be edited. In addition to the default buttons of the text editor, variable substitution buttons have been added, which allow you to create a single letter template for all clients. In the example in the figure, the Client Name button inserts a variable {$ name} into the text, which will be replaced with the name of the particular client taken from the database while sending the letter.
Checkbox send message copy to… allows you to send a copy of the letter to the manager’s mail.
The Upload button allows you to attach a conversation record with the client.
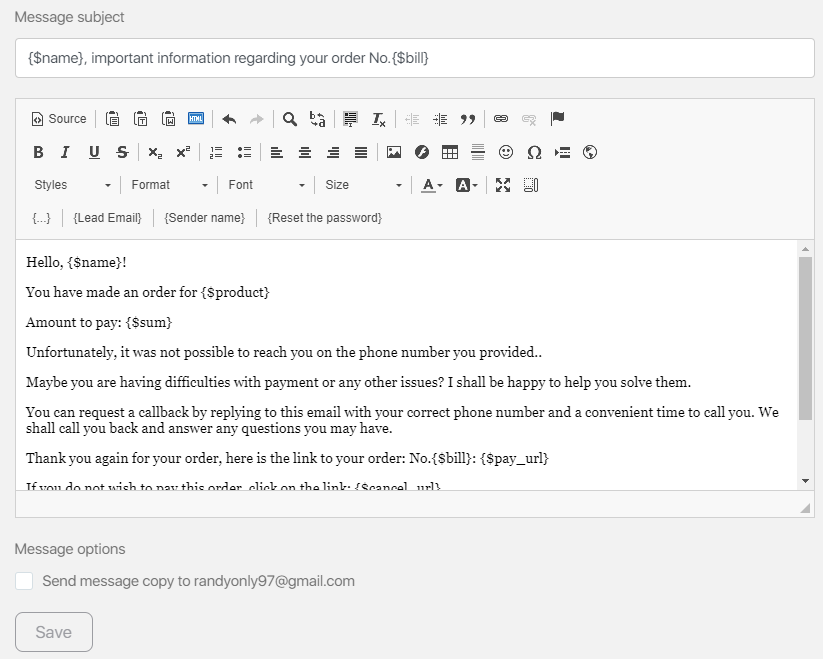
Already paid
If at the time of the call it turns out that the customer has already paid for the order, the Already paid button allows you to mark this order and not disturb the customer again.
You must fill in the form fields, then click the Save button.
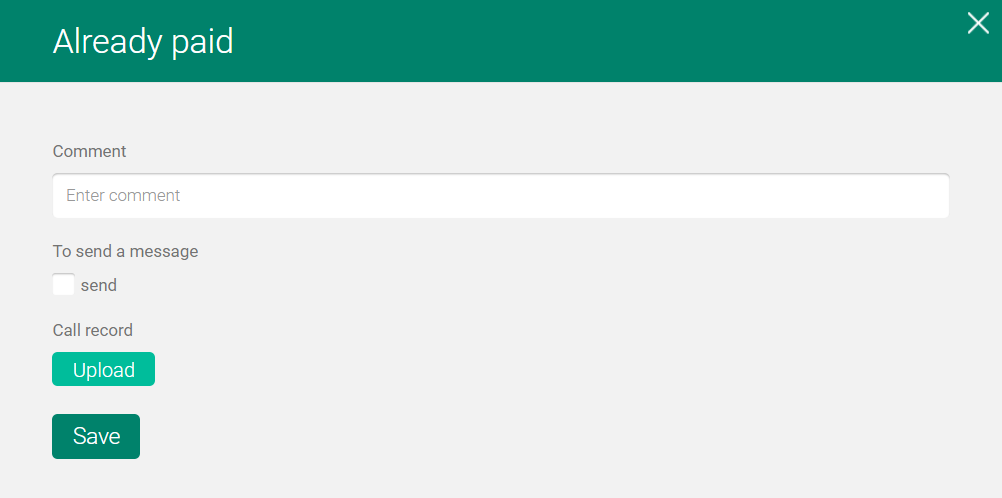
The Comment field allows you to enter custom text information about this order and the conversation.
Checkbox Send a message allows you to send a letter to the client by email.
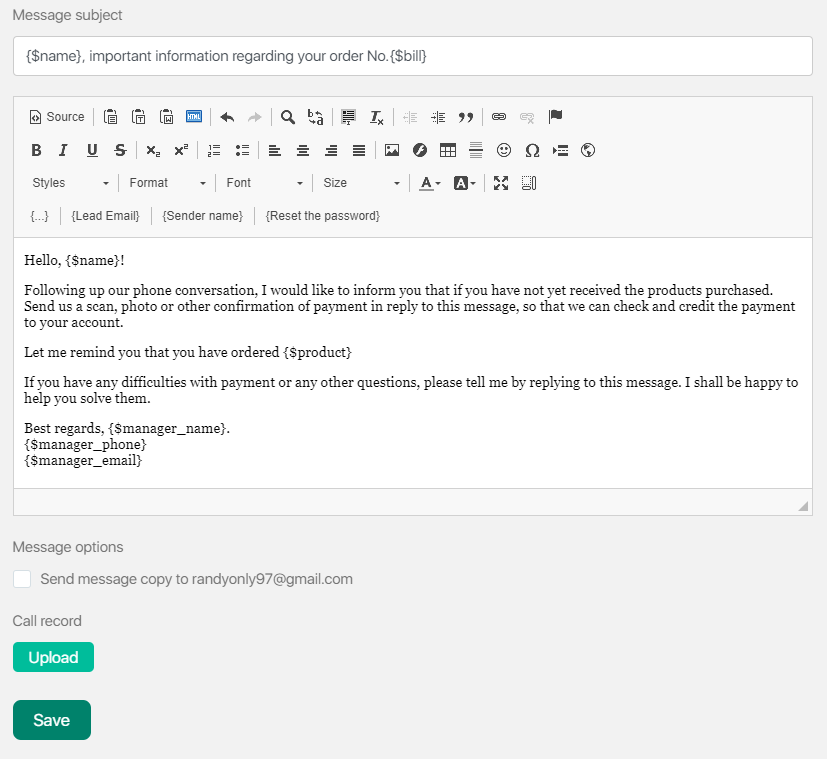
By default, the form contains a sample letter to the client, which can be edited. In addition to the default buttons of the text editor, variable substitution buttons have been added, which allow you to create a single letter template for all clients. In the example in the figure, the Client Name button inserts a variable {$ name} into the text, which will be replaced with the name of the particular client taken from the database while sending the letter .
Checkbox send message copy to … allows you to send a copy of the letter to the manager’s mail.
The Upload button allows you to attach a conversation record with the client.
Refusal and cancellation
If during the conversation the client refuses the order, you should click the Cancel button to cancel this order.
You must fill in the form fields, then click the Save button.
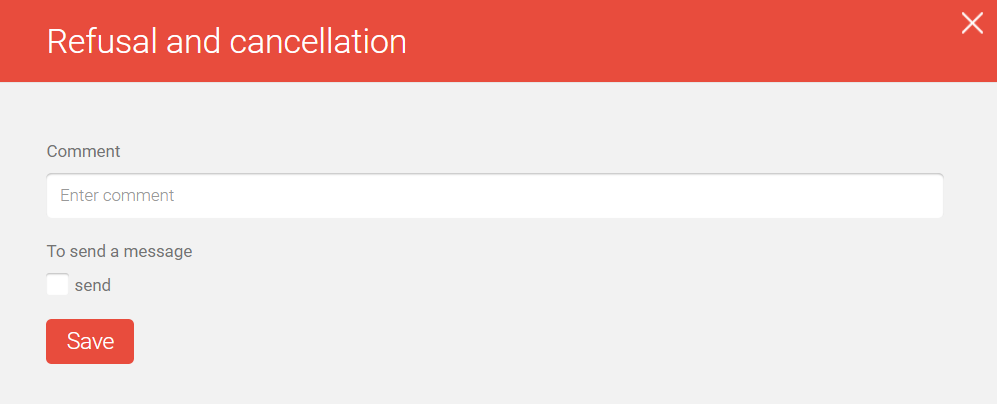
The Comment field allows you to enter custom text information about this order and the conversation.
Checkbox Send a message allows you to send a letter to the client by email.
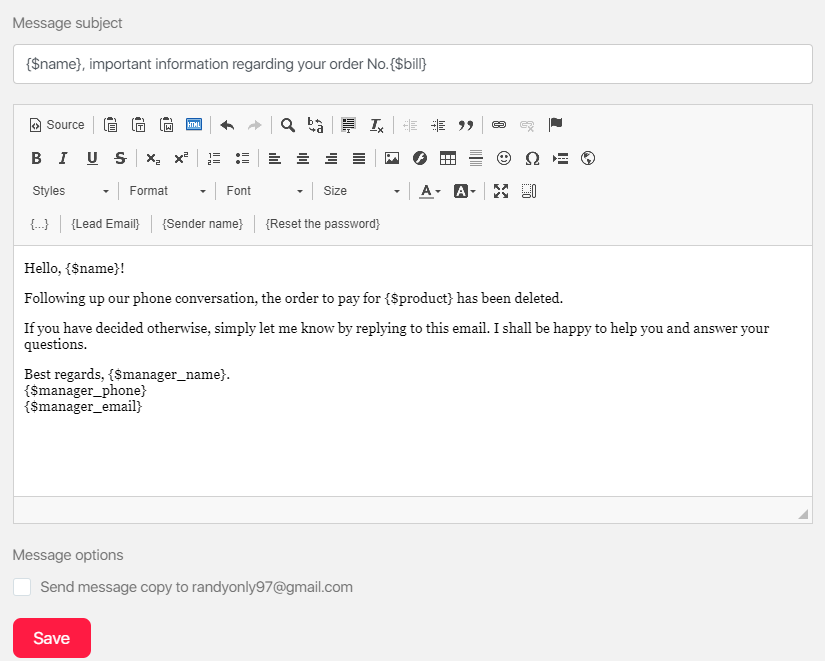
By default, the form contains a sample letter to the client, which can be edited. In addition to the default buttons of the text editor, variable substitution buttons have been added, which allow you to create a single letter template for all clients. In the example in the figure, the Client Name button inserts a variable {$ name} into the text, which will be replaced with the name of the particular client taken from the database while sending the letter .
Checkbox send message copy to… allows you to send a copy of the letter to the manager’s mail.
The Upload button allows you to attach a conversation record with the client.
Invalid lead
The Invalid contact button allows you to mark orders where an error has been made while entering the phone number.
You must fill in the form fields, then click the Save button.
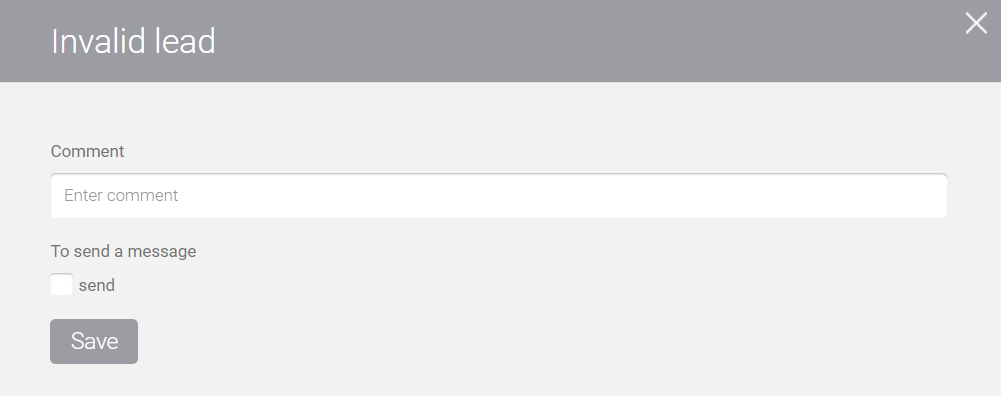
The Comment field allows you to enter custom text information about this order and the conversation.
Checkbox Send a message allows you to send a letter to the client by email.
By default, the form contains a sample letter to the client, which can be edited. In addition to the default buttons of the text editor, variable substitution buttons have been added, which allow you to create a single letter template for all clients. In the example in the figure, the Client Name button inserts a variable {$ name} into the text, which will be replaced with the name of the particular client taken from the database while sending the letter .
Checkbox send message copy to… allows you to send a copy of the letter to the manager’s mail.
To disable auto payments for a specific client, in the Store – Orders section, enter the View button, enable the display of the status of auto payments,

and after the column with the auto payments switch appears, find the customer account and disable auto write-off for this account. To do this, slide the switch to the gray, inactive position.

Please note that both the main account administrator and an additional administrator with the appropriate rights can disable auto payments.
