You’ve ordered a new beautiful model of the selling page from freelancers or a specialized studio, but do not know what to do next and how to place the abundance of the provided files on our system? Then let’s figure it out.
Normal landing is a set of html-layout, css-files and images. Sometimes JS scripts and jQuery libraries are added to it.
So:
- Download all images to the Site => Pages => File Manager
After the images are downloaded, our system will automatically provide links to their placement – the path to the image.
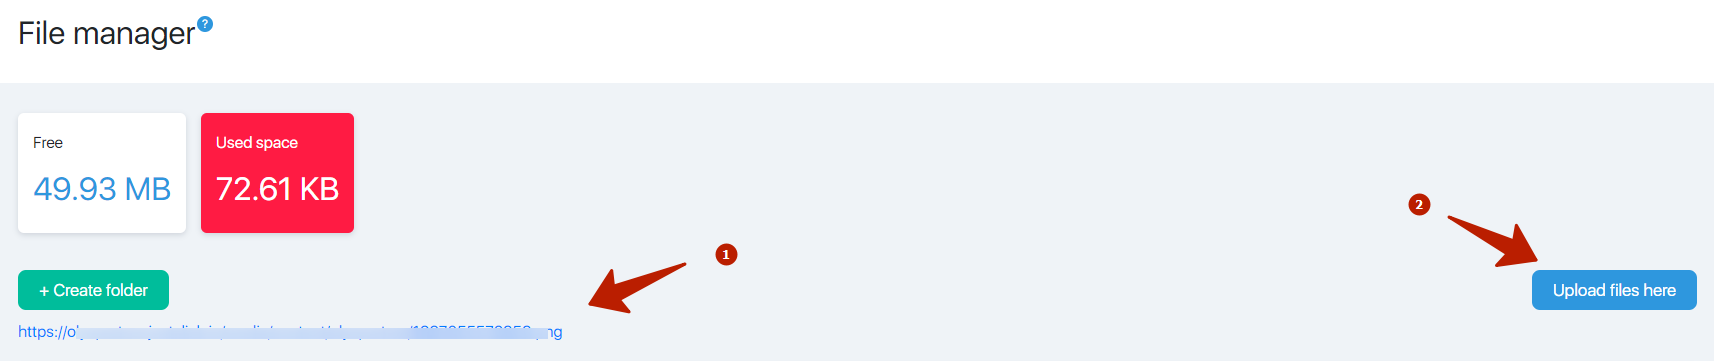
- path to downloaded file
- button for file downloading
If you plan to create a site with a more or less complex structure, or if more than one landing is expected, we recommend creating several folders and downloading files by category for ease of use.
Cataloging options:
IMG – folder for images
CSS – folder for css styles
JS – folder for JS scripts and jQuery
or
Main – all files for the main page
Lanpage1 – all files for the selling page
etc.
Your imagination here is not limited. In this example, the paths for the root (main) directory of the file manager are considered, while the paths to the folders in the file manager may differ slightly.
- In the html-code and css-styles, we find and change addresses for all images
Files with the extension .html and .css are opened with a notebook or any other text editor.
Typically, the default path to the picture is prescribed as “… / image.png”. In this case, you need to change the link, for example, to:
“http: //your_domain_to_justclick.io/media/content/your_login/image.png”
Also, you can prescribe not absolute paths, as in the example above, but relative (from the links we remove the domain):
“/media/content/your_login/image.png”
- We load css-styles, js-scripts and jquery-libraries
Just like the images, we have these files in the Site => Pages => File Manager. Copy and save paths to files.
- Create a new page in the section Site => Pages
When creating a page in templates, select the Html editor.
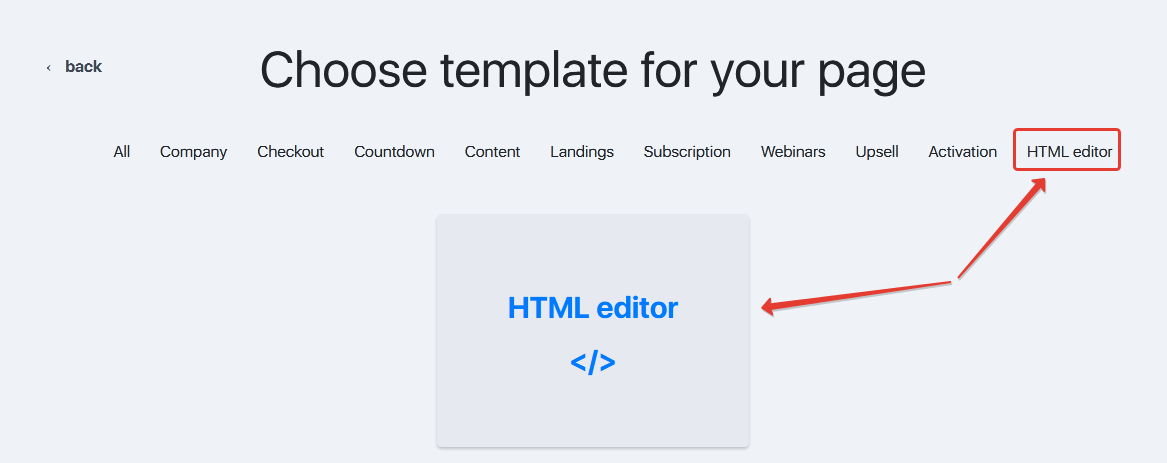
The page with the editor opens.
Assign her a unique identifier. Please note that the identifier is added to the address of the page, that is, it will be visible to site visitors.
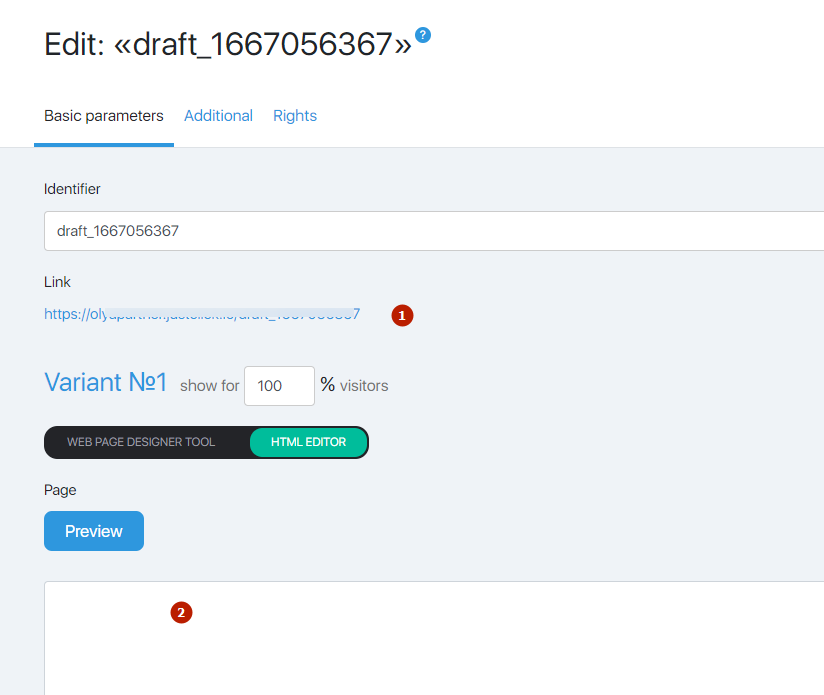
- internet page address
- page code field
- Copy the entire html code and paste it by selecting the “Html editor”. We talked about this in more detail here.
If there are written JS-scripts in the copied html-code, carefully check them for the presence of links to the files downloaded to the File Manager.
Do not forget to change the paths for css-styles, scripts and libraries! Let’s look at an example of how to do this correctly. By default, paths can be written like this:
for CSS:
<link href=”…/style.css” rel=”stylesheet” type=”text/css” />
for JS:
<script src=”…/jquery-1.8.3.min.js” type=”text/javascript”></script>
You need to replace the path either with an absolute one like this:
for CSS:
<link href=”your_domain_on_service/media/content/your_login/style.css” rel=”stylesheet” type=”text/css” />
for JS:
<script src=”your_domain_on_service/media/content/your_login/jquery-1.8.3.min.js” type=”text/javascript”></script>
either relative like this:
for CSS:
<link href=”/media/content/ваш_логин/style.css” rel=”stylesheet” type=”text/css” />
for JS:
<script src=”/media/content/ваш_логин/jquery-1.8.3.min.js” type=”text/javascript”></script>
- Save the changes and check the template display.
You can check it simply by typing the address of the created page into the browser address bar.
