Content
Overview of the section
Lessons are a subsection of the Courses which enables you to create the tasks for the students. To move to the subsection, click “Courses” in the main menu and select “Lessons” in the submenu.
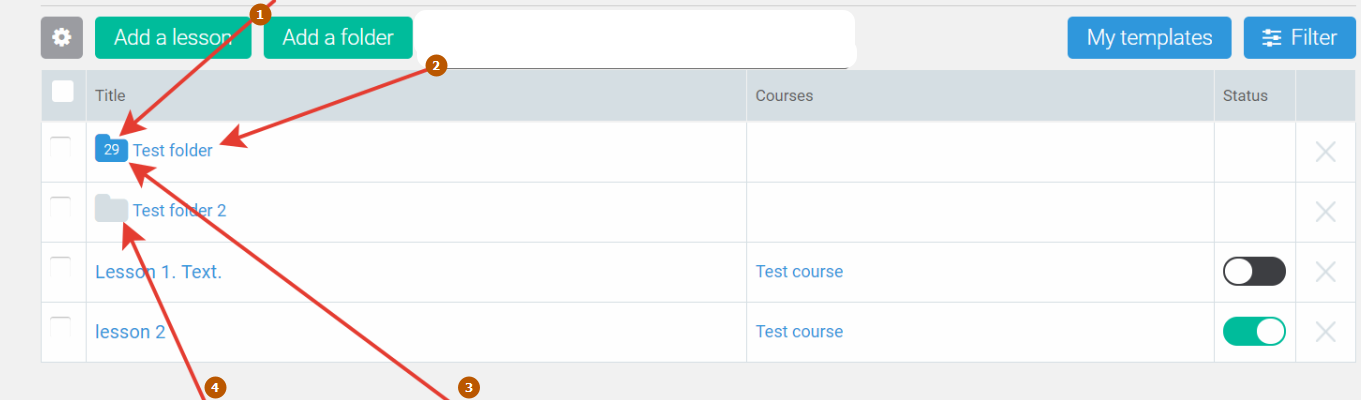
The upper part of the main page of the subsection contains the buttons “Filter”, “Add a Lesson”, “Add a Folder” and a lesson checkbox button. The main part of the window displays a list of created lessons and folders. We will look at these options here.
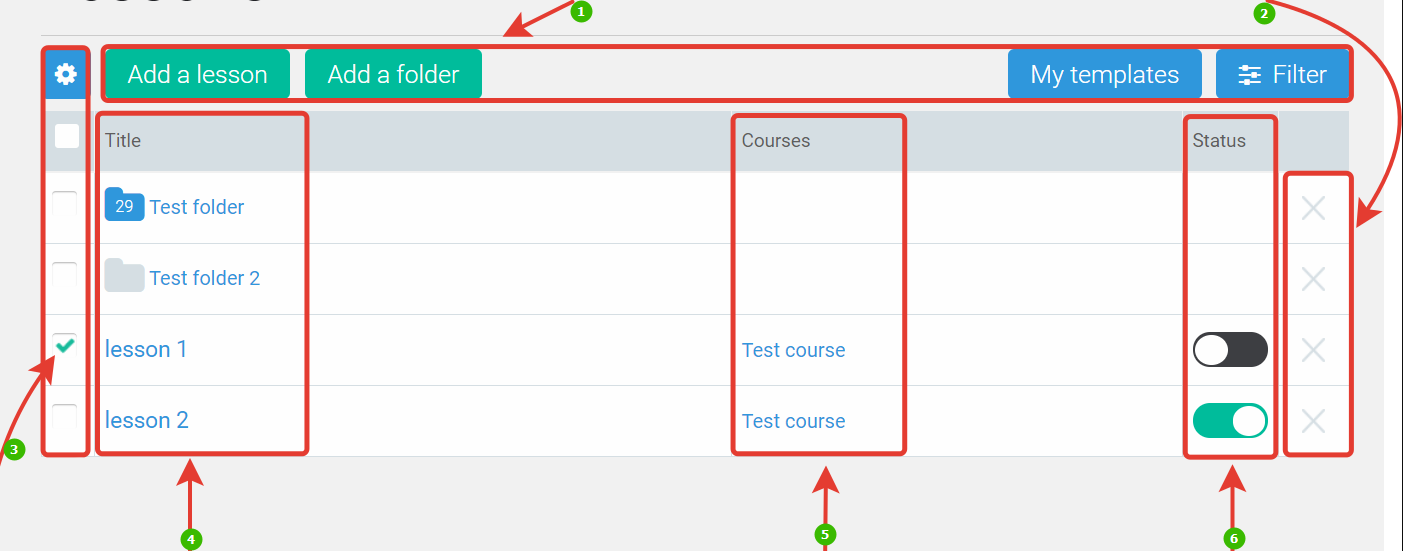
- main buttons
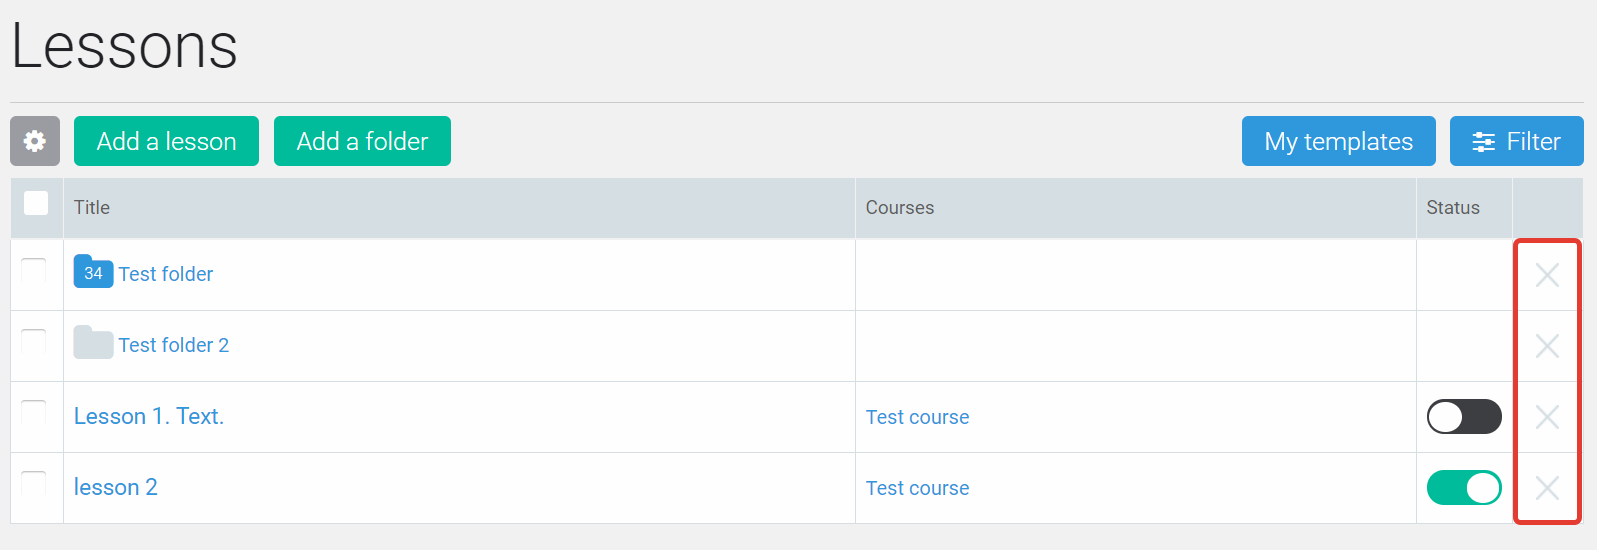
- delete a lesson
- check the lesson
- name of a lesson or folder
- name of a course which a lesson belongs to
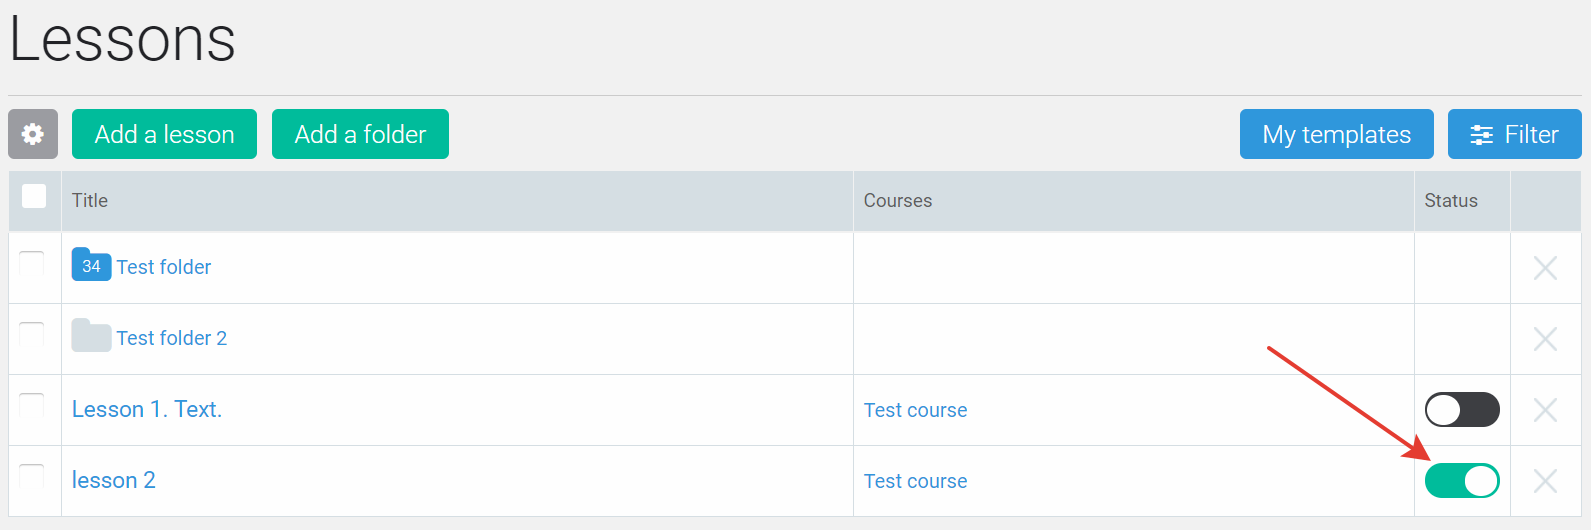
- lesson status
How to add (to create) a lesson?
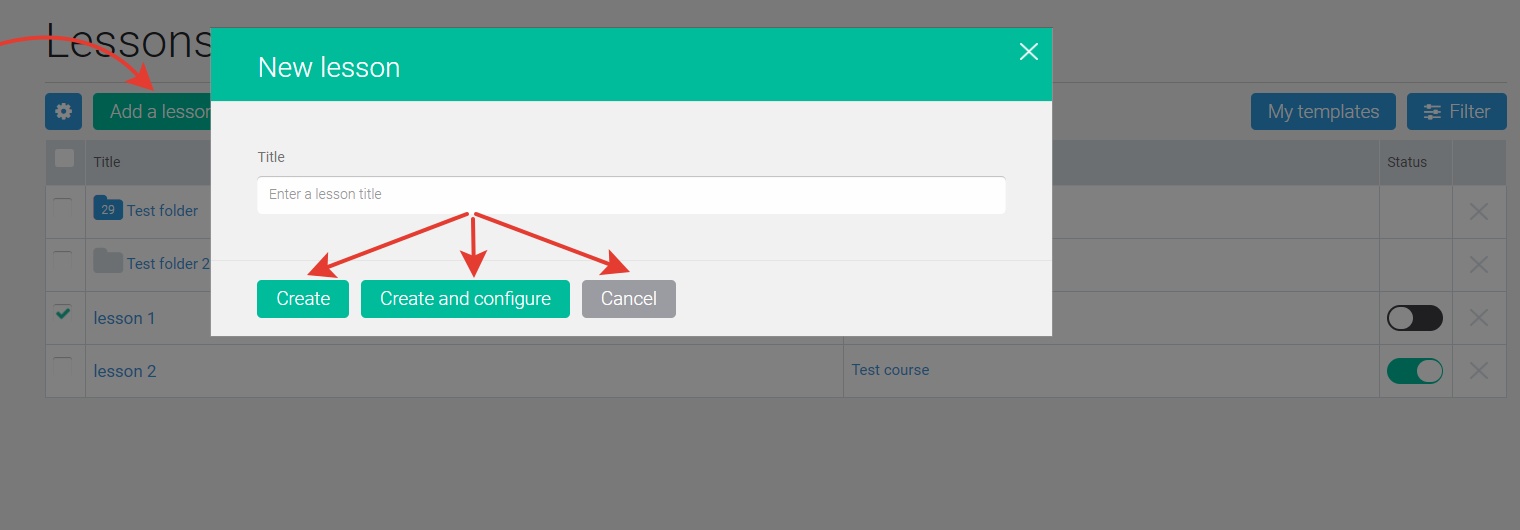
Click “Add a lesson” button. This will open a modal window which offers to enter the name for a lesson. You will see three buttons: “Cancel”, “Create”, “Create and configure”.
If you click “Create”, you will see an empty lesson. This is convenient for “booking” the names if you are working with the structure of the future course rather than with the content of the lesson. Later you can find this lesson on the list and move to its settings.
If you choose “Create and configure”, a lesson will be created, and you will be automatically redirected to its settings page.
It should be added that a lesson can be accessible to a student if it is within a course, however, one lesson can be included into an unlimited number of courses. This is convenient if you deal with the specialists in different areas, but they need the basic knowledge in a particular area. For example, How-to-create-mailouts lessons is useful to those specialists who use the mailouts to notify the clients about the discounts and sales and to those experts who use the mailouts as the main communication channel and a way to attract future buyers. In the latter case, there should be more lessons devoted to this topic, while the first group should also be given the basics. The courses are different, but why should similar lessons be created? See more about the accessibility and all possible options here.
How to edit a created lesson?
By clicking the name of the created lesson, you will be redirected to its settings and editing — this is the same page you are redirected to when clicking “Create and configure”.
This page looks like this: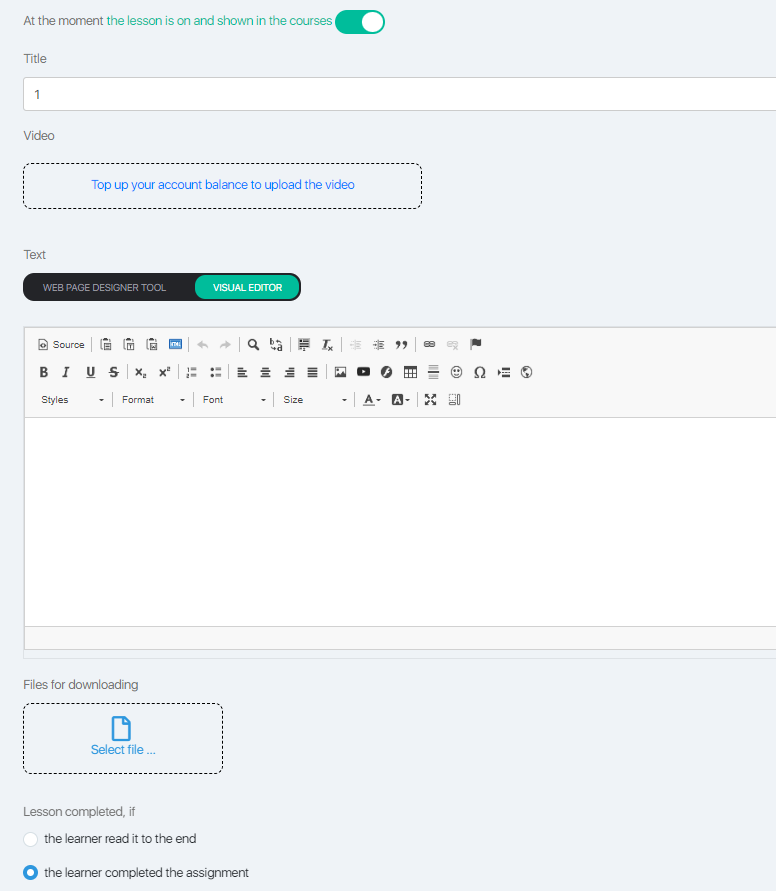
This page displays:
- name of the lesson You can enter a new name here, that is, you can edit the current name from item 1.
- global status of the lesson — it affects the display of the lesson in all (!) courses at once. Disable the lesson here, and it will be disabled in all existing courses and will be inaccessible for selection in the new ones
- video download functionality
- lesson creation mode – web page designer tool or a visual editor. How to create a description of the lessons with the designer tool, we described in this article.
- “files for downloads” — this tool enables you to attach a file which can be downloaded and read by the students (screenshot above gives students’ view). It should be noted that you can attach the files both to the description of the lesson and to the tasks, if required
- the “end” parameter of the lesson
How to add a hometask for a student?
Below on the overview screenshot display the task settings. Here is a part of this screenshot:
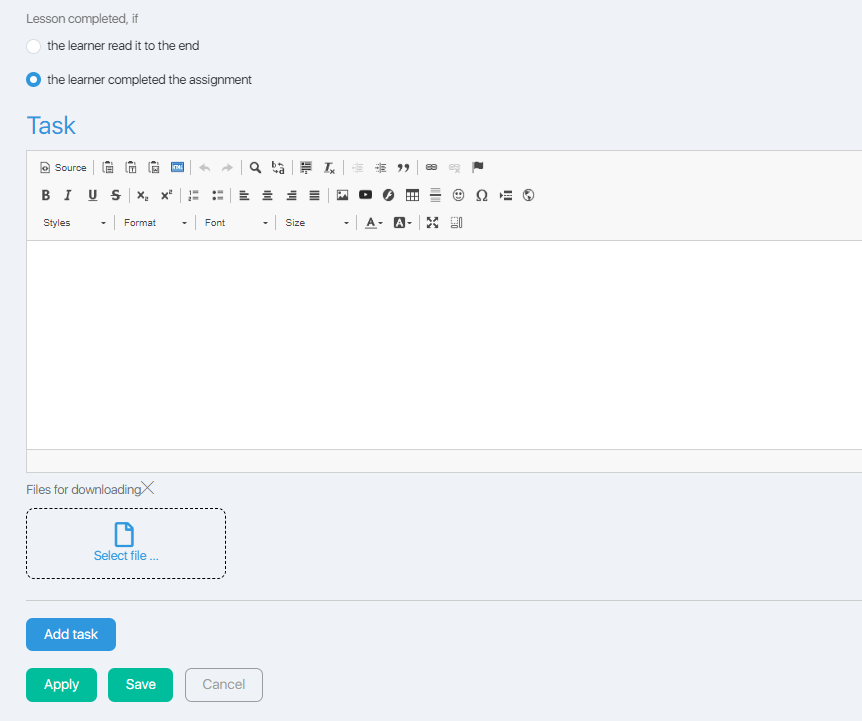
First of all, you can decide when a lesson is supposed to be completed: if a student just reads it (which is suitable for the theoretical lectures, introductory lessons) or if a student does the task. The second option enables you to enter the text of the task and to attach the files, for example, empty report forms or additional didactic materials. Therefore, you don’t have to overload the lesson description with files and thus hint the student where to apply this or that knowledge.
It should also be noted that you can create several tasks. For example, you can create two-three easy tasks to solidify the knowledge and several more complicated ones aimed for multi-sided and profound understanding of the material. You can attach the most relevant files to each task. And the student can give answers and attach the files separately from the tasks. Here is the student view of the lesson which presupposes to be completed by doing one task:
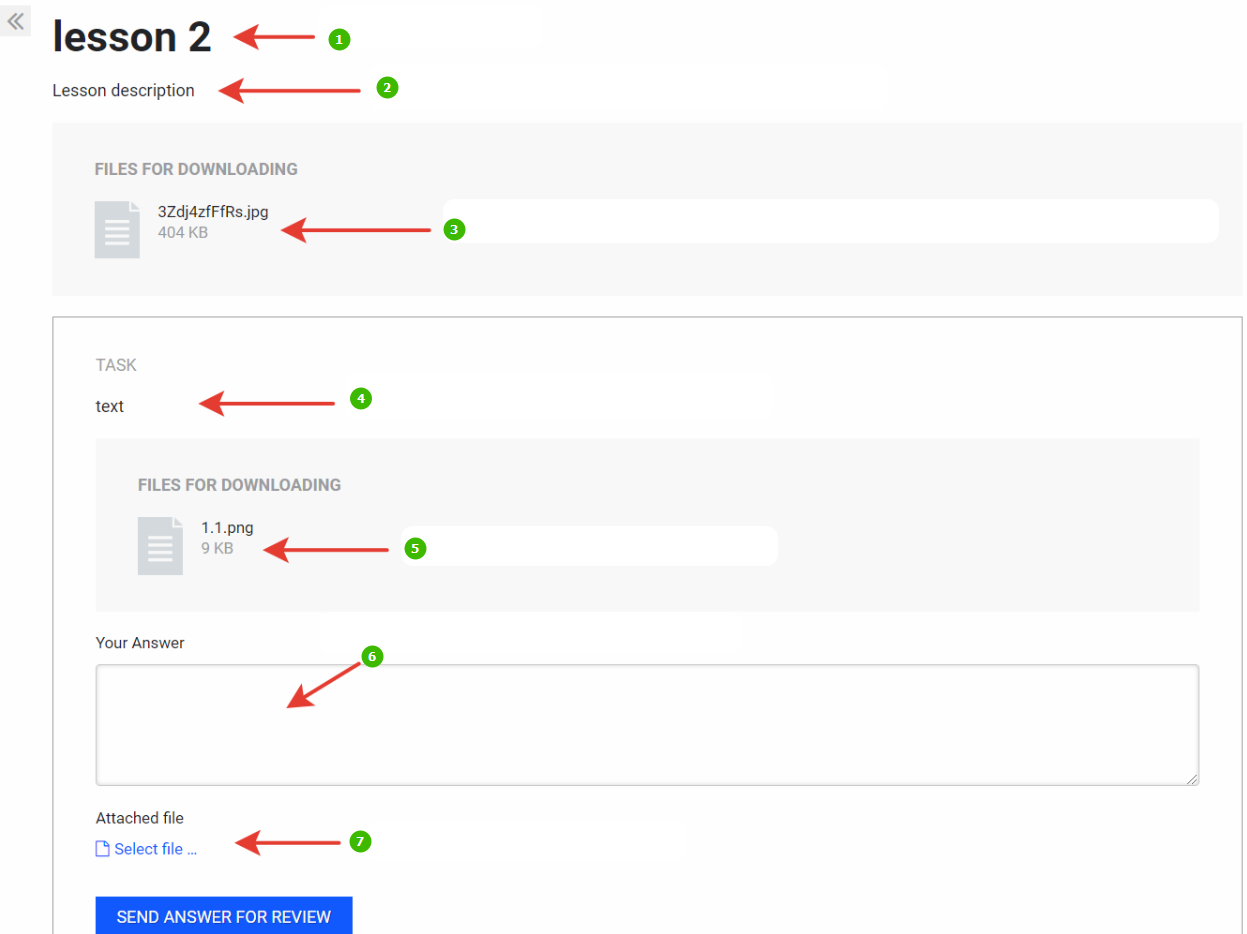
- lesson name
- text from Description eding field
- downloable file attached to a lesson description
- text from Task editing field
- file attached to the task
- field for students answer
- student attached file
What is JustClick player and how does it work?
JustClick Player is a hosting for your video files that allows you to add videos without any ads.
Learn more about the JustClick player in this article.
How to add a folder?
Folders are designed for your convenience, so that you can classify the lessons and quicker search for the lessons. The students will not see the names of the created folders.
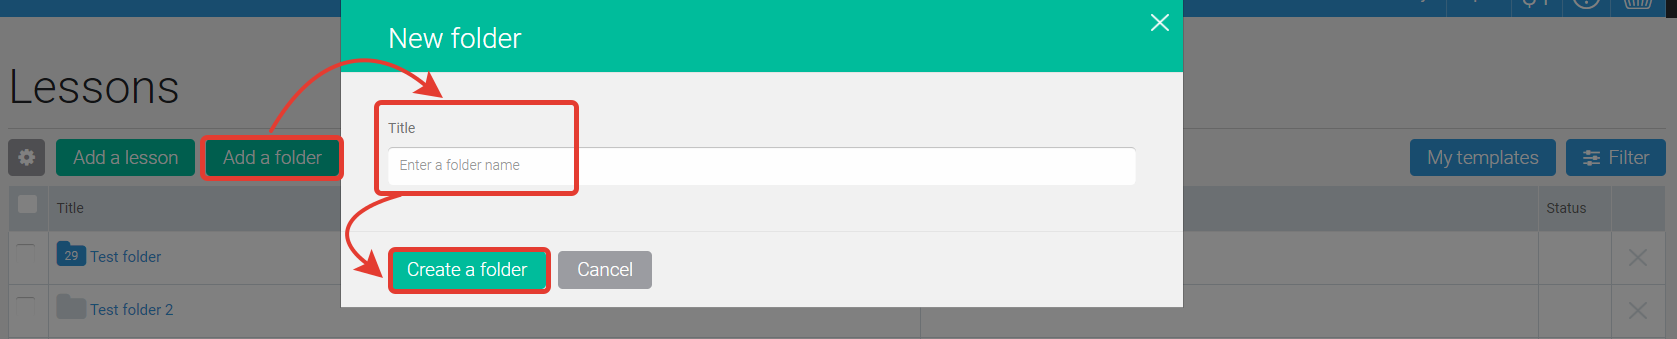
Click “Add a folder” button, this opens a modal window where you should enter the name of the folder and then click “Create a folder”.
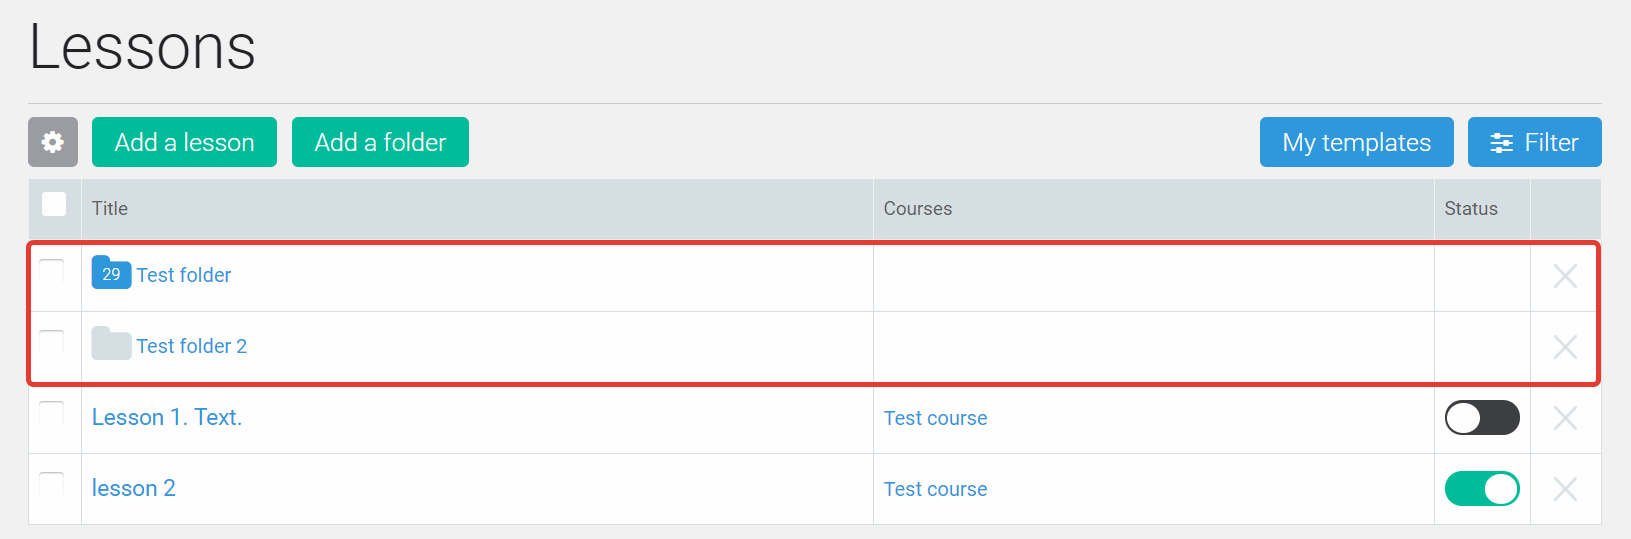
The created folders will be displayed in the main part of the Lessons page:
How to change the name of the folder?
- to enter the folder, click its icon
- to eedit the folder, click its name
- folder with lessons
- folder without lessons
To edit the name of the folder, just click its name. A modal window will pop up, and you will be offered to enter a new name and click “Save” button.
Click the folder’s icon to enter it (left from the name). If the folder contains any lessons, it will be blue, while the number on the icon will display the number of the added lessons; if no lessons are added, the folder will be grey.
You can also create subfolders. To do this, enter the folder and click “Add a folder”.
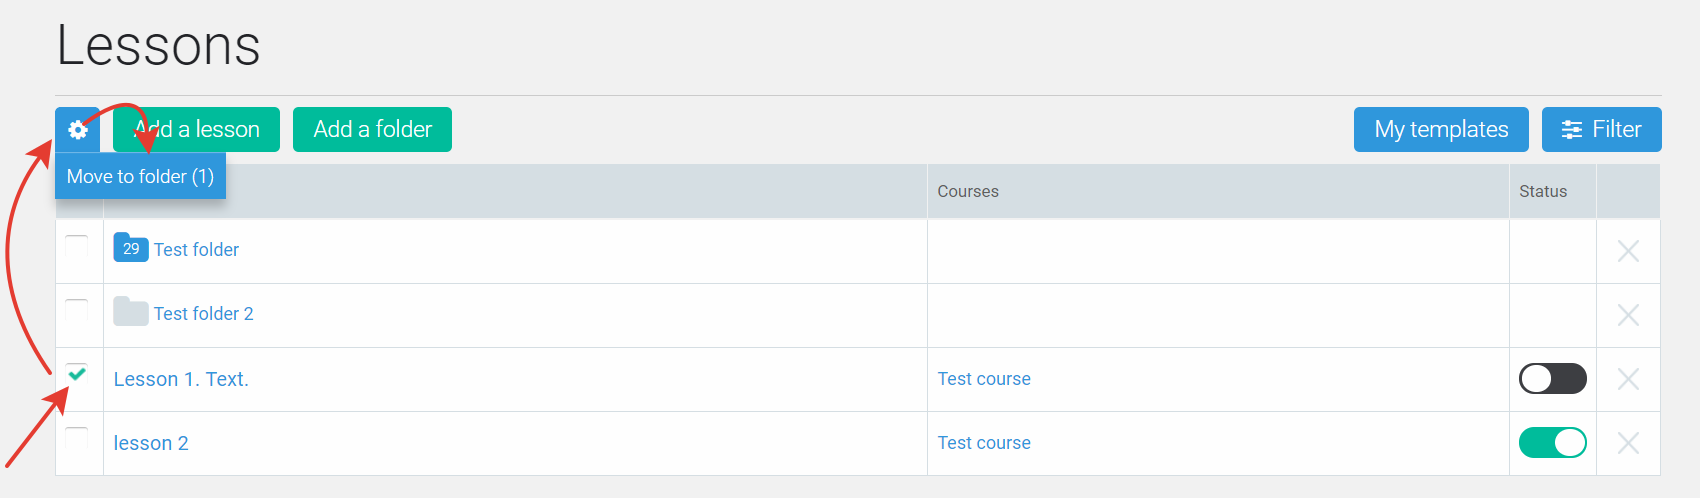
How to move a lesson into a folder?
If you want to move a lesson to a folder, check it and then click a cogwheel icon, and select ‘Move to folder” option.
 This will open a modal window which will display all folders created by you. To select the folder where to move a lesson to, click its name and then click To Move button.
Together with the move, you can create a new folder, to do this, click “Create a folder” button.
To place a lesson into a folder which is in the folder (a subfolder), click the folder icon in the modal window (not its name).
How and why to apply a filter?
The filter is designed to search through already created lessons. The Filter button is in the upper right area of the subsection.
Filtering (search) can be done by different criteria. You can apply all or some of them. The following options are available:
- by the name of the lesson — you can enter the full name of the lesson of its part in this field, and the filter will find the lessons with similar name (or its part);
- lesson search in a particular course or module (we will speak about these structures here) — check the required module or course so that the filter will display the lessons which match them.
- by the lesson status — there are three options: “All”, “Active”, “Inactive”. As a rule, these and the previous settings are used together with the search by the name. “All” — search through all lessons, “Inactive”— the disabled lessons only, while “Active” — through only enabled lessons.
Let us look at the example:
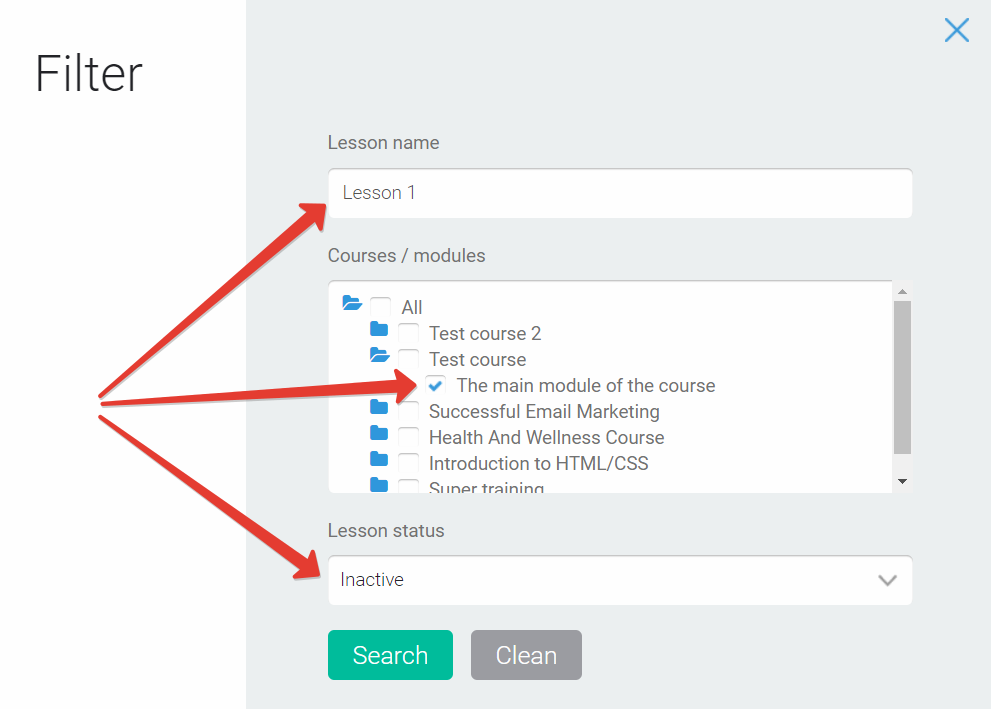
Under these settings the filter will look for the lesson which name contains “Leson 1”, will refer to the module “The main module of the course” and disabled right now. If there is a lesson which meets these criteria, it will be displayed. If it turns out there are several of them, several lessons will be displayed.
How to change the location of the modules and lessons?
The location of the modules, if necessary, can be changed by hooking the mouse with the “three points” sign to the left of the module name and dragging it to the right place in the course structure.
 In the same way you can change the order of lessons.
How to disable a lesson?
To disable a lesson, click the green slider indicating a lesson status.
How to delete a lesson/folder?
To delete a lesson/folder, click the cross in the line with the name of the lesson or folder. When the folders are deleted, all lessons inside the folders are deleted as well.
This will display a modal window where a user should confirm (or decline) his decision. Mind that the lessons for all your courses are taken from this section, and when you delete a lesson, you will delete it everywhere.
FAQ
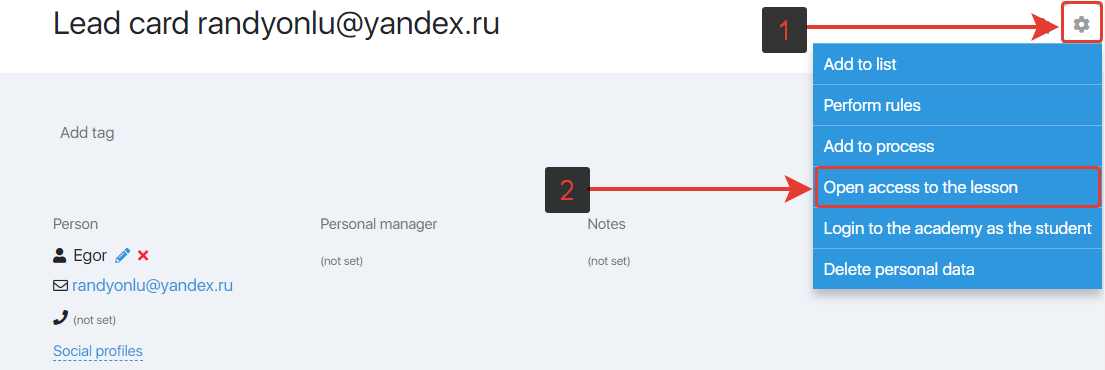
Go to the section “CRM” – “Leads” and use the filter by mail to find the required student. Click on his mail to open the contact card.
In the contact card, click on “Gear” and in the menu that opens, select “Open access to the lesson”.