Content
How to add (create) a lesson?
We have already described how to add a new lesson in this article.
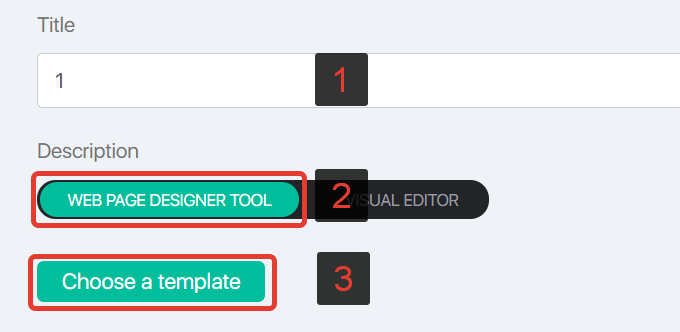
Then select a type of lesson editor — web page designer tool or visual editor. This article will look at Web Page Designer Tool to create new lessons. Therefore, enter the name of the lesson, leave the settings by default and click “Choose a template”:
How to create lessons with visual editor is described in this article.
Template Selection
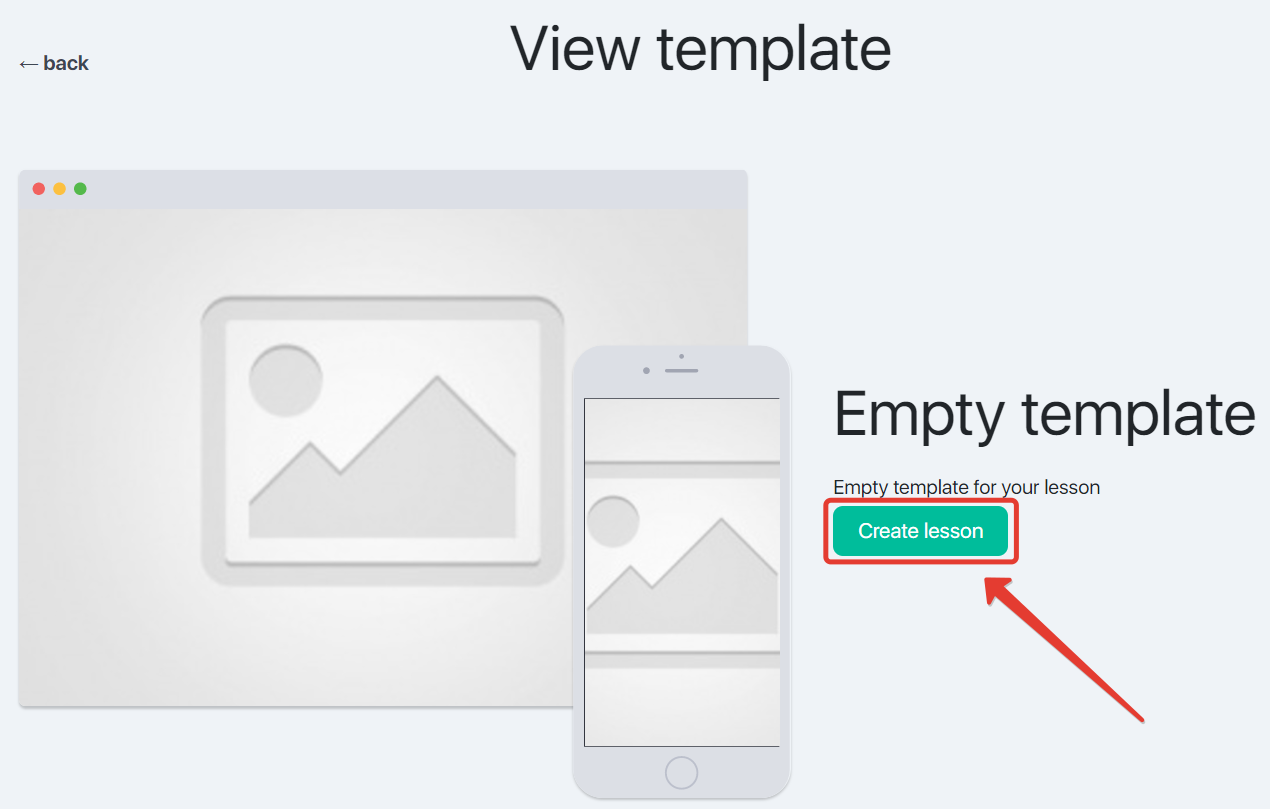
Select a template for your future lessons or create a new template from scratch. Look carefully through the templates to decide on the best one. Here you can also find previously created ones. Click “View” to preview a template:

The opened window will preview the template on a computer screen and mobile devices. If you select the right template, it’s time to create a lesson:
Page designer tool for lessons
- lesson page settings
- adding sections and widgets
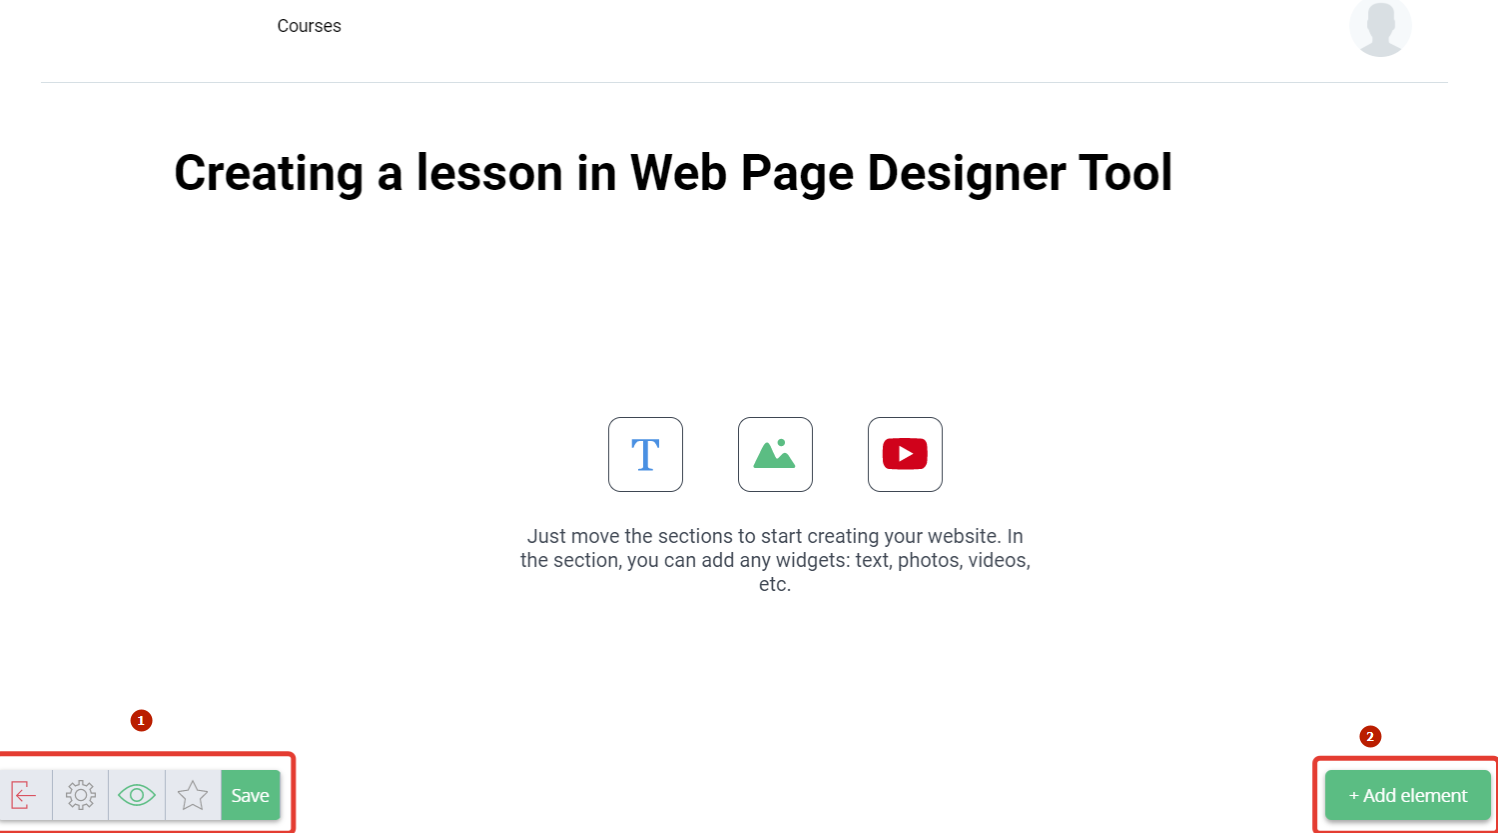
Lesson designer tool occupies all screen.
Control buttons are at the bottom of the screen:
- left — page settings;
- right — adding new elements.
Control buttons on the left:

- exit from designer tool
- lesson page settings
- lesson preview
- saving a lesson as a template
- saving changes in a lesson
To start creating a lesson, drag and drop the required section in the workspace and then add the relevant widgets to it.
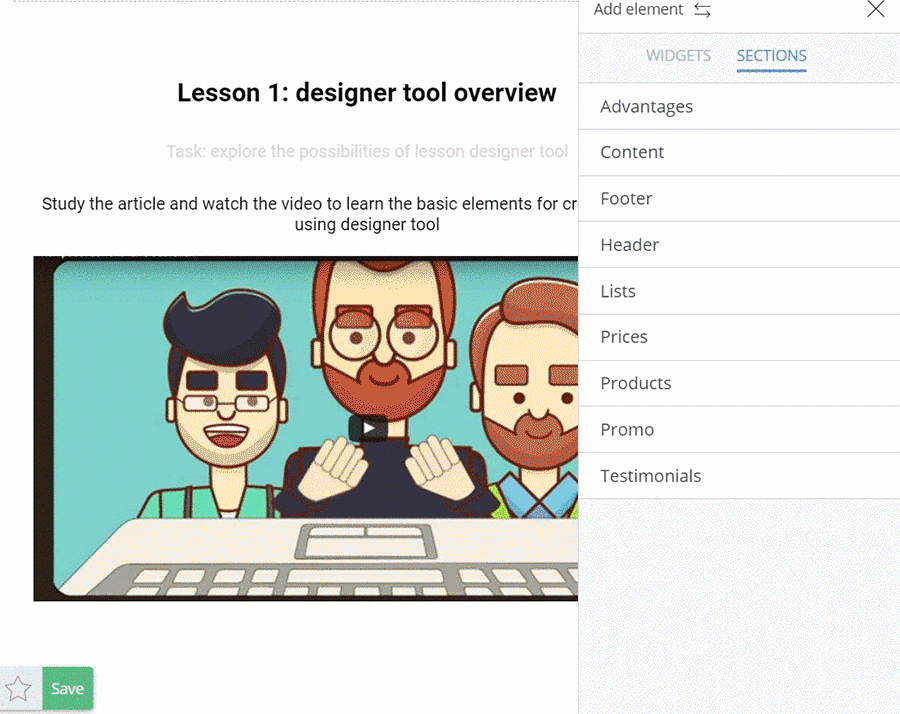
Collection of ready-to-use sections
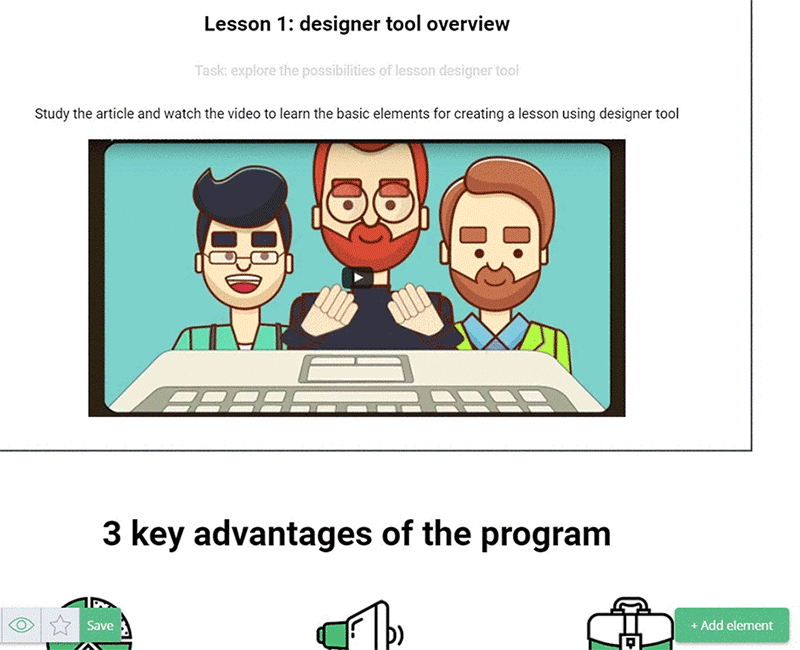
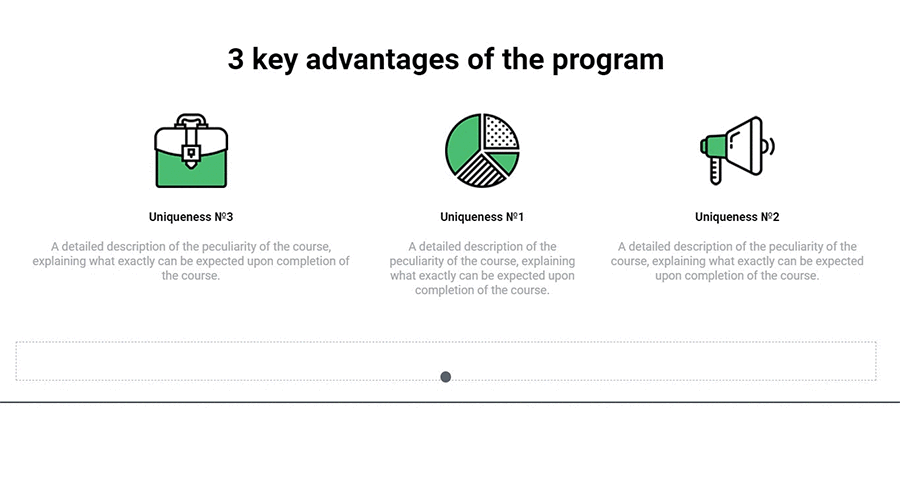
Large page blocks — sections —are divided into categories by the content: advantages, content, header, footer, products, etc. Ready-to-use sections can speed up the process of creating the lessons. Click “Add element” below to the right to select and to add the sections on the page.
You can also add your own partition templates to a collection of finished partitions.
To save the section as a template, move the mouse over the upper-right corner of the section and click the star icon.

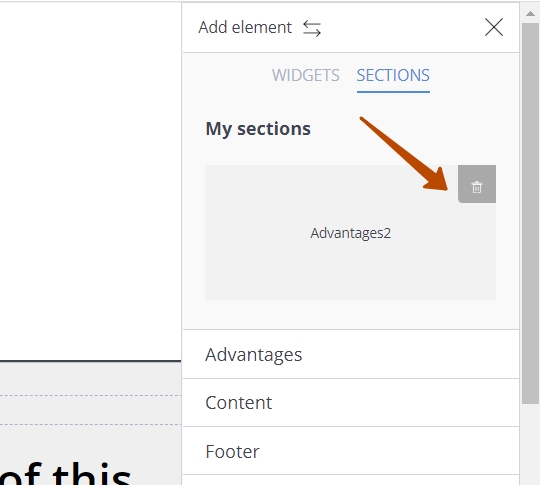
To delete a partition template, go to the My Partitions category in collection and click the recycle bin icon on the partition template you want to delete.
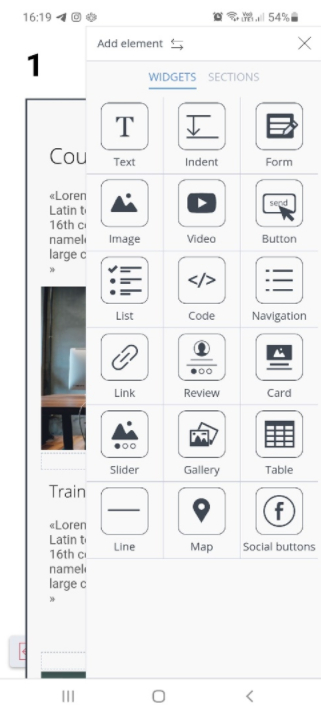
How to add new widgets
To add widgets on the page, select and post a section (by left clicking the mouse). Click “Add element”. A panel will pop up on the right, select a tab “WIDGETS”, click the required element and drag and drop it to the section where you wish it to be.
Element insertion place is blue coloured.
How to drag and drop elements
To move a section or a widget, click a block heading. Hold the left button of the mouse over an element and drag and drop it to the required place. You can select an insertion place before placing an element in the chosen place. Follow the same procedure for the blocks in one row. Just drag the line between them. This procedure is frequently used to place a text near an image, however, it is available for any blocks:
 Widgets can be moved inside a section and between the sections. When you drag a widget from one section to the other, it becomes the first in a new section. Once you drag a widget to a new section, select this section (by left clicking the mouse) and drag a widget to the required place inside the section.
How to change the element design
Click the required element — you will see its settings in the right panel. Each widget has ready-to-use styles which can save your time. You can add CSS classes to the block in html/css tab.

Web page designer tool will save your time and create useful lessons for your students.
Working in the mobile version of the lesson builder
Sometimes it may be necessary to edit a lesson with only a mobile device at hand.
In the lesson designer, you can add, delete sections and widgets, make changes to the widget settings from mobile devices.
FAQ (frequently asked questions)
This error occurs, if your computer or browser has apps/plug-ins which run when a text is accessible for the browser. This behavior is typical for some translators, password managers. Disable all plug-ins in the browser or use another browser/gadget.
If this does not help, contact technical support team in on-line chat which is in the right bottom corner of your account.
Insert a code below with “code” widget and edit the code to your needs.
<details>
<summary>Title. If you need any spoiler to be open, add “open” attribute to “details” tag.</summary>
  <p>Spoiler content</p>
</details>
If you need any spoiler to be open, add “open” attribute to “details” tag.
<details open>
<summary>Title 1</summary>
<p>Spoiler content</p>
</details>
<details>
<summary>Title 2</summary>
<p>Spoiler content 2</p>
</details>
Here is a preview on the page: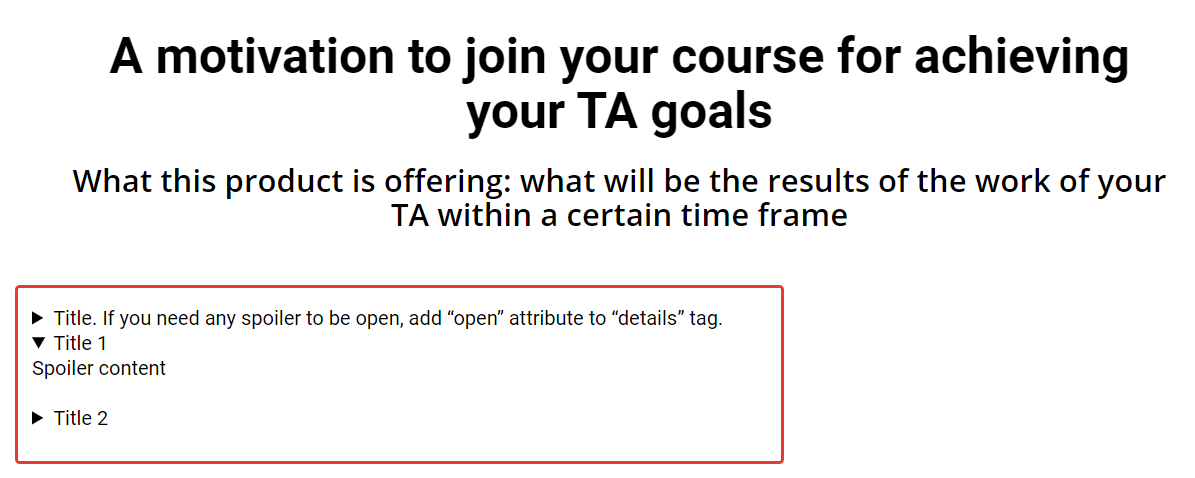
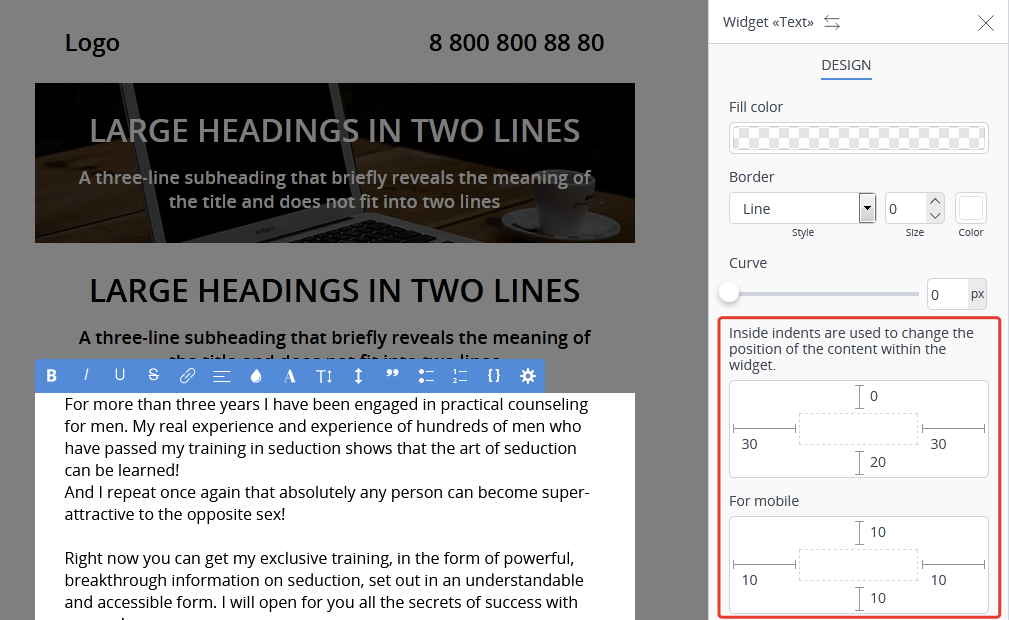
In the settings for the text widget, it is possible to set different indents for the desktop and mobile versions of the lesson separately.
Open the widget “text” settings and set the necessary indent values.
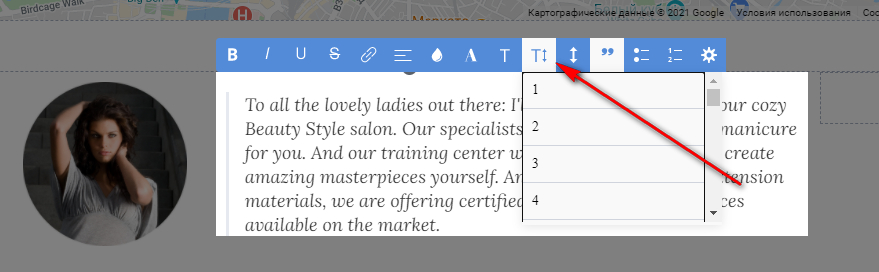
In the settings of the “text” widget it is possible to set a different font size.
Open the settings for the “text” widget and set the required values for the selected font.
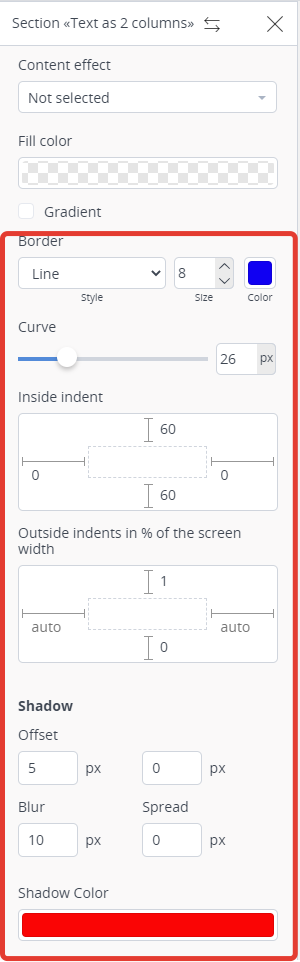
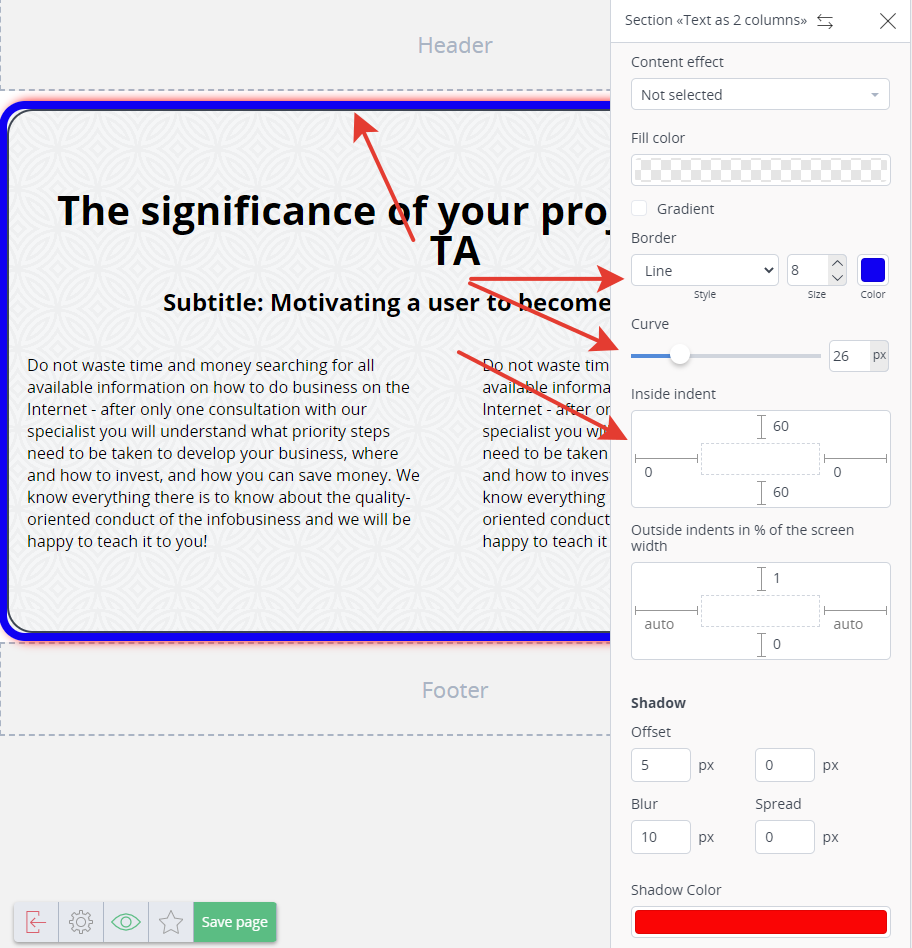
In the section settings it is possible to set different styles for the section outline (frame).
You can choose different types of Section Stroke, line thickness, line color, internal and external margins from the content, the presence of a shadow, its color and width.
Open the Section Settings and set the desired Section Stroke values.
We prepared a separate article on this topic.
In the settings of the widget “Button” in the item “Design settings” in the “Text” tab it is possible to enter additional text, which will be placed below the title block on the button, with the ability to set the height and color of the font. The top line text is edited directly on the button.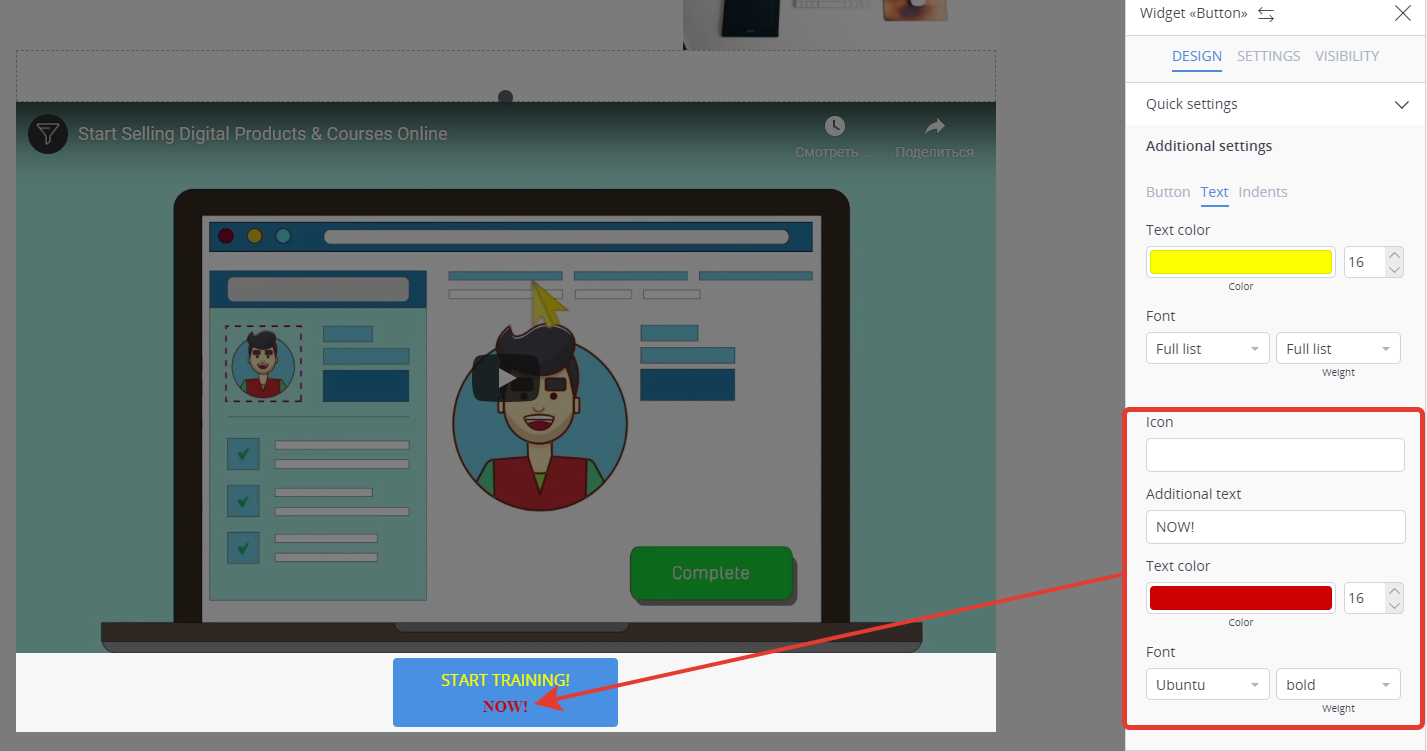
There is a similar function in the Form widget.
