Content
Why do we need the “Reports” subsection
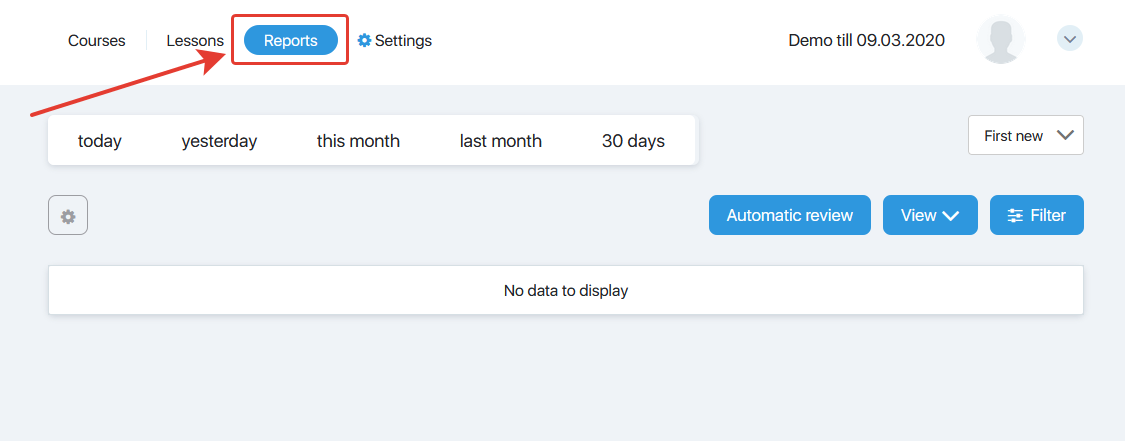
The Reports section is a tool in the Courses section, thanks to which the author can help students complete the course. The main advantage of this tool is that it is now possible to respond to feedback on all courses in one place, where the most useful functionality is collected for this. The Reports section can be opened by following the instructions in the screenshot below:
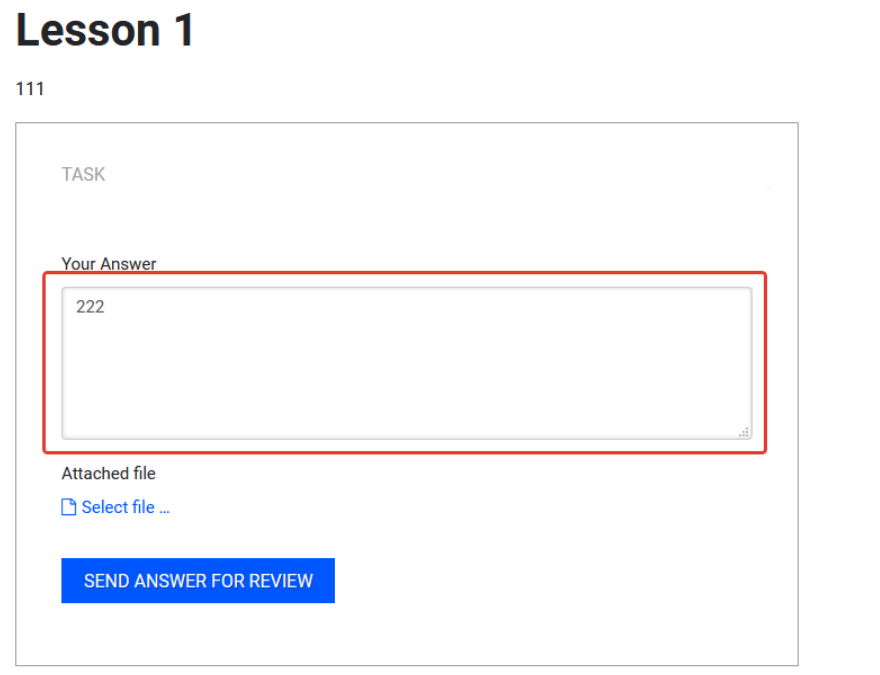
Here you will see reports on all courses that students (subscribers and clients who take your courses) will leave in the tasks of your courses (through the form in the lesson, as shown below). The report will fall into the “Courses” section:
Subpart Characteristic
The main indicators and tools that are used when working with reports are displayed in the screenshot below:
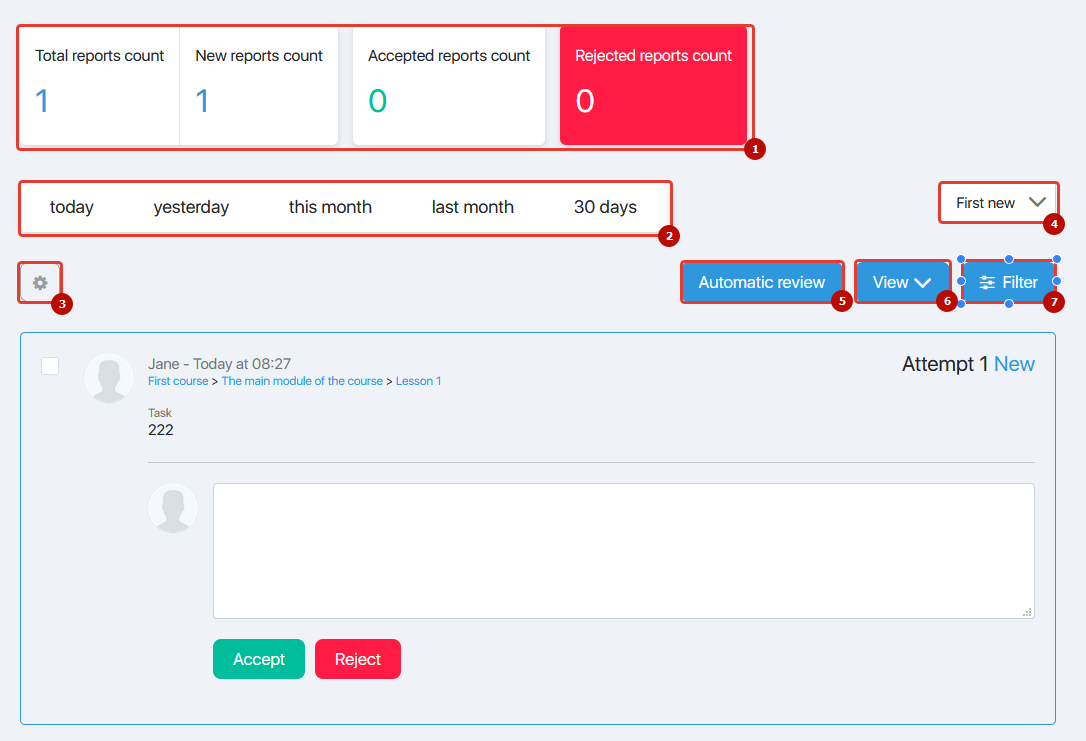
Field 1 – the number of reports in different statuses. The first value is the number of reports in all statuses. New – this is the number of reports to which you have not yet answered. Accepted – how many reports accepted and rejected – how many you rejected. All 4 values are displayed for the period selected in field 2 or in field 5 “Filter”.
Field 2 – the period for which reports are displayed.
Field 3 “Gear” is an add-on that allows you to perform bulk operations on reports. There are 3 possible actions for all the reports marked with a tick: accept, reject (in assignments with mandatory verification of the report this action will not miss the student to the next lesson until you accept his new report or change the status of the current one) and delete (the report will be deleted without accepting or deviations).
Field 4 is a simple tool for filtering reports by time: if you select “first new”, first reports written later than others (right up to “just”) will be displayed, if you select “first old” – reports that were written earlier.
Field 5 “Automatic review” allows you to add and configure rules that will allow you to automatically accept student reports.
Field 6 “View” – allows you to enable or disable the description of the task for which the report is left. Click on “View” and check the box “task text” to activate this option.
Field 7 “Filter” – allows you to search for individual student reports by the specified parameters.
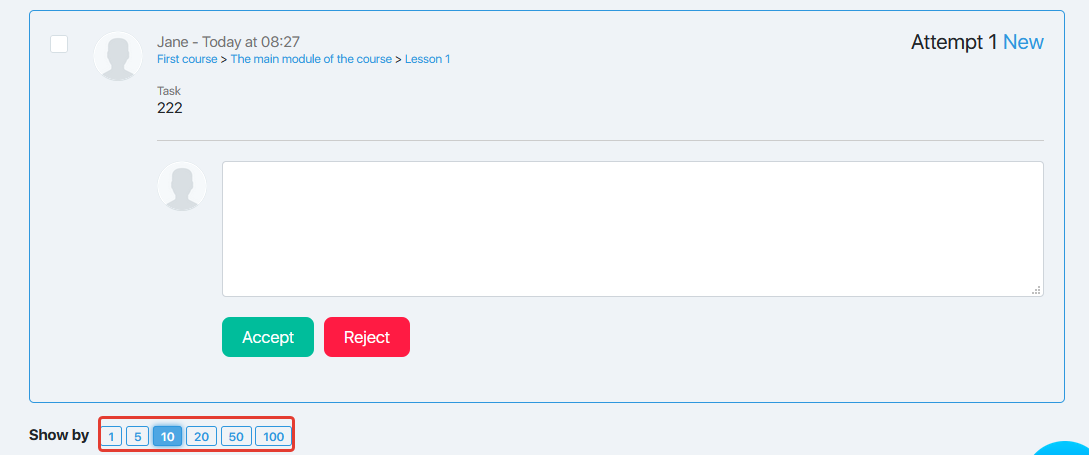
At the bottom of the page there is a paginator. With it, you can set how many reports on one page you want to show. It is located under the reports, above the basement of the page:
Work with reports
Working with a report is not only their acceptance or rejection, but also the opportunity to help the student achieve their goals. To work with the report as efficiently as possible, we will examine each component of the tool:

Field 1 is the student avatar. Each student can add a picture (or photo) of the avatar in the settings of their student account.
Field 2 – report characteristic. Namely: name (in the example – Sergey), date and time of adding the report. Below them is the “bread crumbs” of the lesson to which the report is added (course – module – lesson to which the report is added).
Field 3 is an attempt to add a report to the task. If you reject the report and the student writes a new report – there will be an attempt “2”, then “3” and so on.
Field 4 – the current status of the report, by clicking on it, you can change the status to a new one, accepted, rejected or delete the report altogether.
Field 5 is the task text. It will be shown if you have turned on its display in the “View” button.
Field 6 – the text of the report itself. What the student tells you after completing the lesson.
Field 7 is your avatar.
Field 8 is the text of your response to the report. After writing the answer, you need to either accept the report below or reject it (so that the answer is sent to the student).
Filter
The “Filter” field allows you to precisely search for the desired reports. For a description of how best to use the filter, see the screenshot below:
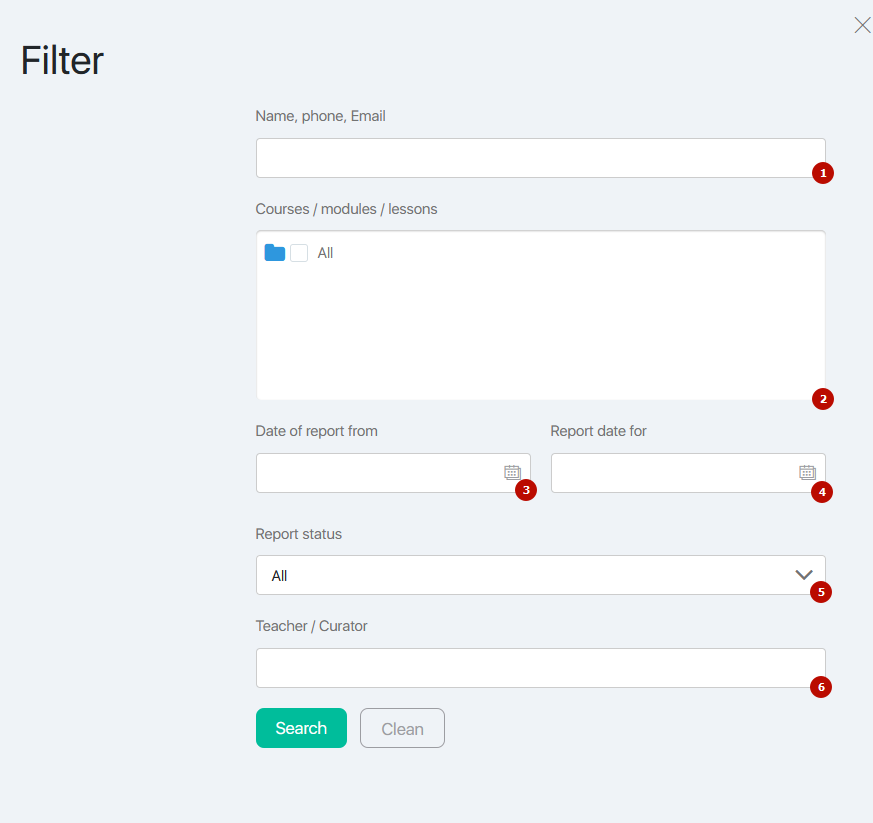
Field 1 is the student’s contact information. Usually the best thing is to add student mail.
Field 2 – it is necessary to tick off the desired course, the reports of which need to be filtered.
Field 3 and 4 are the estimated dates between which the necessary reports are added.
Field 5 – statuses of reports that need to be found.
Field 6 is the teacher or curator who works with the course.
Reply to Report
The report will use the first name, last name and photo set in the user’s profile. After the response to the report has been added, it will be sent to the client by mail and added in the lesson under the client report:
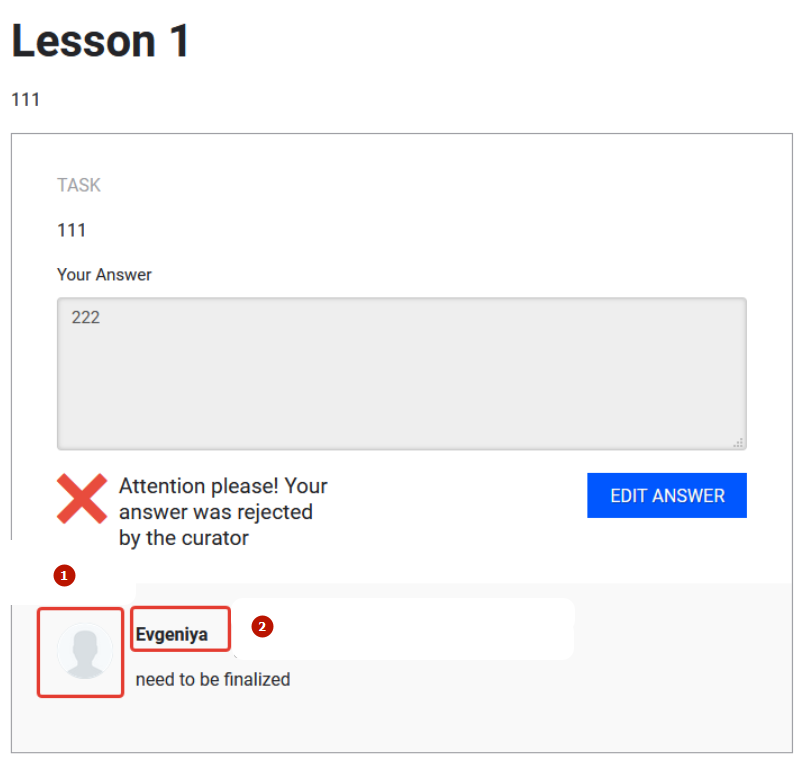
- photo
- first and last name
In the screenshot – an example of a response to a report sent by clicking on the “Reject” button.
In this case, the student must edit the report and resend it. You will receive a new report from the student:
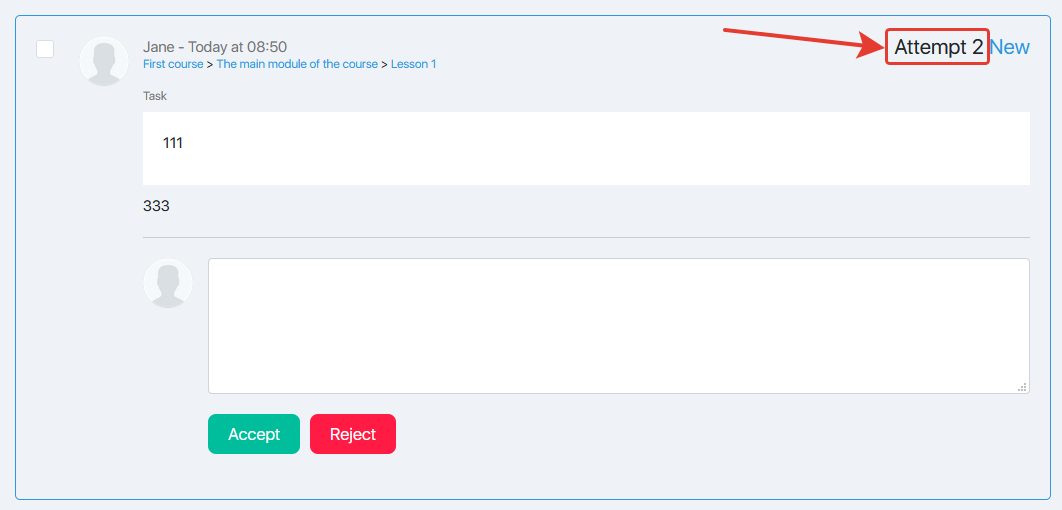
In such a report there will be a note that this is an attempt of “2”. Attempts, of course, can be any number.
