Content
- 1 The main page of Courses subsection
- 2 How to create (add) a new course
- 3 “Tariffs” tab
- 4 “Notices for students” tab
- 5 “Reports” tab
- 6 FAQ
The main page of Courses subsection
To start your work with the Courses, first look through the main settings of the page to create a course.
By opening Courses — Courses, we get right to the main page, where you can add new courses, edit created courses, search the courses by filter, copy the link to the required course in one click, and to move to the catalogue of already created courses. But let’s start from the very beginning.
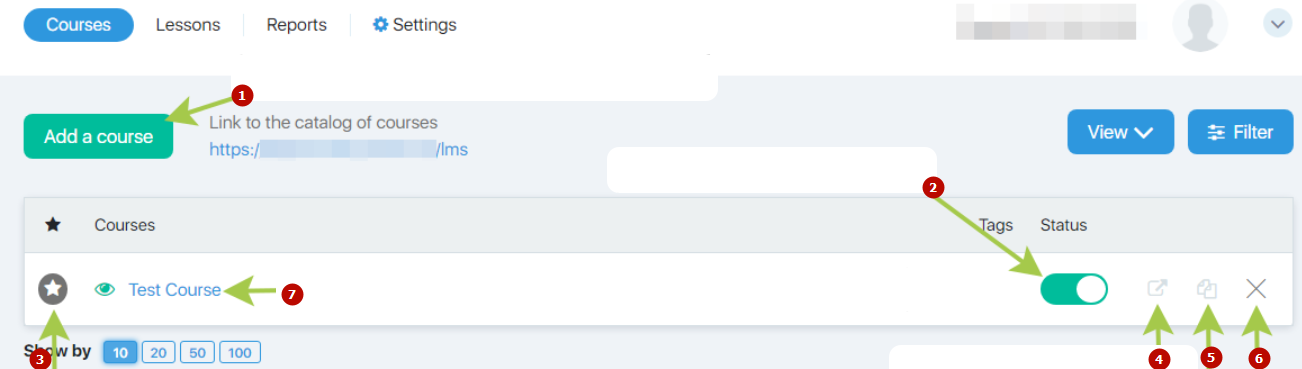
- this button creates/adds a new course
- enable/disable a course
- add to favourites
- copy the course link
- copy the course structure (create a course based on the previous one)
- delete a course
- clicking the name of course opens the settings page
The screenshot displays the numbered tools. The figures in the list match the number on the screenshot.
- A new course is added by “Add a Course” button. Click it and enter the name and description of the course, save it. You will be redirected to the page with the course settings.
- The slider in “Status” column could enable and disable the course. When the slider is green, the course is enabled, but when it is grey, it is disabled.
- Click the name of the chosen course to move there. The green eye icon to the left of the course’s name will forward you to the course page.
- To copy the link to the required course (for example, to send it to the clients), click the icon which is to the right from the slider.
- To copy the existed course, click the icon with two paper turned-down corner sheets.
In this case all course settings and parameters (including the structure of the course, except for the students’ reports) will be copied to a new course. Click the button and give a new name for a copied course.
This feature helps you create new threads of course by a couple of clicks.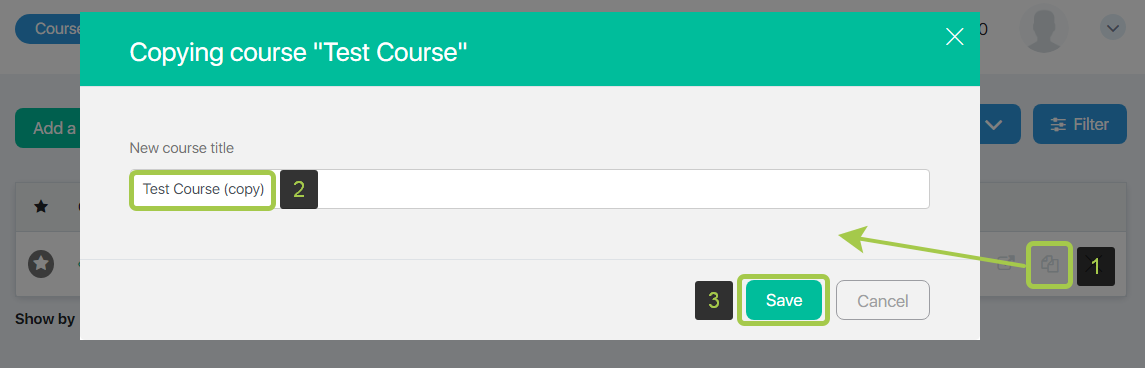 Note that:
1. The status of the copied new course will be disabled by default!
2. The lessons in the copied course ARE NOT duplicated. These are the same lessons, that is when editing a lesson in the copied course, the original lessons will be changed as well (the reverse situation is also true). - Clicking the cross will delete the course.
- Clicking the star icon will mark the course as a favourite one. This setting will affect the course display in your personal Account and in Students’ Accounts. They will be displayed at the top on the list, while for students this course will occupy two cells instead of one on the page with the accessible courses.
See the example: 1. the cource is selected as a favourite one 2. not favourite cources will be displayed in the blocks together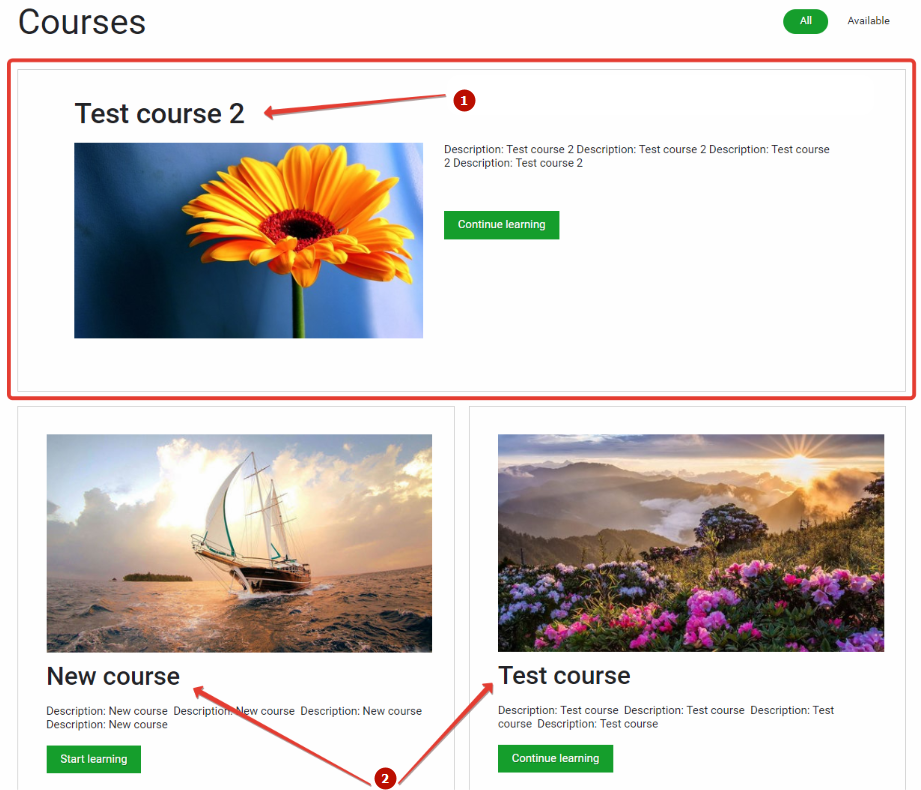
“View” and “Filter” button will be displayed in the right upper corner on the main page of the subsection.

- clicking the View button opens the menu where you can enable the report statistics display
- clicking the Filter button opens the modal window where the course could be search for by defined pharameters
Click “View” button. Here you can select the Report statistics and the Quick Filter bars in the settings.
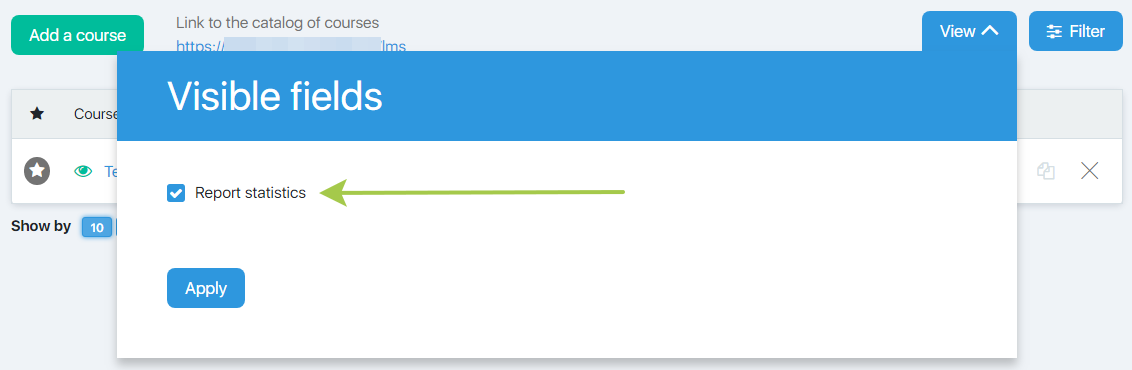
If this option is checked, then you can see the report statistics. The statistics will be displayed in the table:
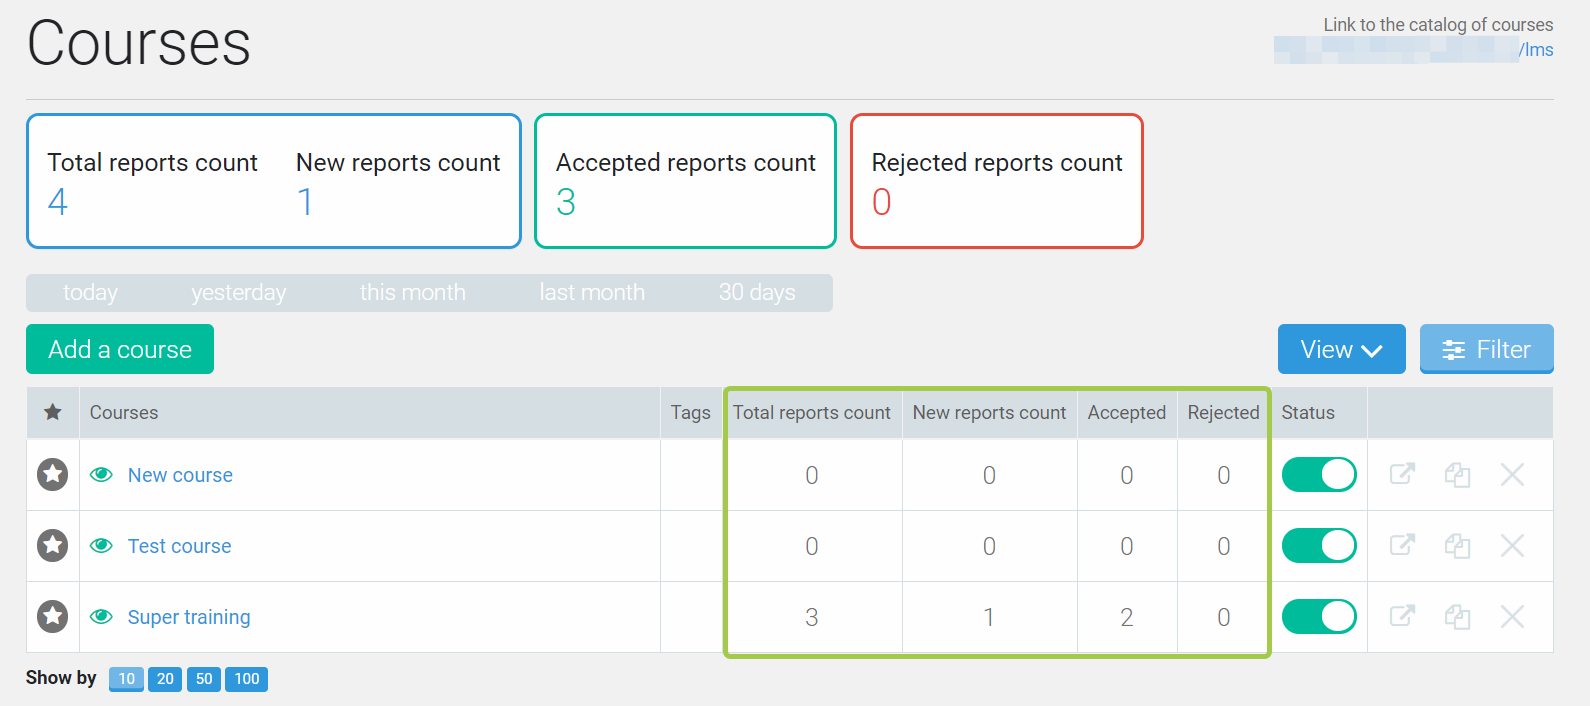
Then we can see if there are new reports and could check them very quickly by clicking the number of the course we are interested in.
Also the quick filter bar will be displayed above To Add button. You can filter the reports by one of the options in the quick filter bar (today, yesterday, this month, last month, 30 days).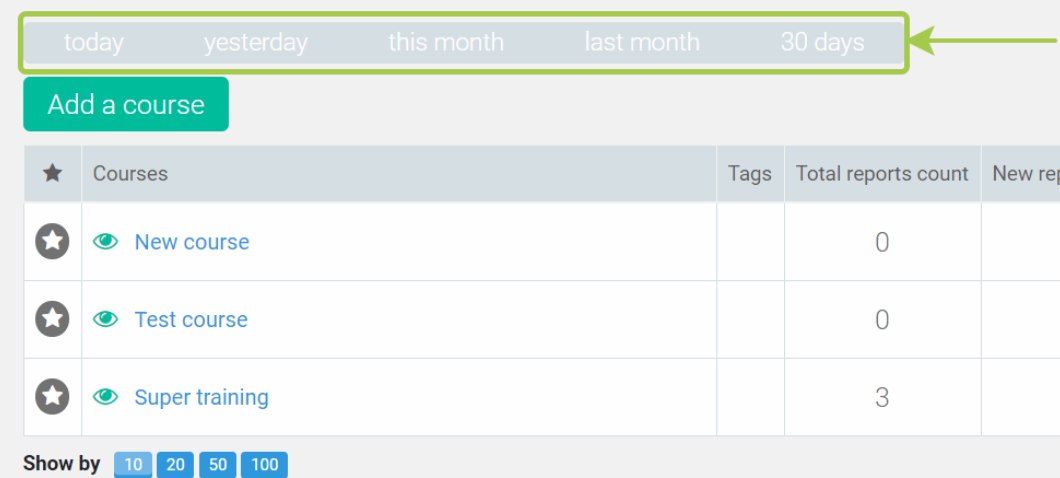
Click the “Filter” button. This will open the modal window with a convenient search by courses.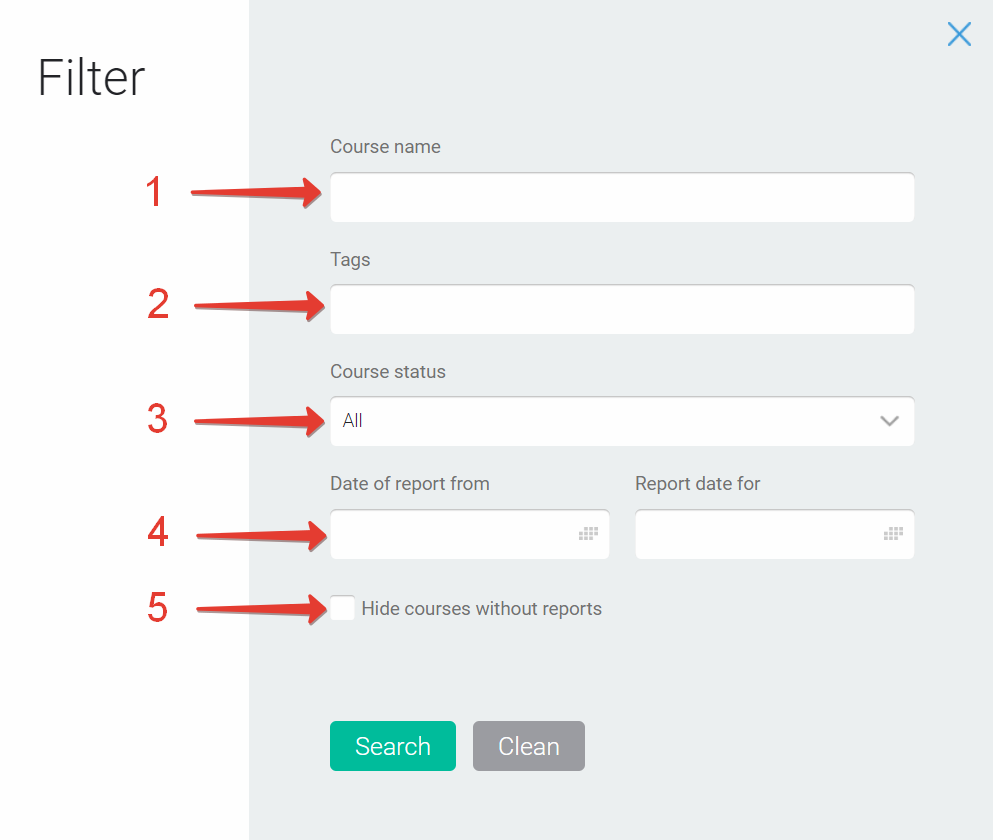
Search could be done by:
- Name.
- Tags.
- Course status (enabled/disabled).
- Date of adding the report to the course.
- Also the courses without reports could be hidden by ticking the box. Then the courses with no generated reports will not be displayed.
You can also combine the filter settings and use them together and separately.
Links to a course catalogue
Here is one more parameter on the main page of the Course subsection — a link to the course catalogue which you have already created. Just click the link in the right upper corner of the settings page and you will be redirected to the course catalogue.
And now move to the most exciting part of this article – to the creation of a new course.
How to create (add) a new course
- Click “Add a Course” button.
- Enter its name and description on the opened page.

- Click the “Create and configure” button. This will forward you to the settings page of the created course.
The course settings page has several tabs, let’s look at them in detail:
“Course” tab
This tab displays the name and the description which you have entered when creating a course. You can change them later, if required.

You can also select the picture for the cover of the course. Just click “Select a file” link.
Please note that the name, the description and the picture of the course will be displayed in the main list of the courses (Course catalogue) by the link http://YOUR-LOGIN.justclick.io/lms (or http://YOUR-VALID-DOMAIN/lms), here: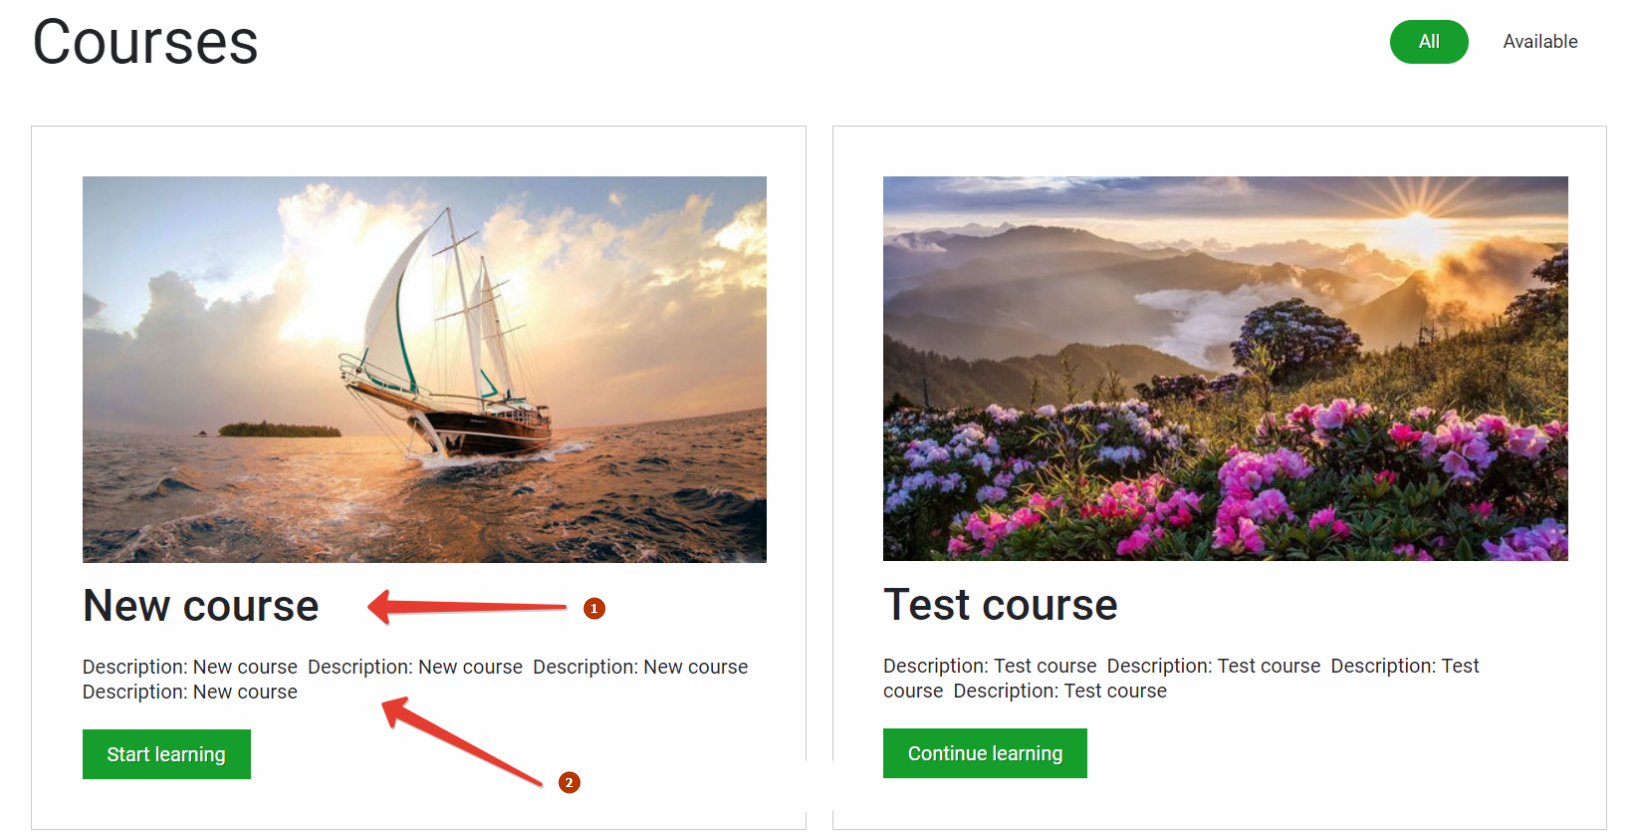
- course name
- course description
How to add a tag
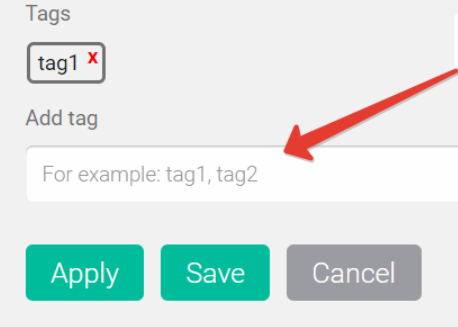 I believe you’ve already noticed that the “Course” tab has one more field “Tag”. Tags could be entered both in Latin and Cyrillic letters. A tag is added by pressing Enter key. Enter a tag in the field and then press Enter.
The tags are used to unite the courses similar by topic and to make the search by courses easier and simpler for your Students.
Tags are displayed in the Student’s account above the course list.
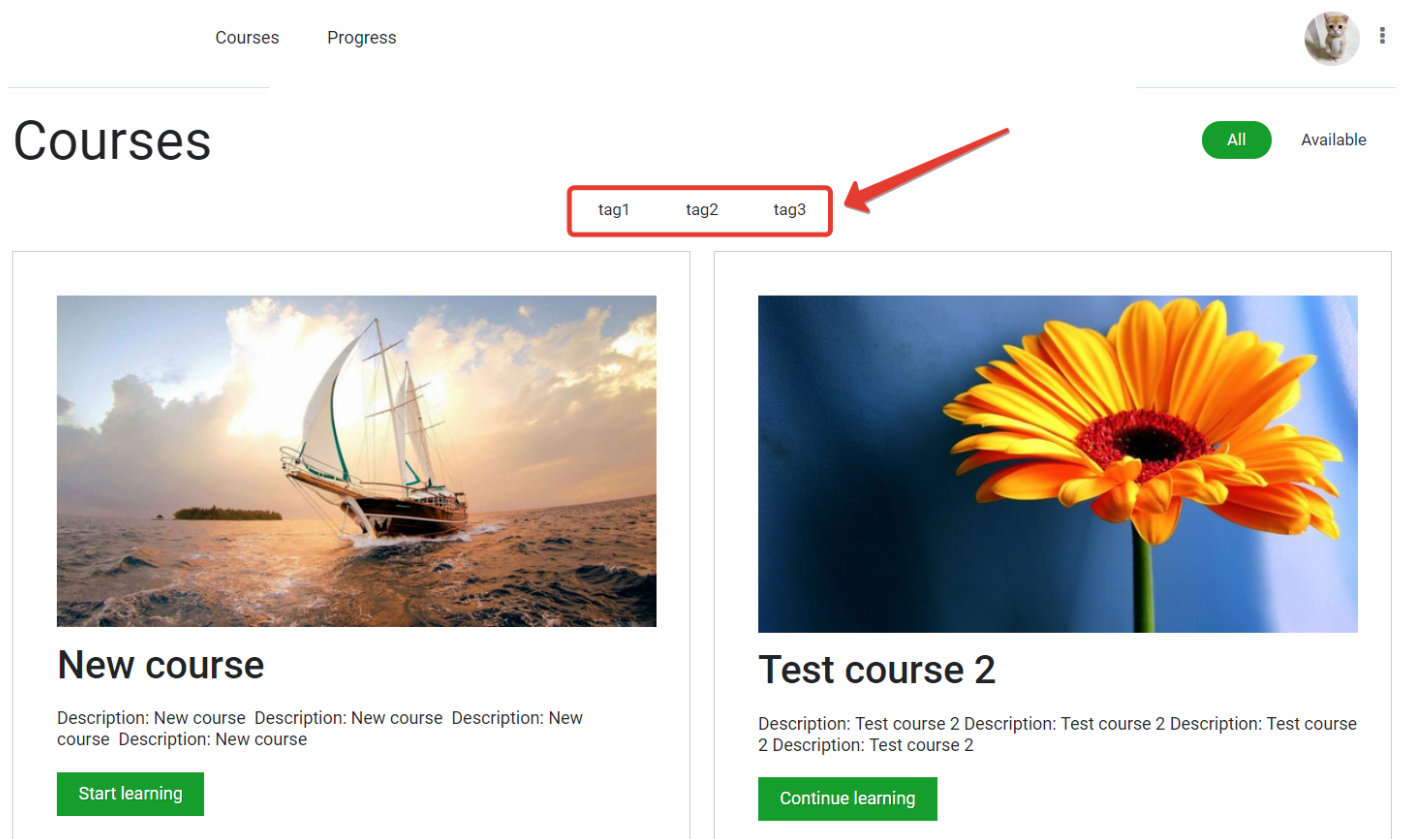
Clicking a tag displayed all courses matching this tag (which the tag is attached to).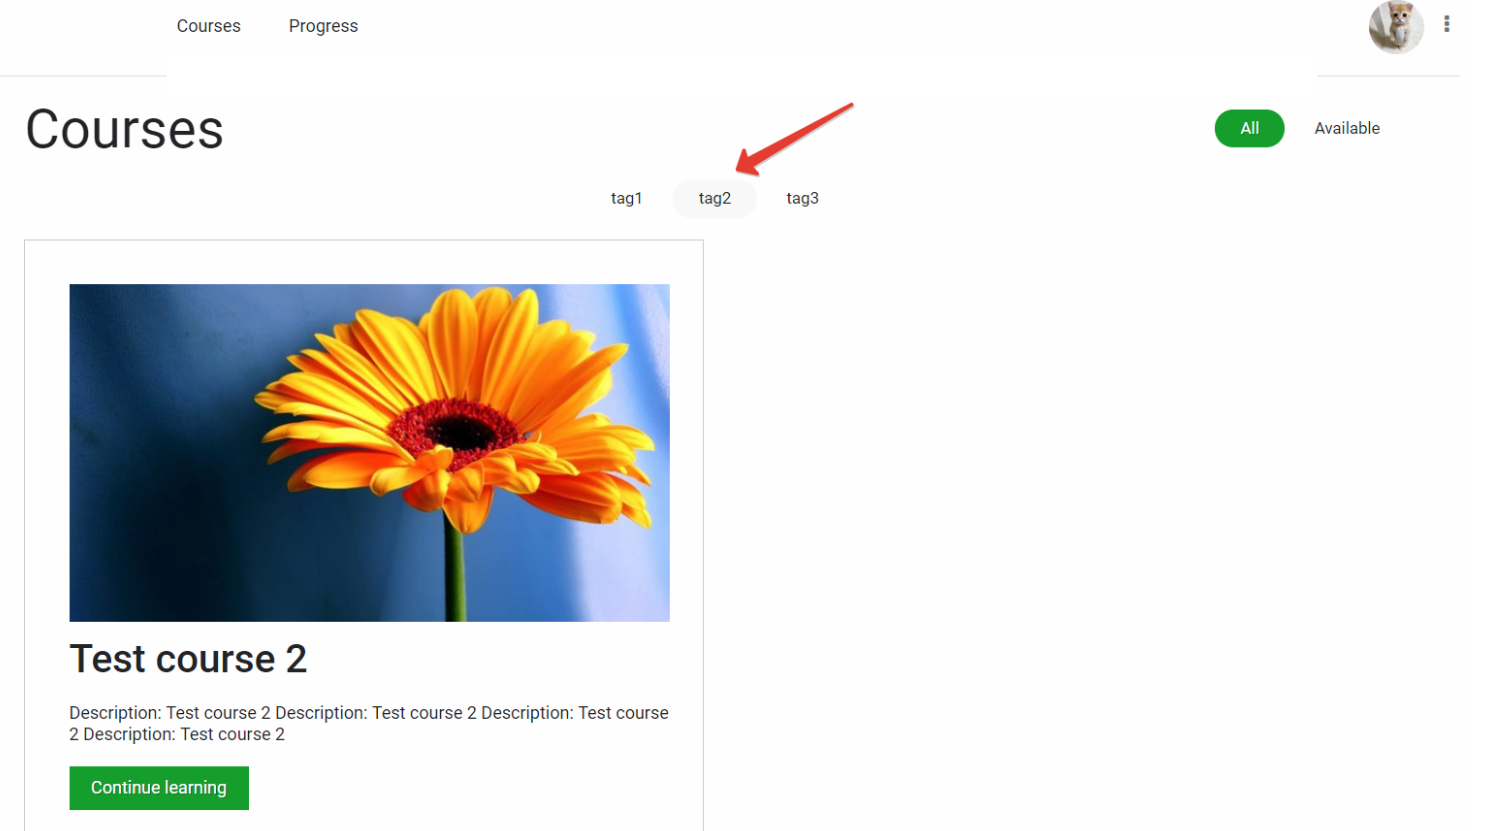
If you double click the tag, it will be called off, that is as if this tag had never been selected.
Moreover, one course could have several tags, although a Student could select only one tag at a time.
“Course Structure” tab
General features of “Course Structure” tab
Move to the next tab – “Course Structure”. Here you can select the required settings — 
- click the name to change the module name
- select an icon
- select the time/dates when and how long the module will be displayed
- module settings
- enable/disable a module
- delete a module
- add a lesson to the selected module
- add a new module
- add multiple lessons to the module
First, let us look at the general features in this tab, and then consider the options of adding and setting a new module, as well as adding lessons for it.
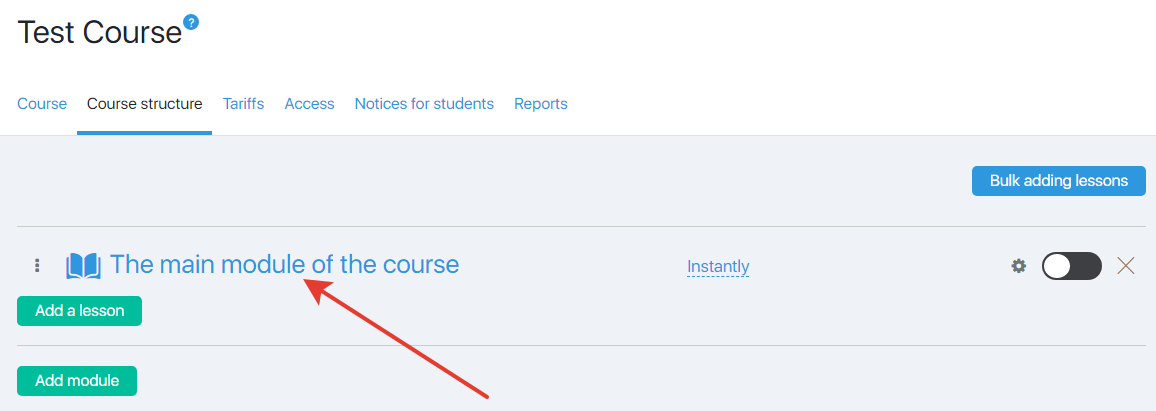
The numbers on the list match the number on the screenshot.
The course consists of one module by default (it is called “Main module of a course”).
- To change the name of the module, click its name – you can make changes in the pop-up window.
- You can select an icon for the course module which will be displayed in the Student’s account.
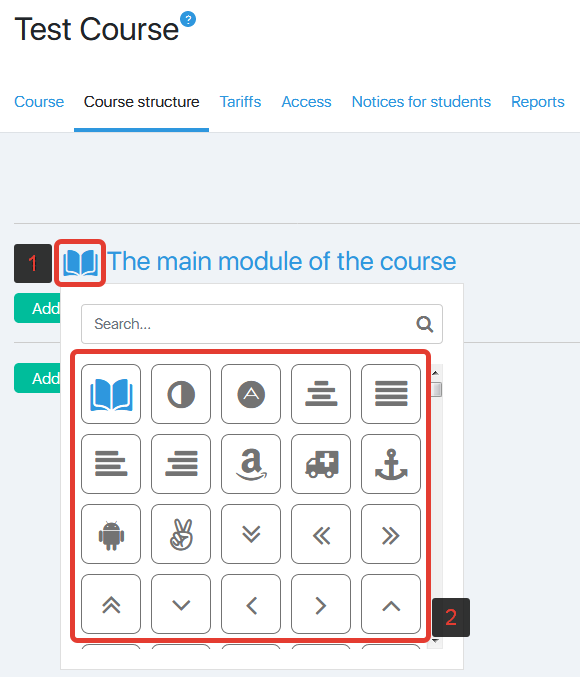 The icon will be displayed in the Student’s Profile in the left side panel.
 The Student could open it by clicking the green button.
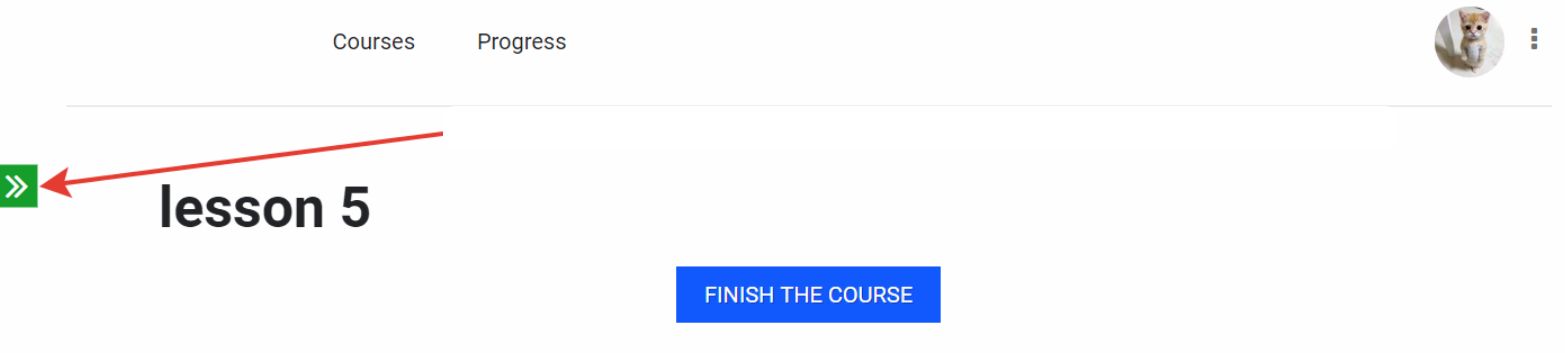
- The course module will be accessible by default, but you can select the accessibility of the module, for example:
а) in a particular time after the course completion and for a particular period;
б) in a particular time after the completion of the previous module and for a particular period;
в) the module could also be accessible only in particular dates.
The next section of this article will deal more with the settings of this function.
These settings are worth using only when you know the operating principle of this function.

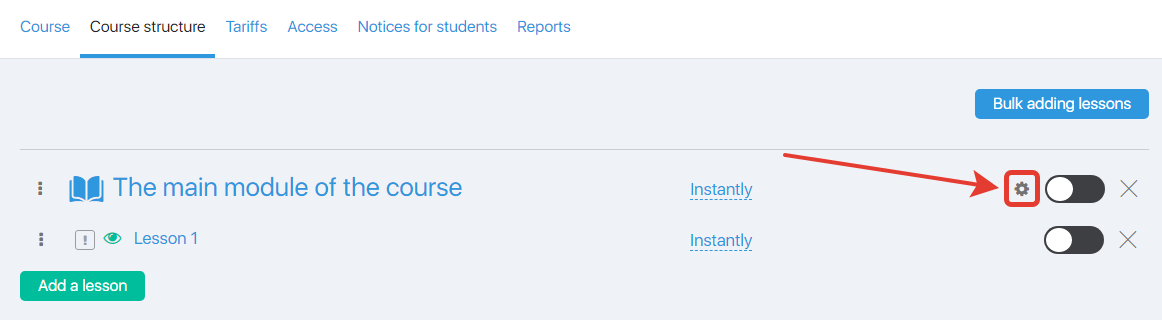
- Clicking the cogwheel will open the module settings (access). These settings could help you select the contacts which will be provided with the access to the course module.
 “How to add a module. Module settings” contains more information about the module settings.
These particular settings are for the module. There are main access settings for the Course, which are managed in Access tab. Don’t rush into applying these settings of accessibility for the lessons/modules/courses, we will write more about the typical combinations below and illustrate the ideas with the examples. - The course module could be enabled or disabled with a slider.
- The cross will delete the module.
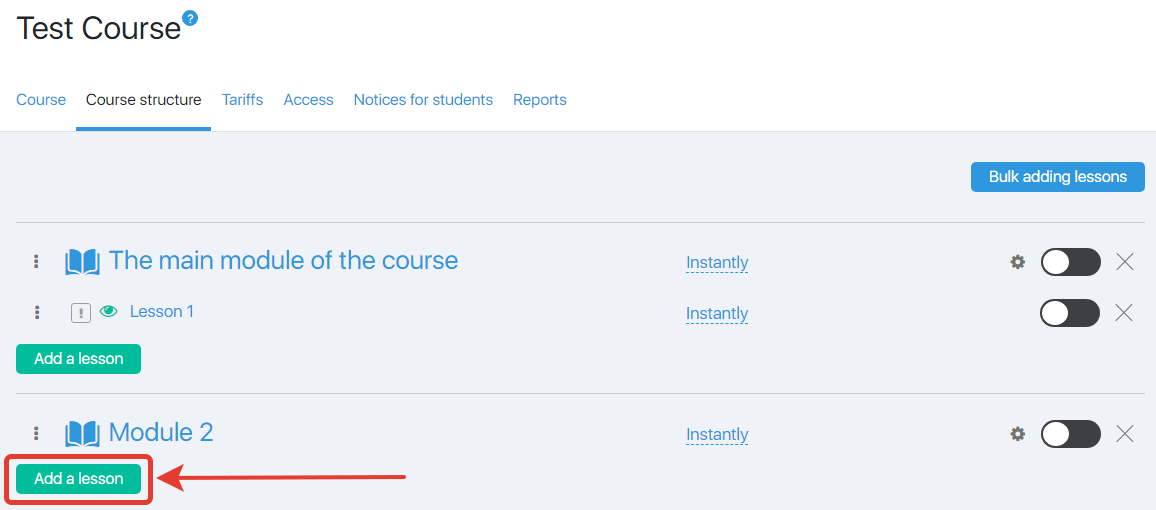
- “Add a Lesson” button will add a lesson for the chosen module.
- “Add a Module” button will add a new module.
- “Bulk add lessons” button will add add several lessons to the selected module at once.
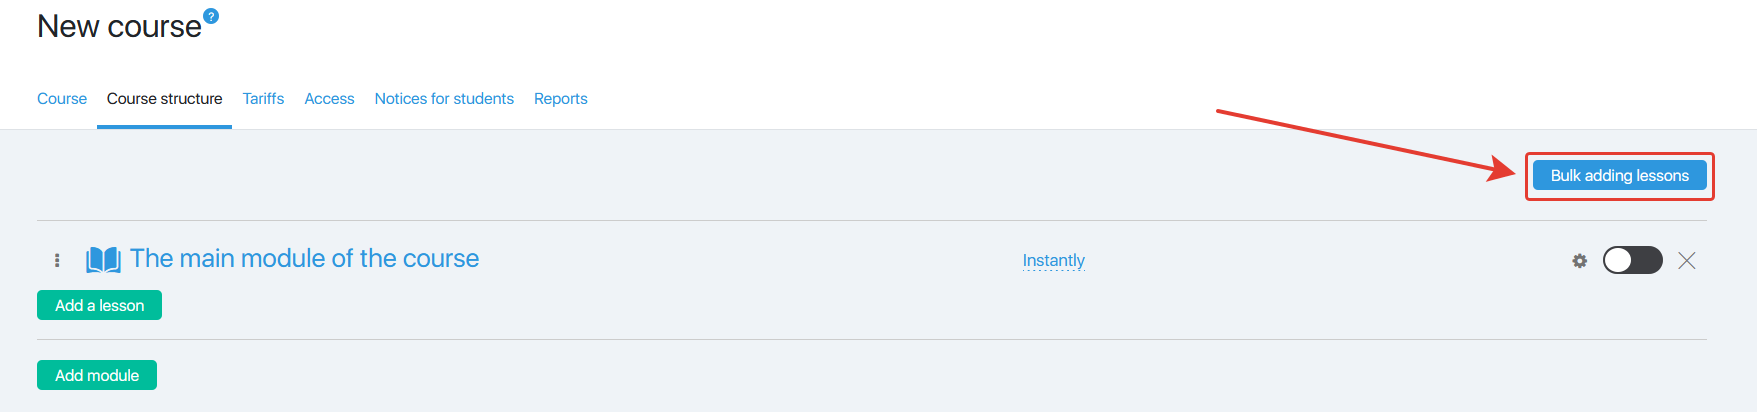
Let us dwell on this point in more detail.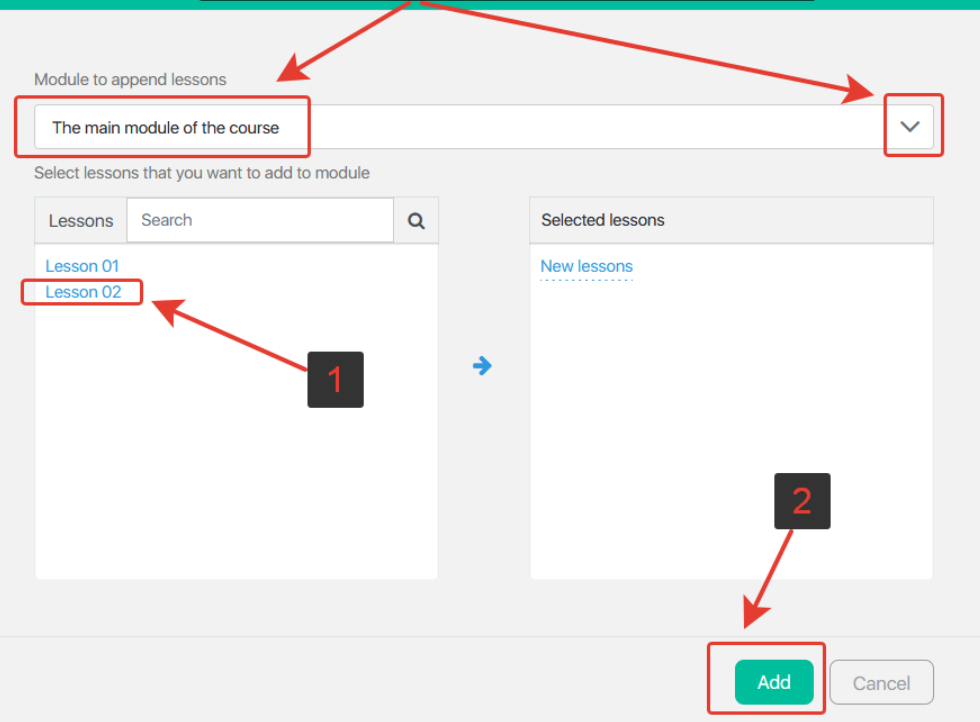 By clicking on the button, a popup window opens, in which you can:
9.1. Add specific lessons from the list to the end of the selected module (when you hover over a lesson, a “plus” appears near it to add).
9.2. By clicking on the “Add” button, exit to the “Course Structure” tab to add a new lesson.
How to add a module?
To add a new module, follow the steps below:
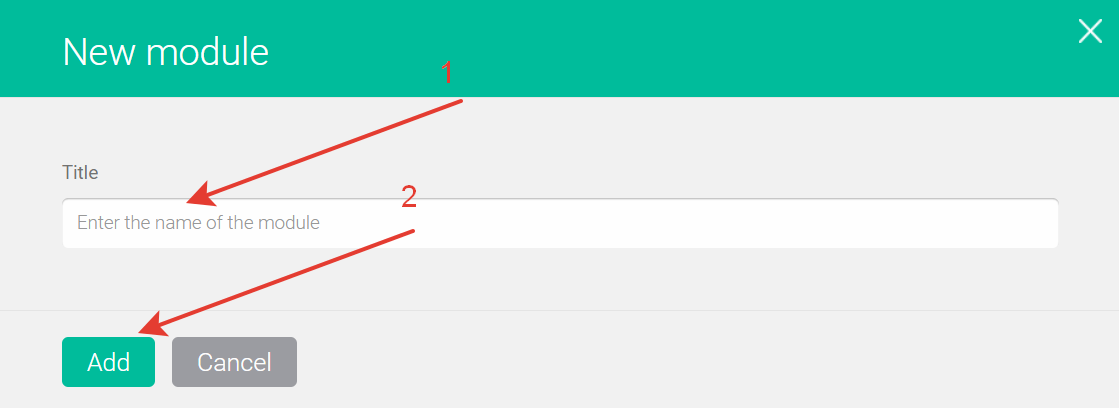
- Click “To Add a Module” button.

- Enter the name of the module in the pop-up window and click “Add” button.
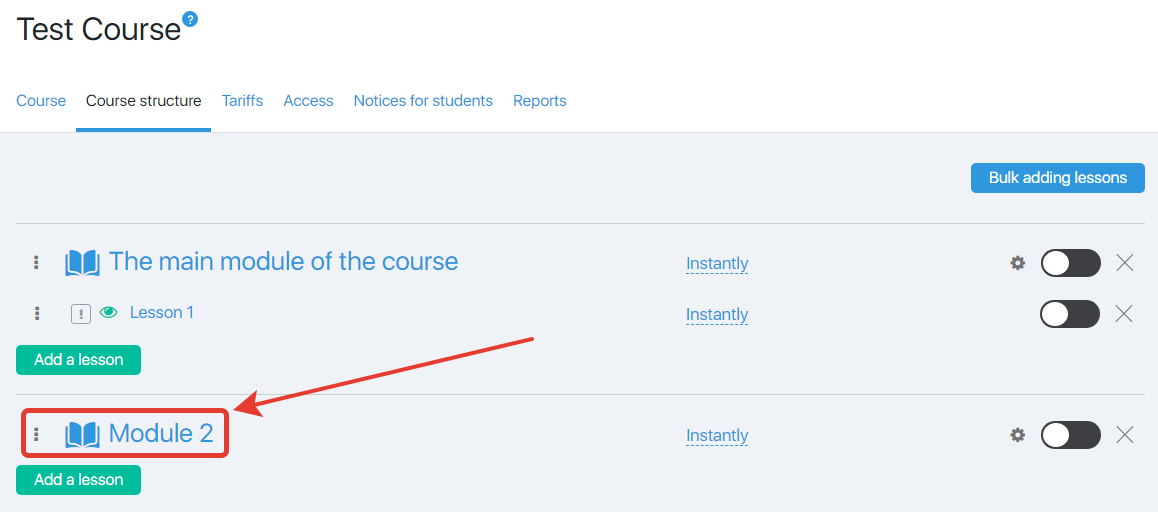
- Then the added module will be displayed in “Course Structure” tab.
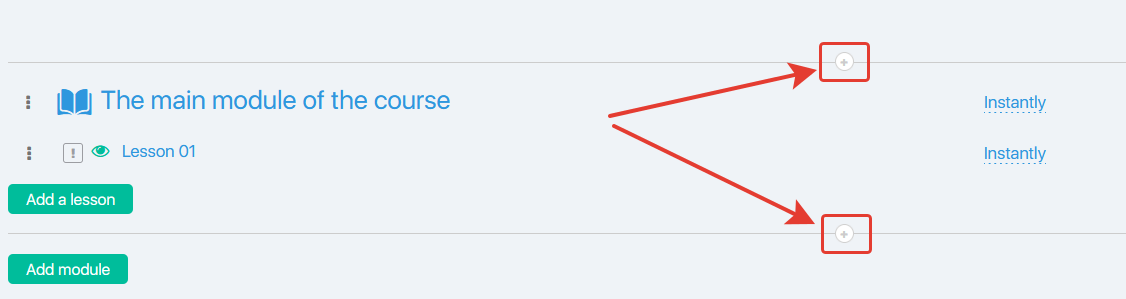
- You can also add a module if you hover over the borders of the module and click on the plus.
 By clicking the “New module” window will open.
 By clicking on the “Add” button, the popup window closes, a new module is added between those modules that shared the plus sign.
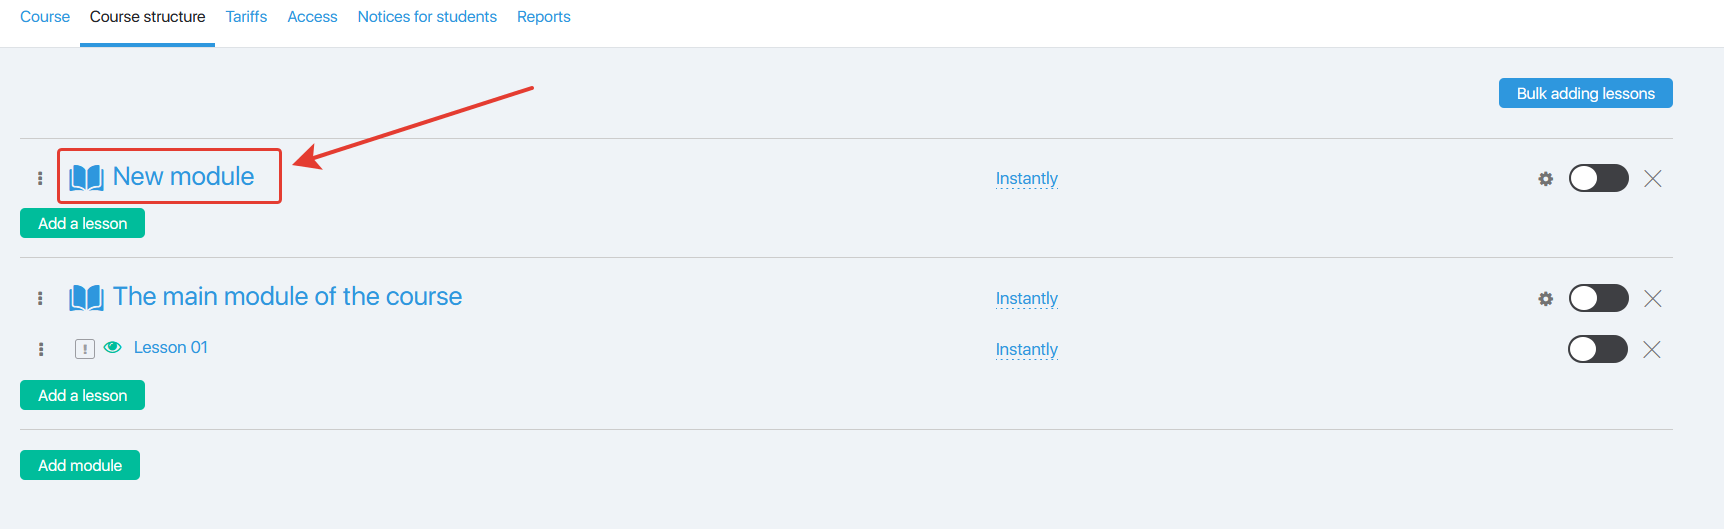
Module settings
To open the module settings, click the cogwheel of the icon opposite the module you need.
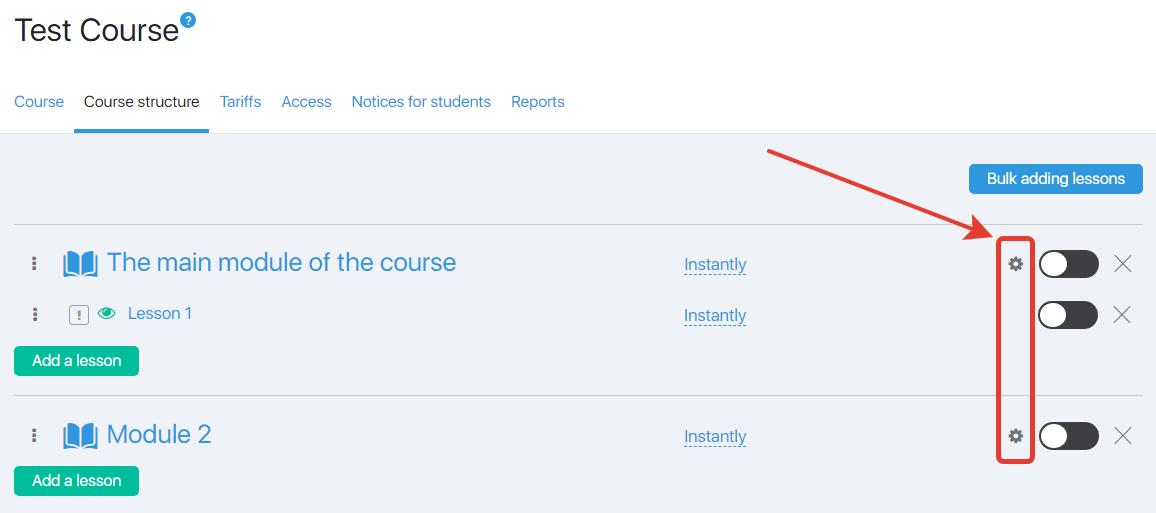
The window with the following settings will pop up.
Let’s look at 3 settings options:
- “Allowed to leads in lists” – here you can select the contact lists which will have an access to the module.
- “Not allowed to leads in lists” – here you can select the contact lists which will not have an access to the module (similar to the limitations in auto or instant mailouts: if a contact is in a list which does not have an access to the module, then it does not matter whether the contact is in a list with the access to this module).
- “When the module is not available to the lead, in the modal window, display the message” – you can enter the message in this field which will be displayed to the user (with no access to this module), if he clicks the module name in his Student’s account.
If the course is looked at by a contact from a list with no feature “Allowed to leads in lists”, this student will see this module locked and will not see the lessons inside the module in his Student’s account.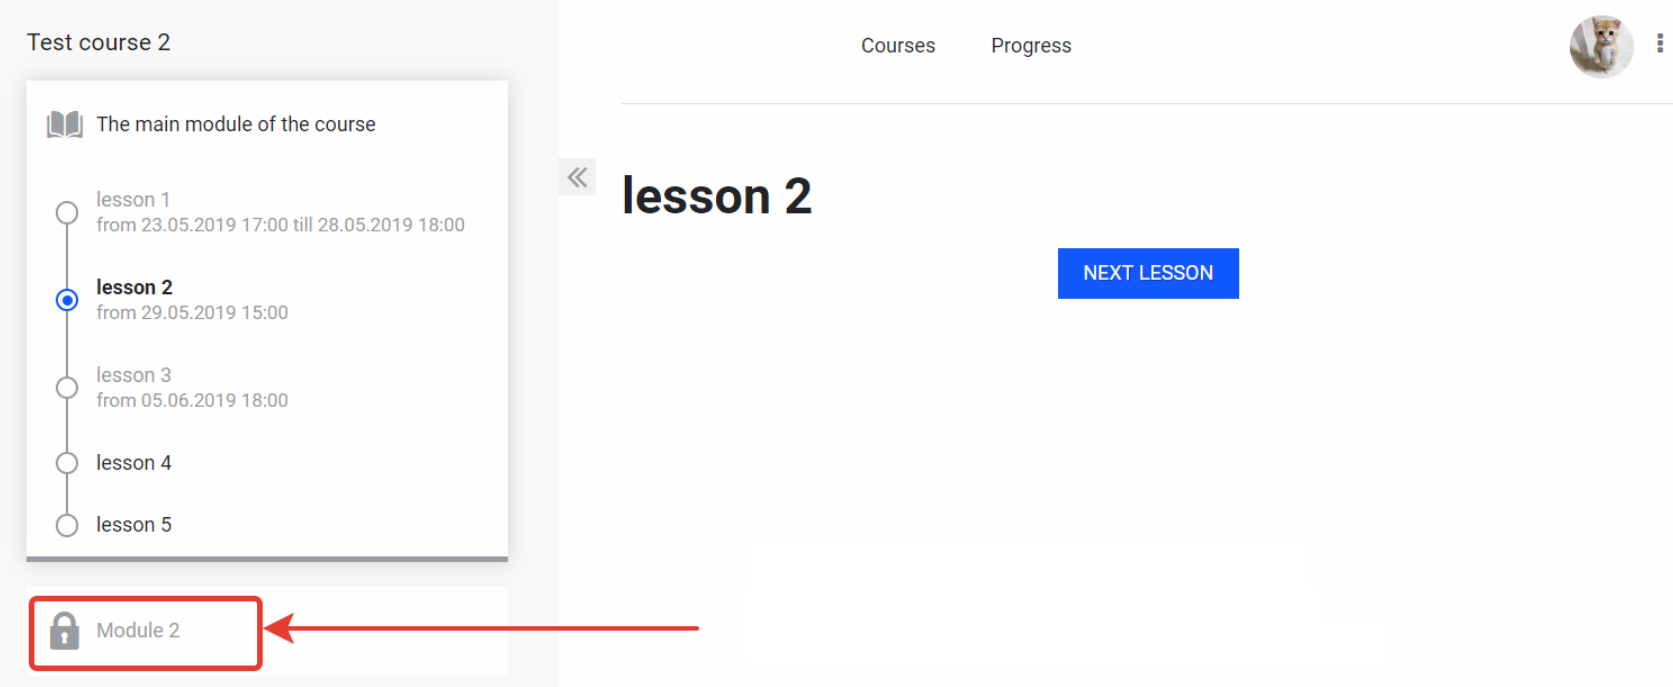
Clicking the module name will display the pop-up window with the text entered in the module settings in the field “When the module is not available to the lead, in the modal window, display the message”.
This is the pop-up window with the text which is displayed when clicking the module name in the Student’s account.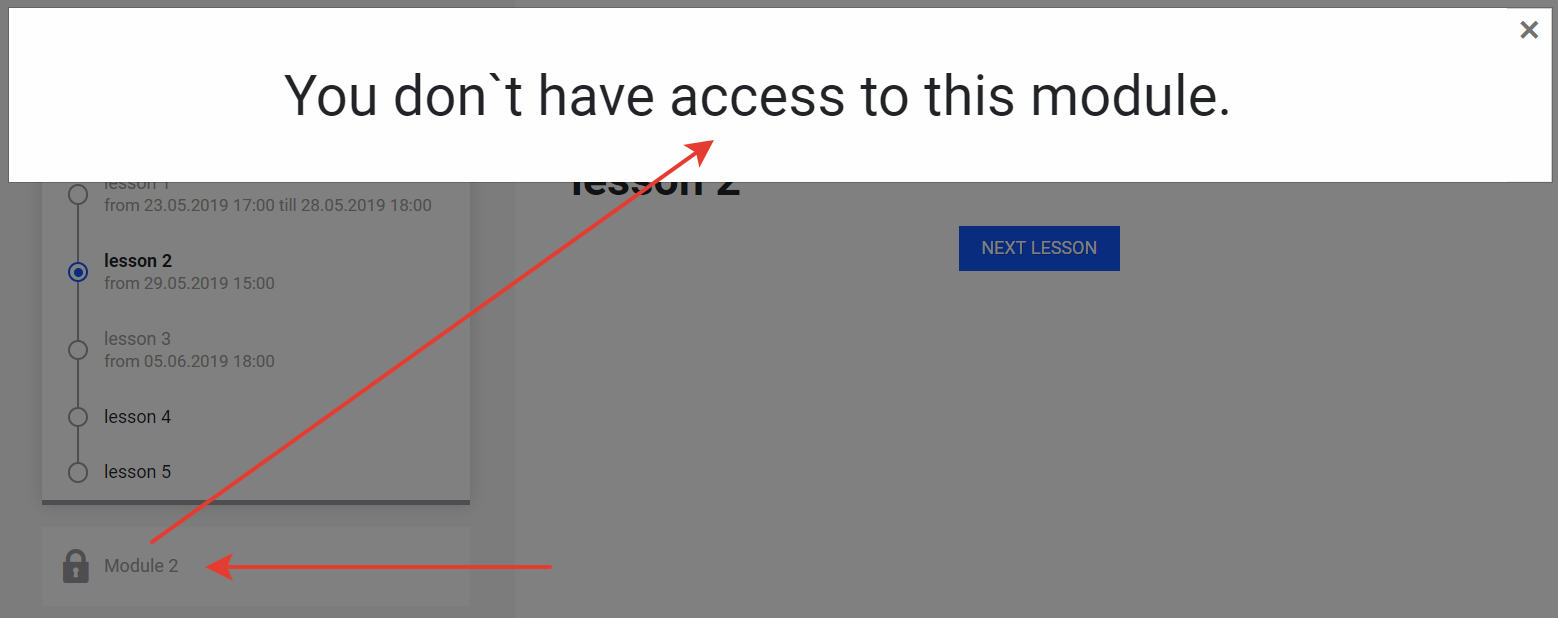
The text of the pop-up window is taken from the module settings, here: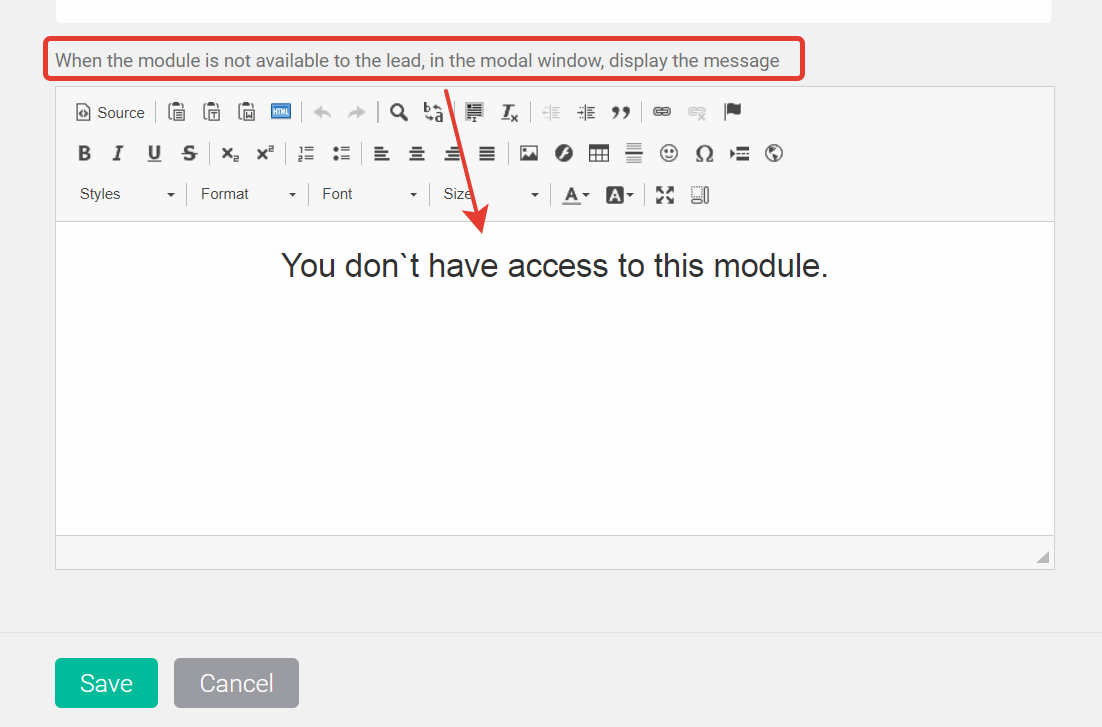
How to add the lessons to the module?
To add the lessons to a module, follow the steps below:
- Click “Add a Lesson” button.
- The pop-up window with two columns will be displayed.
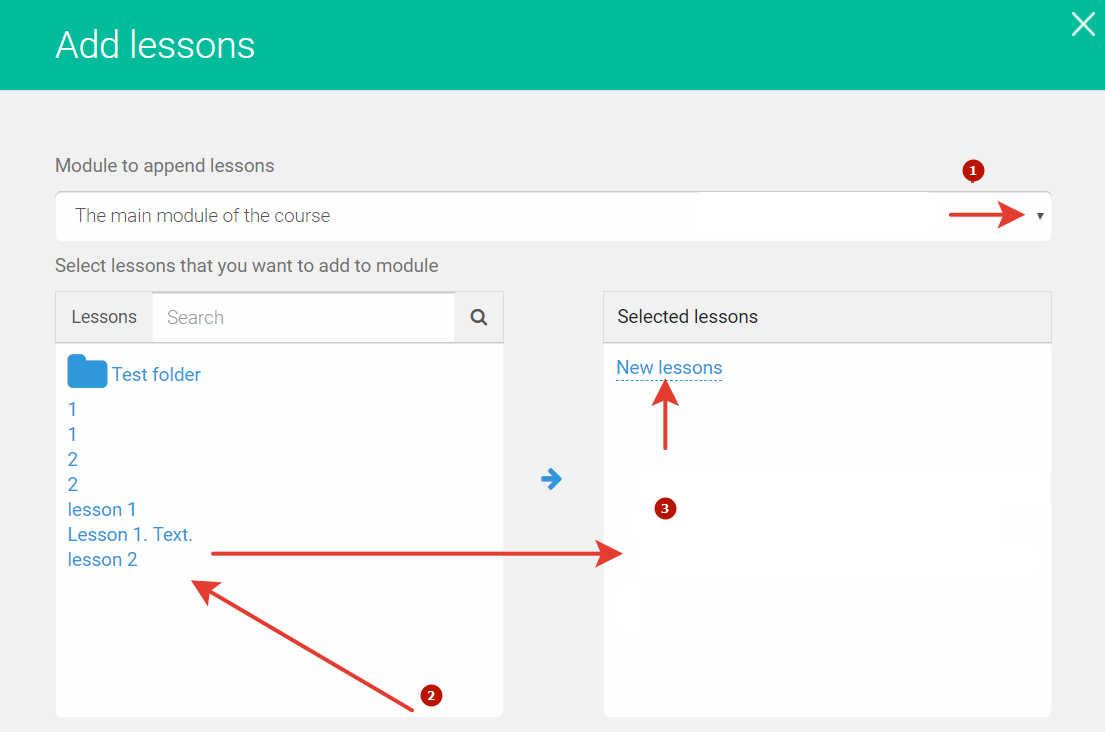
- Here you can create a new lesson (in the right column). However, the lesson is set and edited in the section Courses – Lessons.
It is more convenient to add a lesson from the list of already existed lessons. They will be displayed in the left column (both in the folders and without them). To add the existed lesson into the module, just click its name (in the left column), and it will be transferred to the right column.
If you see that one lesson is missing, you can click “New lessons” in the right column and enter the name of the lesson in the field that appears. Then the lesson will appear in the course structure. Later you can edit this lesson in Courses/Lessons section.
How to delete a lesson from the module?
If you add an extra lesson or add a lesson by mistake, then it can be deleted by clicking the name of the lesson in the right column (a red cross near the lesson). In this case the lesson will be deleted from the list of module lessons, it will exist physically and be available for editing in Courses – Lessons section and for adding into other modules or courses.
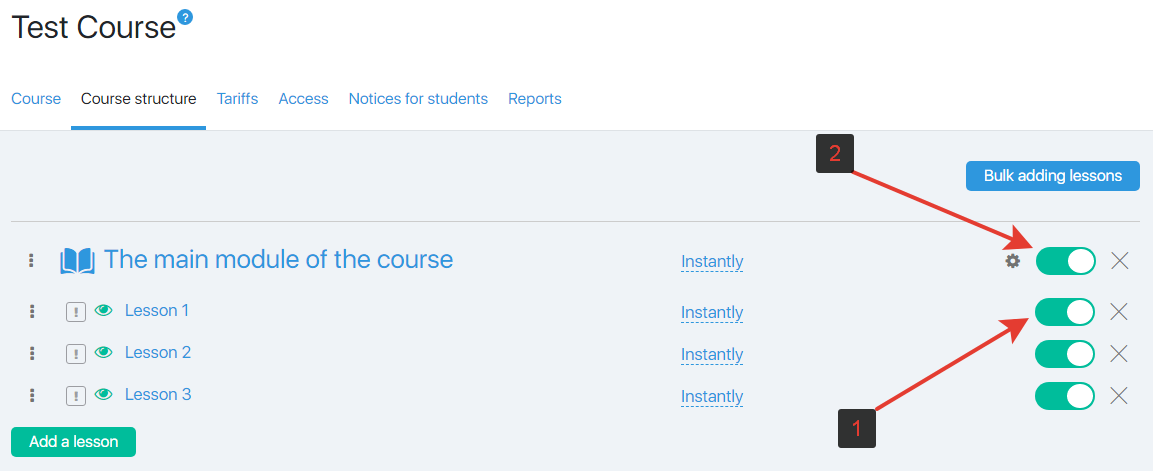
We have looked at the example of how to add a new module and a new lesson. Similar actions can be applied to the next modules and lessons.
When you add the lesson for the module (modules), the main page of Course Structure tab will be changed and look like this.
Let’s look at the key functions of this section with the added lessons
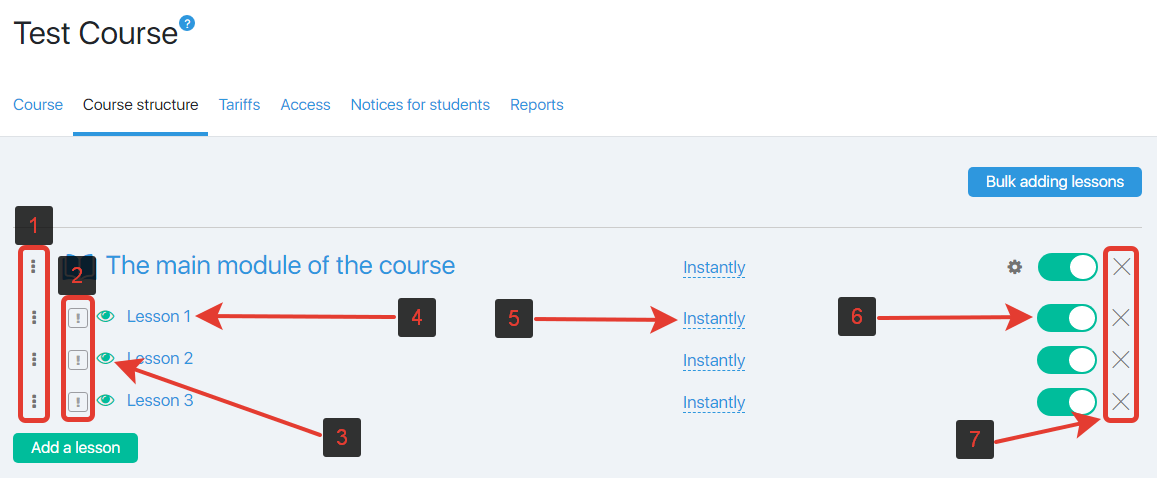
One by one:
- Three vertical dots at the very beginning of the line change the order of lessons in the module. You can change the order of the lessons by dragging them.

- An icon with an exclamation note marks a lesson as an obligatory one for the module completion. The module will not be considered to be completed unless the marked lessons are completed.
An exclamation note is blue for the obligatory lessons, while the green exclamation note shows usual lessons. Therefore, you can create the modules with different levels of complexity and to assess the knowledge and the involvement of the students.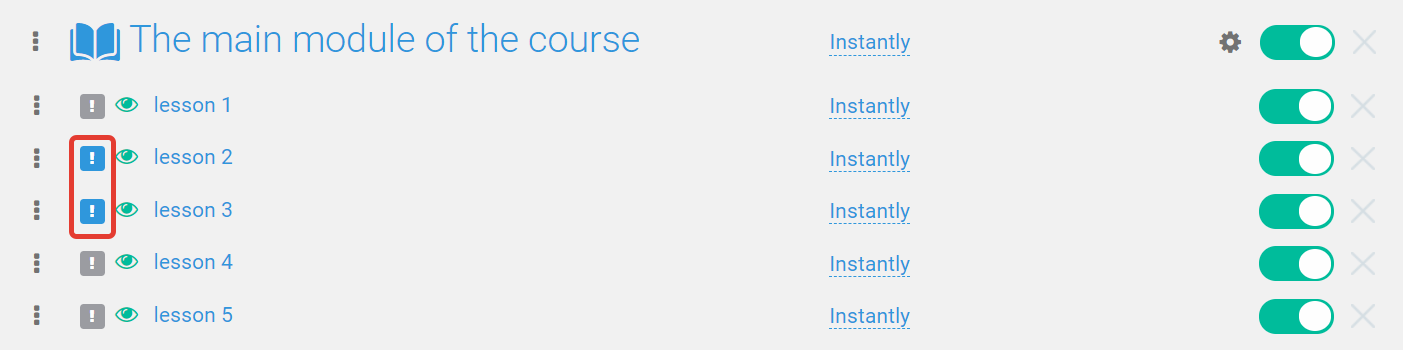
- A green eye icon by the lesson name directs to the lesson page. Clicking this icon will show the lesson from the Student’s view.

- Clicking the lesson name forwards to Courses – Lessons subsection and open the settings page of this lesson. Read more about this here.

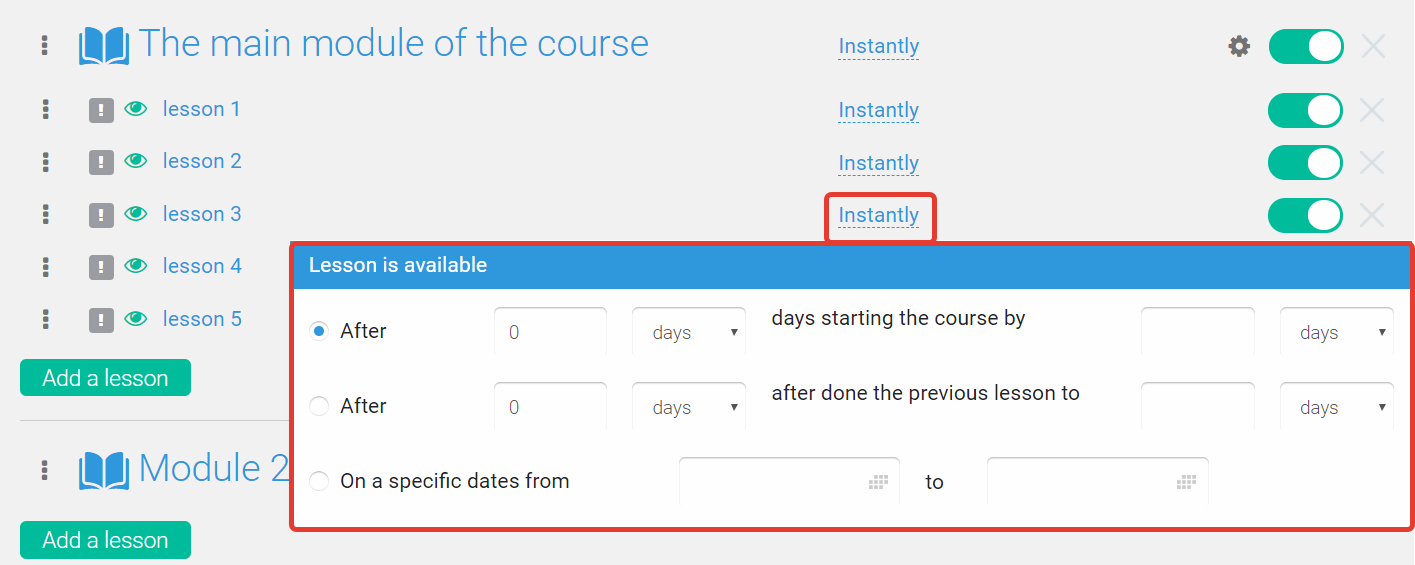
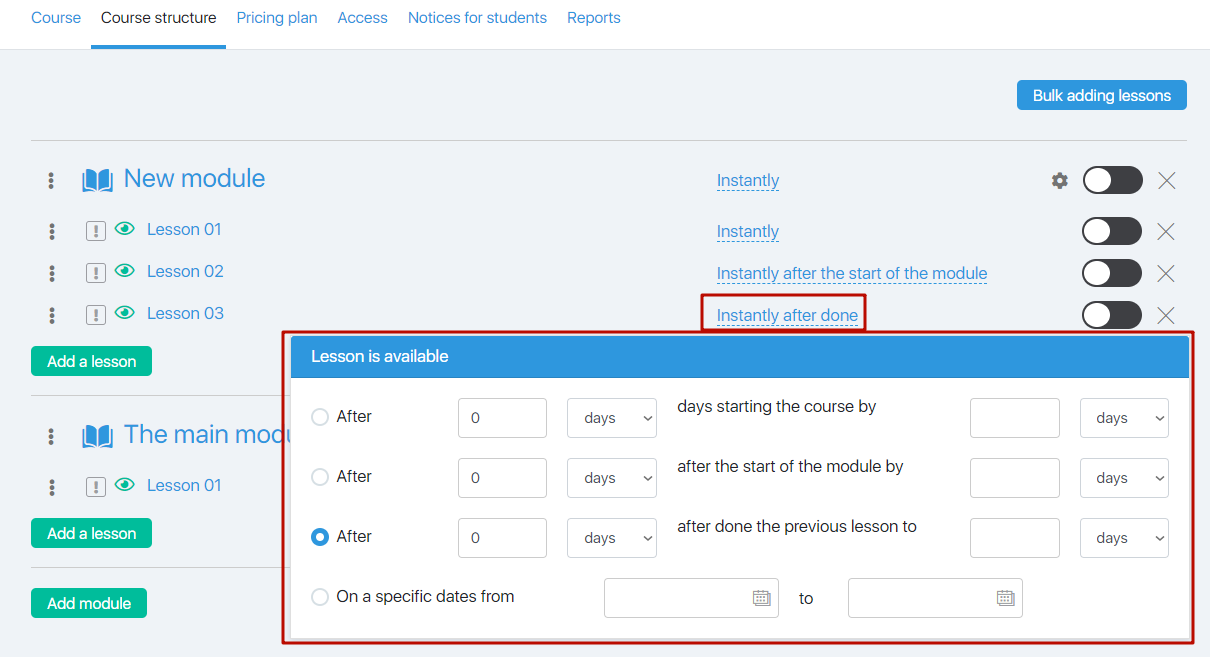
- By default, all lessons are available as soon as the student accesses the course. But by clicking on the ‘Immediately’ inscription opposite the desired lesson, you can set various interesting accessibility settings:
– after a certain time after the start of the course;
– after a certain time after passing the previous module;
– after a certain time after passing the previous lesson;
– for a certain time after the start of the course;
– for a certain time after passing the previous module;
– for a certain time after passing the previous lesson;
– you can also customize the display of the lesson on certain dates.
This is how the access settings for the lesson look like if you click on ‘Immediately’.
An example of applying the lesson accessibility settings
As an example, let’s take the item 2 in the lesson accessibility settings (in a particular time after the completion of the previous lesson). We have 0 days and an empty field for the number of days when the lesson is accessible. In this case the lesson will always be accessible right after the completion of the first lesson.
However, unless you complete the first lesson, the second lesson is inaccessible.
By the way, the settings are applied automatically, which is quite user-friendly.
Let’s move to the Student’s account and see that the second lesson is inaccessible.
It is grey. And if you click the name of the lesson, nothing happens, the click won’t work.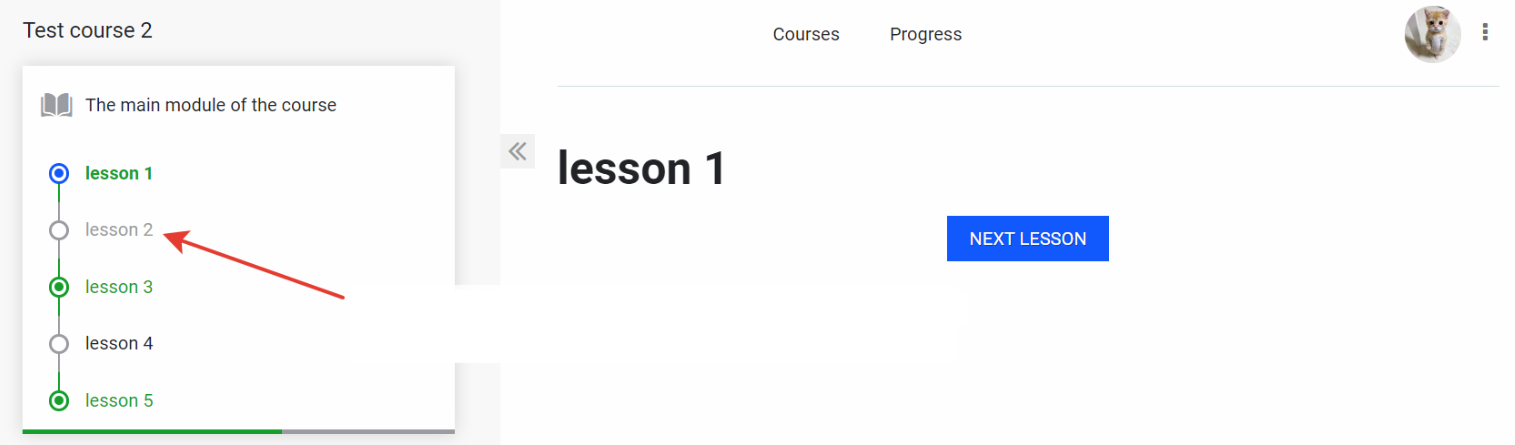
The same approach can be applied to the choice of other lesson accessibility settings.
The accessibility period could be measured in days, hours or minutes. These parameters are selected in the drop-down menu.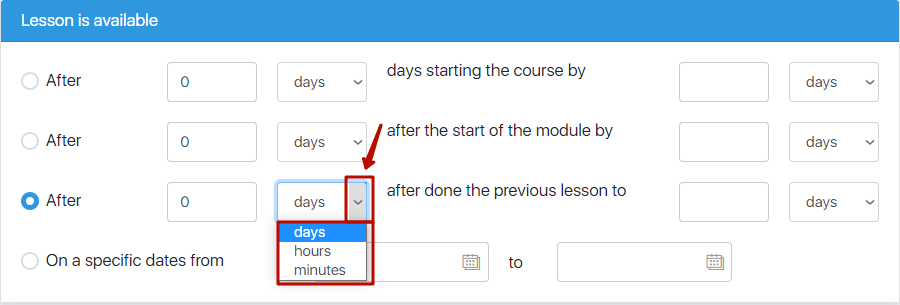
RECOMMENDATION
Try and check different lesson accessibility settings with different parameters. Then see the result in the Student’s account. This will make it easier for you to understand how the settings work and what they are for.
6. Lesson enabled/disabled slider.
NOTE:
A lesson could be disabled in “Course Structure” tab, if required. This can be done by a slider (in the case of enabled lesson the slider is moved to the left, and green is changed into grey).
Then the lesson will not be displayed in the Course where it is disabled. If the same lesson is included to other courses, then it remains to be enabled (with the activated option).
The disabled lesson will also not be displayed in the module in the Student’s account.

- lesson in anabled
- lesson is disabled
NOTE:
If the lesson is disabled in Courses/Lessons section, then this lesson will be shown as enabled by a bit transparent colour (shadowed colour) in Courses/Courses section in the “Course Structure” tab.
This colour of the slider means that the lesson is GLOBALLY disabled in Courses/Lesson section.
The lesson cannot be enabled from the Course settings. It remains to be inaccessible unless it is enabled in Courses/Lessons section.

7. To delete a lesson, click the cross next to the slider.
The lesson will be deleted from the selected course. If the lesson is included in other courses, then it will not be deleted there.
“Access” tab
Access tab is designed for selecting the contact lists which will be granted with an access to the course you choose. You can also define the lists with no access to the course.
To grant an access to a particular contact list, just check the box “Allowed to leads in lists”. To close the course for a particular list of contacts, check the box “Not allowed to leads in lists”. A student receives an access to the Course provided the student is a member of a particular list.
1. “Allowed to leads in lists”— here you can select the contact lists and grant them an access to the selected course. (For example, this could be a client list with those who have paid for a product).
2. “Not allowed to leads in lists” — here you can select the contact lists without the access to the course. Please note that if a contact is included into a list with an access and a list without it at the same time, the access to the course will ultimately be denied.
Trainings have 2 access settings: accessible to all subscribers (just enabled) or accessible to the buyers only. In the latter case the system is searching for the paid order. The practice shows that it is not always a good option. It is more convenient just to check whether a person is a member of a list. That is why the Courses section has such an option.
These are not all settings which deal with the accessibility – there are particular settings for the module (“Course Structure” tab, module settings).
The module settings also have an access concept (Accessibility).
In other words, each module could have its own accessibility mode for the contacts from particular lists, if required.
These options have already been previously described in a “Course Structure” tab part.
Example:
The course could be accessible both to list A and list B.
While the module could be accessible to list A only.
In other words, a client from list B will have an access to the Course, but will not be granted an access to a particular module of the course.
The inaccessible module for the client from the list B will be closed but clicking the name of the module will open a pop-up window with the text which you have entered in the settings of the module when selecting the access settings for this module.
These are all options which could affect the course accessibility and which could be used in marketing.
3. You can also choose whether to display the course in the student’s office if the course is not available to the contact. If both options are disabled, the course will not be displayed.
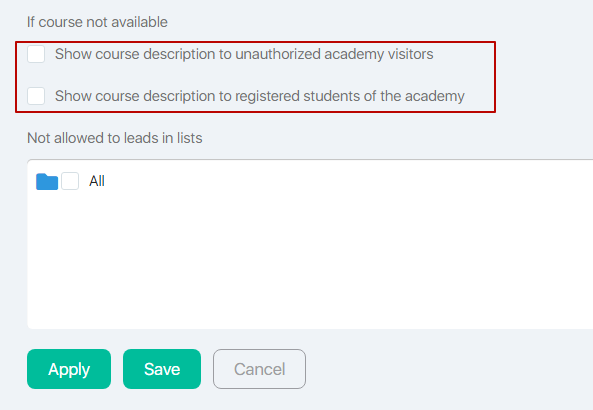
There are 2 options here:
1. “Show the course description to unauthorized visitors of the academy.” This means that in the list of courses this course will be displayed for unauthorized visitors.
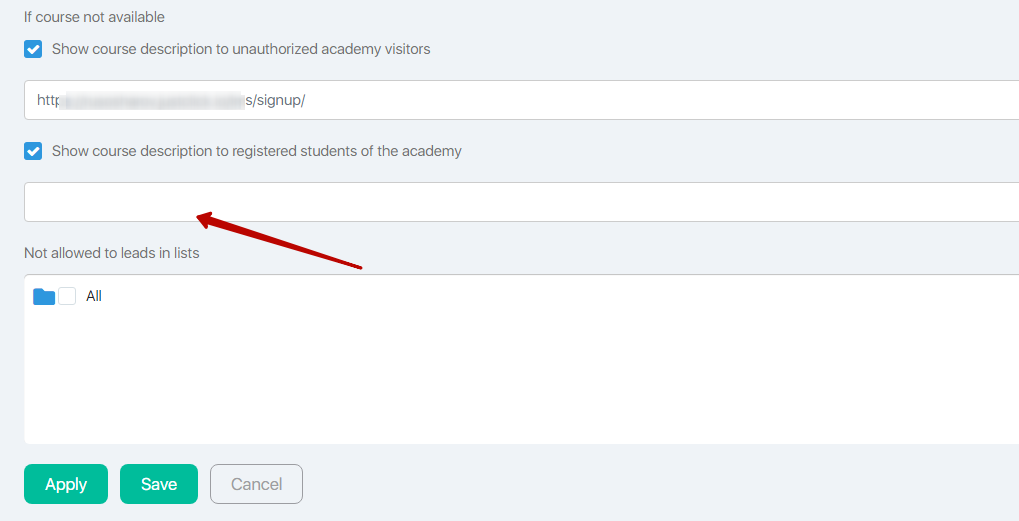
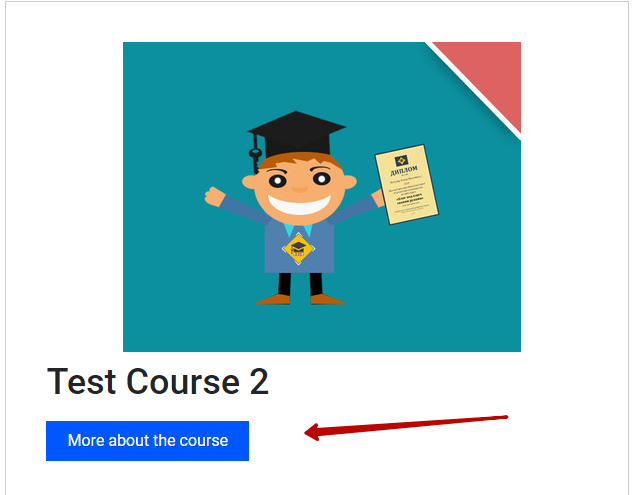
If you select the option “Show the course description to unauthorized visitors of the academy”, in the student’s office, in the description of this course, there will be a button “More about the course”, when you click on it, the page you specified will open. If the page is not specified, the authorization page is opened by default.
2. “Show the course description to registered students of the academy.” This means that in the list of courses this course will be displayed if the visitor is authorized.
If you select the option “Show the course description to registered students of the academy”, in the student’s office in the description of this course there will be a button “More about the course”, when you click on it, the page you specified will open. If no page is specified, the button will not be displayed by default.
In both fields, you can specify a link to the page that will open to the student if he clicks on the button with the description of the course. This can be any page, for example, a subscription (or selling) page for mailing to a group, which includes the buyer of the Course. Everything here is at your discretion. You can come up with the most profitable marketing solution for this purpose yourself.
Example 1:
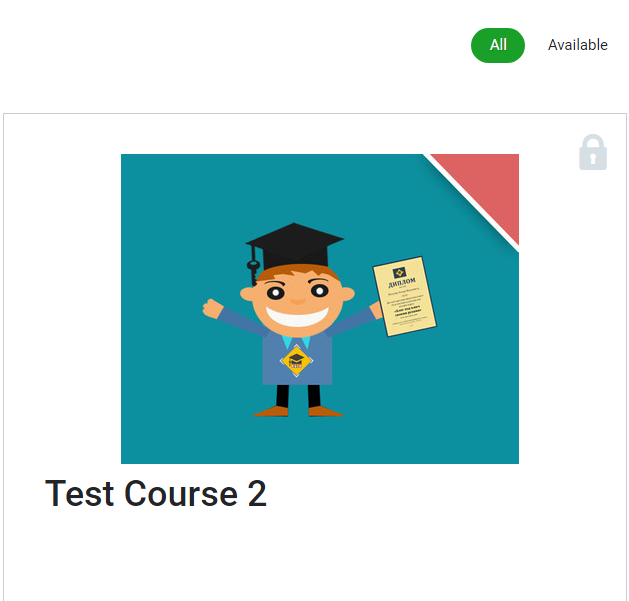
If the “Test Course 2” course is not available to an unauthorized visitor and the option “Show course description to unauthorized visitors of the academy” is checked, the student will see this course in the course list like this:
Example 2:
If the “Test Course 2” course is not available to an authorized visitor and the option “Show course description to registered students of the academy” is checked, but the link is not specified, the student will see this course in the course list like this:
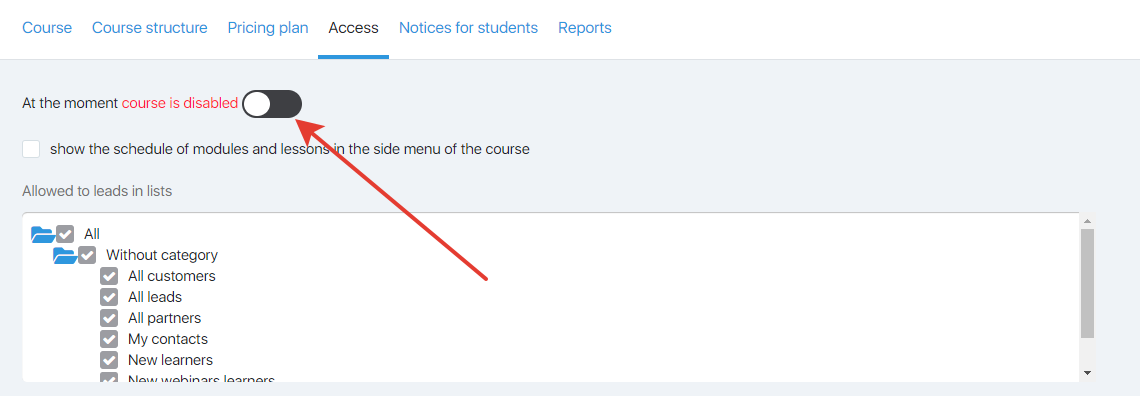
4. We have one more option in “Access” tab left — “Show the schedule of modules and lessons in the side menu of the course”.
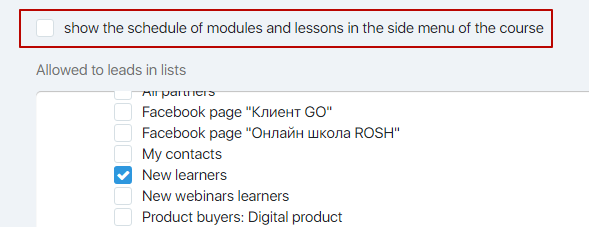
This option is disabled by default. If it is enabled (checked and saved), then the Student’s account will display the starting and finishing dates of the module activation or the starting dates of the module activation. Everything will depend on the accessibility settings for the lessons and modules in Course Structure tab, here:
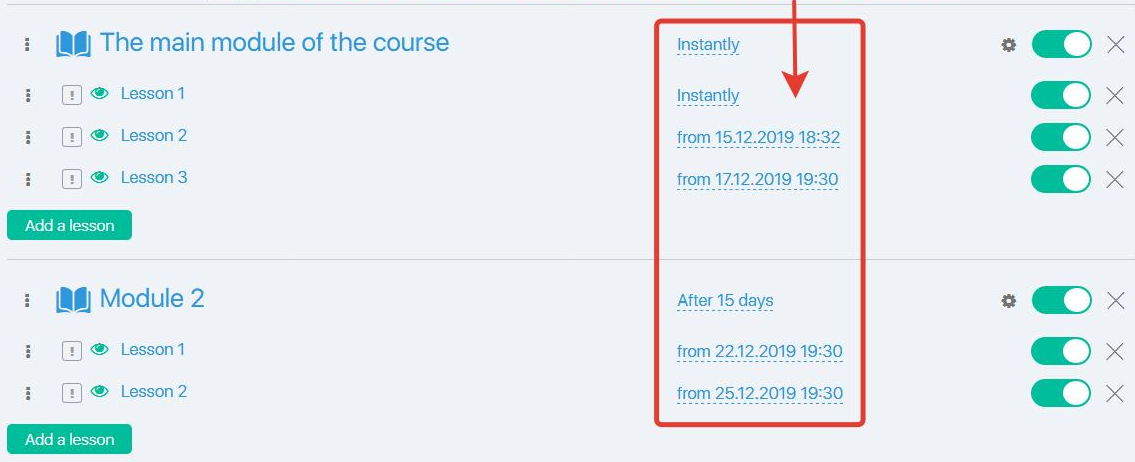
The timetable will look like this in the Student’s account: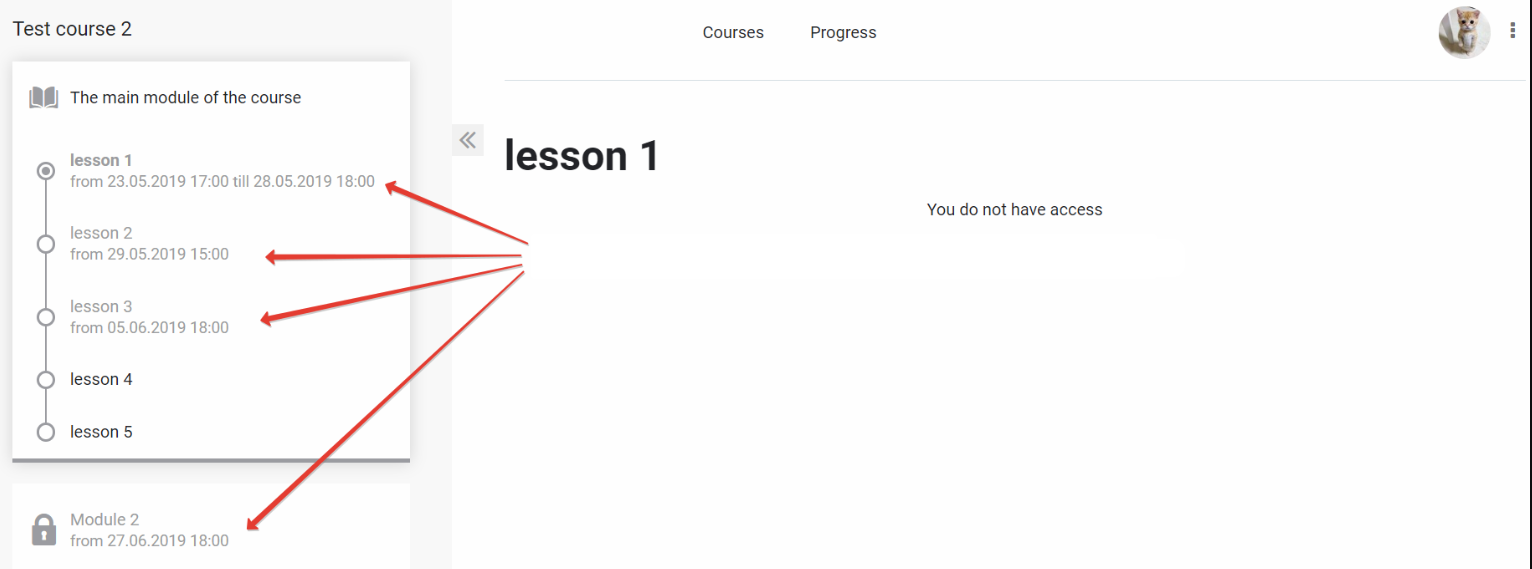
5. On the “Access” tab, you can turn off and on the course, for this you need to move the switch and save the settings.
“Tariffs” tab
We will tell more about creating tariffs for a course from a separate article.
“Notices for students” tab
Let’s look at the settings in “Notices for students” tab.
Here you can set the sender Contact and the notifications for the students.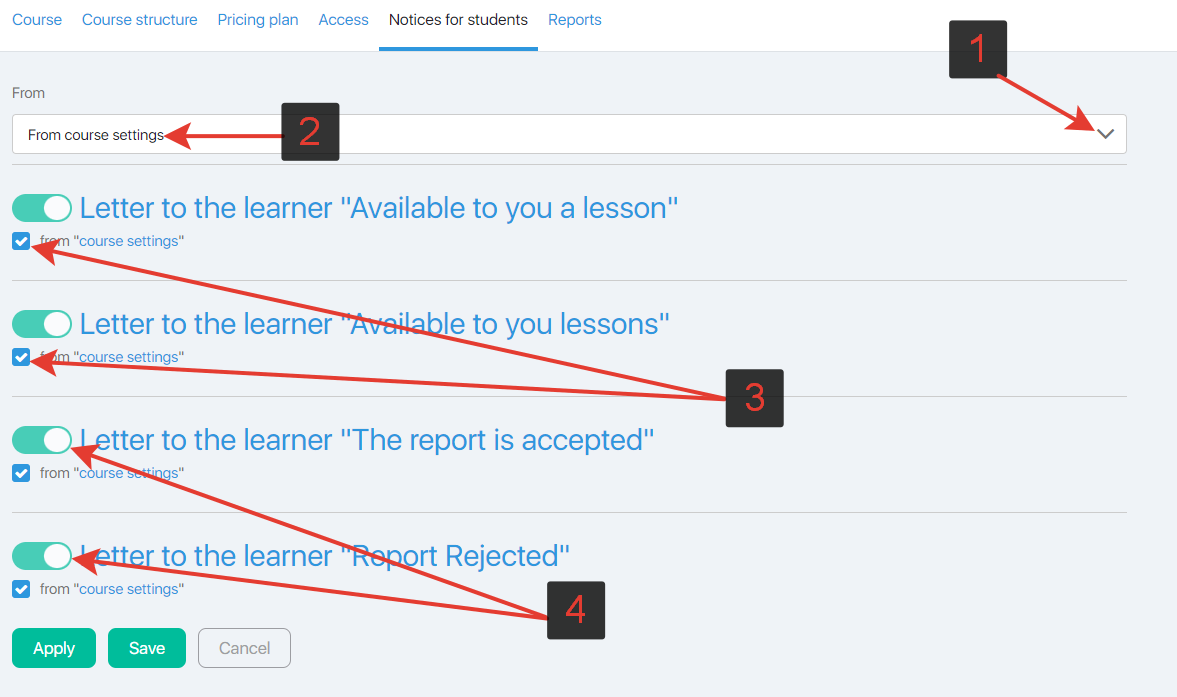
- selection of the sender’s contact;
- display of the current contact of the sender;
- by default, standard letters of notification of students are used, if you uncheck the box, you can write your own content of the notification letter;
- enable / disable notification letters.
“From” field
Here you can select the sender contact which will send the letters about the lessons and the report reviews to the students.
A contract is chosen from the course settings by default (in Courses/Settings section). From this section below: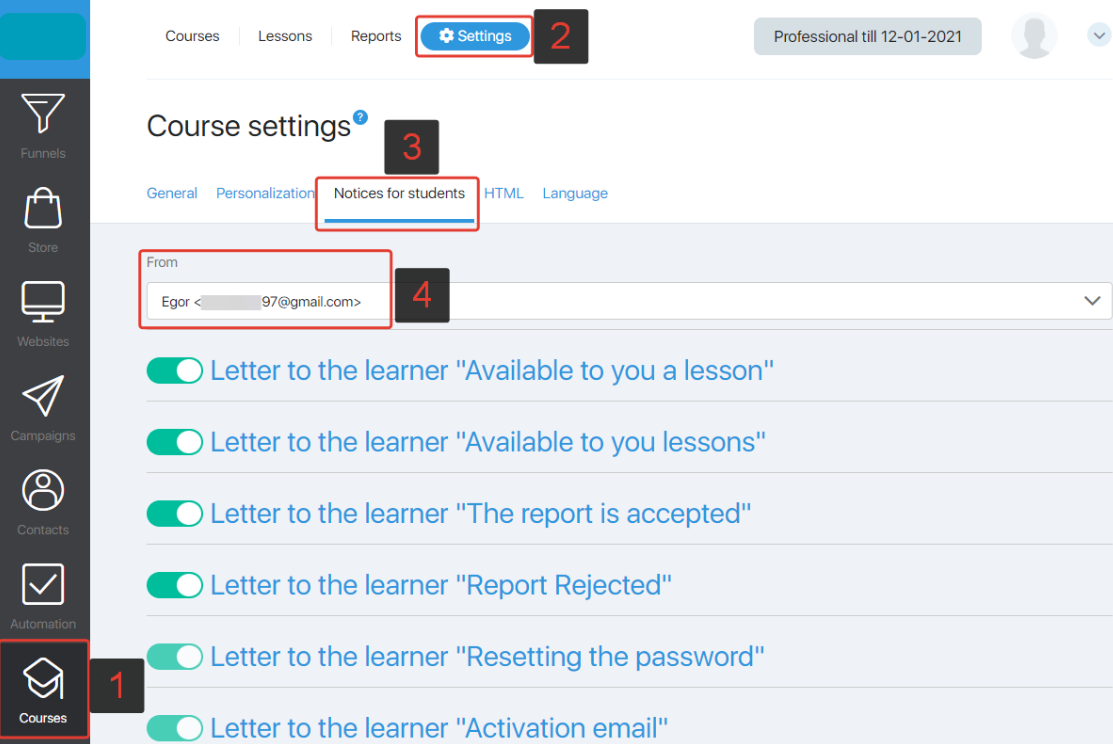
However, you can choose any other contact which is given in the sender’s contacts.
Let us remind that the sender’s contacts can be added in Campaigns — Settings = > “Sender contact information” tab.
Letters to the lerner
Letters to a student are designed to send the notifications (“Available to you a lesson” and “Available to you lessons”, “The report is accepted” and “Report Rejected”) about each course.
Notification letters will be taken from course settings (if it is checked) in Courses — Settings by default.
If the option is unchecked, then you can set different notification letters for different courses on your own.
If the option is unchecked, the letter editor panel will open: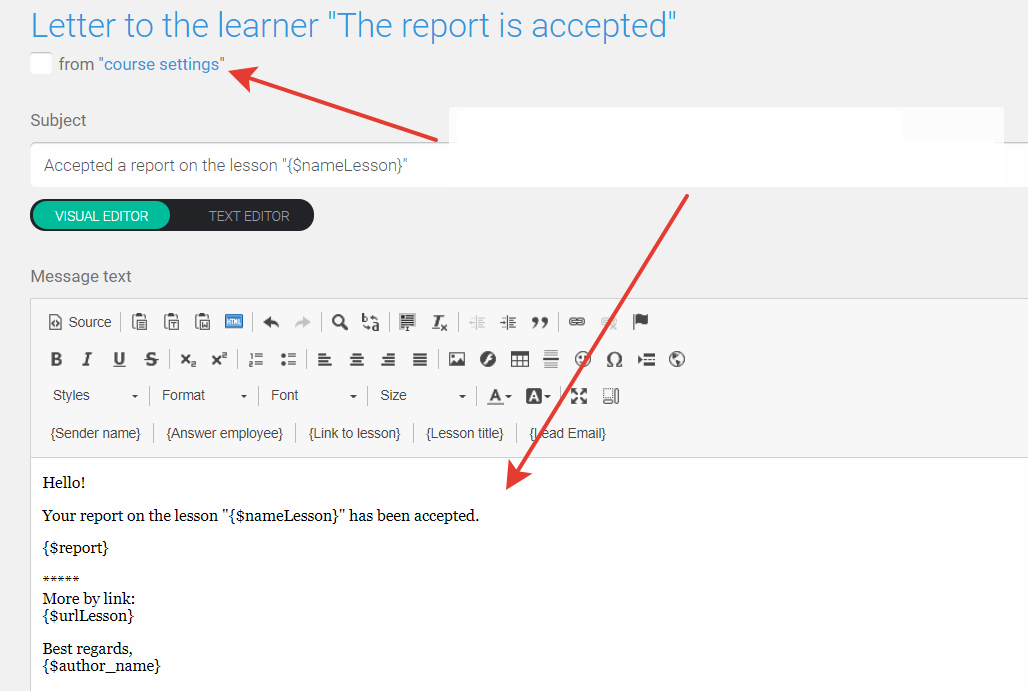
“Reports” tab
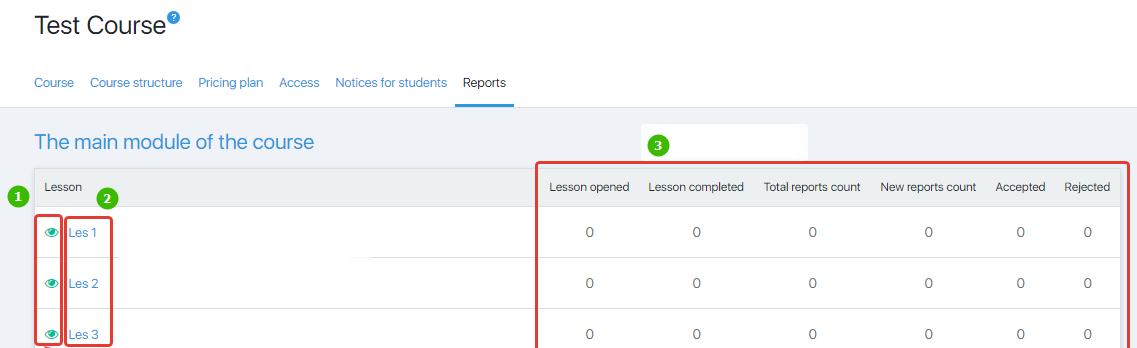
- clicking the green eye icon opens the lesson page
- clicking the lesson name opens the lesson settings
- report statistics
This tab is designed for quick access to the course lesson settings and to reports on these lessons.
Clicking the lesson name will open the lesson setting page where you can select “the learner completed the assignment”. Then to have an access to the next lesson, a student should send a report with the task completion for the current lesson.
To enable the option of sending the reports on the lessons, just select the option “Lesson completed if” = > “the learner completed the assignment” in the lesson settings.
If “the learner read it to the end” is selected, then it is not obligatory for a student to send a report on the lesson.
Read more about the lesson settings here.
2. Clicking the green eye icon will open a lesson page, and you will see it as it is displayed to your student.
3. This tab can also display the report statistics for each lesson.
When you click on the number “Lesson opened” or “Lesson completed” you will see the contacts of students who opened or completed the lesson.
When you click on the numbers “Total”, “New”, “Accepted”, “Rejected” in the statistics columns
a page with these reports will open in the “Courses – Reports” section.
Where you can find the users’ reports
All users’ reports will be displayed in “Courses — Reports” subsection, here:
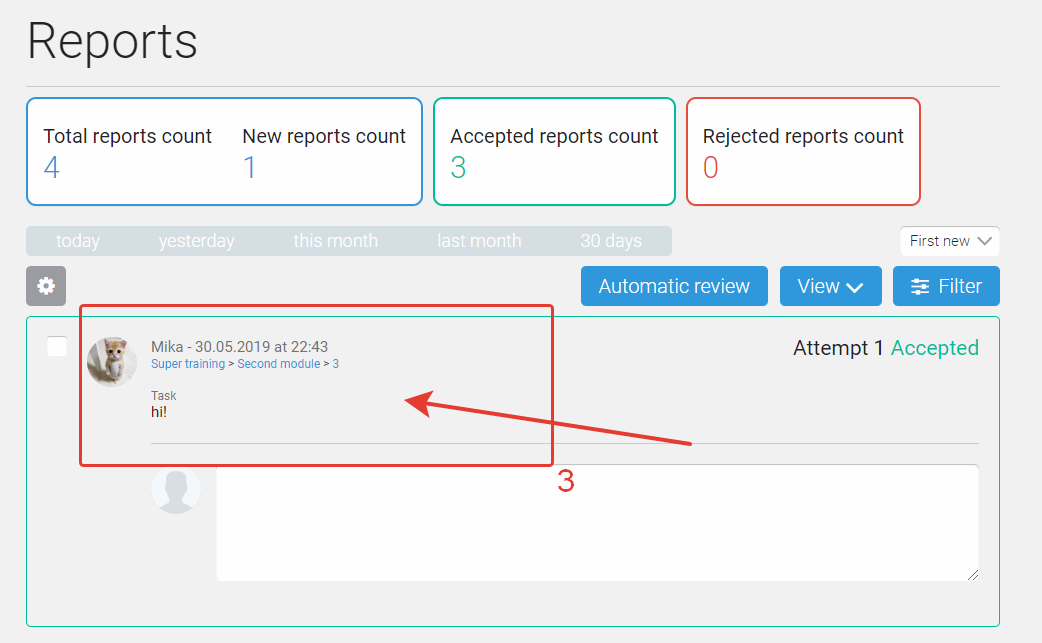
Read more about the work with the reports here.
FAQ
Go to the section “CRM” – “Leads” and use the filter by mail to find the required student. Click on his mail to open the contact card.
In the contact card, click on “Gear” and in the menu that opens, select “Login to the academy as the student”.

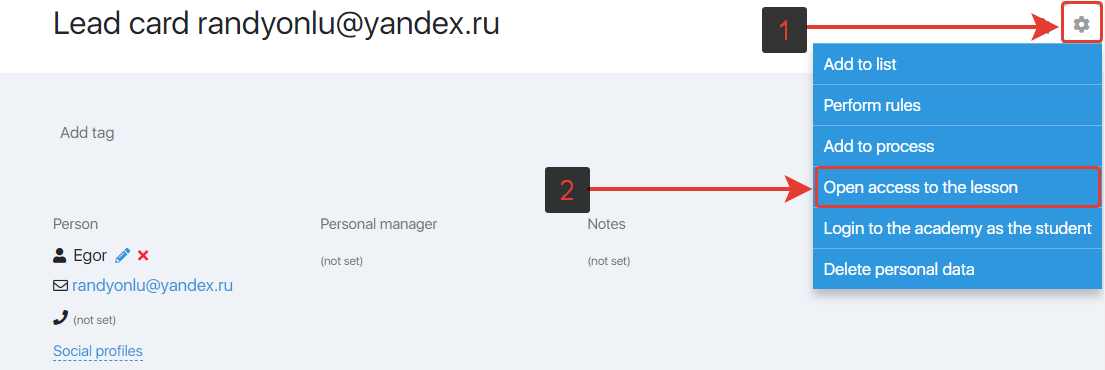
Go to the section “CRM” – “Leads” and use the filter by mail to find the required student. Click on his mail to open the contact card.
In the contact card, click on “Gear” and in the menu that opens, select “Open access to the lesson”.
A lesson is considered passed when a student clicks the ‘Next Lesson’ button in the previous lesson.
The module is considered passed when all the lessons in the module were passed with the “Next lesson” button
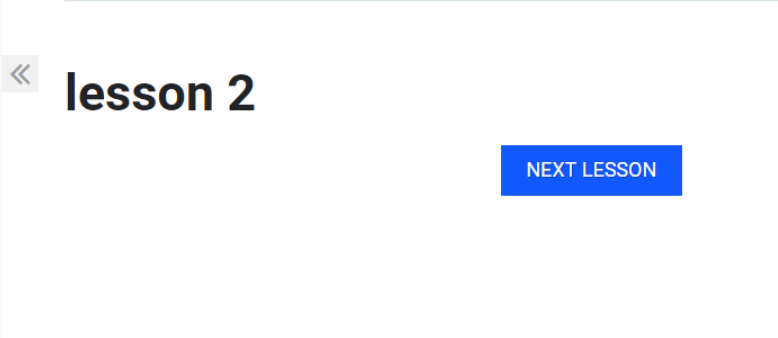
Solution: go through the lessons by pressing the “Next lesson” button.
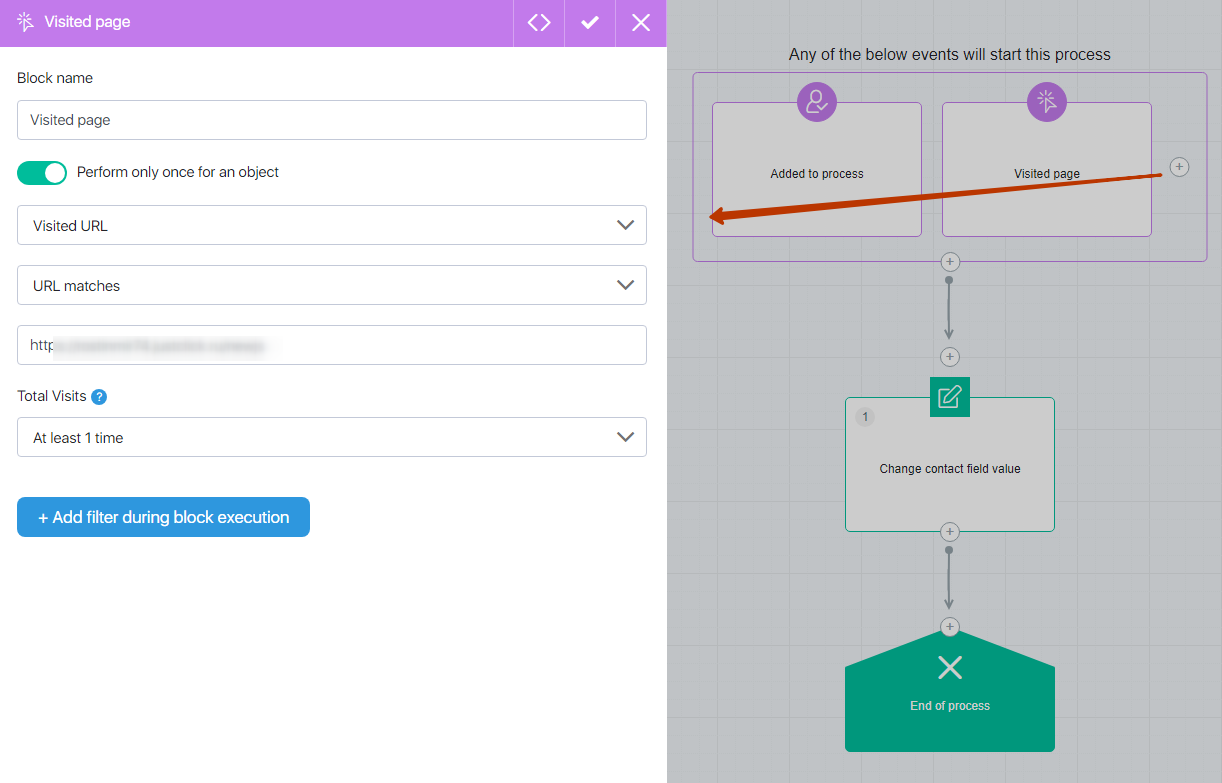
Create a process with an initial “Opened the page” trigger. In the settings of the block include the option “Run only 1 time for the object” so that points are not awarded when you visit the lesson page again. In the “Visited URL” field specify a link to the lesson.
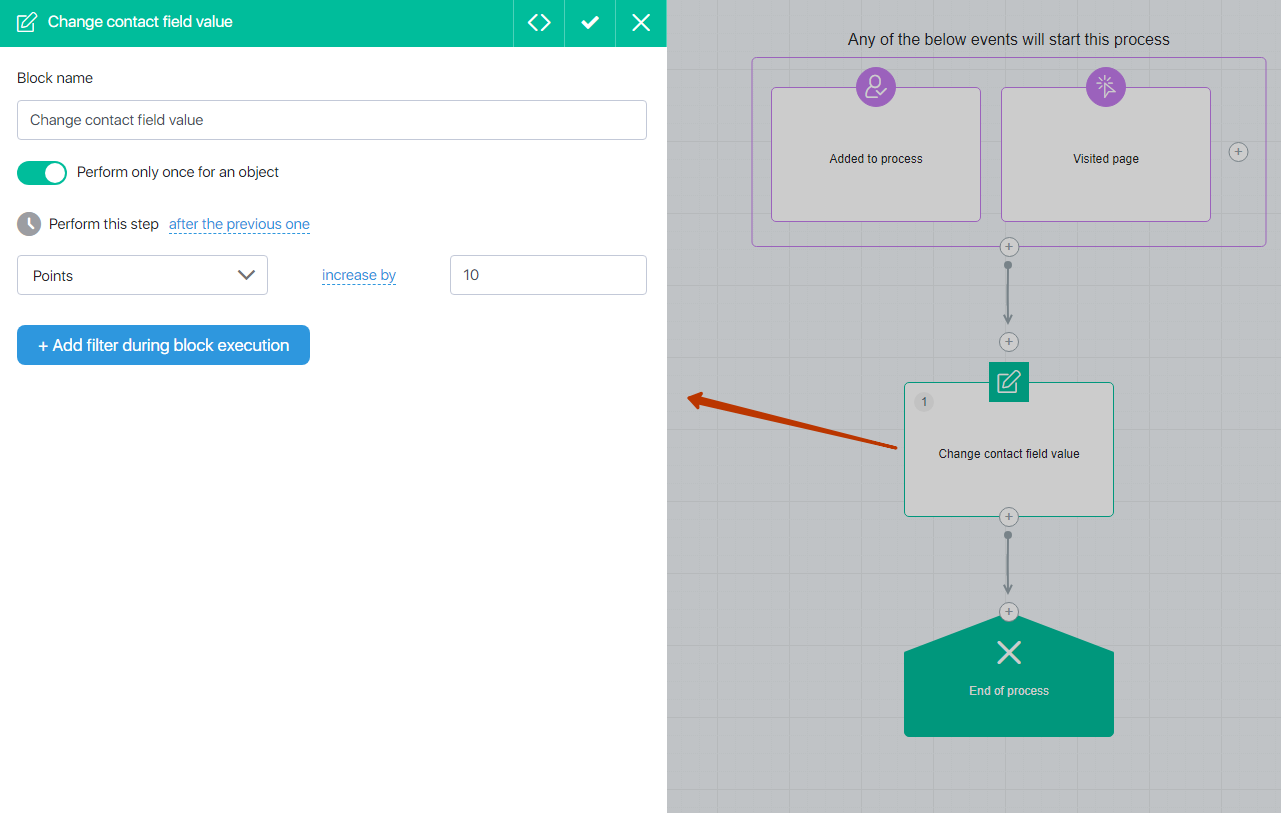
Add action “Change the value of the field”. In the block settings enable the “Run only 1 time for object” option, and in the list of actions select “Points” and increase the points by the desired amount.
This scheme will only work when the student visits the lesson page.
If the lesson has homework set up and the next lesson is available only after its completion and checking, and the points are needed for the passed lesson with homework, then the link in the “Opened the page” block must be added to the next lesson.
Going to the next lesson will mean that the previous lesson is passed.
If there is a situation when a client has purchased a cheaper tariff and later wishes to switch to a more expensive one, in this case you can create a separate account for the product with a more expensive tariff and specify the required surcharge amount.
Create an account in the “Store/Accounts” section by clicking on the account creation button.
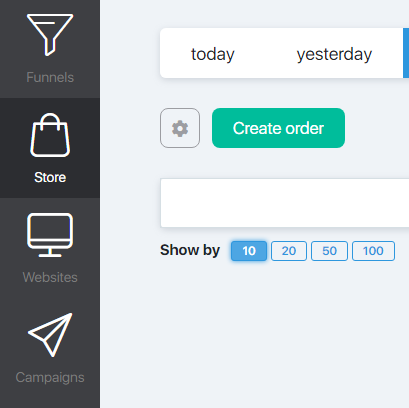
Fill in the customer details and add a product. Specify the required surcharge amount.
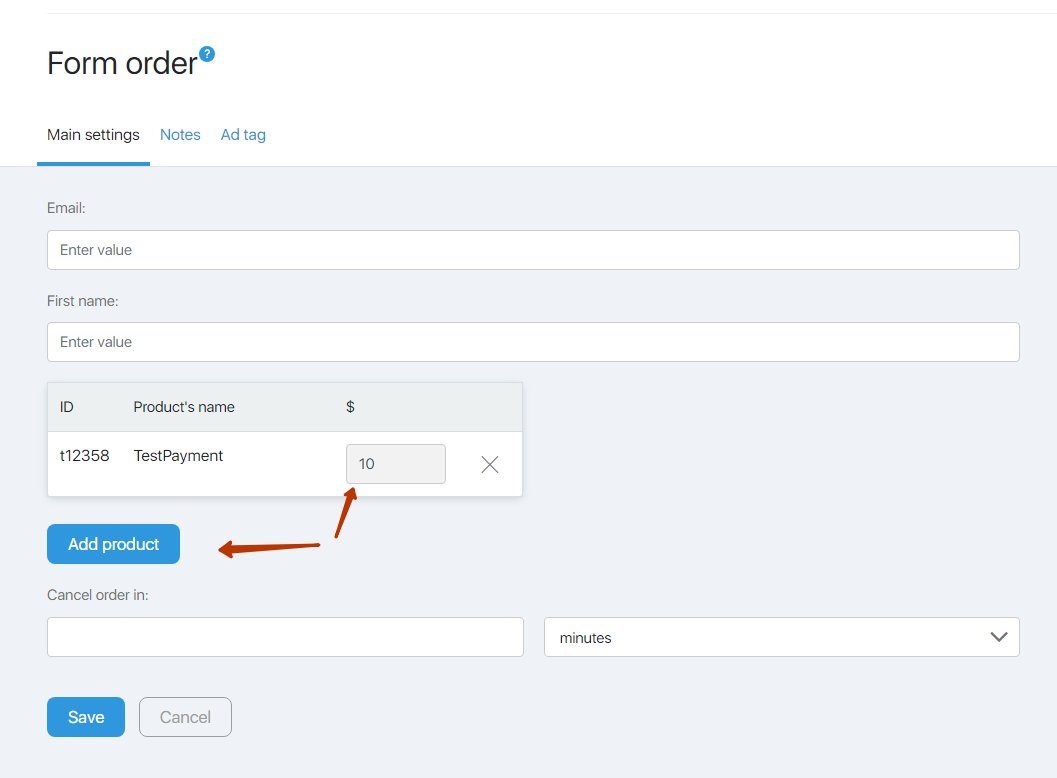
After the customer pays the bill he will be automatically assigned to the customer group for this product.
We talked more about creating an invoice in this article https://help.justclick.io/archives/157
