What is “active auto-payment access”?
It is often required to limit access to certain courses for a student after cessation of payments from his/her side. Here we are talking about recurrent payments (periodic auto-payments).
In our system you have such a possibility, i.e. you may customize settings in such a way that if payments are transferred by the client, the course is accessible for him/her, and when the client stops to pay, access is blocked.
How to set up such access?
- Create a product with the recurrent payment in the section “Store – Products”. For this purpose, when the new product is created, choose “Subscription” in the tab “Main parameters”.
 More information about periodic auto-payments you can find in this article.
 - In the product settings, in the tab “Recurring payments”, choose a group (groups), into which the client will fall after the transfer of the periodic payment. In other words, you should indicate the group, into which the client will fall after the first payment and to which he/she will belong as long as he/she will continue to pay for access.When the client stops to pay, the system will remove him/her from the indicated group. This possibility we will use when setting up courses.
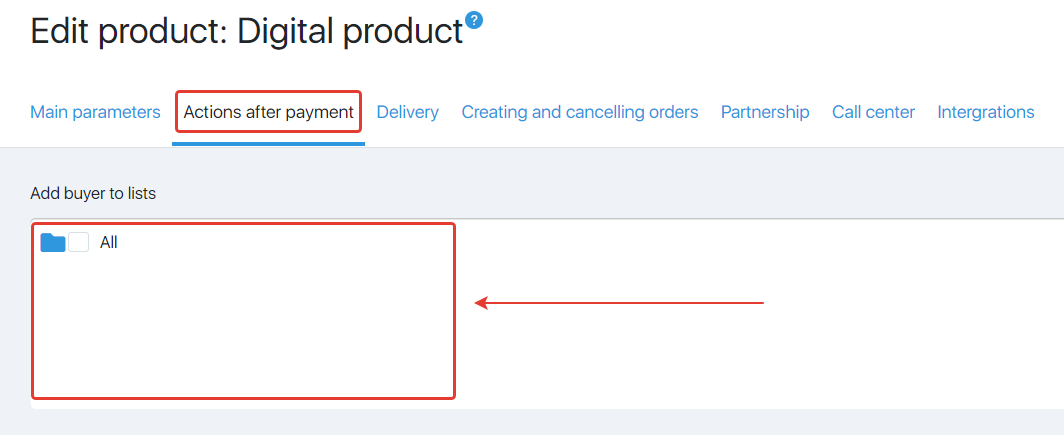
- In the tab “Actions after payment”, choose the group too. But, it is important that this group will be different from the group you chose in the “Recurring payments” tab. It is essential because when the client is removed from the “Auto-payments” group, he/she will stay in another group and you will keep him/her in the general contact list and be able to send e-mails to this client group, for example, with another offer.
- Now, we shall set up access to the Courses for the 3rd group.
In the section “Courses – Courses”, click the name of the desired course. Then, in the course settings, in the “Access” tab, select the group that you specified in the product settings in the “Recurring payments” tab.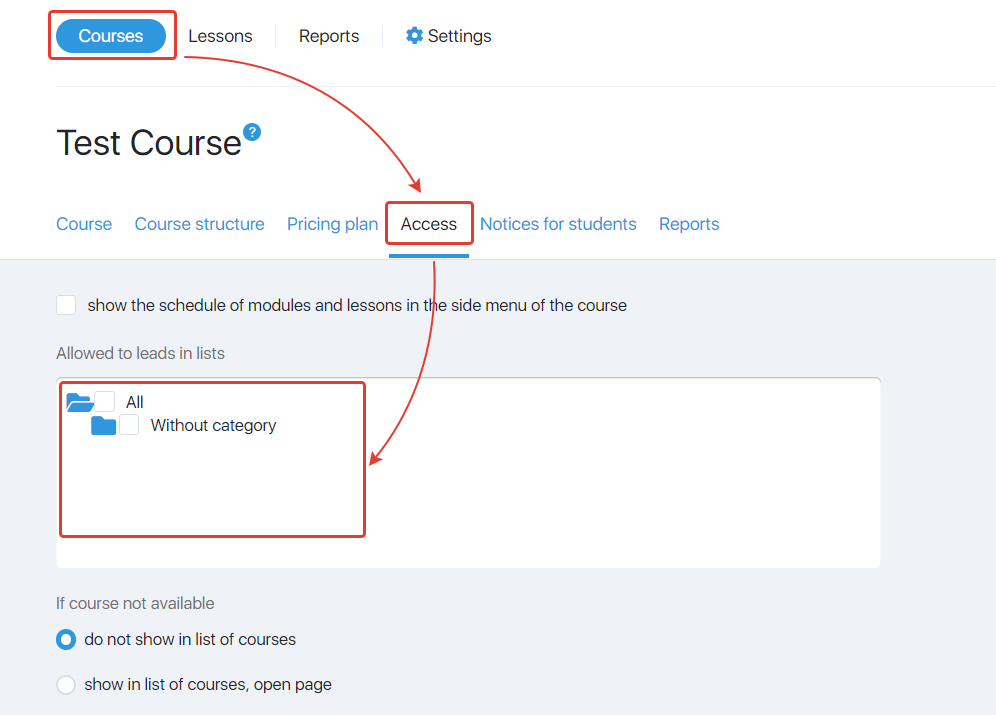
- In this case, after cessation of payments, the client will be removed from the “Auto-payments” group and, accordingly, he/she will not have access to the Course, because he/she will not belong to the group.
You can find more information about the course access settings in this article. - Well done! By following a couple of steps, you set up the access blocking after cessation of card payments by the student.
