Content
- 1 General
- 2 Personalization
- 3 Notices for students
- 3.1 Field “From”
- 3.2 Letters to the learners
- 4 HTML codes
- 5 Language
To go to Courses settings, you should select Courses in the main menu and then Settings in the submenu:


The form contains tabs:
- General;
- Personalization;
- Notices for students;
- HTML;
- Language.
General
This tab contains the key settings for Courses.
Let us look at each setting.
[1] Domain. How to attach a new domain
In this field (the first image under 1), you can select one of the Active domains attached to the account.
In other words, you can select a domain (from the ones connected to your account) which will be used by default to open the Courses pages. The courses and course pages will be opened by the name of the selected domain.
Please note that the ticked domain will refer to the whole project and will be displayed for all courses and lessons.
A link “Add a new domain” is given to go to domain management section and to add a new domain. Once you connect a new domain, you can select it for the courses.
Please read more about connecting your own domain/subdomain here.
If you don’t connect your own domain, a standard JustClick domain will be applied, the one you receive upon registration in the system. This is like Your_Login.justclick.io
[2] Project name
A field “Project name” (the first image under 3) is the name which will be displayed on the main page of your courses for a student.
It will also be displayed in the title of your website. Please mind that this project name will refer to the whole project and will always be displayed no matter what course a student does.
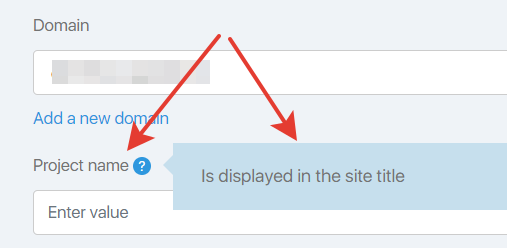
The students of the course see this name in the browser’s address bar (this works only for some browsers) and in the browser’s tab referred to the Courses page.
Ability to set the date format that will appear in your courses.
The following formats are available for selection:
MM-DD-YYYY
DD.MM.YYYY
DD-MM-YYYY
DD / MM / YYYY
YYYY-MM-DD
In the format you choose, the dates in the courses will be displayed to you and your students.
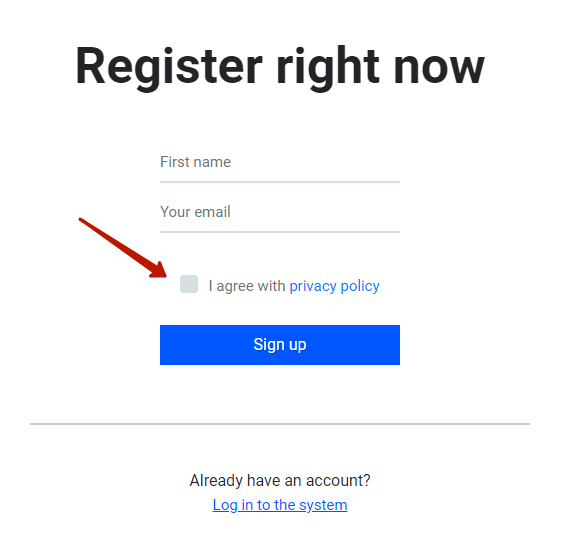
[4] Consent to the privacy policy on the registration page
If you tick this box, the fields ‘Consent text’, ‘Consent link text’, ‘Privacy policy link’ appear, which must be filled out.
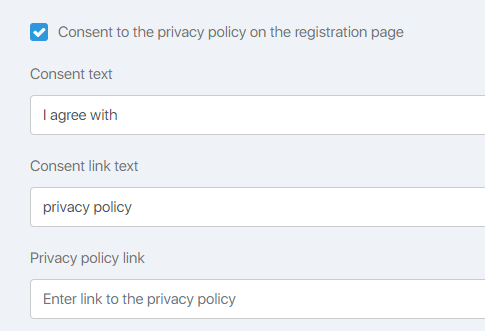
With these settings, when registering for the course, the student must agree to the Privacy Policy.
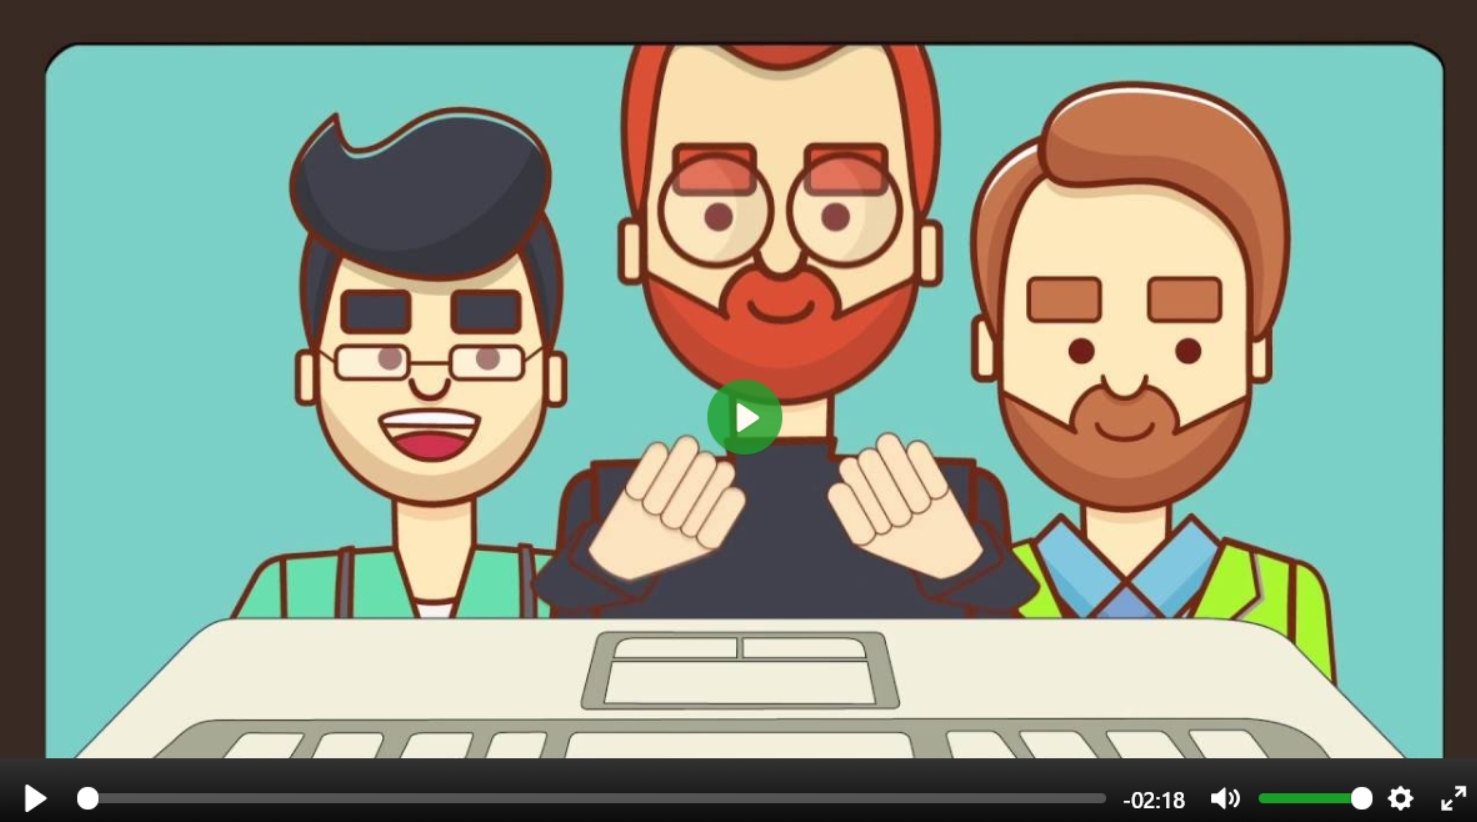
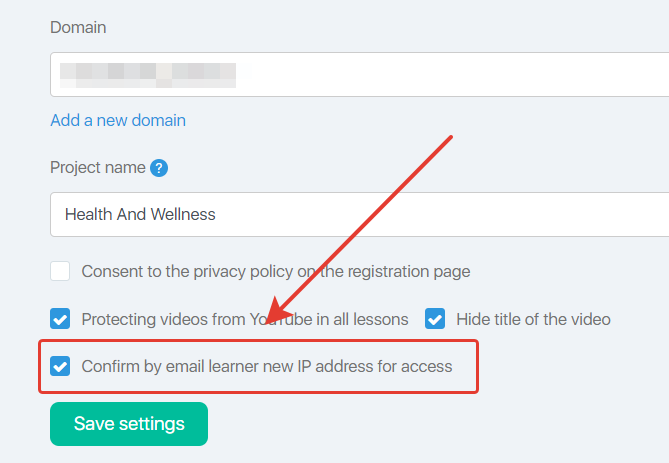
[5][6] Video content protection
By ticking “Protecting videos from YouTube in all lessons” (number 4 on the screenshot above), you will make sure that none of the students downloads a Youtube video and uploads it with free access.
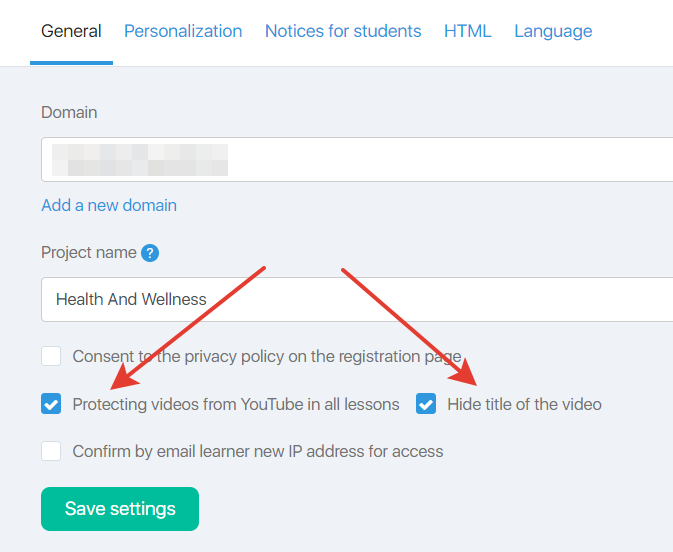
If this function is enabled, then the video will not contain Youtube logo, and the player view will be changed (see player screenshot below).
[7] Protection by a student’s IP-address
Any student can make his/her profile accessible for public, and then anyone can take the courses bought by a dishonest student.
We make this scenario impossible. If a student logs in a profile from a new IP-address, then he/she must confirm the process, to do this, a student must follow a link in the email letter sent every time a student’s profile is logged in from a new address.
How to enable this function? It’s easy — just tick “Confirm by email learner new IP address for access”, here:
Please read more about the confirmation to log in a student’s profile by IP-address in this article.
Personalization
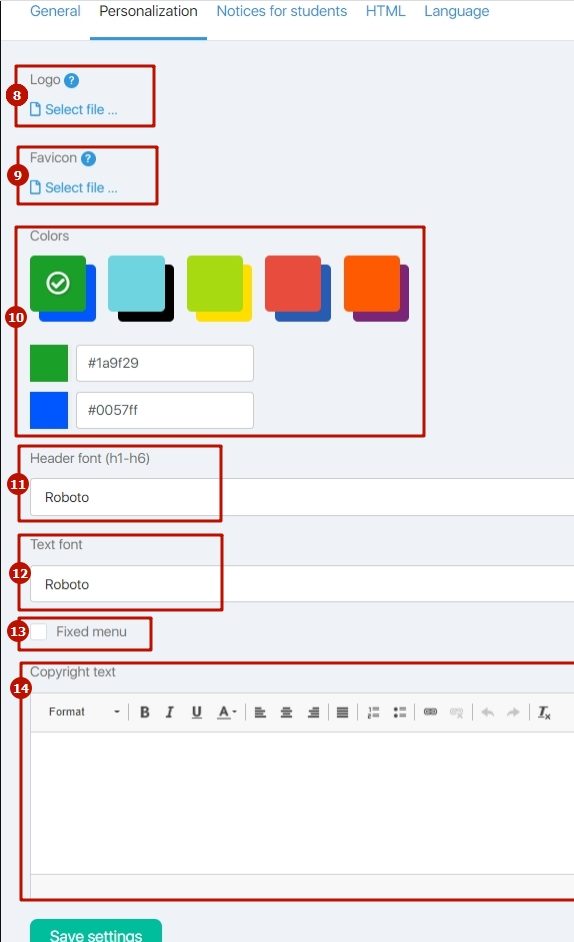
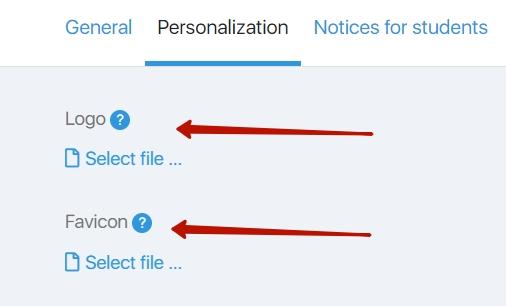
[8] Logo and [9] icon (favicon)
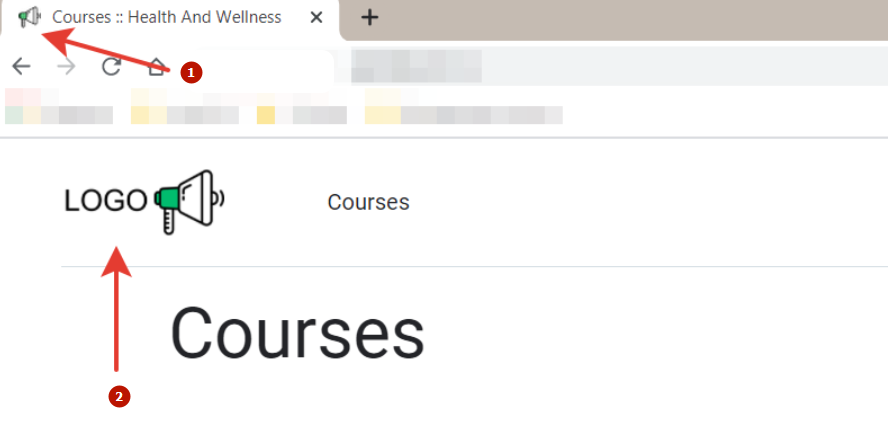
Logo (number 5 in the very first image) is the picture seen by the students in the upper left part of the Courses main page. A student will also see it on the pages with the course lessons.
A company’s logo is very often used on the squeeze and landing pages.
An icon (number 6 in the very first image), or favicon is the picture which is seen to the left from the browser’s tab and in the panel with tabs corresponding to your course page.
- favicon
- logo
[10] Colors
Color set (number 7 in the upper image) provides the course appearance. You can select the color combinations for the elements (chains, buttons, links) in your course.
Colors can be chosen by clicking palette or by entering the number of the color in palette field.

[11][12] Fonts
Fonts for the headings (number 8 in the upper image) and for the main text (number 9 in the upper image) can provide the balanced design for the lessons of your course so that the course lessons look nice, and information is easily perceived.
- header font
- text font
By checking this box (number 10 in the first image), you freeze the course menu, and it will always be locked in place while scrolling a lesson page.
[14] Copyright text
Copyright text (number 11 in the upper image) is the text displayed in the footer of the course pages (on the main page and on the lesson pages).

Copyright text on the course lesson page:

Notices for students
Let us look at the course settings in “Notices for students” tab.
Field “From”
A field “From” will display a contact of a Sender whose name will be displayed in the notifications about the lessons and check reports.
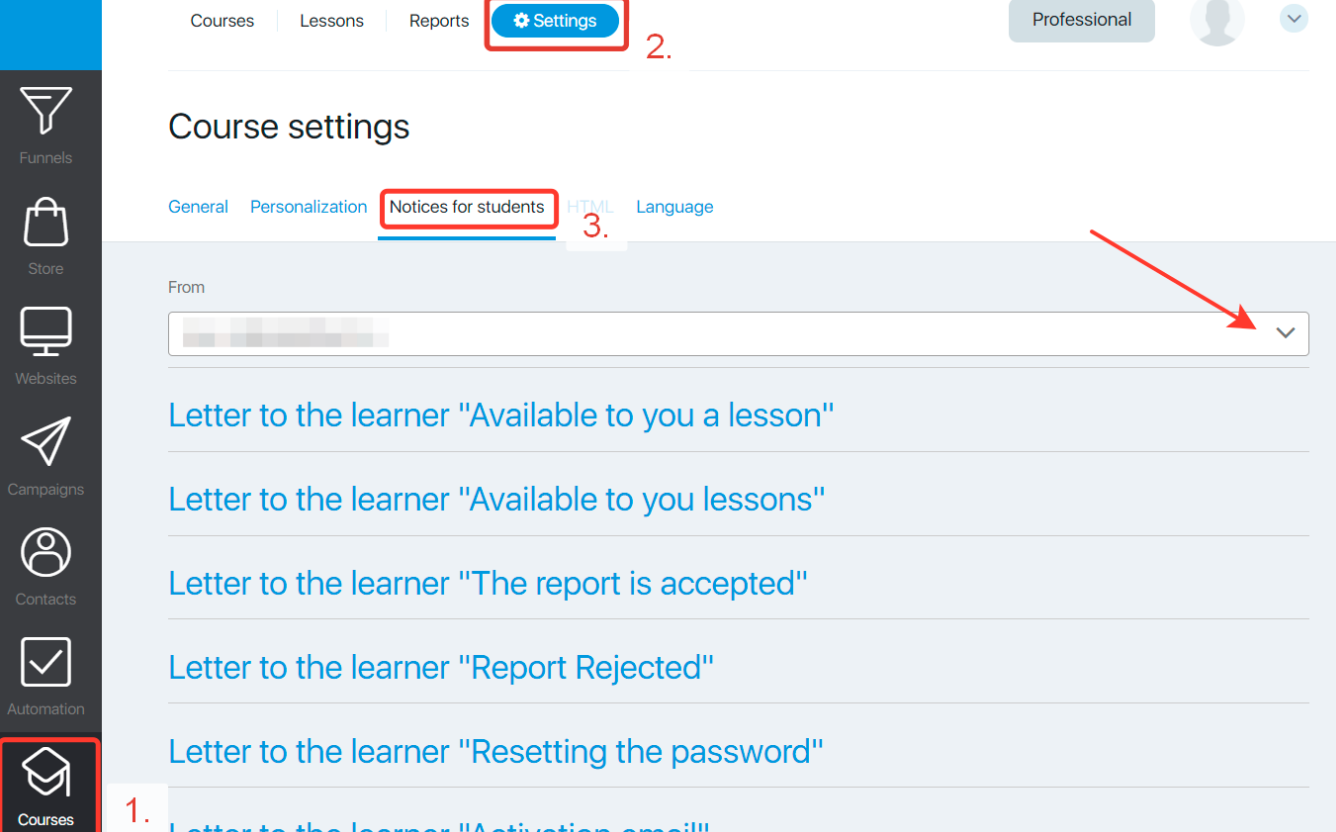
Letters to the learners
“Notices for students” tab allows you to edit the letters which will be sent to your students when a new lesson(s) is(are) accessible to them, as well as the notifications whether a report is accepted or declined. Let us look at this in more details.
Letters “Available to you a lesson” and “Available to you lessons”
General view
These letters are sent when a student is granted with an access to a lesson(lessons).
Let us look at a couple of cases when a student receives these letters:
Case (a letter “Available to you a lesson” is received)
In this case the course settings are customized so that one of the lessons becomes accessible in 7 days once the previous lesson has been finished. A letter “Available to you a lesson” will arrive in 7 days as soon as a lesson is accessible.
Another case (a letter “Available to you lessons” is received)
The course settings are customized for two lessons so that they are accessible in 1 minute after the course is started. Then a letter “Available to you lessons” is received by a student in 1 minute after a student starts doing the Course.
In other words, if a student is given an access to one lesson of the course, then he/she receives a letter with a link to this lesson.
If a student is given an access to several lessons of one course with no regard to modules, then he/she receives one letter with a list of all lessons and their links.
When notifications are not sent?
- If the lesson was opened by a student. In this case, the opening of the lesson is considered to be a click on the link (url) of the lesson.
IMPORTANT: the link is always available if there is access to the course, but the content that the system will place at this address depends on whether the lesson is available or not.
Thus, the student can open the lesson link and see the text content of the “Lesson not available” view. But the system will count the opening of the lesson and will not send a notification about it. - If the entire course (or module) becomes available later (at the time of registration is not yet available), then notifications are not sent for the simple reason that it is customary for such courses to send notifications timed to a specific event within your business (your “ecosystem” ). Common words in this case will not work and are even more likely to harm.
- If notifications are disabled in course settings.

When notifications are sent?
- Contact’s (student’s) global status is “Activated”/”Subscribed”.
- Contact (student) has an access to a course/module in “Allowed to leads in lists” — “Not allowed to leads in lists”. Please find out more about these settings here and here.
- A student has an access to a module/lesson by date (“up to”). Please find out more about these settings here (clause 5).
- A course was opened by a student.
- A lesson is not finished yet.
Letters “The report is accepted” and “Report Rejected”
Course students will receive this notification if they do the tasks of a lesson wrong or right.
A letter “Resetting the password”
It is sent to a student if a student forgets a password and would like to restore an access to the course.
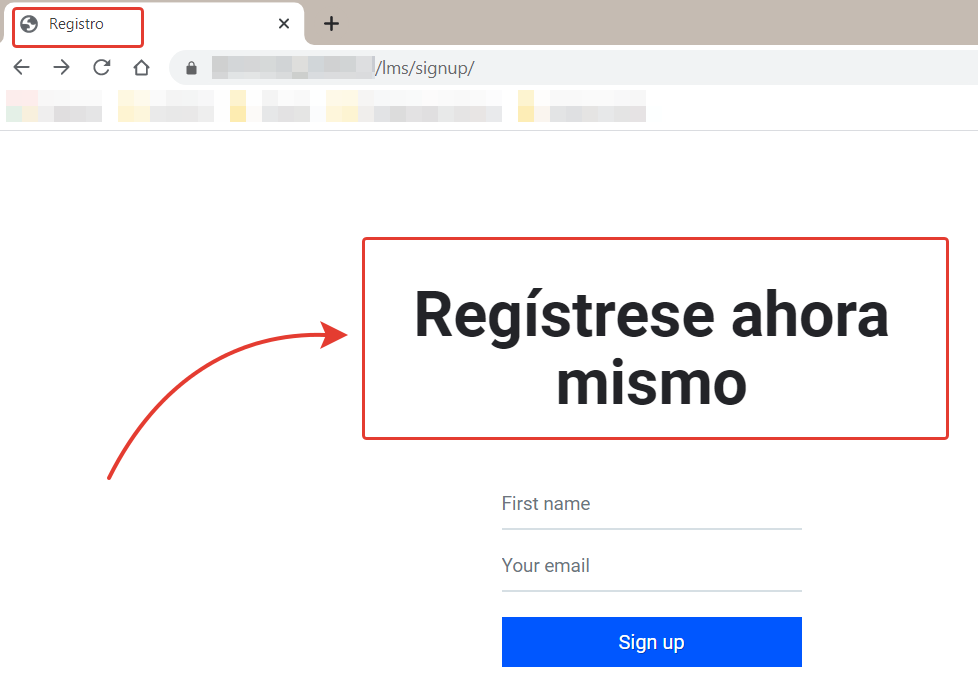
A letter “Activation email”
This letter is sent right after the registration on the page Your_Login.justclick.io/lms/signup
You can choose whether to send an activation email to new students or not. To send the email, you need to check the box ‘Send an activation email to all new students to confirm their consent to receive email newsletters’.

PLEASE NOTE: if you DO NOT send an activation email, new students will not be your subscribers and you will not be able to send them newsletters.
A letter “Confirm new IP address”
This letter is sent if there was an attempt to log in a student’s profile from a new ip-address.
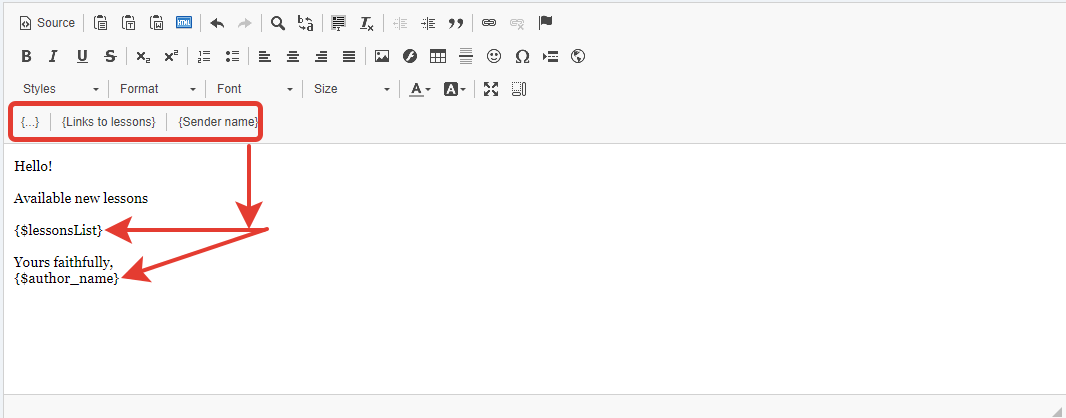
Variables in letters to students
Each letter can have variables which can be used to enter the required information, as shown in picture below.
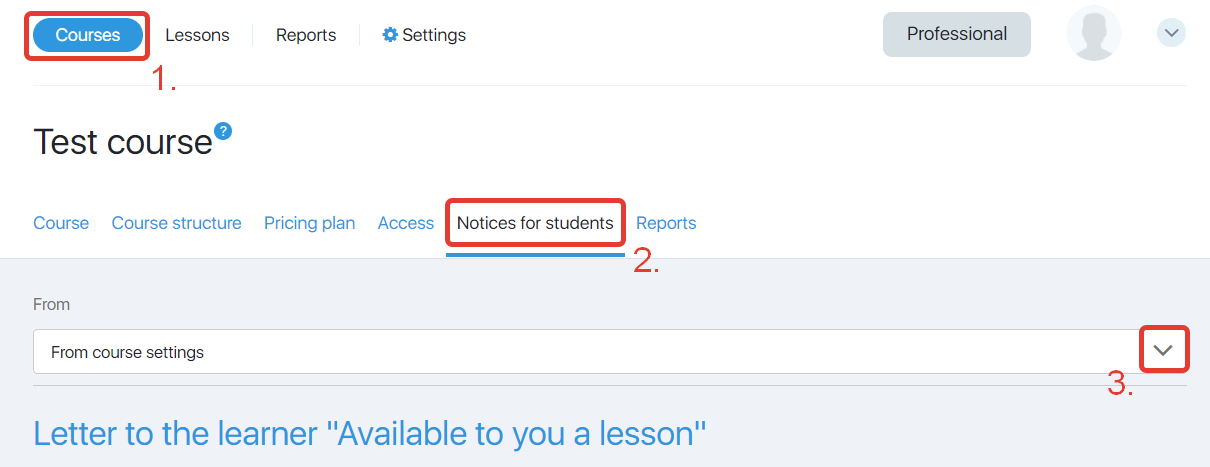
You should understand that the course settings define the main parameters which by default will be inserted in a particular course in Course section in Notices for students tab, as shown in picture below. However, you can customize the settings for each course.
The {…} button has appeared on the editor panel, which allows you to add information from additional contact fields to letters. More details can be found here.
We have looked at the main settings of course section dealing with the appearance and performance of the course. Now we can turn to the settings of the course themselves and each lesson in a course.
HTML codes
Fields “Add HEAD code” and “Add FOOTER code” (numbers 15 and 16 in the first image) can add html codes from any analytics which you use (Google Analytics, Facebook pixel code, Yandex metrics, etc.) to evaluate the course page traffic.
Language
In this tab, you can edit and / translate into another language the pages of the courses and the student training room. Each of the field groups is responsible for the translation of the individual functionality of the training room (in order to open a group of fields, click on its name):
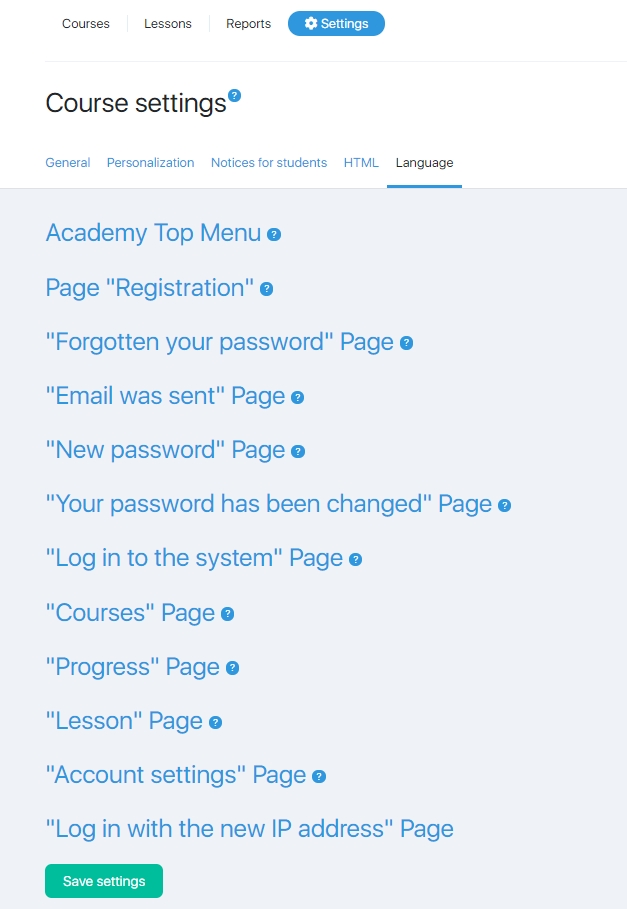
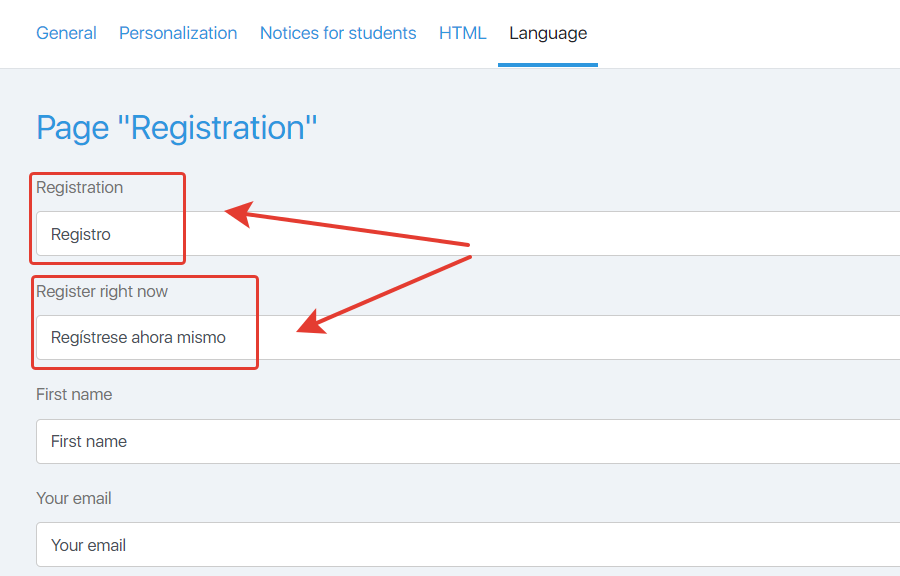
- Page “Registration” – text fields for translating the student registration page in your study room https://username.justclick.io/lms/signup/, where username is your login.
- “Password recovery” page – text fields for translating the student password recovery page https://username.justclick.io/lms/password/recover, where username is your login.
- The page “We have sent you instructions” is displayed after entering the e-mail address when recovering the password https://username.justclick.io/lms/password/recover/success?email, where username is your login.
- The page “Your password has been successfully changed”, which is displayed after the student has changed the password https://username.justclick.io/lms/password/recover/confirm/success?email, where username is your login
- Page “Authorization in the system” – text fields for transferring the student’s login page to his study room https://username.justclick.io/lms/login/, where username is your login.
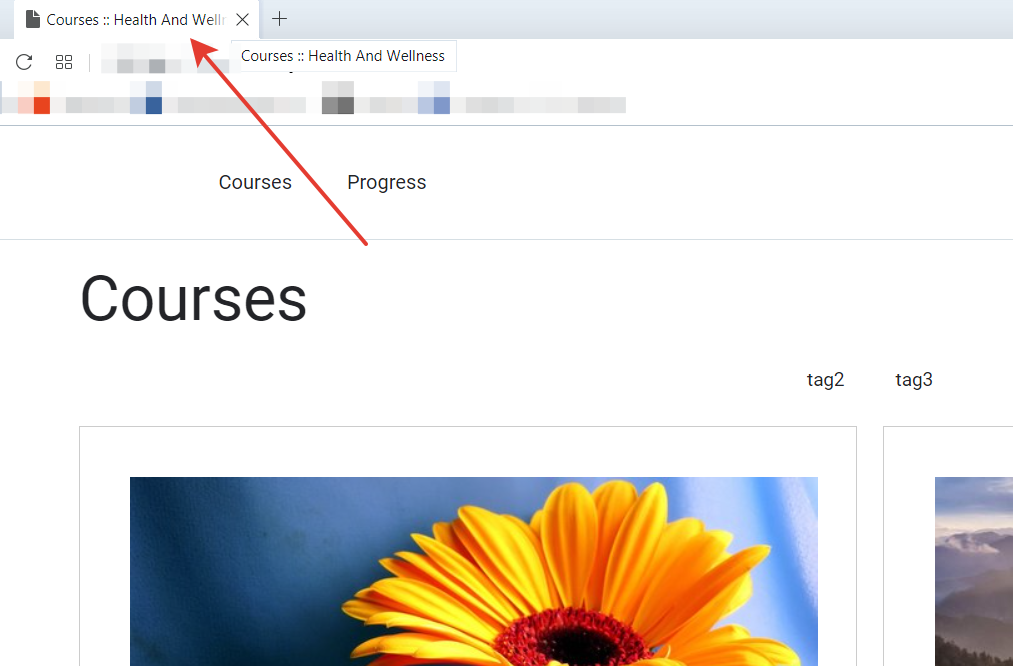
- Page “Courses” – text fields for translating the main page of the student’s office after authorization in the student’s study room https://username.justclick.io/lms/, where username is your login.
- Page “Progress” – text fields for translating the page for viewing the progress of learning by the student https://username.justclick.io/lms/progress, where username is your login.
- “Lesson” page – text fields for translating the course lesson page https://username.justclick.io/lms/course/XXX/module/YYY/lesson/ZZZ/, where username is your login, XXX is the system number of the course, YYY – system number of the course module, ZZZ – system number of the lesson.
- Page “Profile settings” – text fields for translating the page for editing the student account credentials in the training system https://username.justclick.io/lms/profile, where username is your login.
- Page “Log in with the new IP address” Page” — text fields for translating the page when the client authorizes from a new ip address.
By replacing the data on the course language settings page:
They will be changed or translated on the landing page after saving the course settings: