Content
This page allows you to add new or edit existing auto lists.
The difference between an auto-list and the usual one is that contacts are automatically added to an auto-list when certain conditions are met.
The pages for adding and editing are identical to each other except for the page title (Add or Edit respectively).
The page consists of 2 tabs:
- Basic data
- Conditions
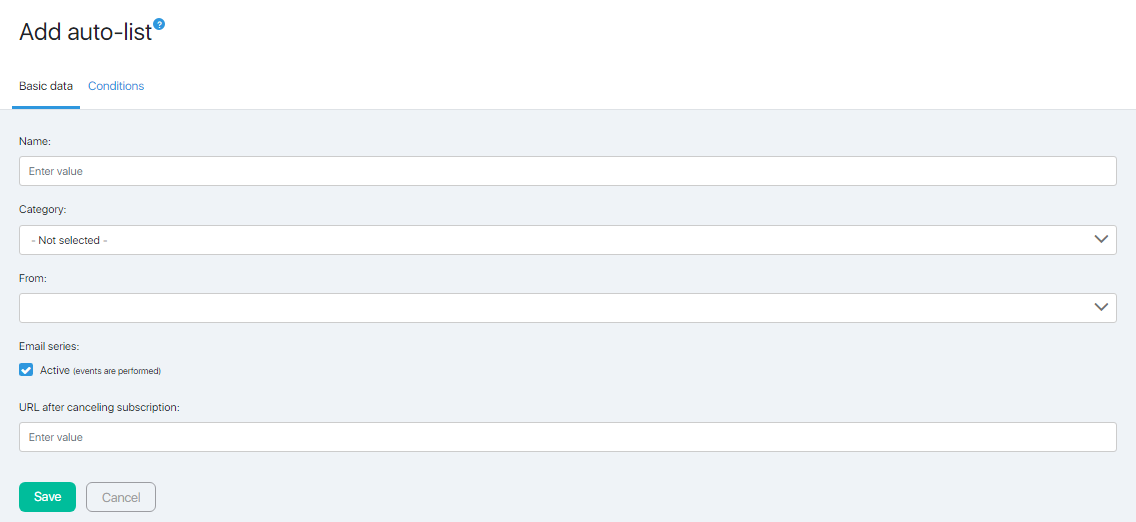
Basic data
Enter the name of the auto list in the Name field.
Use the Email series checkbox to specify whether the auto list members will continue to receive the email series.
Select the sender for the series letters.
The remaining fields are optional.
You can:
- Arrange auto lists by combining them into categories (they must first be created). Also, the distribution by category can be adjusted at any time.
- Set the redirect page after unsubscribing.
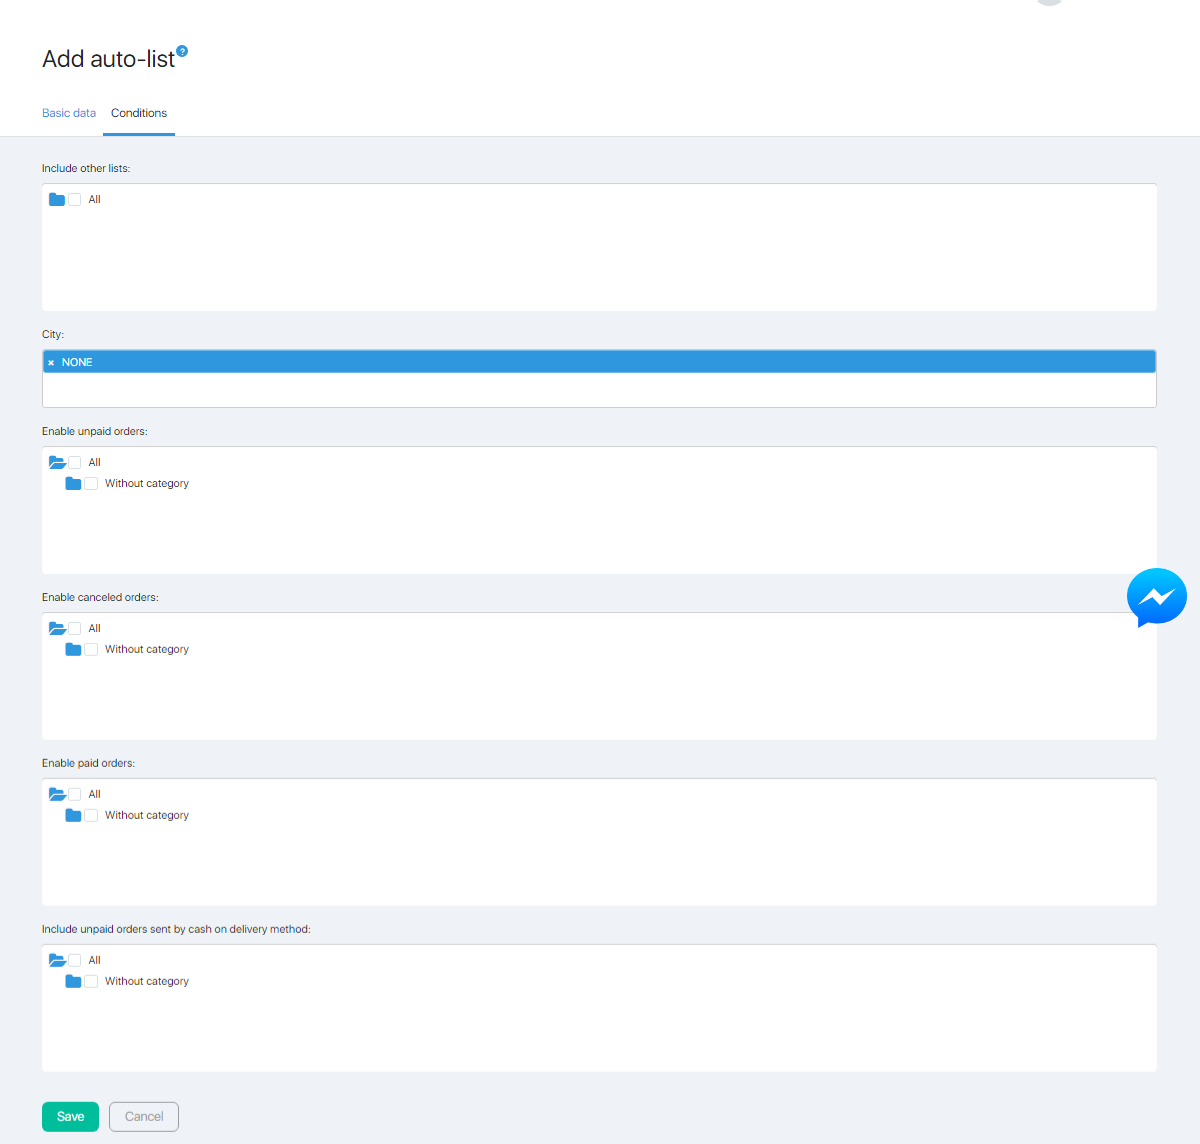
Conditions
It is in this tab that you specify the conditions under which the contact will be added to the auto list.
You can configure the addition of any other list / lists to the list of participants, or customers of a certain product / products that paid / unpaid / canceled accounts.
Moving by category is done by clicking on the blue folder. Selecting a list by clicking on the checkbox (empty square). It should have a blue tick. All lists in the category can be chosen by clicking on the checkbox category.
For example, there is a course or training that is sold in several packages with different contents. Accordingly, several lists of clients will be formed (by the number of packages). If participants of all these lists should receive an informational newsletter during the training or recording of the same lessons, they can be combined into one auto list for ease of distribution.
It is also possible to create an auto-list by the location of contacts by specifying the value in the City field. This can be used when announcing offline events to subscribers.
After making the necessary changes, click the Save button. The auto-list will be added to the list on the Contact lists page.


