Content
The concept of Contacts is broader than subscribers. Subscribers are those contacts who have agreed to receive the newsletter. You can only contact these subscribers, not other contacts, using JustClick.
However, you can also have contacts, for example, received during offline events. You can add such contacts to your base, and then call them or send an Email message.
You can access the contact page from the Contacts menu then the Leads submenu.

The form allows you to:
- View summary information for contacts;
- View detailed information for each contact;
- Import contacts;
- Add new contacts;
- Edit contacts;
- Add / delete contacts to groups;
- Send letters;
- Export contacts;
- Customize the table.
View
The View button allows you to adjust the visibility of the columns of the table. When you click on it, the pop-up window Visible fields opens.
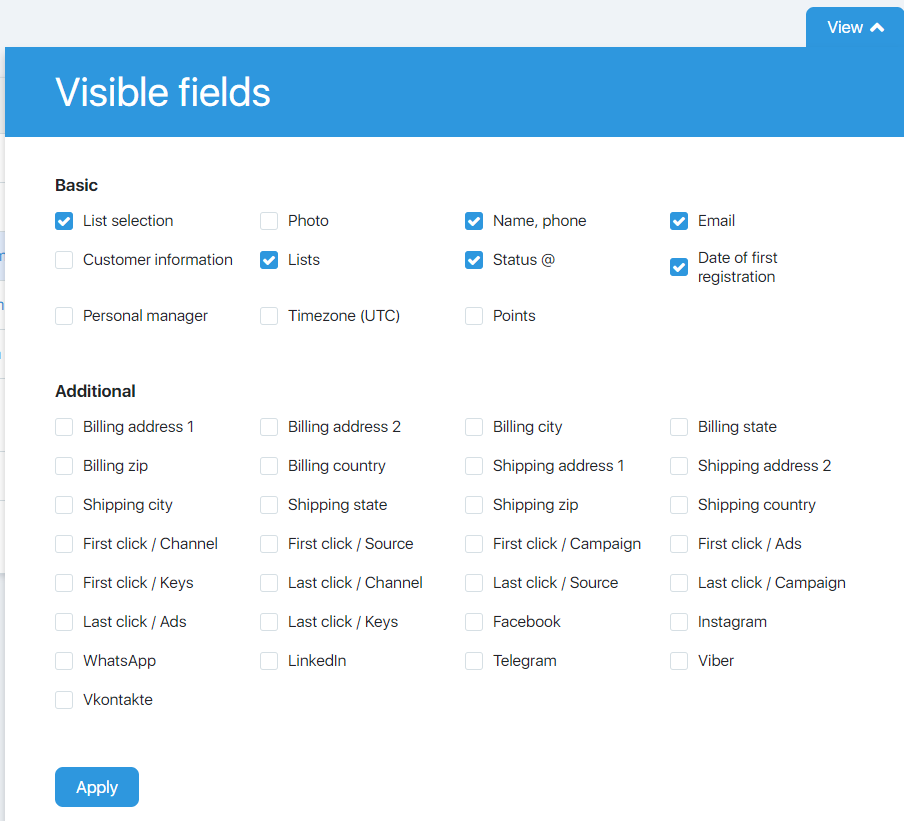
By ticking or ticking checkboxes, you can add / remove certain columns from the screen.
Filter
The filter allows you to customize the output of table rows (individual contacts) according to the specified conditions. When you open the filter it looks like this.
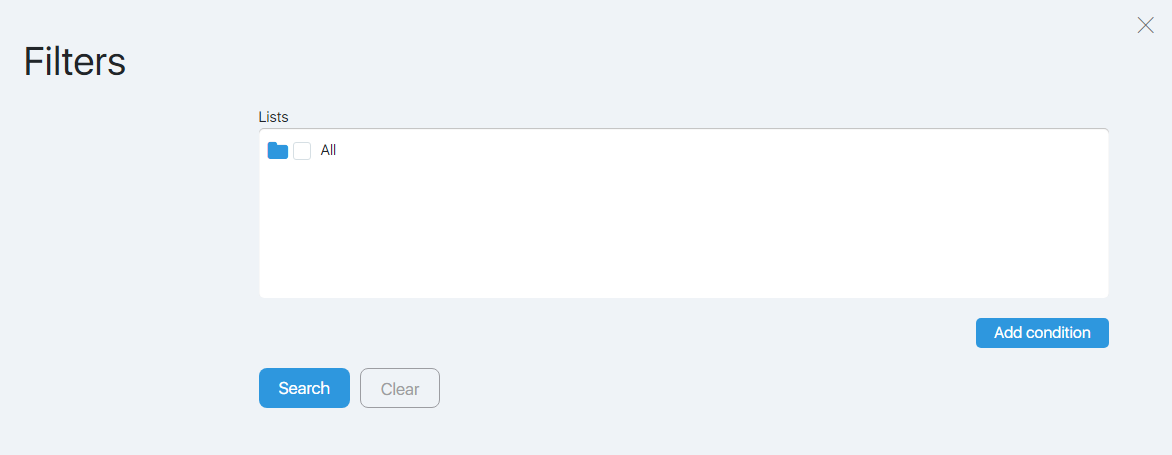
You can customize the output of contacts from a specific group. Moving by category is done by clicking on the blue folder. Select a group by clicking on the checkbox (empty square). It should have a blue tick. All groups in the category can be chosen by clicking on the checkbox category.
Clicking on the Add Condition button allows you to expand additional filter fields.
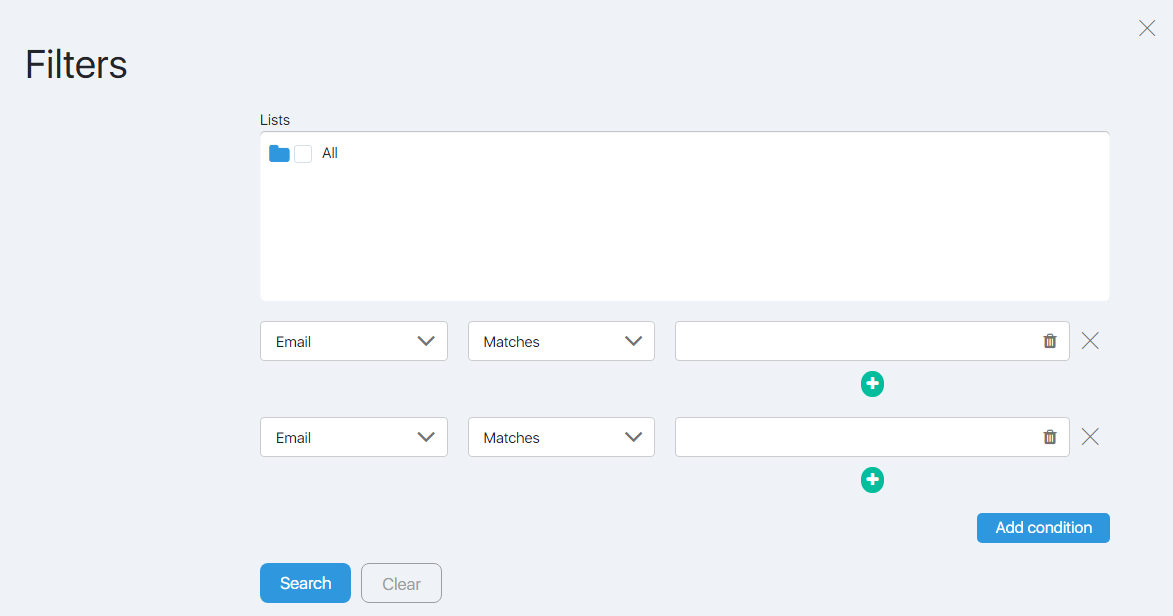
You can configure filtering by the following fields:
- Email;
- Phone number;
- Total amount paid;
- Last name;
- First name;
- Middle name;
- Email exists;
- Customer information;
- Status @;
- Date of first registration;
- Tags;
- Date of subscription to a list;
- Personal manager;
- Timezone (UTC);
- Points;
- Billing address 1;
- Billing address 2;
- Billing city;
- Billing state;
- Billing zip;
- Billing coutry;
- Shipping address 1;
- Shipping address 2;
- Shipping city;
- Shipping state;
- Shipping zip;
- Shipping coutry;
- Your gender.
For each field, you can specify different match types for the value:
- Corresponds;
- Does not match;
- More than;
- Less than;
- More than or equal to;
- Less than or equal to;
- Contains.
The + button allows you to specify multiple values for one condition.
Add Condition button – add the required number of conditions.
Summary information on contacts
At the top of the page, in the Total block, the total number of contacts for the account is displayed.
Detailed information for each contact
When you click on a name or e-mail contact, you will go to the Contact card (Shop-> Account section) containing the complete contact information.
Clicking on the group to which the contact belongs opens the Subscribers form, with the selection of all subscribers of this group.
The blue number next to the name of the group shows how many more groups this contact contains. When you click on it, a full list of groups is displayed.
Import contacts
The Import button opens a form where you can apply for the transfer of subscribers from another service, or add it manually (for example, when transferring from one mailing list to another).
Add a contact
The Create contact button allows you to fill in the data for a new contact.
Note! You cannot send e-mails to manually added contacts. However, you can send SMS and make calls.
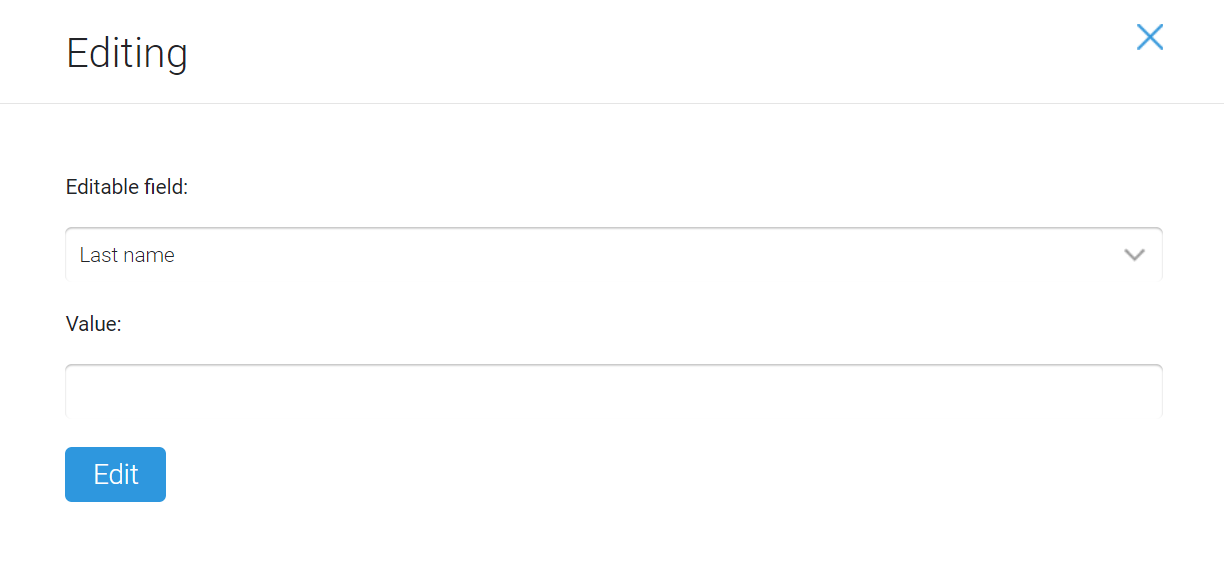
Editing contacts
To edit contacts, you must use the filter to find a specific contact / contacts. You can also select contacts by ticking the checkboxes of the first column.
After that, you can change one of the following fields:
- Surname;
- Name;
- Middle name;
- Phone;
- City;
- Description.
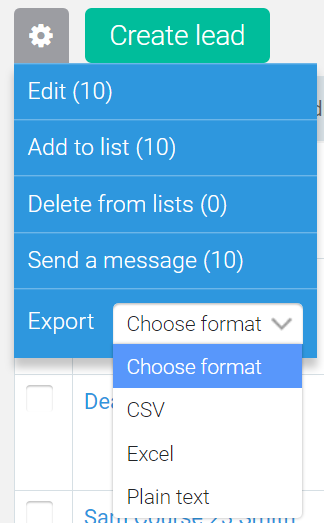
To do this, click on the button with the gear and select Edit in the menu that opens.
Then, in the window that opens, select which field to edit and set a new value.
Add to group
To add contacts to a list, you must use the filter to find a specific contact/ contacts. You can also select contacts by ticking the checkboxes of the first column.
After that you must click on the button with the gear and select Add to group in the menu that opens.
In the window that opens, specify which group the contacts will be added to.
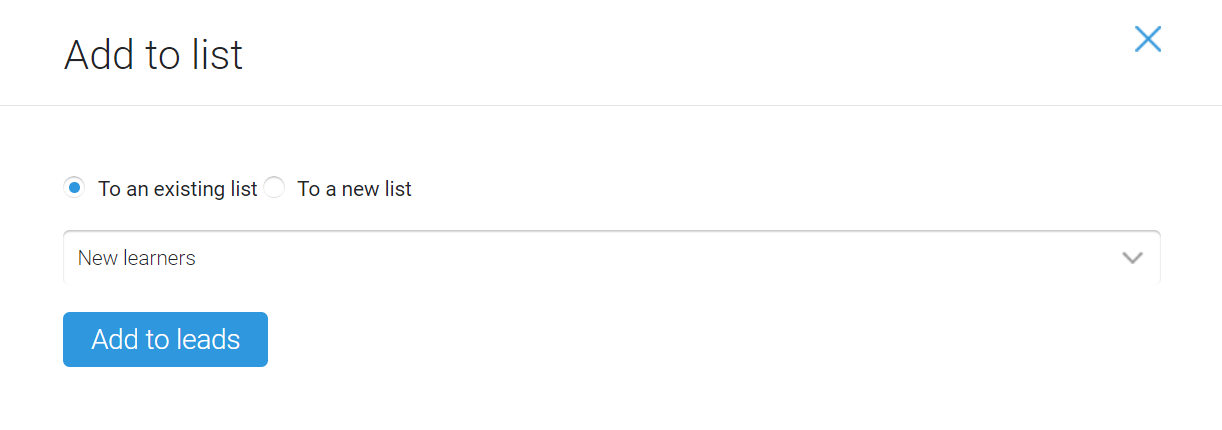
Then click the Add to Contacts button.
Deleting contacts from a group
To delete contacts from a group, you must select contacts by ticking the checkboxes of the first column. For convenience, you can first find a specific contact / contacts using the filter.
After that it is necessary to click on the button with the gear and in the opened menu select Delete from lists.
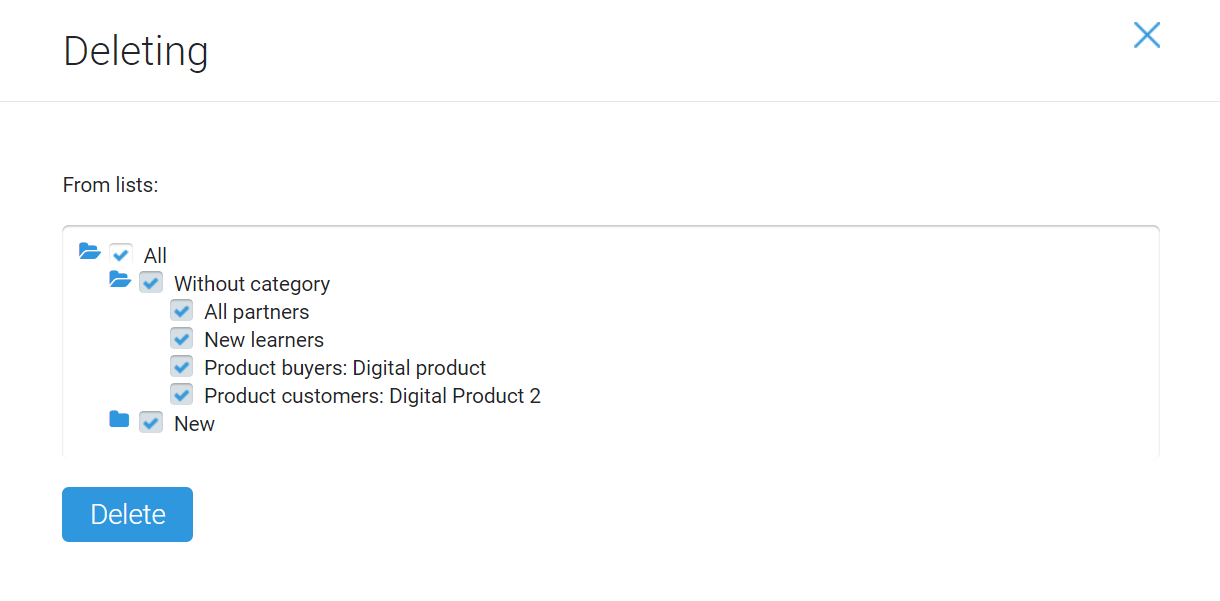
In the window that opens, use the checkboxes to specify which group to delete contacts from. All groups in the category can be chosen by clicking on the checkbox category.
If you received a request from the subscriber for the complete removal of personal data from the store (GDPR) or want to completely delete your data, then send us a request to the support service. At the moment, it is impossible to completely delete contacts from the store, but we can delete 1 contact if you received such a request so as not to violate the GDPR law.
Export contacts
To export contacts to a computer, you must use the filter to find the desired contact/ contacts. You can also select contacts by ticking the checkboxes of the first column.
After that it is necessary to click on the button with the gear and choose the export format from the menu that opens:
- CSV;
- Excel;
- Plain text.
When you click on the selected format, the contacts will be exported to the computer (to the default download folder). After exporting contacts, the following fields will be displayed in the document:
- Surname;
- Middle name;
- Telephone;
- Email;
- Description;
- Personal manager;
- UTC time zone;
- Billing address 1;
- Billing address 2;
- City of billing;
- Billing region;
- Billing index;
- Country code of invoicing;
- Delivery address 1;
- Delivery address 2;
- Delivery city;
- Delivery region;
- Delivery index;
- Delivery country code;
- First click UTM (5 parameters)
- Last UTM (5 parameters)
- Facebook;
- Instagram;
- WhatsApp;
- Telegram;
- Viber;
- In contact with
- Points;
- Status;
- Sms status;
- Call status
- Tag;
- All add. Fields.
