Content
How should this work?
Many have a need to make the processes before (recording to the webinar) and after (for those who missed and finished watching) completely through the chatbot.
Just about this we will talk about.
In this example, we fully conduct all the chain of communication (before and after) through Telegram and additionally inform via e-mail, so the contact must not only subscribe through a form, but also to activate a subscription by clicking on the link in the e-mail.
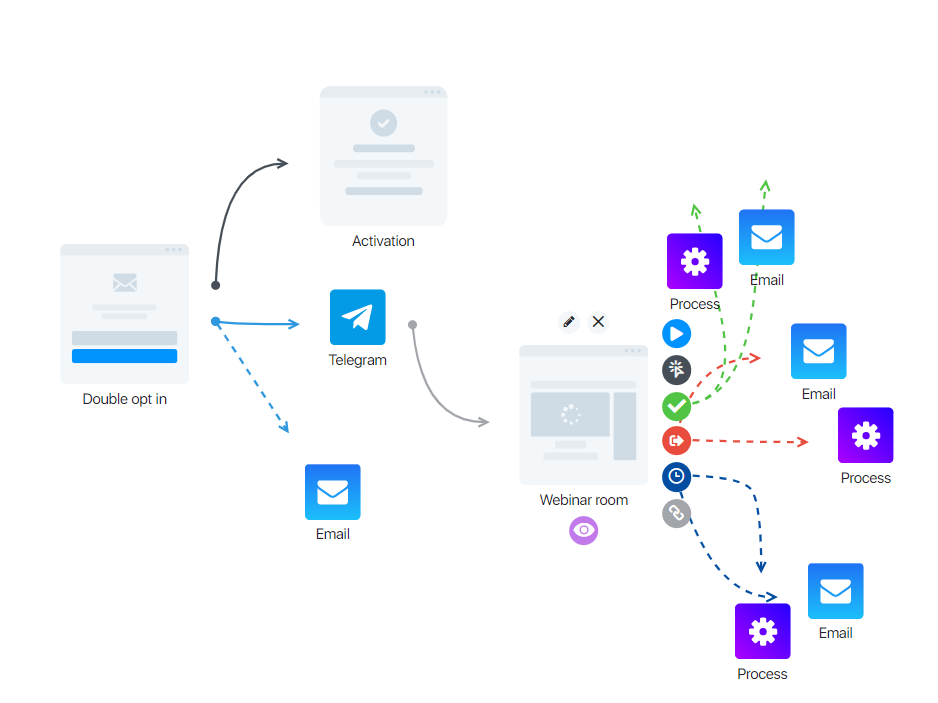
First we bring the subscriber to the subscription page, after activation we take him to the chat bot and lead him to the webinar, and after the webinar we lead him to the arrows (outputs) in the processes that are associated with Telegram and send letters to the email.
How do I set up such a chain?
Before you start setting up this chain, bind the bot to JustClick.
Detailed instructions on how to connect a Telegram chatbot are in this manual.
Setting up a subscription page
Subscription page is set up just like any other page. You choose the design you like (or build it from scratch) and change the text.
We wrote about how the page builder works in detail in this article.
Configuring the Telegram chatbot block
Drag and drop the Telegram chatbot into your workspace and start editing it. Configure it the way you want it to work. Leave space in your emails for a link to the webinar room.
After setting up, save the chatbot process and close, in the funnel pull the blue arrow (exit “activate subscription”) from the subscription page block to Telegram.
Setting up a webinar room
Detailed instructions on setting up a webinar room is in this article.
The only nuance, so that the trigger “Finished till the end” worked correctly – set the end time of the webinar in the settings of the webinar room (for autovebinar) or do not forget to finish it, if you live webinar.
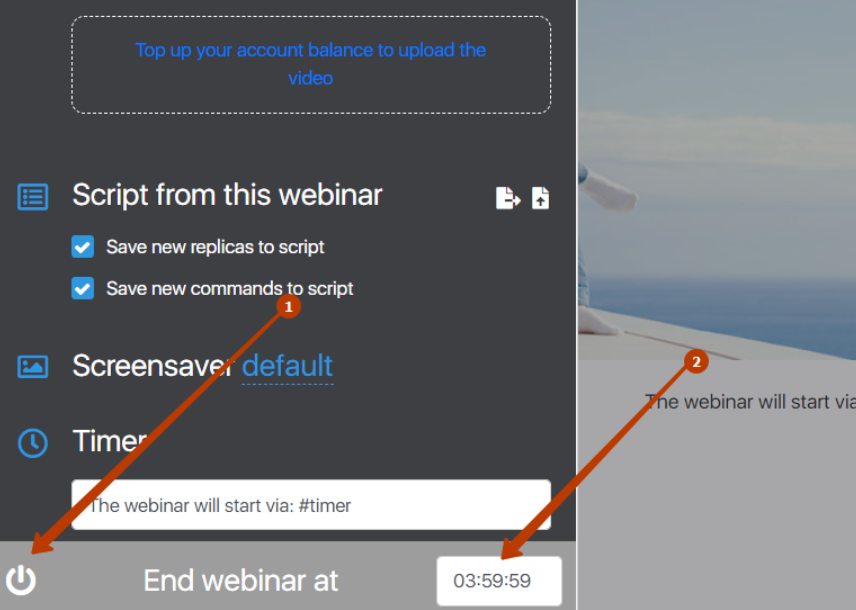
- Clicking will end the webinar
- Webinar will end when the time expires
Save the webinar room settings and exit the webinar room.
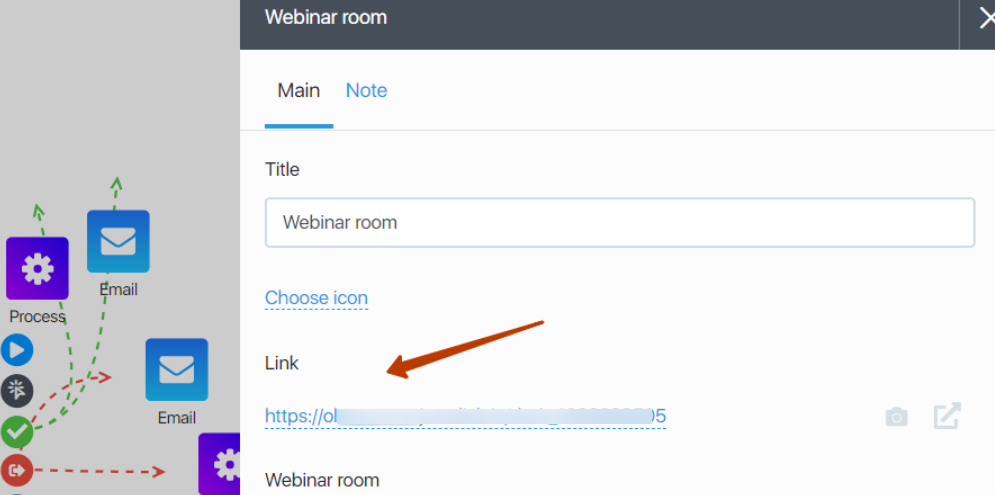
After you have created a webinar room – go back to the previous step and add a link to the webinar room in your messages. Don’t forget to save the chatbot process after that.
The link to the webinar room should be taken in the webinar block edit.
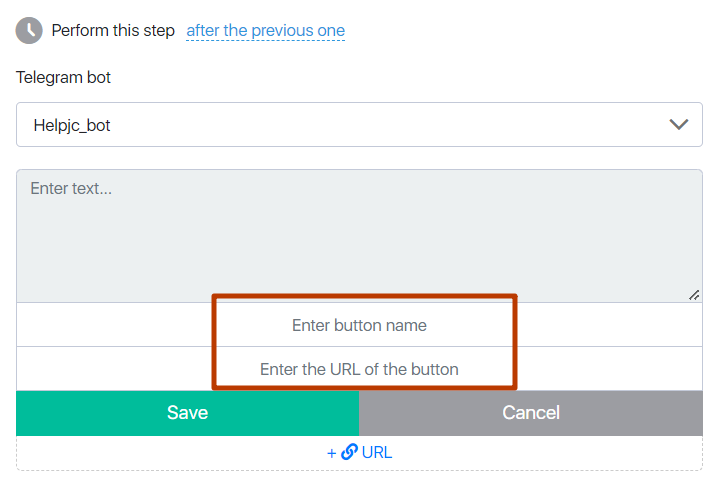
In the chatbot, the link can be inserted in the message and in the button by pressing “+ URL”.
Continuing communication after the webinar in Telegram
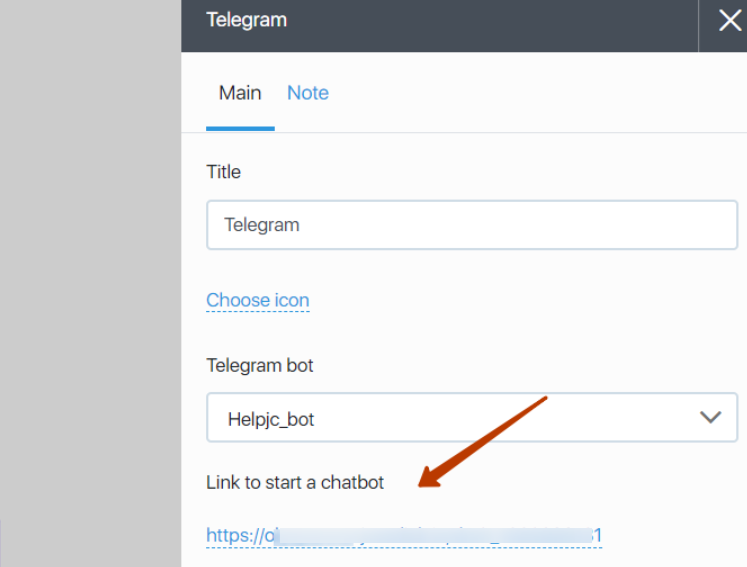
The thing is that the chatbot is activated only when you click on a special link (screenshot) and will not start if you pass a contact from the previous block (by the “Added to Process” trigger). But if you pass a contact to the “Process” block, then due to the fact that he has previously activated a subscription to the bot – we will be able to send him a message.
Therefore, to set up further communication (exits from arrows), you need to use the “process” block.
Later we will refine it so that it will be possible to pass a contact by arrow (connection) to the “Telegram chatbot” block, but for now you will use the “process” block.
The process block needs to be configured in the same way as the chatbot. That is, you need to use only those actions in it that are related to Telegram. Carefully check that you have the same Telegram bot involved in your chains.
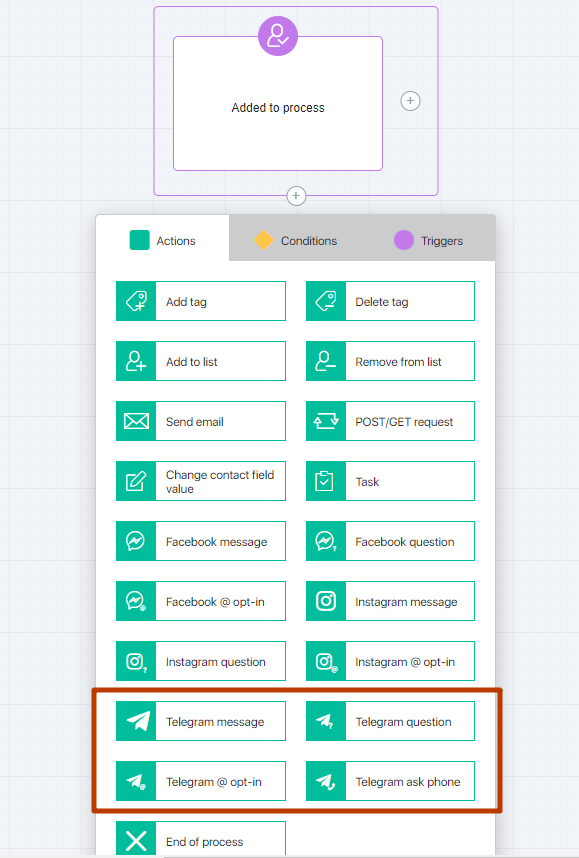
If you have several Telegram chatbots connected, check that the same Telegram bot is specified in all settings.
Note also that in the processes with the filter “Visited a webinar” you can separately identify customers, taking into account the specific time of the visit webinar. This point is described in more detail here.
After setting up, save the process and exit it. Pull the desired arrow (finished watching, missed webinar, etc.) from the webinar room to the process block.
This is a simple way to set up a complete chain of interactions with a subscriber via Telegram.
It is not necessary to repeat our simple chain, you can take it as a “backbone” and expand it to your goals, keeping only the basic “skeleton”.

