Content
Provide your clients with the opportunity to make an appointment with you or your employee. For example, your client can sign up for a consultation or coaching session by choosing a convenient date and time in the calendar that you have set up in advance. The calendar entry is available with both subscription and payment. The tool will allow you to set up customer meetings for your sales team.
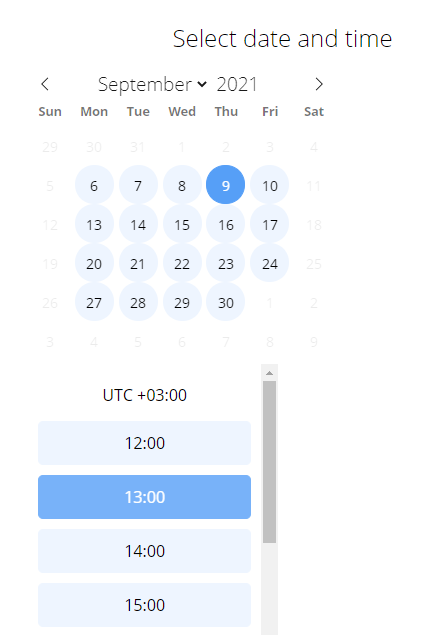
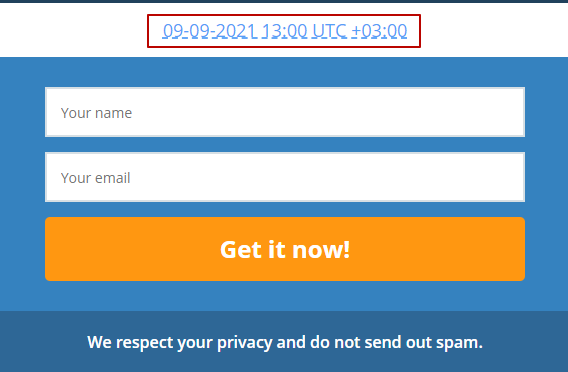
The customer first interacts with the calendar, then fills out the form. When registering for a meeting, the time is displayed according to the local time of the contact, and the time zone is additionally displayed.
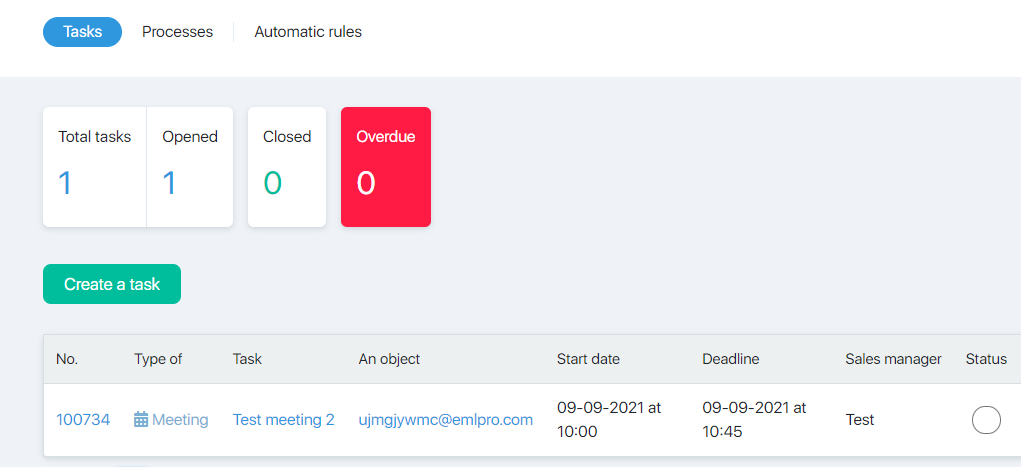
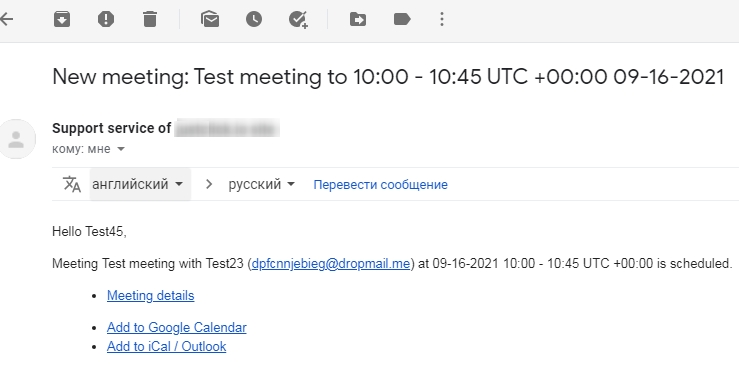
After the appointment (after signing up or paying), the person in charge of the meeting will receive a notification about the new request for the meeting, and will be able to process it.
How do I create an appointment?
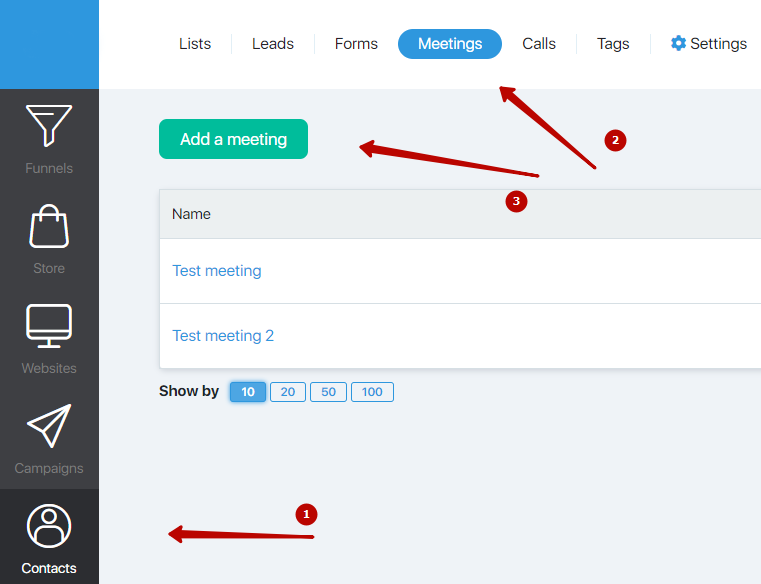
A meeting can be created through the “Funnels” section when planning it, or in the “CRM-Meetings” section. The calendar for recording is available when creating an appointment through the “Funnels” section.
Click on the “Create an appointment” button.
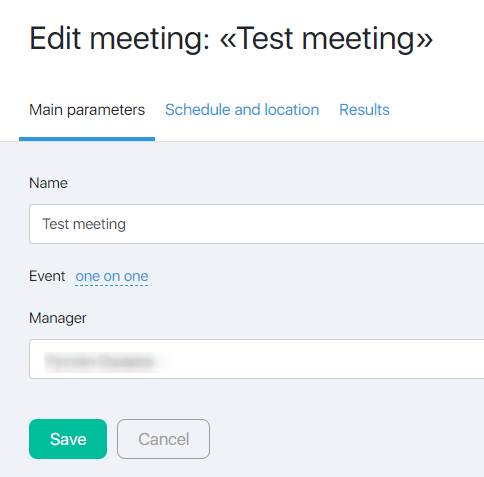
General
Provide a title for the meeting.
Select the person in charge of the meeting:
- by default, the profile of the main administrator (owner) is specified;
- or employee profile (if active);
- or a team of employees (if created).
Schedule and meeting point
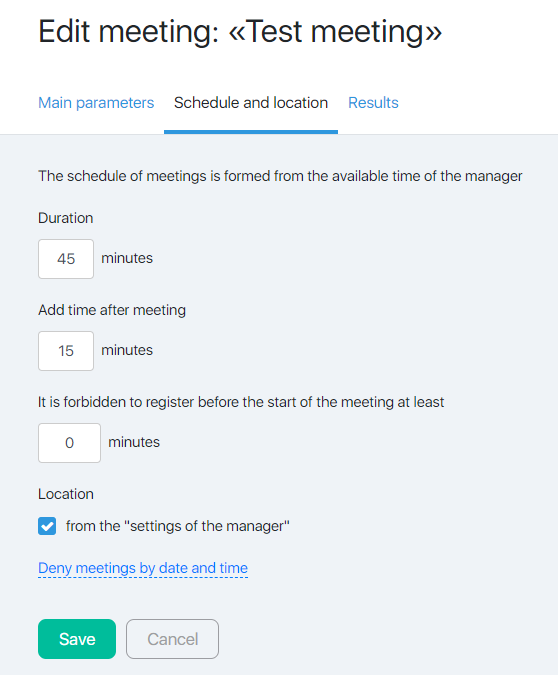
The schedule of meetings is formed from the available time of the responsible employee.
- For the account owner in the profile settings
- For an employee in the employee card.
In our example, the duration of the meeting is 45 minutes and 15 minutes for a break, so the client will have access to intervals of 1 hour for recording. If you change the duration in the settings, the old orders remain unchanged. And only new tasks will already have a new duration!
The time in the field “It is forbidden to register before the start of the meeting at least before” limits the client to the minimum registration time before the start of the meeting. For example, you need to move away and you will not be able to respond on time to meetings if the client signs up 5 minutes before the meeting starts. If you specify 30 minutes in this field, then the closest available appointment option will be removed from the schedule for clients who sign up for it 30 minutes or less from the current one. The default is zero.
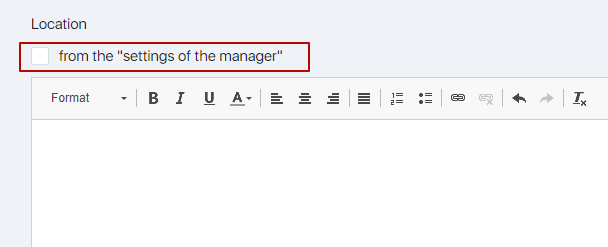
Venue
A textual description (instruction) about the meeting place. There can be both online and offline meeting.
The data about the meeting place is transferred to the contact card after making an appointment and sent in a letter to the client / subscriber.
For example, you can specify a link to a room in Zoom, a Skype login or phone number, a link to a Telegram profile.
You can use the data about the meeting place from the settings of the responsible person in the owner / employee profile, or disable the checkbox and specify new data and styling.
Banning meetings by date and time
Indicate on what dates and times you will be unavailable and the client will not be able to make an appointment.
Results
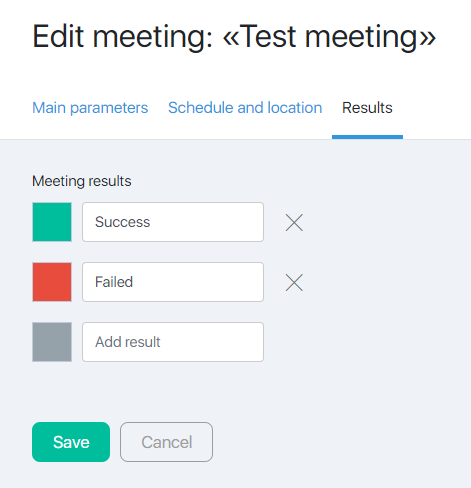
By default, there are 2 options for the meeting result – Successful and Failed. You can add other options as well.
Option buttons are displayed under the request in the contact card and in the block of sales funnels, for which it is possible to specify links with other modules (an example with funnels will be below).
Notifications
Turn on / off notifications for an upcoming meeting, set the time for notifications.
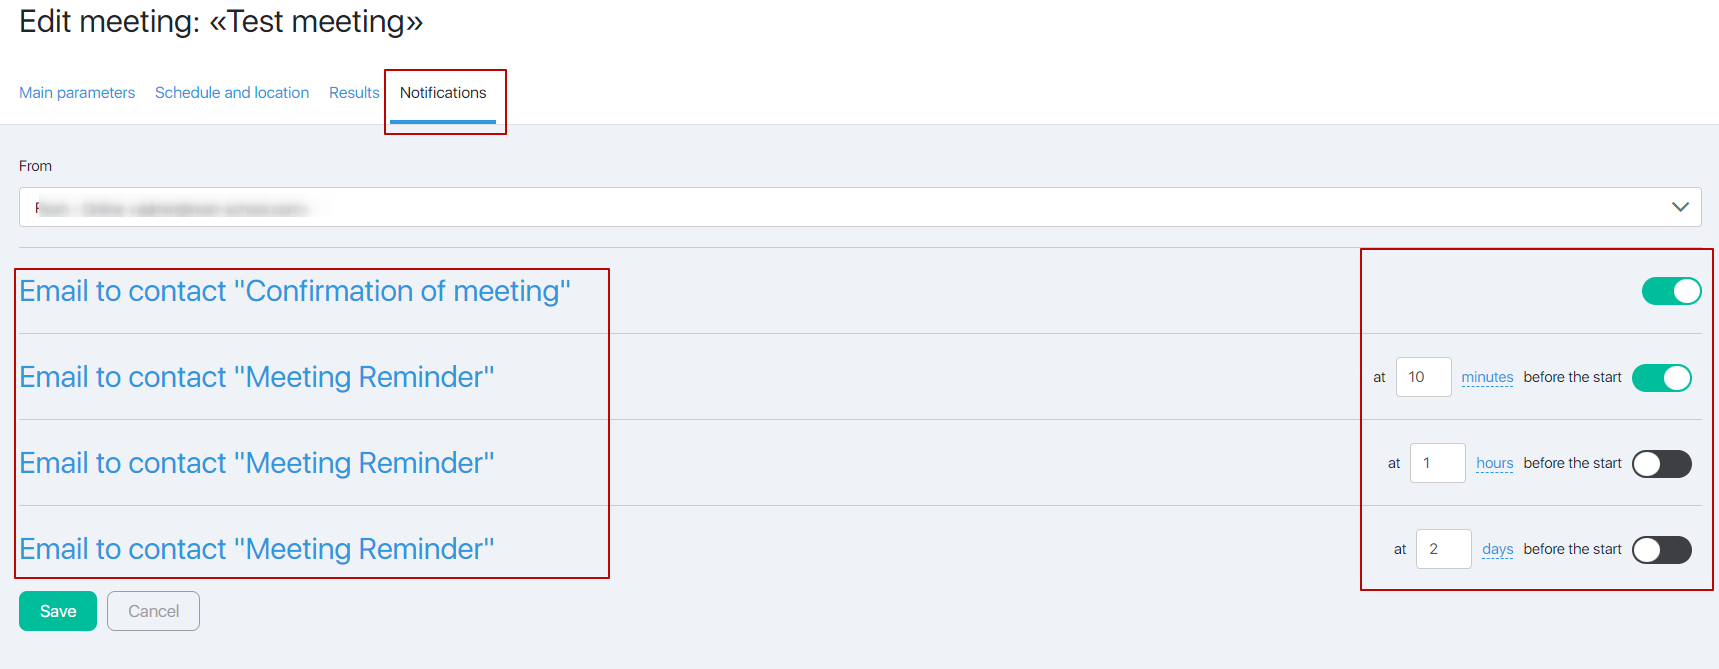
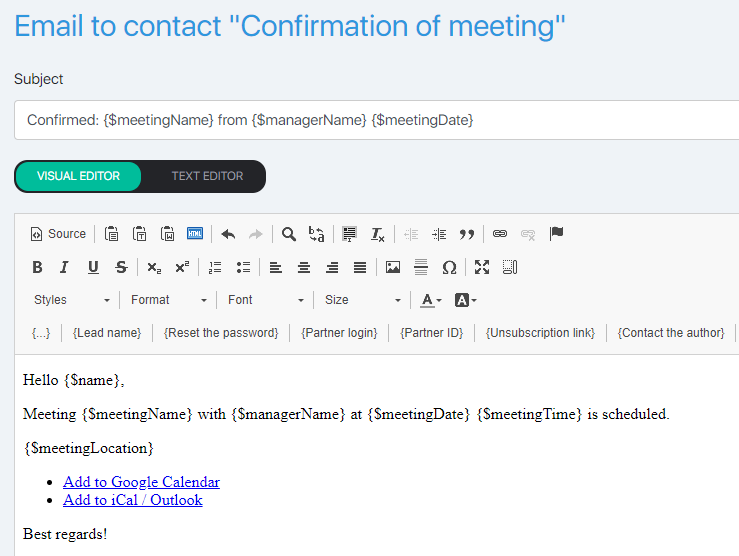
Click on the header to edit the email.
If a meeting was scheduled for an employee, the employee will receive a system notification about the upcoming meeting. The email template is notdisplayed in your account and cannot be edited.
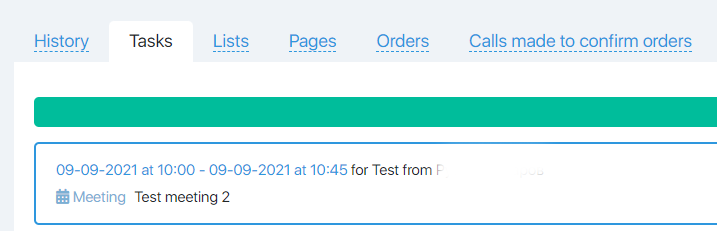
Edit the meeting request
The information on the application can be changed through the contact card. Click on the status of the application.

Then “Edit” and change the required data.
For example, you can change the person in charge, date, time.
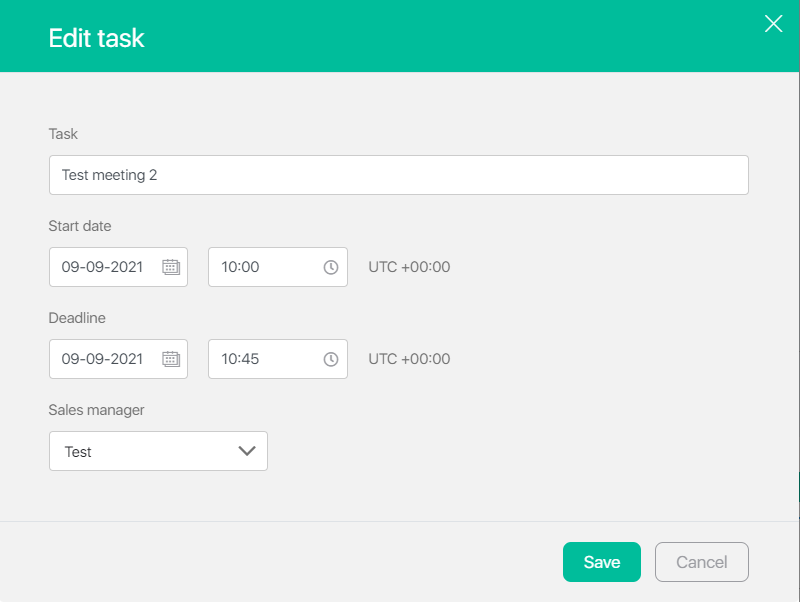
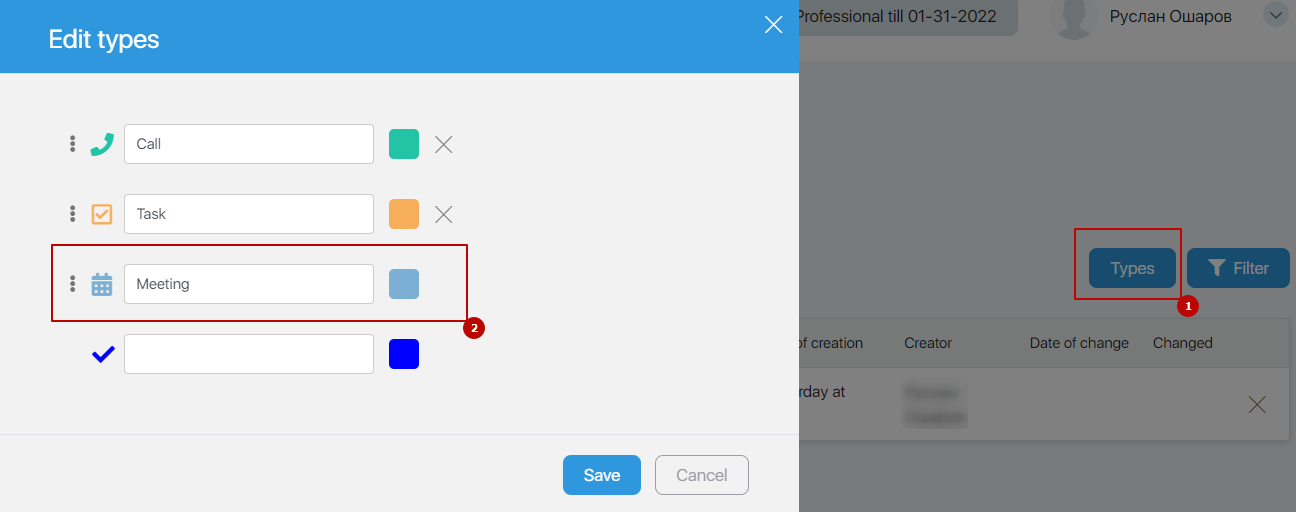
You can change the icon, color and name of tasks with the “Meeting” type. To do this, go to the “Tasks-Tasks” section, click the “Types” button.
Rescheduling / canceling a meeting
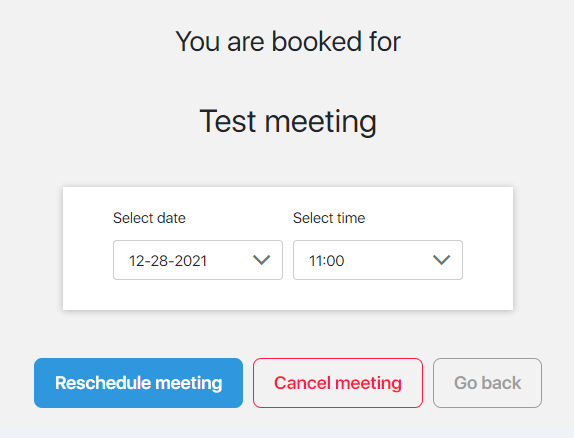
If necessary, the client can also cancel / reschedule the appointment. To do this, he needs to follow the cancellation / reschedule link that is in the letter he received after making an appointment, and change the date of the meeting to another or cancel the meeting altogether.
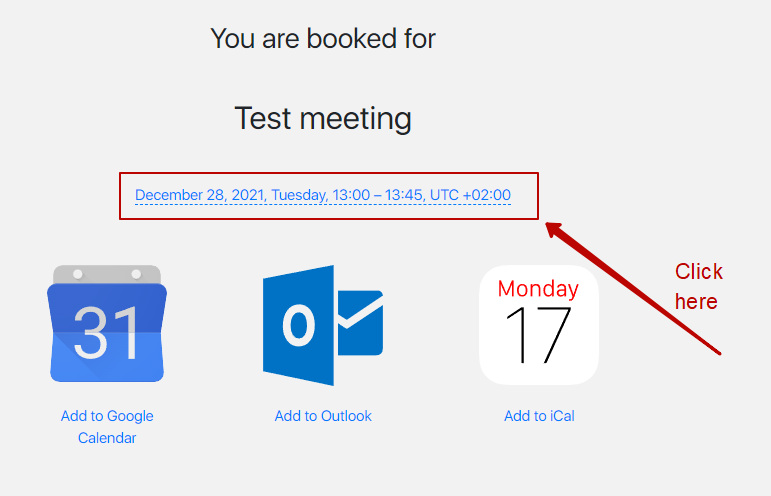
After the transfer / cancellation of the meeting, the client will be sent an email confirming the transfer / cancellation (from the meeting notification settings). If the meeting was scheduled for an employee, the employee will receive a system notification about the postponement / cancellation of the meeting. The email template is not displayed in your account and cannot be edited.
The meeting time (which was previously occupied) becomes free and other clients can sign up for it.
If the meeting was canceled, then the task goes into the “Closed” status with the result that was selected in the meeting settings when it was canceled, and the contact goes through the corresponding outlet of the funnel.
How do I create an appointment through Funnels?
If you have never used Visual Sales Funnels in your project before, start with this article.
To create a meeting, go to the “Funnels” section and create a funnel or edit the current one.
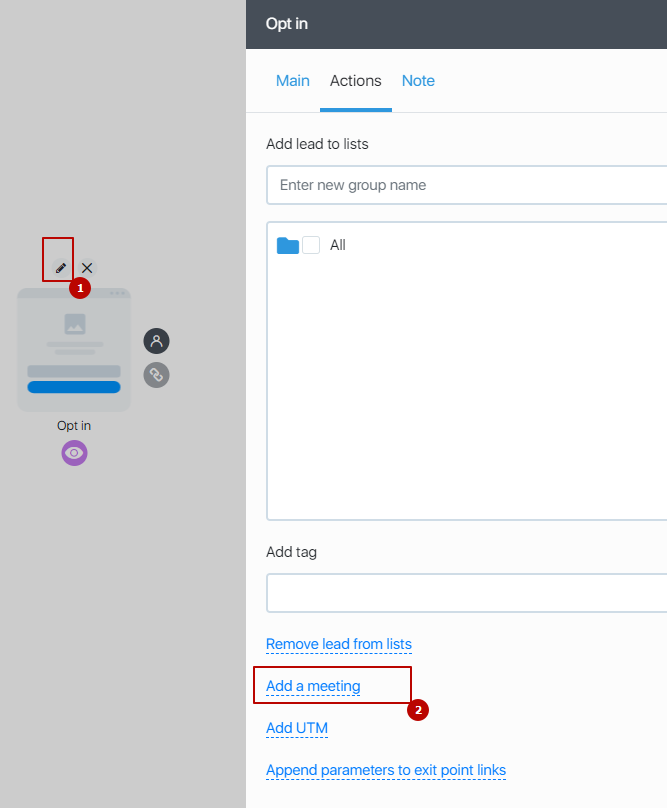
Adding an appointment “Add appointment entry” is available for the following blocks on the “Action” tab:
- Opt in;
- Double opt in;
- Payment page;
- Single opt in form;
- Double opt in form;
- Payment form.
You will be able to set up an appointment only after payment from the client’s side, using the payment page or payment form blocks. For example, if you are using a paid coaching session or a paid consultation, provide the client with a calendar for recording and after payment the meeting will be created.
The tool works in a similar way to the Bump Offer tool. Once an appointment has been specified, all forms on the page show the calendar.
Let’s set up an appointment for the “Subscription” block. After subscribing, a task of the “Appointment” type will be created for the responsible person.
- create a page with a form or use the current one;
- add an appointment record;
- select the current meeting or create a new one;
- specify a group to subscribe;
- customize the style for the meeting, or leave the default settings.
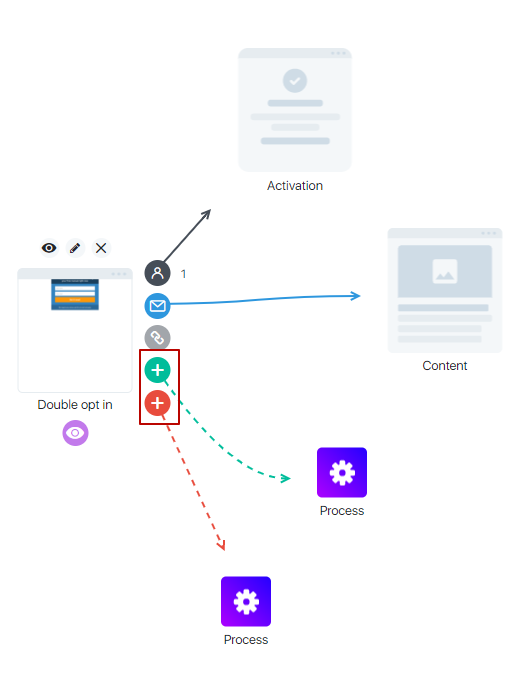
After adding a meeting, new outputs appeared in the “Subscription” block, which correspond to the results of the meeting:
- Green (Successful)
- Red (Failed)
You can add other blocks to these outputs, for example “Process”, configuring what further actions should occur depending on the result.
Copying a funnel with such blocks
If the funnel is copied within one account, then the current meeting will remain in the “Select an appointment” field.
If the funnel is copied between different accounts, then the meeting will be copied, and the account owner will become the owner.
FAQ (answers to frequently asked questions)
According to the distribution of tasks from the team settings.
