Content
This page allows you to configure the rights and access of a particular user.
Pages for adding and editing an user are absolutely identical. They differ only in the heading (Add / Edit).
The page contains 3 tabs:
- Basic data – on this tab information about the employee is entered: name, surname, phone number, login, mail and password.
- Access rights – on this tab, you can configure the rights that determine the options available to the employee in his account.
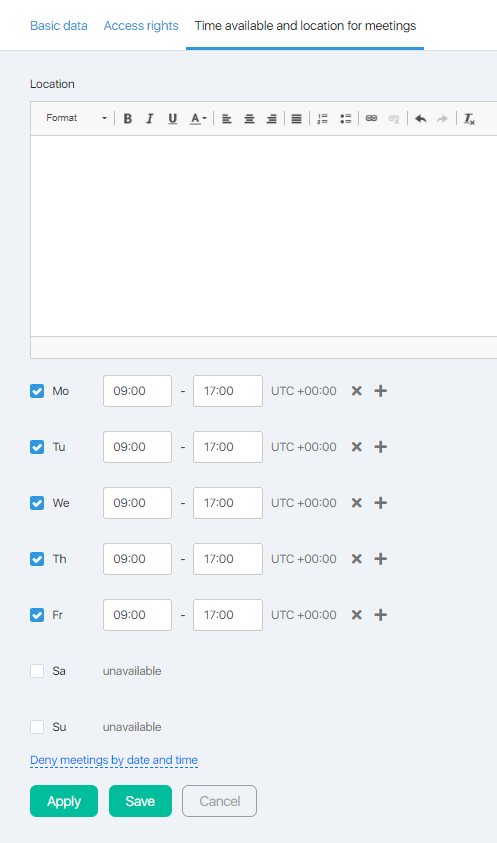
- Time available and location for meetings – on this tab, you can configure the available time and place for meetings of the employee with clients.
The rights tab contains the settings for the following sections:
- Funnels;
- Store;
- Site;
- Newsletter;
- Contacts;
- Tasks
- Courses;
- Reports;
- Affiliate program.
Note! Depending on the selected rights, a certain set of tabs will be available.
The Meeting Access Settings tab has three sections:
- Venue;
- Time by day of the week;
- Unavailable time for meetings.
Profile
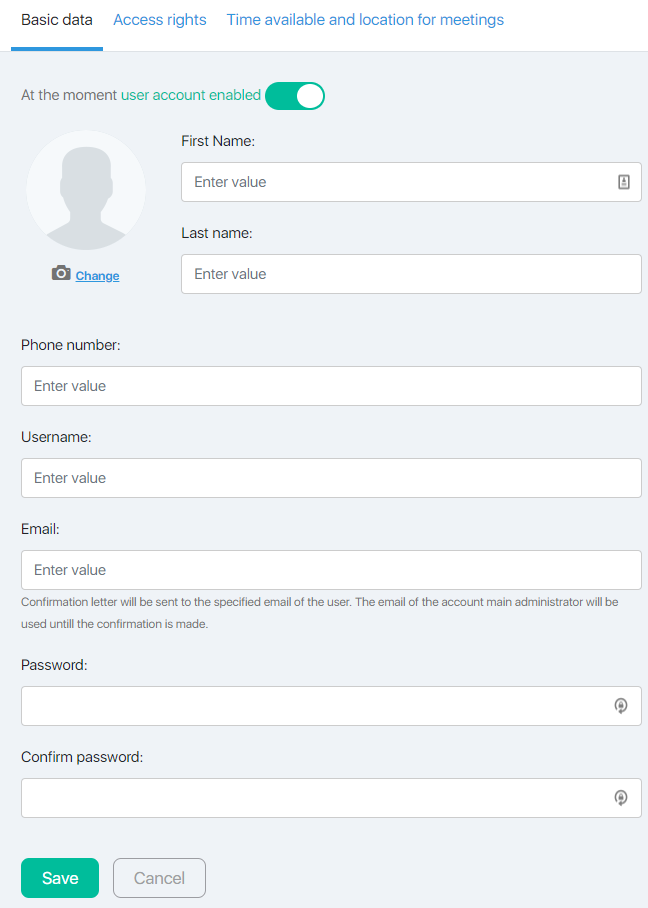
In the fields of the user profile you can set the basic settings for the user.
The slider “At the moment user account enabled” allows you to activate / deactivate user access rights.
You can also upload a photo of an user here by clicking on the “Change” button. This photo will be displayed next to the student’s responses to student reports in the lessons.
The Role drop-down list allows you to select a ready-made profile for rights and accesses from existing ones.
Note! If the role is selected, the settings on the other tabs will not be available. Individual rights can be set only when no role is selected.
The Access rights radio button allows you to set the user’s basic rights (if the role is not selected).
There are five types of rights:
- Call-center – can change the status and comment on the call in the accounts. If you select this type, the Call Center tab will be available.
- Delivery – product shipping. If you select this type, no other tabs are available, because no additional settings are needed.
- Additional administrator – user with configurable rights. If you select this type, all additional tabs will be available, except Call Center.
- Administrator – the administrator has access to all sections and functions of the account, except for the balance of the agent account and settings (changes) of the profile of the main administrator.
- Accountant – an employee with such rights has full access to the account balance and can replenish it.
Next, you need to specify the data of a specific user – login, password, email, name and phone.
A confirmation letter will be sent to the indicated user’s email.
The user will need to click on the link in the email to confirm access to the account.
Next, if you select no role settings (for Call Center and Additional Administrator types), you must go to the other tabs and tick the checkboxes to configure the necessary rights.
Note! Some settings are only opened when a checkmark is ticked in the top-level checkbox.
Funnels
This tab allows you to add additional administrator rights to work with visual sales funnels.

Store
This tab allows you to configure the rights of an additional administrator to work with the store.
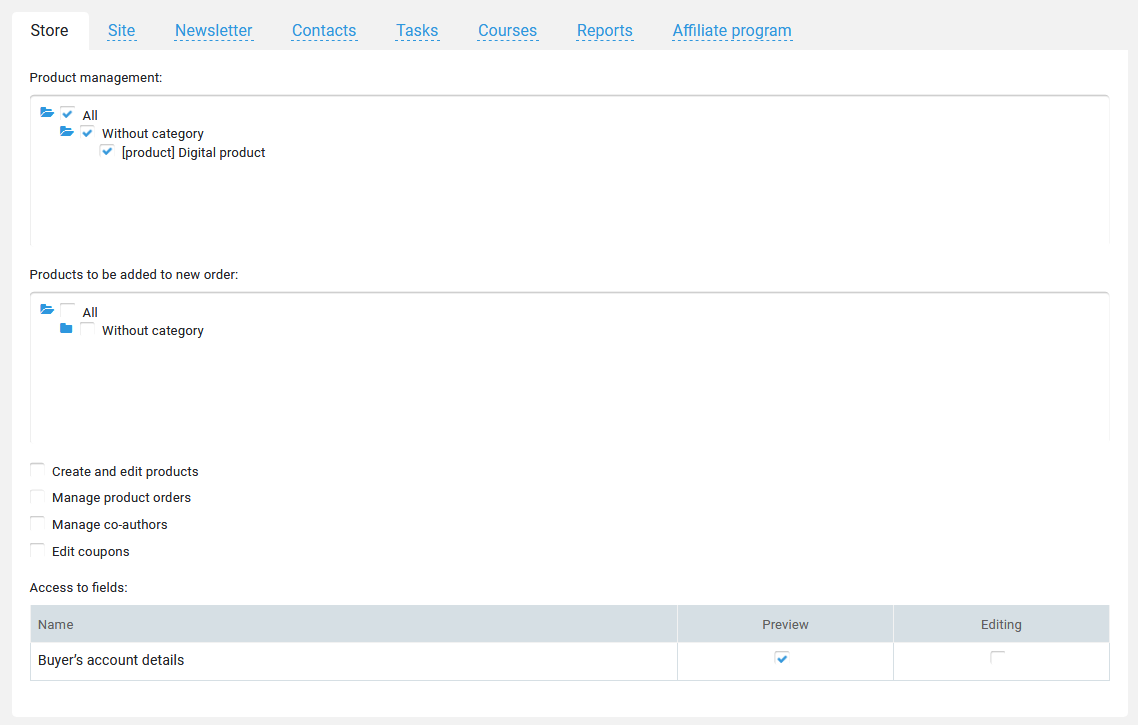
You can give access to work with all products / a certain category / individual product.
Set up access to create and edit products, work with accounts, discounts and co-authors.
Site
This tab allows you to configure the rights of an additional administrator to work with the site.
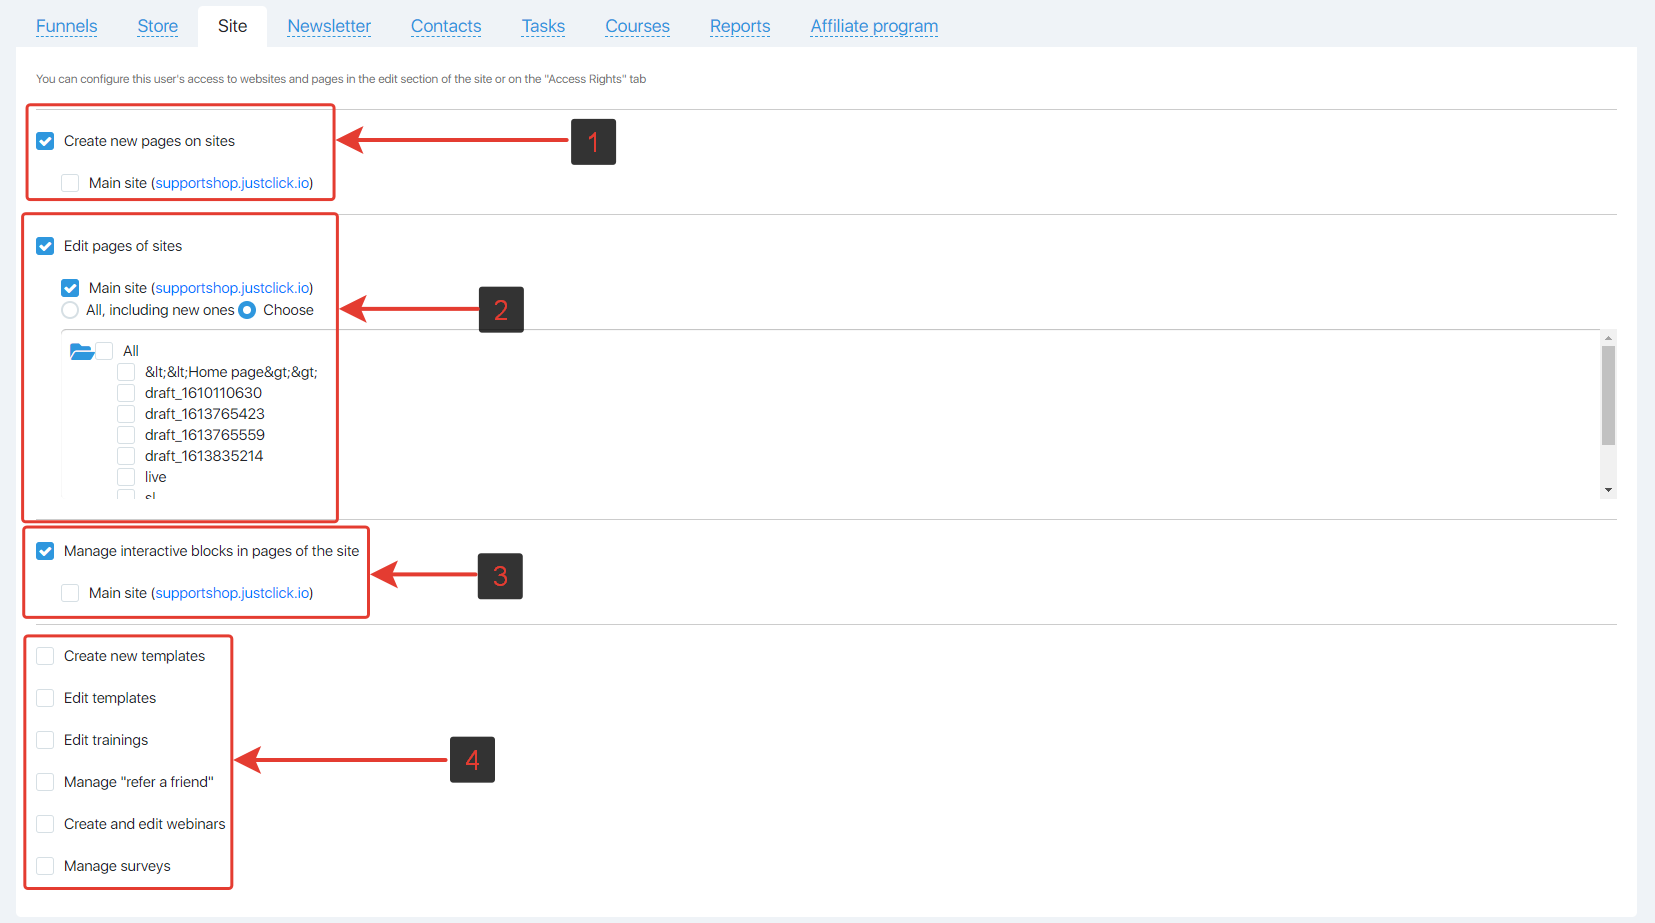
- The rights to create new pages on your sites. One underscore is the name of the site. Double underscore – domains that are linked to it;
- Rights to edit existing pages of the site. You can select specific pages, or everything, including new ones (which will then be created);
- Rights to enable / disable interactive blocks. You can also set for all pages or select the ones you need;
- Creation and editing of page templates (can be set separately). Editing trainings (the section is no longer supported, since a new, more complete functionality “Courses” has been developed. This setting remains for users who have old trainings). Recommendations and survey management can be set separately. Creation and editing of webinars provides access to the section “Site” – “Webinars”.
You can give access to the creation and editing of site pages and templates, set up separate access to interactive blocks, access to trainings, surveys and viral promotions.
Newsletter
This tab allows you to configure the rights of an additional administrator to work with the email campaign.

You can enable sending emails and / or exporting subscribers.
Contacts
This tab allows you to configure the rights of an additional administrator to work with Contacts.
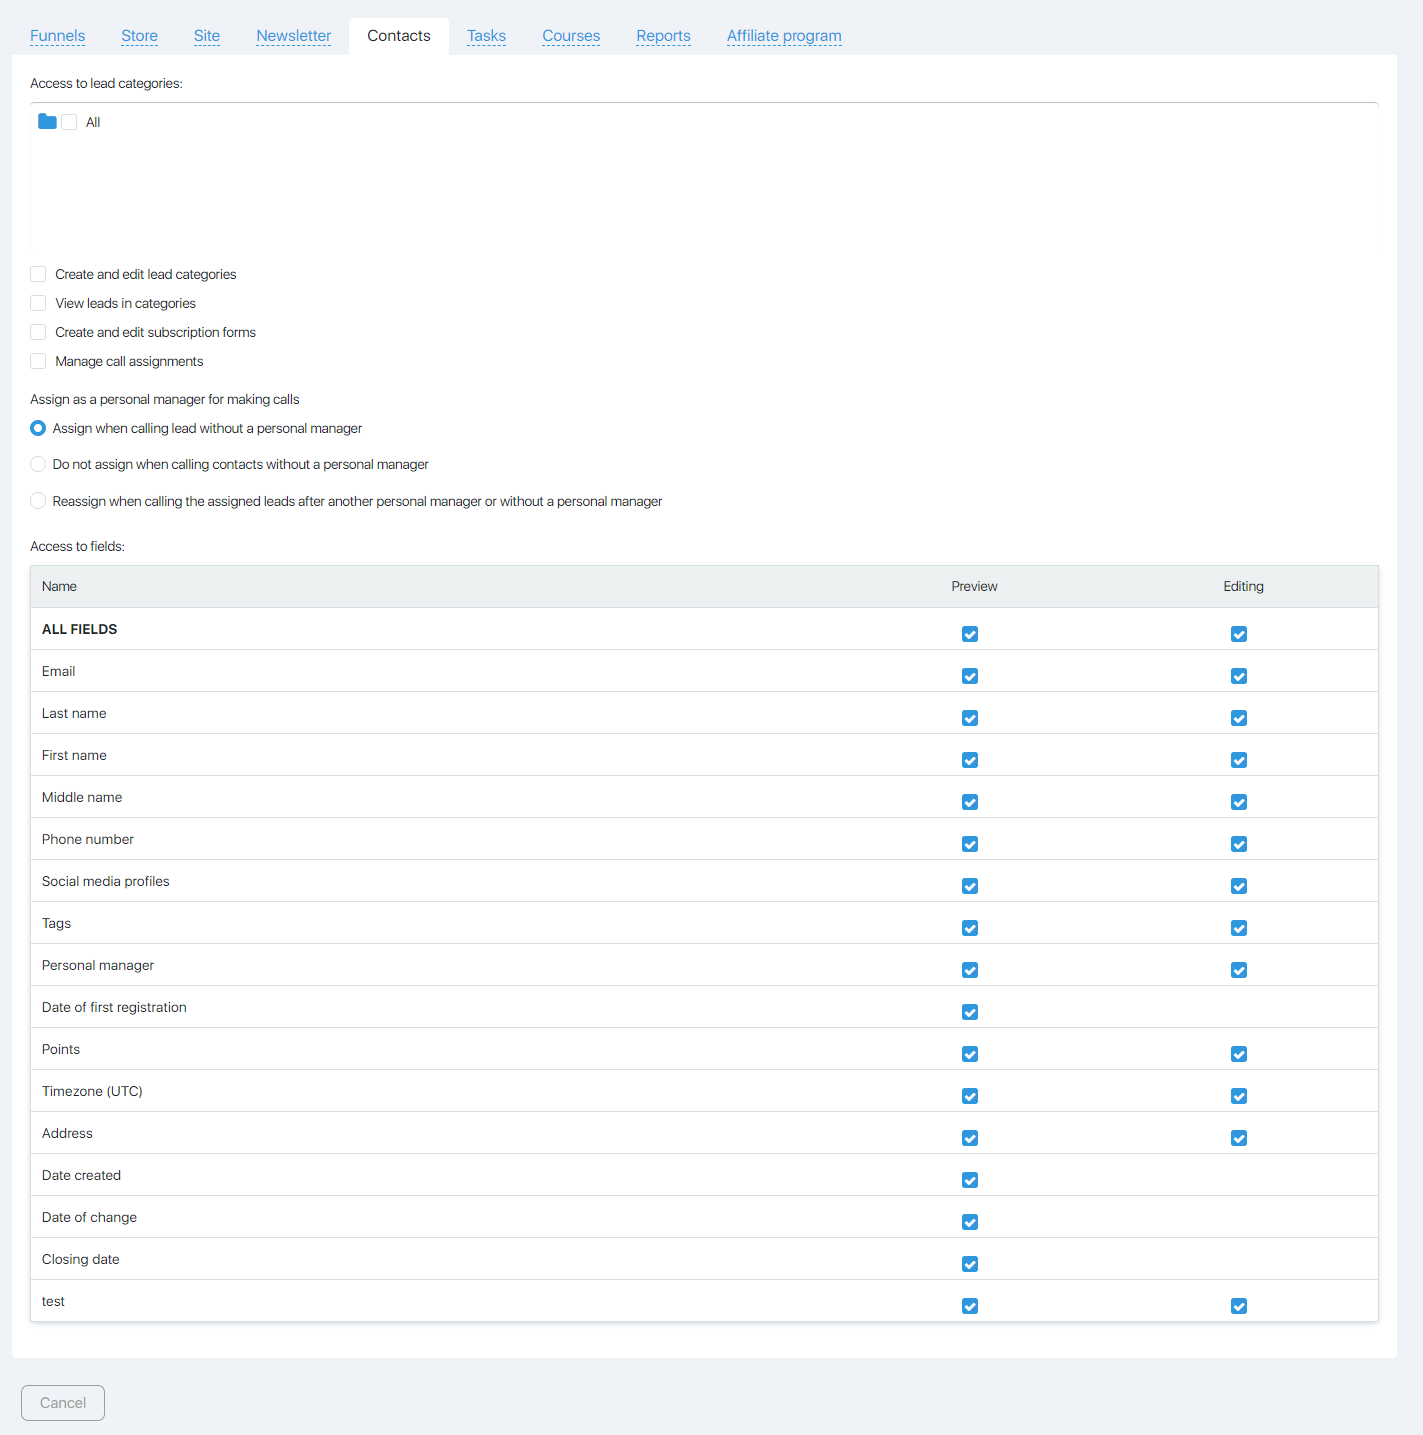
You can give access to work with all contact lists / a certain category / individual list.
It is possible to create and edit contact lists and subscription forms, view contacts and manage call orders.
Also, you can restrict user access to the fields that are in the contact card. By default, all fields are visible and editable. However, you can give rights to only view or to change and view.
In this case, if you give permission to “all fields”, then all those fields that are currently available, as well as those that you create in the future, will be available.
Tasks
This tab allows you to configure additional administrator rights to work with rules and processes.

Courses
This tab allows you to configure additional administrator rights to work with courses.

You can give access to either editing lessons, folders and courses, as well as checking reports for all courses. Or only access to checking reports of courses.
Reports
This tab allows you to configure the rights of an additional administrator to work with analytics.
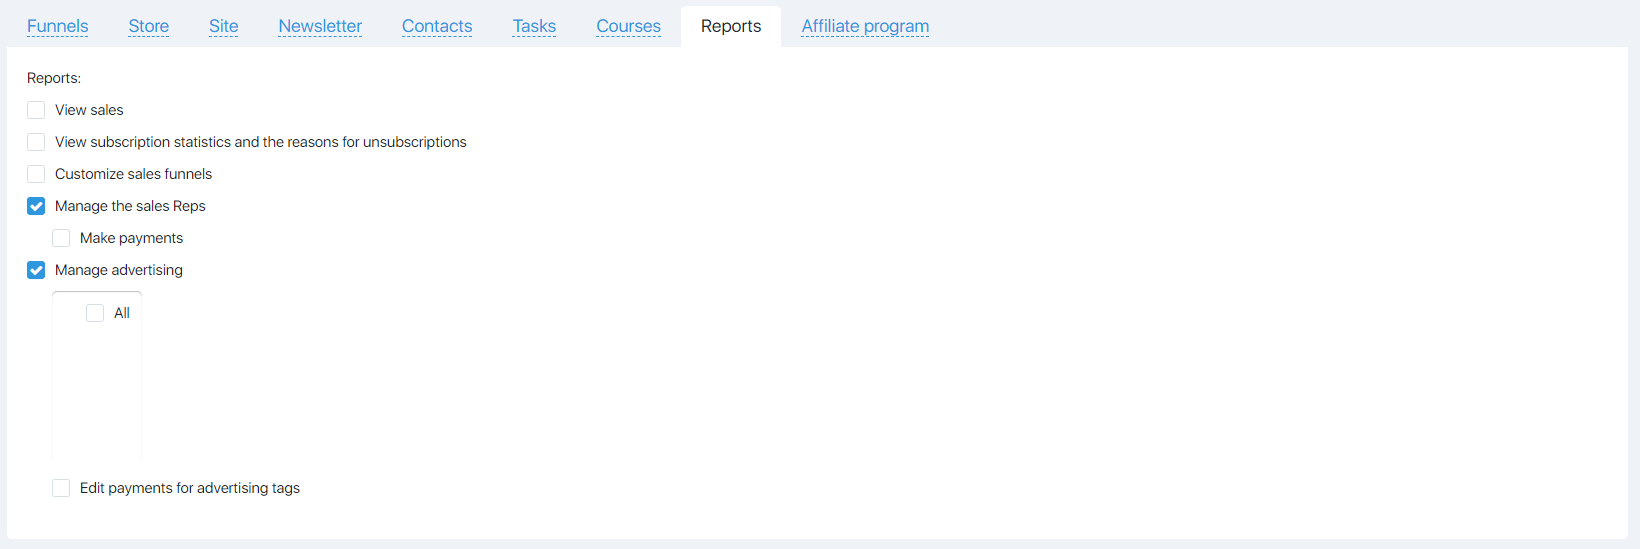
You can give access to sales statistics and newsletters, customization of sales funnels and advertising companies, as well as to manage the sales department.
Affiliate program
This tab allows you to configure the rights of an additional administrator to work with the affiliate.
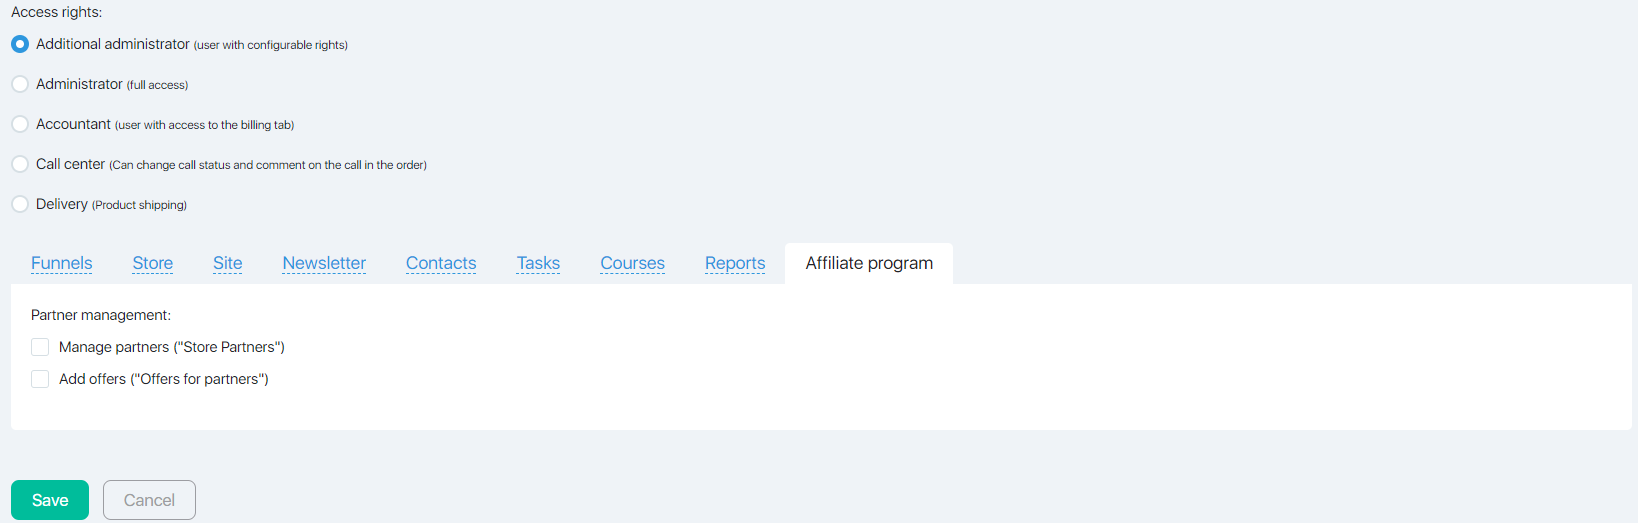
You can give access to partner management, adding promotional materials.
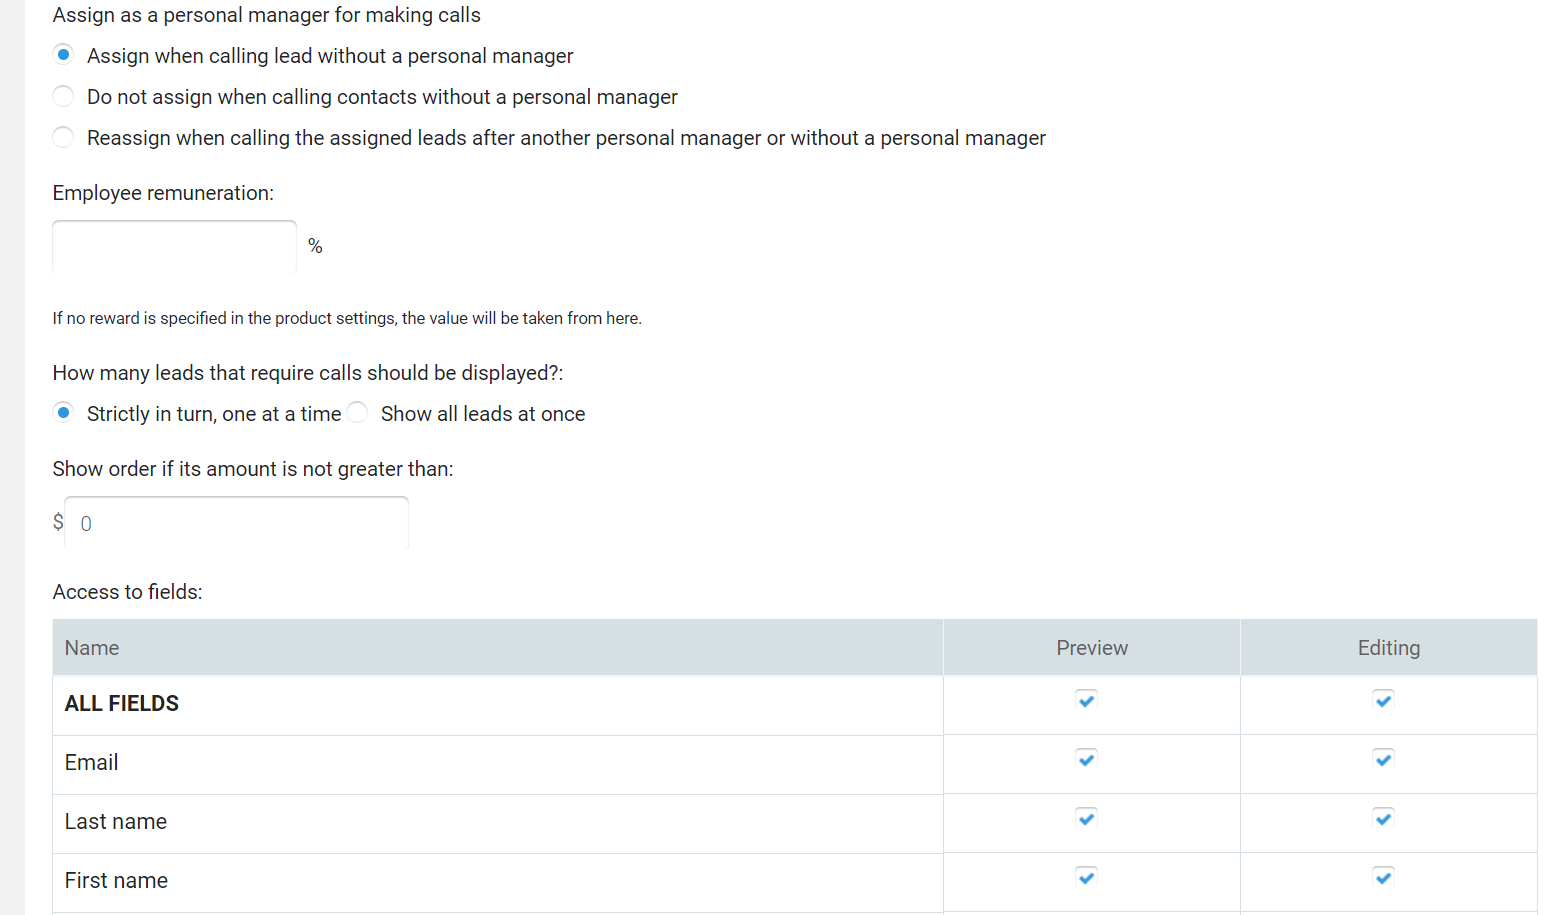
Call center
This tab allows you to configure the rights of the call center user.
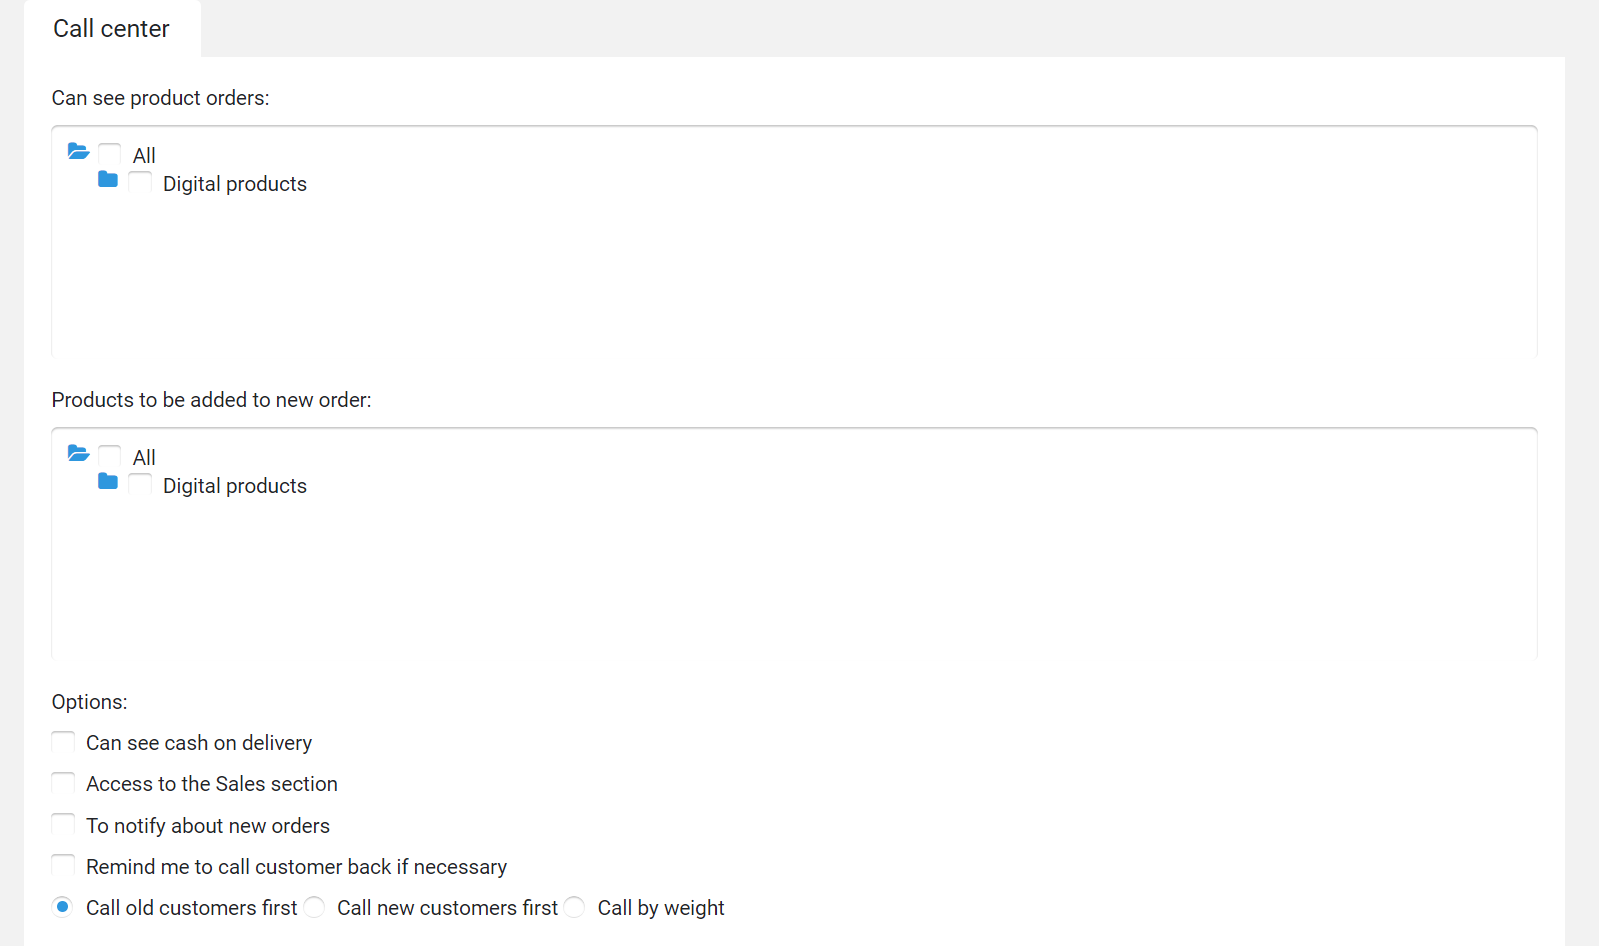
You can give access to work with the orders of all products / a certain category / individual product.
Configure access options.
Indicate the user’s remuneration in %.
Set visibility settings for orders.
After making all the settings, click the Save button.
The user will be added to the list on the Users page.
Note! New users must follow the link that they receive in the letter. You can also remind them of this address by taking it here:

FAQ (frequently asked questions)
You have added a new user, specified the necessary data in the settings, saved them, but the user’s email address is not displayed in the “Email” field?
The thing is that when adding / changing an email address, the Email will remain the same (or it will be the account holder email if the user is being added for the first time) until the user confirms his email address.
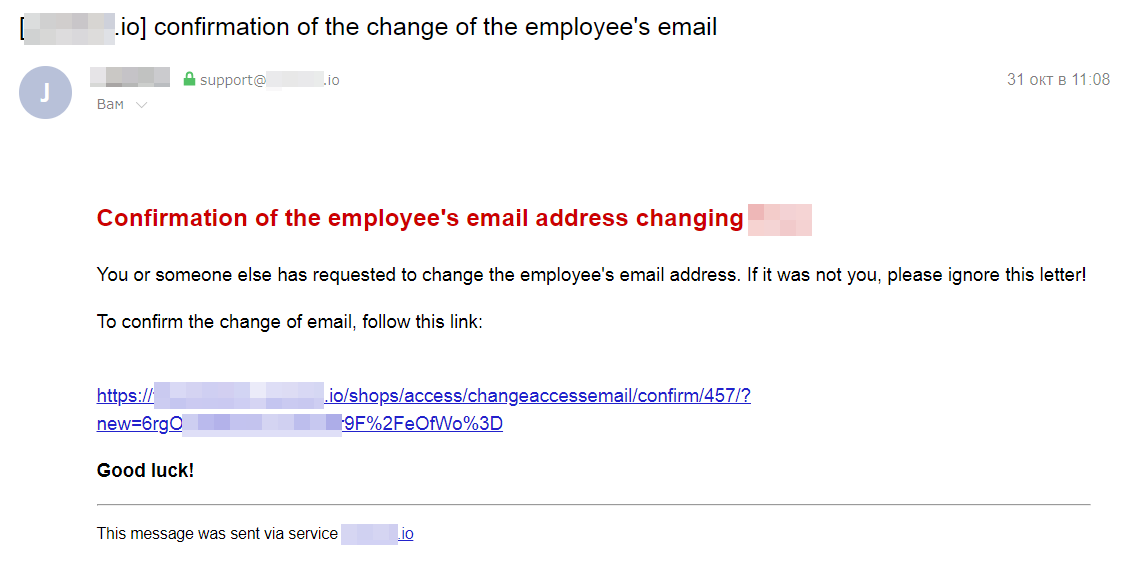
When changing of user’s Email, a confirmation letter will be sent. Subject: “confirmation of user’s email adress changing.”
An user needs to open this letter and follow the link in it. After that, his email will be confirmed and be replaced with a new one in the user settings.
If an user cannot log into his account, the reason in most cases is that:
1. Invalid login link. The correct login link looks like this: https://LOGIN.DOMAIN.COM/dashboard/, where “LOGIN” is the login of the main administrator of the account.
The correct link (with the already specified “LOGIN”) is in the registration confirmation letter, which is sent to the user’s mail.
2. The user enters his email in the login field, not his login. It is necessary to enter the login.
3. The user did not confirm account registration. To confirm, he needs to click on the link in the activation letter.
